Cobbler实现自动化安装(下)--实现过程
实验环境
[root@cobbler ~]# cat /etc/redhat-release

CentOS Linux release 7.2.1511 (Core)

[root@cobbler ~]# ifconfig eno16777736

eno16777736: flags=4163<UP,BROADCAST,RUNNING,MULTICAST>  mtu 1500

        inet 192.168.4.116  netmask 255.255.255.0  broadcast 192.168.4.255

        inet6 fe80::20c:29ff:fe93:270f  prefixlen 64  scopeid 0x20<link>

        ether 00:0c:29:93:27:0f  txqueuelen 1000  (Ethernet)

        ...

[root@cobbler ~]# systemctl stop firewalld.service

[root@cobbler ~]# systemctl disable firewalld.service

[root@cobbler ~]# vim /etc/selinux/config

    ...

    SELINUX=disabled

    ...

[root@cobbler ~]# init 6
1)安装Cobbler所依赖的相关服务
[root@cobbler ~]# yum -y install tftp tftp-server dhcp httpd  #pxe可通过http或者ftp等方式提供安装文件

[root@cobbler ~]# yum install -y syslinux  #提供pxe安装所需要的pxelinux.0等文件

[root@cobbler ~]# vim /etc/dhcp/dhcpd.conf

    option domain-name "test.com";

    option domain-name-servers 8.8.8.8,114.114.114.114;

    default-lease-time 600;

    max-lease-time 7200;

    log-facility local7;

    subnet 192.168.4.0 netmask 255.255.255.0{  #ip地址范围必须跟本机ip一致

            range 192.168.4.1 192.168.4.100;

            option routers 192.168.4.116;

            filename "pxelinux.0";

            next-server 192.168.4.116;

    }

[root@cobbler ~]# systemctl start dhcpd  #启动dhcp

[root@cobbler ~]# cat /var/lib/dhcpd/dhcpd.leases  #通过查看该文件可以看到ip的租借情况

[root@cobbler ~]# systemctl start httpd tftp.socket  #启动http,tftp
2)安装cobbler
1、安装cobbler,启动服务,然后执行cobbler check
[root@cobbler ~]# yum -y install cobbler

[root@cobbler ~]# systemctl start cobblerd

[root@cobbler ~]# cobbler check

    The following are potential configuration items that you may want to fix:

    1 : The 'server' field in /etc/cobbler/settings must be set to something other than localhost, or kickstarting features will not work.  This should be a resolvable hostname or IP for the boot server as reachable by all machines that will use it.

    2 : For PXE to be functional, the 'next_server' field in /etc/cobbler/settings must be set to something other than 127.0.0.1, and should match the IP of the boot server on the PXE network.

    3 : change 'disable' to 'no' in /etc/xinetd.d/tftp

    4 : Some network boot-loaders are missing from /var/lib/cobbler/loaders, you may run 'cobbler get-loaders' to download them, or, if you only want to handle x86/x86_64 netbooting, you may ensure that you have installed a *recent* version of the syslinux package installed and can ignore this message entirely.  Files in this directory, should you want to support all architectures, should include pxelinux.0, menu.c32, elilo.efi, and yaboot. The 'cobbler get-loaders' command is the easiest way to resolve these requirements.

    5 : enable and start rsyncd.service with systemctl

    6 : debmirror package is not installed, it will be required to manage debian deployments and repositories

    7 : The default password used by the sample templates for newly installed machines (default_password_crypted in /etc/cobbler/settings) is still set to 'cobbler' and should be changed, try: "openssl passwd -1 -salt 'random-phrase-here' 'your-password-here'" to generate new one

    8 : fencing tools were not found, and are required to use the (optional) power management features. install cman or fence-agents to use them

    Restart cobblerd and then run 'cobbler sync' to apply changes.
2、针对检查出来的各种报错进行相应处理
#针对1、2、7进行修改

[root@cobbler ~]# openssl passwd -1 -salt "123456" "zhanfei"  #创建密钥

    $1$123456$KhkWS/sJLYBtZ7iKPSRxT0

[root@cobbler ~]# vim /etc/cobbler/settings
  ...

    server: 192.168.4.116

    next_server: 192.168.4.116

    default_password_crypted: "$1$123456$KhkWS/sJLYBtZ7iKPSRxT0"  #此密钥是安装系统后root默认密码
  ...

#针对3进行修改

[root@cobbler ~]# vim /etc/xinetd.d/tftp

    ...

    disable = no

    ...

#针对4进行修改

[root@cobbler ~]# cobbler get-loaders

...

#针对5进行修改

[root@cobbler ~]# systemctl start rsyncd.service

[root@cobbler ~]# systemctl disable rsyncd.service

...

#实验不涉及debian系统,第6点可以不理会

#针对8进行修改

[root@cobbler ~]# yum -y install fence-agents

...
3、重启cobbler
[root@cobbler ~]# systemctl restart cobblerd

[root@cobbler ~]# cobbler check

    The following are potential configuration items that you may want to fix:

    1 : debmirror package is not installed, it will be required to manage debian deployments and repositories

    Restart cobblerd and then run 'cobbler sync' to apply changes.

[root@cobbler ~]# cobbler sync  #忽略debian的配置
3)配置cobbler
1、创建centos7.2的cobbler对象
[root@cobbler ~]# mount /dev/cdrom /mnt  #挂载centos7.2光驱

[root@cobbler ~]# cobbler import --name=centos-7.2-x86_6 --path=/mnt  #创建cobbler对象组,此过程较耗时

[root@cobbler ~]# cobbler distro list  #查看对应的distribution

    centos-7.2-x86_64
镜像会被自动导入到/var/www/cobbler/ks_mirror,后续通过http的方式获取安装源;
默认情况下,cobbler还会生成一个最小化安装的kickstart文件,默认是/var/lib/cobbler/kickstarts/sample_end.ks。如果我们想要自定义的kickstart文件,可进行如下操作:
[root@cobbler ~]# cp centos7.2.cfg /var/lib/cobbler/kickstarts/  #centos7.2.cfg为自定义的kickstart文件

[root@cobbler ~]# cobbler profile add --name=centos-7.2-x86_64-custom --distro=centos-7.2-x86_64 --kickstart=/var/lib/cobbler/kickstarts/centos7.2.cfg  #--distro要对应上一步创建的distro对象

[root@cobbler ~]# cobbler profile list

    centos-7.2-x86_64

    centos-7.2-x86_64-custom
检查httpd和tftp服务相关目录是否已经创建了相应的文件:
[root@cobbler ~]# ll /var/www/cobbler

total 0

drwxr-xr-x. 4 root root 54 Oct 17 16:06 images

drwxr-xr-x. 5 root root 67 Oct 17 16:04 ks_mirror

drwxr-xr-x. 2 root root 54 Oct 17 16:06 links

drwxr-xr-x. 2 root root  6 May 28 20:41 localmirror

drwxr-xr-x. 2 root root 37 Oct 17 10:29 misc

drwxr-xr-x. 2 root root  6 May 28 20:41 pub

drwxr-xr-x. 2 root root  6 May 28 20:41 rendered

drwxr-xr-x. 2 root root  6 May 28 20:41 repo_mirror

drwxr-xr-x. 2 root root 62 Oct 17 10:29 svc

[root@cobbler ~]# ll /var/lib/tftpboot/

total 300

drwxr-xr-x  3 root root     17 Oct 17 15:00 boot

drwxr-xr-x. 2 root root      6 May 28 20:41 etc

drwxr-xr-x. 2 root root     77 Oct 17 15:00 grub

drwxr-xr-x. 4 root root     54 Oct 17 16:06 images

drwxr-xr-x. 2 root root      6 May 28 20:41 images2

-rw-r--r--. 1 root root  26268 Mar  6  2015 memdisk

-rw-r--r--  2 root root  54964 May 10 16:49 menu.c32

drwxr-xr-x. 2 root root      6 May 28 20:41 ppc

-rw-r--r--  2 root root  16794 May 10 16:49 pxelinux.0

drwxr-xr-x. 2 root root     20 Oct 17 15:00 pxelinux.cfg

drwxr-xr-x. 2 root root     25 Oct 17 15:00 s390x

-rw-r--r--  2 root root 198236 May 10 16:49 yaboot
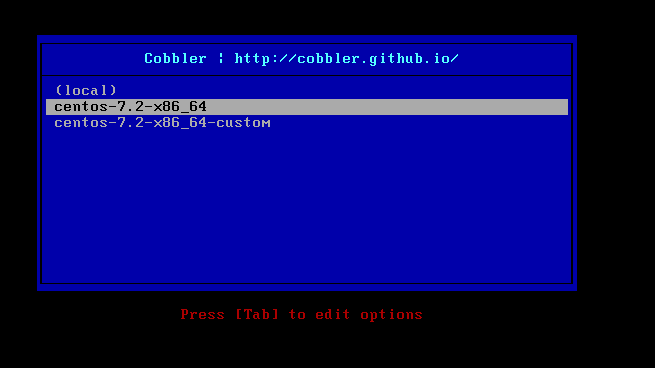
测试安装:(只测试了cobbler自建的kickstart,成功)

2、创建centos6.7的cobbler对象
[root@cobbler ~]# mount /dev/cdrom /mnt  #挂载centos7.2光驱

[root@cobbler ~]# cobbler import --name=centos-6.7-x86_64 --path=/mnt  #创建cobbler对象组

[root@cobbler ~]# cobbler distro list  #查看对应的distribution

    centos-6.7-x86_64

    centos-7.2-x86_64

[root@cobbler ~]# cobbler profile list

    centos-6.7-x86_64

    centos-7.2-x86_64

    centos-7.2-x86_64-custom
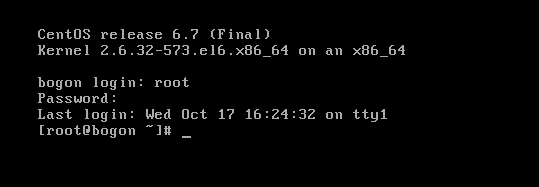
测试安装6.7:成功

4)cobbler的web管理界面
[root@cobbler ~]# yum -y install cobbler-web

[root@cobbler ~]# vim /etc/cobbler/modules.conf

    ...

    [authentication]

    module = authn_pam   #使用authn_pam,本地用户认证模块

    ...

[root@cobbler ~]# useradd cbadmin

[root@cobbler ~]# echo 123456|passwd --stdin cbadmin

    ...

[root@cobbler ~]# vim /etc/cobbler/users.conf

    ...

    [admins]

    admin = "cbadmin"

[root@cobbler ~]# systemctl restart cobblerd
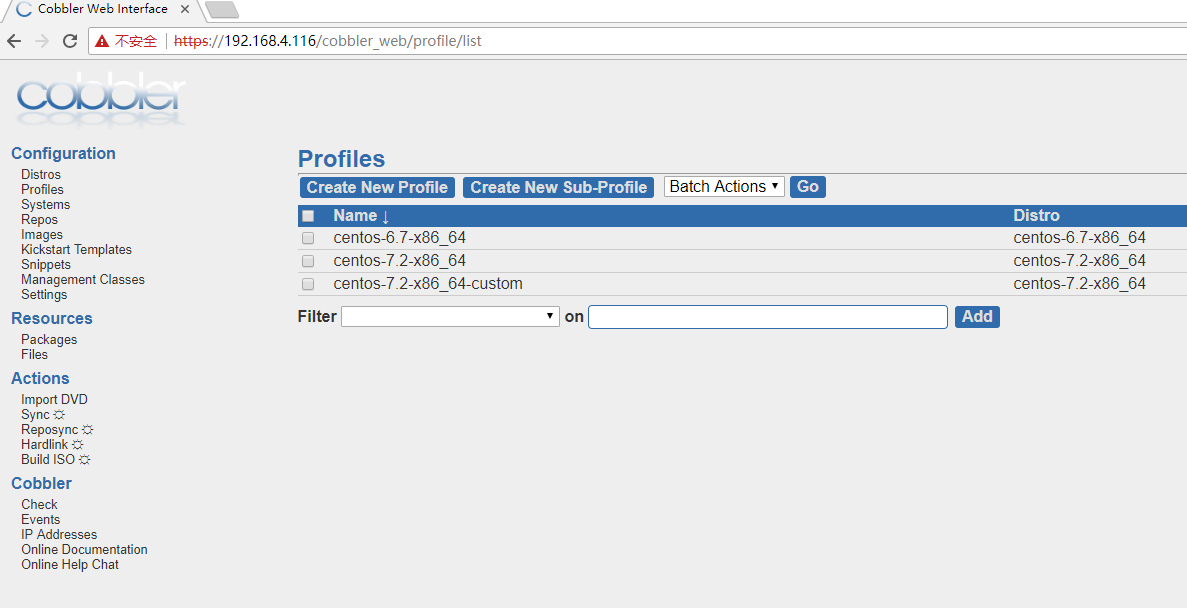
客户端测试:(注意是https)
Cobbler实现自动化安装(下)--实现过程的更多相关文章
- Cobbler实现自动化安装(上)--原理篇
了解Cobbler之前,我们需要先对PXE及KickStart有一定的认识. PXE PXE(Pre-bootExecution Environment),预启动执行环境,通过网络接口启动计算机,支持 ...
- 树莓派安装cobbler,自动化安装CentOS
安装python.相关python模块.apache sudo apt-get install python python2.7 python-django python-netaddr python ...
- CentOS 7 搭建Cobbler实现自动化安装系统
1.安装软件包 # yum -y install epel-release #安装EPEL源 # yum -y install cobbler dhcp pykickstart 2.启动cob ...
- 进阶!基于CentOS7系统使用cobbler实现单台服务器批量自动化安装不同版本系统(week3_day5_part2)-技术流ken
前言 在上一篇博文<cobbler批量安装系统使用详解-技术流ken>中已经详细讲解了cobbler的使用以及安装,本篇博文将会使用单台cobbler实现自动化批量安装不同版本的操作系统. ...
- cobbler单台服务器实现批量自动化安装不同版本系统-技术流ken
前言 在上一篇博文<cobbler批量安装系统使用详解-技术流ken>中已经详细讲解了cobbler的使用以及安装,本篇博文将会使用单台cobbler实现自动化批量安装不同版本的操作系统. ...
- Cobbler自动化安装部署系统
自动化安装部署 https://www.cnblogs.com/nulige/p/6796593.html PXE+Kickstart工作原理 pxe+kickstart工作流程 网卡上的pxe芯片有 ...
- cobbler自动化安装centos
转载于:https://www.cnblogs.com/skymydaiji/p/10877533.html 一.cobbler介绍 1.前言 cobbler 是基于 python 语言开发的 pxe ...
- s33 cobbler自动化安装系统
1. Cobbler介绍 参考链接:http://blog.oldboyedu.com/autoinstall-cobbler/ Cobbler是一个Linux服务器安装的服务,可以通过网络启动(PX ...
- Cobbler自动化安装
# Cobbler自动化安装 [Cobbler官网](http://cobbler.github.io) : 3.运行node.
- 阿里云安装jdk报错gzip: stdin: unexpected end of file
在阿里云上面安装jdk时候报了这个问题,如下图所示 然后看了下jdk应该是有150多M的,但是阿里云上面的只有1M多,删除 重新下载... tar zxvf jdk 好了
- java自增(自减)运算符
自增(自减)运算符: ++ --就是可以将当前变量自我增加(减少)1 的运算符. i++, 后++, 先将 i 的值作为整个表达的值, 然后将 i 增加 1. ++i, 先++, 先将 i 增加 ...
- mac和windows自动清理内存工具
因为我比较懒,所以需要一款能自动清理电脑内存的工具,目的是设置内存最小值,然后自动清理. mac: drcleaner windows: MaxMem win10设置开机启动地址:C:\Program ...
- SQL Server ->> 数据一致性检查命令 -- DBCC CHECKDB
Comming soon!!! 参考文献: CHECKDB From Every Angle: Complete description of all CHECKDB stages
- webpack从零开始第1课:安装webpack和webpack-dev-server
原文地址:https://segmentfault.com/a/1190000012536871 webpack目录 第1课: 安装webpack和webpack-dev-server 第2课: 配置 ...
- MySQL案例01:Last_SQL_Errno: 1755 Cannot execute the current event group in the parallel mode
周五同事监控报警,有个MySQL从库复制状态异常,让我帮忙排查下,经过排查发现是MySQL5.6并行复制的一个Bug所致,具体处理过程如下: 一.错误信息 登录mysql从库服务器,检查复制状态 my ...
- redis持久化方法
1.redis持久化,来自官方说明 如何选择使用哪种持久化方式? 一般来说, 如果想达到足以媲美 PostgreSQL 的数据安全性, 你应该同时使用两种持久化功能. 如果你非常关心你的数据, 但仍然 ...