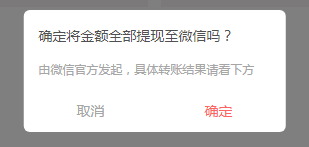
效果:

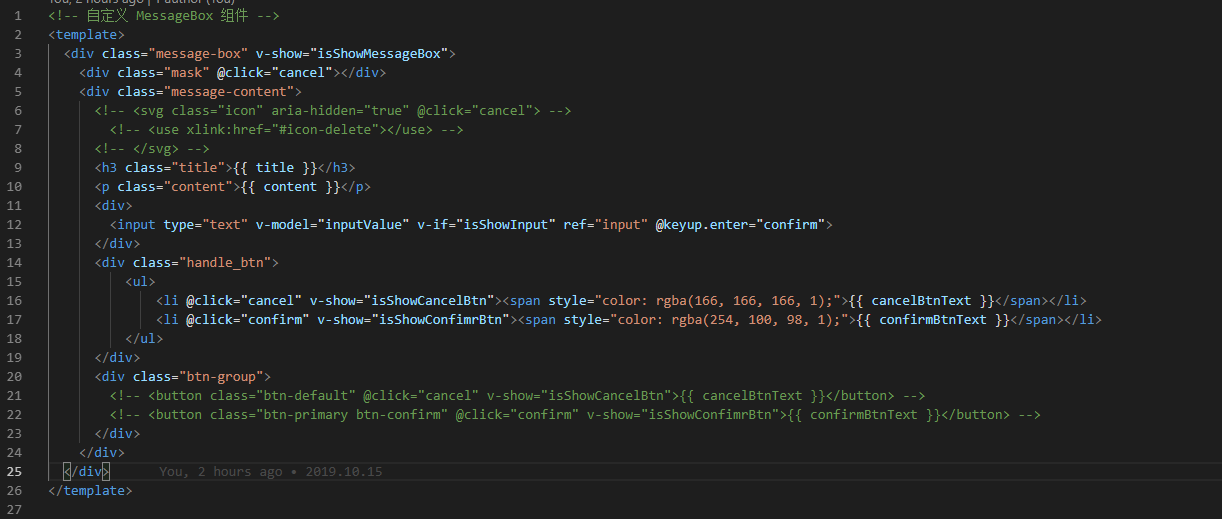
公共组件页面:

js部分:
<script>
export default {
props: {
title: {
type: String,
default: '标题'
},
content: {
type: String,
default: '这是弹框内容'
},
isShowInput: false,
inputValue: '',
isShowCancelBtn: {
type: Boolean,
default: true
},
isShowConfimrBtn: {
type: Boolean,
default: true
},
cancelBtnText: {
type: String,
default: '取消'
},
confirmBtnText: {
type: String,
default: '确定'
}
},
data () {
return {
isShowMessageBox: false,
resolve: '',
reject: '',
promise: '' // 保存promise对象
};
},
methods: {
// 确定,将promise断定为resolve状态
confirm: function () {
this.isShowMessageBox = false;
if (this.isShowInput) {
this.resolve(this.inputValue);
} else {
this.resolve('confirm');
}
this.remove();
},
// 取消,将promise断定为reject状态
cancel: function () {
this.isShowMessageBox = false;
this.reject('cancel');
this.remove();
},
// 弹出messageBox,并创建promise对象
showMsgBox: function () {
this.isShowMessageBox = true;
this.promise = new Promise((resolve, reject) => {
this.resolve = resolve;
this.reject = reject;
});
// 返回promise对象
return this.promise;
},
remove: function () {
setTimeout(() => {
this.destroy();
}, );
},
destroy: function () {
this.$destroy();
document.body.removeChild(this.$el);
}
}
};
</script>
css部分:
<style lang="less" scoped>
.message-box {
position: relative;
.mask {
position: fixed;
;
;
;
;
;
, , , 0.5);
}
.message-content {
position: fixed;
box-sizing: border-box;
padding: 1em;
min-width: 70%;
left: 50%;
top: 50%;
transform: translate(-50%, -50%);
border-radius: 0.4em;
background: #fff;
;
.icon {
position: absolute;
top: 1em;
right: 1em;
width: 0.9em;
height: 0.9em;
color: #878d99;
cursor: pointer;
&:hover {
color: #2d8cf0;
}
}
.title {
// font-size: 1.2em;
// font-weight: 600;
margin-bottom: 1em;
, , , );
font-size: 14px;
line-height: 150%;
font-weight: normal;
}
.content {
// font-size: 1em;
line-height: 2em;
// color: #555;
, , , );
font-size: 12px;
line-height: 150%;
}
input {
width: 100%;
;
background-color: #fff;
border-radius: 0.4em;
border: 1px solid #d8dce5;
box-sizing: border-box;
color: #5a5e66;
display: inline-block;
font-size: 14px;
height: 3em;
;
outline: none;
1em;
&:focus {
border-color: #2d8cf0;
}
}
.btn-group {
margin-top: 1em;
float: right;
overflow: hidden;
.btn-default {
padding: 0.8em 1.5em;
font-size: 1em;
color: #555;
border: 1px solid #d8dce5;
border-radius: 0.2em;
cursor: pointer;
background-color: #fff;
outline: none;
&:hover {
color: #2d8cf0;
border-color: #c6e2ff;
background-color: #ecf5ff;
}
}
.btn-primary {
padding: 0.8em 1.5em;
font-size: 1em;
color: #fff;
border-radius: 0.2em;
cursor: pointer;
border: 1px solid #2d8cf0;
background-color: #2d8cf0;
outline: none;
&:hover {
opacity: .8;
}
}
.btn-confirm {
margin-left: 1em;
}
}
}
}
.handle_btn{
position: relative;
bottom: -20px;
>ul{
display: flex;
justify-content: space-between;
text-align: center;
>li{
width: 45%;
span{
border-radius: 6px;
font-size: 14px;
line-height: 150%;
}
}
// >li:first-child{
// }
}
}
</style>
main全局:

公共的js设置全局属性
import msgboxVue from './index.vue';
// 定义插件对象
const MessageBox = {};
// vue的install方法,用于定义vue插件
MessageBox.install = function(Vue, options) {
const MessageBoxInstance = Vue.extend(msgboxVue);
let currentMsg;
const initInstance = () => {
// 实例化vue实例
currentMsg = new MessageBoxInstance();
let msgBoxEl = currentMsg.$mount().$el;
document.body.appendChild(msgBoxEl);
};
// 在Vue的原型上添加实例方法,以全局调用
Vue.prototype.$msgBox = {
showMsgBox(options) {
if (!currentMsg) {
initInstance();
}
if (typeof options === 'string') {
currentMsg.content = options;
} else if (typeof options === 'object') {
Object.assign(currentMsg, options);
}
return currentMsg.showMsgBox()
.then(val => {
currentMsg = null;
return Promise.resolve(val);
})
.catch(err => {
currentMsg = null;
return Promise.reject(err);
});
}
};
};
export default MessageBox;
<!-- 自定义 MessageBox 组件 -->
<template>
<div class="message-box" v-show="isShowMessageBox">
<div class="mask" @click="cancel"></div>
<div class="message-content">
<!-- <svg class="icon" aria-hidden="true" @click="cancel"> -->
<!-- <use xlink:href="#icon-delete"></use> -->
<!-- </svg> -->
<h3 class="title">{{ title }}</h3>
<p class="content">{{ content }}</p>
<div>
<input type="text" v-model="inputValue" v-if="isShowInput" ref="input" @keyup.enter="confirm">
</div>
<div class="handle_btn">
<ul>
<li @click="cancel" v-show="isShowCancelBtn"><span style="color: rgba(166, 166, 166, 1);">{{ cancelBtnText }}</span></li>
<li @click="confirm" v-show="isShowConfimrBtn"><span style="color: rgba(254, 100, 98, 1);">{{ confirmBtnText }}</span></li>
</ul>
</div>
<div class="btn-group">
<!-- <button class="btn-default" @click="cancel" v-show="isShowCancelBtn">{{ cancelBtnText }}</button> -->
<!-- <button class="btn-primary btn-confirm" @click="confirm" v-show="isShowConfimrBtn">{{ confirmBtnText }}</button> -->
</div>
</div>
</div>
</template>
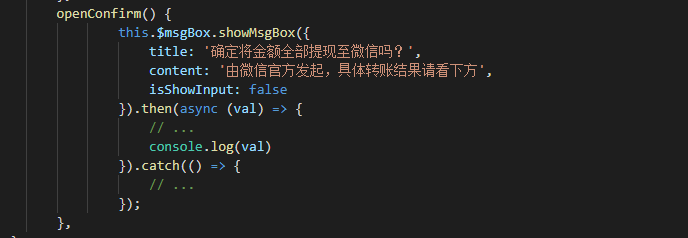
调用:

- WPF 自定义 MessageBox (相对完善版)
WPF 自定义 MessageBox (相对完善版) 基于WPF的自定义 MessageBox. 众所周知WPF界面美观.大多数WPF元素都可以简单的修改其样式,从而达到程序的风格统一.可是当 ...
- WPF 自定义 MessageBox (相对完善版 v1.0.0.6)
基于WPF的自定义 MessageBox. 众所周知WPF界面美观.大多数WPF元素都可以简单的修改其样式,从而达到程序的风格统一.可是当你不得不弹出一个消息框通知用户消息时(虽然很不建议在程序中频繁 ...
- element-ui MessageBox组件源码分析整理笔记(十二)
MessageBox组件源码,有添加部分注释 main.vue <template> <transition name="msgbox-fade"> < ...
- SSIS自定义数据流组件开发(血路)
由于特殊的原因(怎么特殊不解释),需要开发自定义数据流组件处理. 查了很多资料,用了不同的版本,发现各种各样的问题没有找到最终的解决方案. 遇到的问题如下: 用VS2015编译出来的插件,在SSDTB ...
- Android Studio开发基础之自定义View组件
一般情况下,不直接使用View和ViewGroup类,而是使用使用其子类.例如要显示一张图片可以用View类的子类ImageView,开发自定义View组件可分为两个主要步骤: 一.创建一个继承自an ...
- [UE4]自定义MovementComponent组件
自定义Movement组件 目的:实现自定义轨迹如抛物线,线性,定点等运动方式,作为组件控制绑定对象的运动. 基类:UMovementComponent 过程: 1.创建UCustomMovement ...
- 【转】Android学习基础自定义Checkbox组件
原文网址:http://forum.maiziedu.com/thread-515-1-1.html heckbox组件是一种可同时选中多项的基础控件,即复选框,在android学习中,Checkbo ...
- Swift - 继承UIView实现自定义可视化组件(附记分牌样例)
在iOS开发中,如果创建一个自定义的组件通常可以通过继承UIView来实现.下面以一个记分牌组件为例,演示了组件的创建和使用,以及枚举.协议等相关知识的学习. 效果图如下: 组件代码:Score ...
- vue2入坑随记(二) -- 自定义动态组件
学习了Vue全家桶和一些UI基本够用了,但是用元素的方式使用组件还是不够灵活,比如我们需要通过js代码直接调用组件,而不是每次在页面上通过属性去控制组件的表现.下面讲一下如何定义动态组件. Vue.e ...
随机推荐
- JetbrainsCrack-4.2-release-enc.jar 激活补丁包
http://wangshuo.jb51.net:81/201904/tools/JetbrainsCrack_jb51.rar ps:这里提供jetbrainscrack-2.10.jar.jetb ...
- 390-基于Zynq UltraScale+ MPSoC的单板嵌入式计算机
基于Zynq UltraScale+ MPSoC的单板嵌入式计算机 概述:Aldec TySOM-3-ZU7EV,将Xilinx Zynq UltraScale+ ZU7EV MPSoC以及DDR4 ...
- Kintex7 XC7K325T 板卡五兄弟
Kintex 7五兄弟 1. 基KC705E 增强版基于FMC接口的Xilinx Kintex-7 FPGA K7 XC7K325T PCIeX8 接口卡(136) 本板卡是Xilinx公司芯 ...
- DFSORT
1.1 Outline I. Introduction Overview 2.1 What is DFSORT? 2.2 Usage of DFSORT 2 ...
- vue之templete模板
1.templete里要用data里的数据的话,不要加this. 2.按理说Js是写在<script></script>标签体内的.但是Vue的templete模板中对所有的数 ...
- 02.自定义banner、全局配置文件、@Value获取自定义配置、@ConfigurationProperties、profiles配置
自定义banner src/main/resource 下新建 banner.txt,字符复制到banner.txt 中 生成字符网站推荐: http://patorjk.com/software/t ...
- shiro 安全框架 详解
---恢复内容开始--- Shiro 简介 简介• Apache Shiro 是 Java 的一个安全(权限)框架.• Shiro 可以非常容易的开发出足够好的应用,其不仅可以用在JavaSE 环境, ...
- uwsgi部署django项目
一.更新系统软件包 yum update -y 二.安装软件管理包及依赖 yum -y groupinstall "Development tools" yum install o ...
- 纯JSP简单登录实例
记一下,免得以后忘记了,又要去查. 文件共有四个web.xml.login.jsp.logout.jsp.welcome.jsp四个文件 测试环境:Tomcat 6.0.x 假设项目名称是LoginS ...
- PHP远程DoS漏洞深入分析及防护方案
PHP远程DoS漏洞 4月3日,有人在PHP官网提交PHP 远程DoS漏洞(PHP Multipart/form-data remote dos Vulnerability),代号69364.由于该漏 ...


