大数据学习笔记——Hadoop编程实战之HDFS
HDFS基本API的应用(包含IDEA的基本设置)
在上一篇博客中,本人详细地整理了如何从0搭建一个HA模式下的分布式Hadoop平台,那么,在上一篇的基础上,我们终于可以进行编程实操了,同样,在编程前需要做一些准备工作,好了,那我们就开始吧!
1. 编程准备
在后续的学习中,我们基本都是在用IntelliJ IDEA这款集成开发环境,所以在Windows端,我们首先需要准备以下这三款软件:
1)IntelliJ IDEA软件下载并安装,盗版即可,激活码自己上百度搜,本人使用的版本是IntelliJ IDEA 2019.2.3
2)Hadoop的Windows版本:hadoop-2.7.3下载并配置环境变量,然后在Windows端的hosts文件中务必写上之前搭建的虚拟机主机名和IP地址的映射
3)Maven:后续在大数据学习中需要涉及到大量其他包与包之间的依赖,因此使用Maven可以大幅简化导包的过程,下载并配置Maven的环境变量,apache-maven-3.6.1
4)Maven简介:Maven是一个构建工具,简化了项目的构建流程,进行了依赖管理以及项目信息管理,Maven编程的核心是pom文件,它是一个xml文件,其中,groupId,artifactId,以及version这三个Id指定了一个项目在maven世界中的一个坐标
2. IDEA基本设置
2.1 外观设置及快捷键设置导入
一打开IDEA后,首先点击左下角将左侧边栏打开
导入字体设置:点击Settings,搜索Appearance,右侧更改为自己喜欢的字体,主题即可

进行快捷键设置或导入自定义快捷键设置:点击Settings -> Keymap,一般来说选择系统默认的就行了

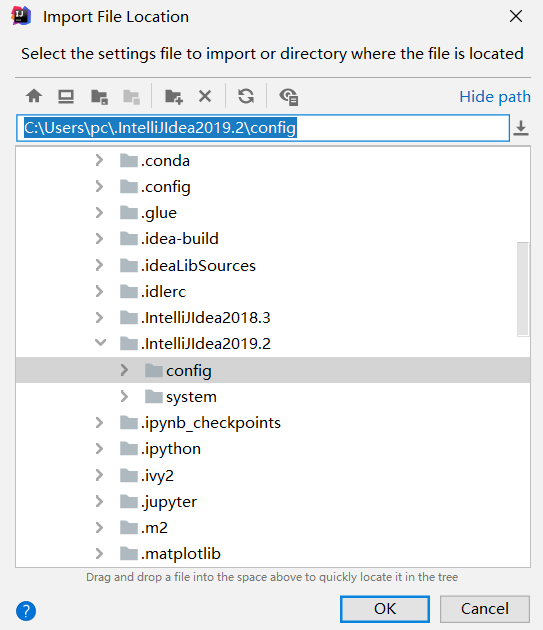
也可以导入自定义设置:点击File -> Import Settings
开启Maven的自动导包功能:点击Settings -> 搜索"Maven",其中第一个框中是环境变量设置的MAVEN_HOME,第二个框是设置xml文件,而Local repository指的是当用户install了某个package后可以查看的目录

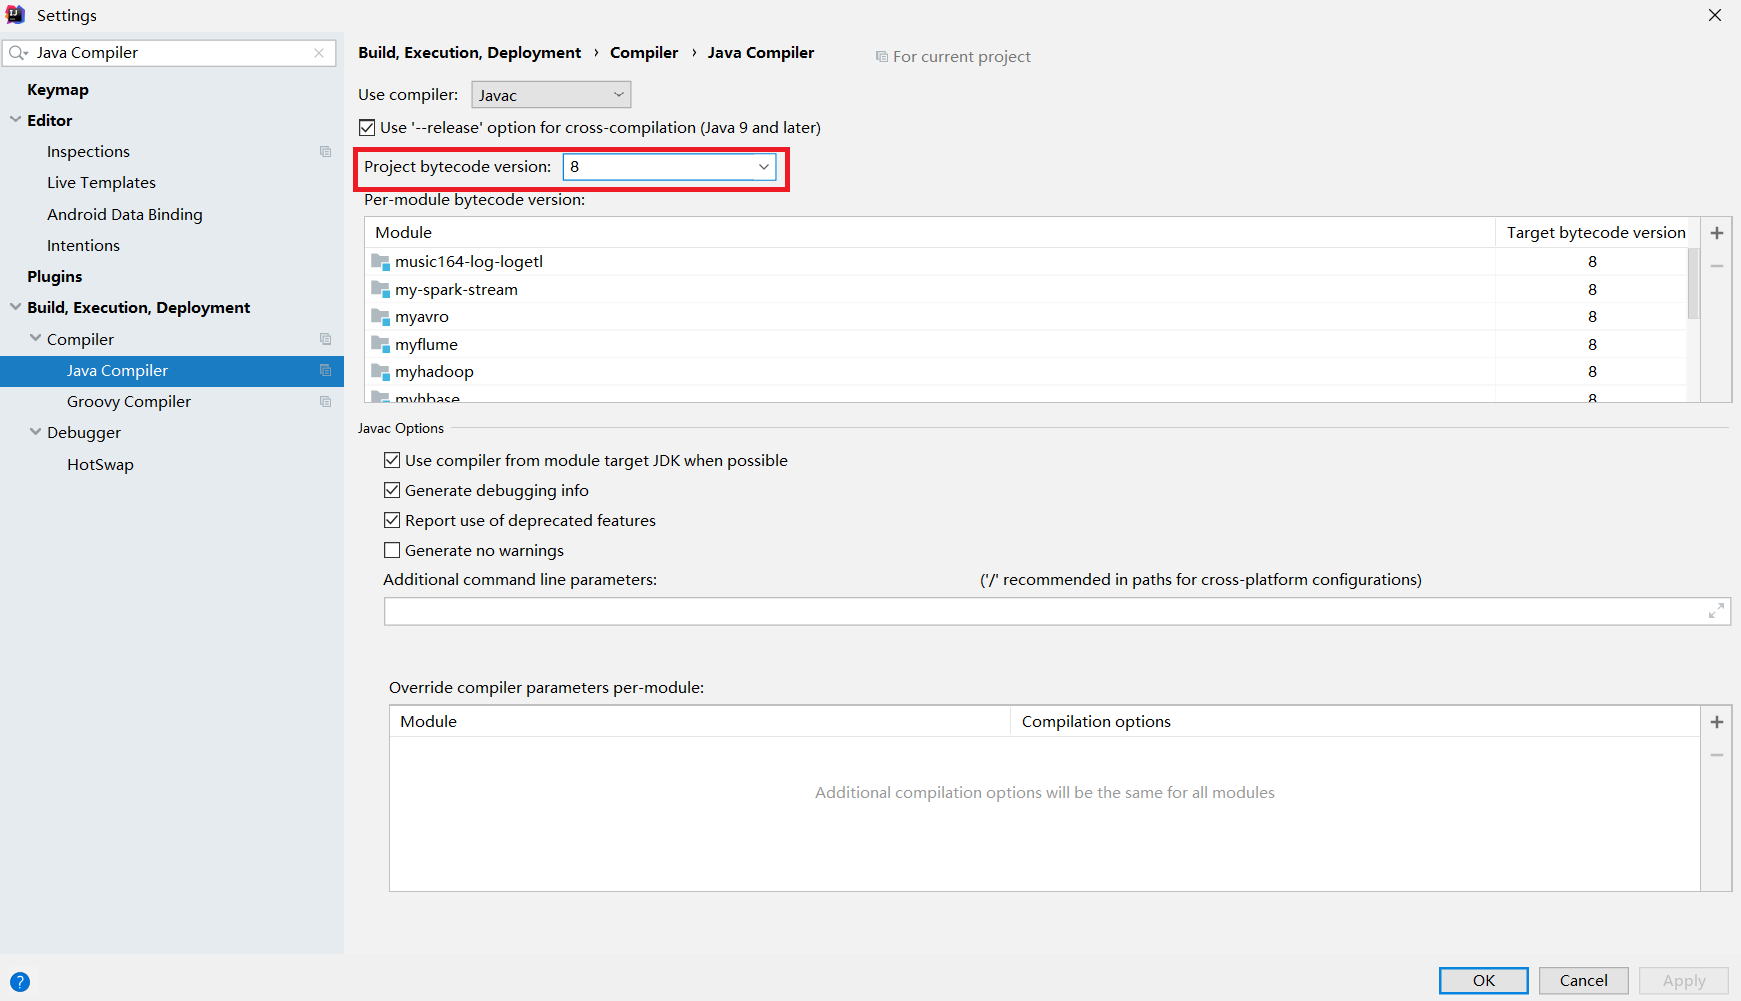
编译器版本设置:编译器版本不对或过低会导致编译过程报错,因此需要进行设置,点击Settings -> 搜索Java Compiler,将所有出现version的地方都改为8
2.2 Maven项目转化步骤
将一个普通的java项目工程转化为Maven项目的具体流程如下所示:
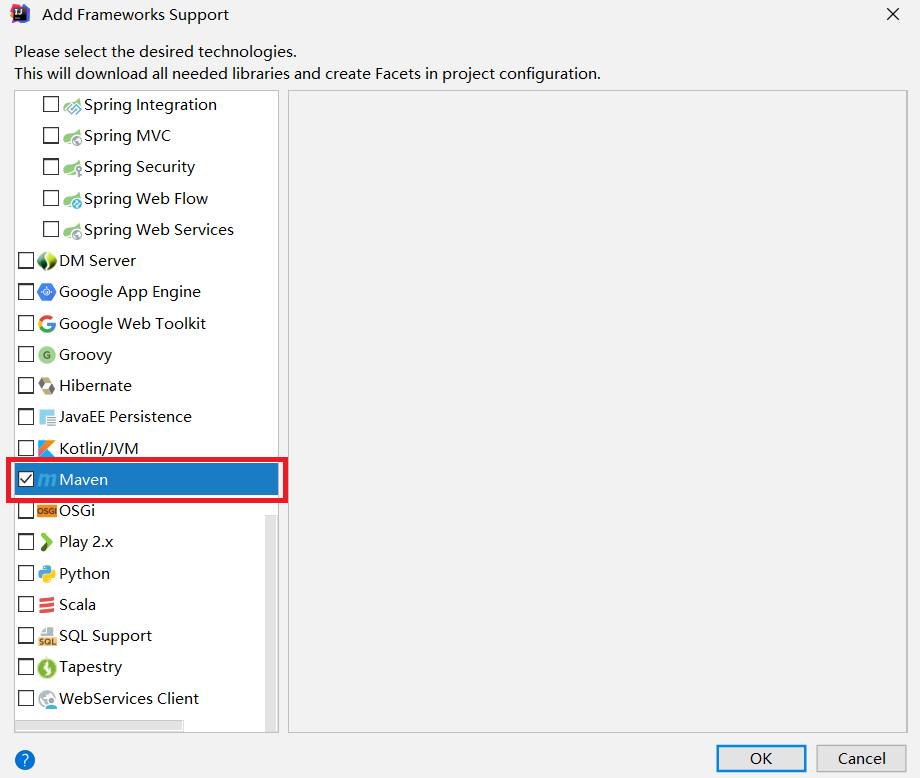
1)添加框架支持,Add Framework Support

2) 拖动到最后,找到Maven,打勾
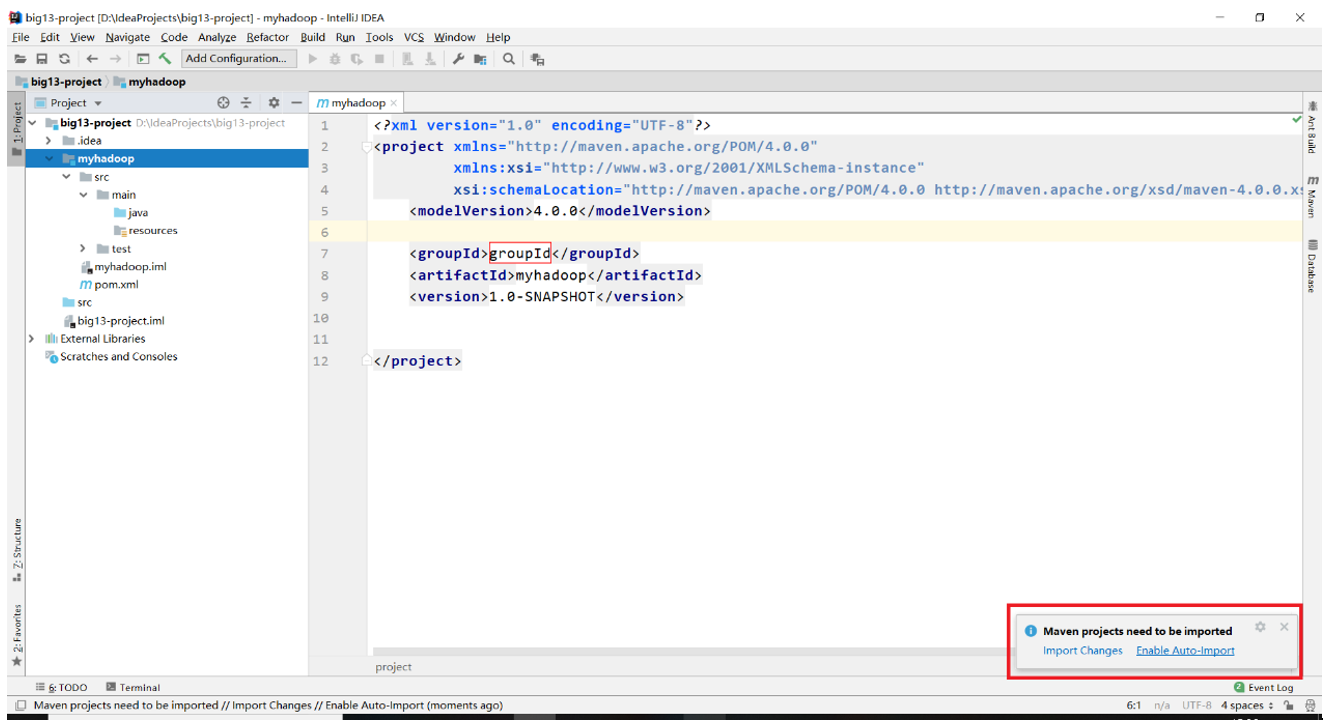
3)此时右下角会出现提示,选择Enable Auto-Import即可
至此,IDEA的基础设置已经完成!
3. Hadoop正式编程
3.1 Maven依赖和资源文件夹
需要注意,下的是什么版本的hadoop在写依赖的时候也要指定相应版本的hadoop,而后续编程会使用到单元测试简化测试流程,因此又需要用到junit这个包,pom.xml文件设置如下:
<?xml version="1.0" encoding="UTF-8"?>

<project xmlns="http://maven.apache.org/POM/4.0.0"

         xmlns:xsi="http://www.w3.org/2001/XMLSchema-instance"

         xsi:schemaLocation="http://maven.apache.org/POM/4.0.0 http://maven.apache.org/xsd/maven-4.0.0.xsd">

    <modelVersion>4.0.0</modelVersion>

    <groupId>groupId</groupId>

    <artifactId>untitled</artifactId>

    <version>1.0-SNAPSHOT</version>

    <dependencies>

        <dependency>

            <groupId>org.apache.hadoop</groupId>

            <artifactId>hadoop-client</artifactId>

            <version>2.7.3</version>

        </dependency>

        <dependency>

            <groupId>junit</groupId>

            <artifactId>junit</artifactId>

            <version>4.12</version>

        </dependency>

    </dependencies>

</project>
点进项目结构都可以看到一个名为resources的资源文件夹,往资源文件夹下放入这三个文件:
1. core-site.xml
2. hdfs-site.xml
3. log4j.properties
3.2 文件读写
写出一个helloworld文件到hdfs文件系统上去
//测试文件的写出

    @Test

    public void testWrite() throws Exception{

        //需要注意的是,首先要设置成能使用root权限进行文件的读写

        System.setProperty("HADOOP_USER_NAME","root");

        //新建一个conf对象

        Configuration conf = new Configuration();

        //使用conf对象获得到

        FileSystem fs = FileSystem.get(conf);

        //设置文件输出的路径

        Path path = new Path("hdfs://mycluster/helloworld.txt");

        //使用path对象获取到输出流

        FSDataOutputStream fos = fs.create(path);

        for(int i = 0; i < 100; i++){

            fos.write("helloworld".getBytes());

            fos.write("\r\n".getBytes());

        }

        fos.close();

    }
从hdfs文件系统读取一个文件并打印到控制台
//测试文件的读取

    @Test

    public void testRead() throws Exception{

        Configuration conf = new Configuration();

        FileSystem fs = FileSystem.get(conf);

        Path path = new Path("hdfs://mycluster/helloworld.txt");

        //输入流的读取方法是open方法

        FSDataInputStream fis = fs.open(path);

        byte[] buf = new byte[1024];

        int len = 0;

        while((len = fis.read(buf)) != -1){

            System.out.println(new String(buf,0,len));

        }

        fis.close();

    }
使用一个十分方便的工具类IOUtils进行文件的互拷
//使用IOUtils类方便地实现文件的拷贝

    @Test

    public void testCopy() throws Exception{

        //首先需要准备好一个输入流以及一个输出流

        Configuration conf = new Configuration();

        FileSystem fs = FileSystem.get(conf);

        Path path = new Path("hdfs://mycluster/helloworld.txt");

        FSDataInputStream fis = fs.open(path);

        FileOutputStream fos = new FileOutputStream("d:/helloworld.txt");

        //使用IOUtils进行文件拷贝

        IOUtils.copyBytes(fis,fos,1024);

        //关流

        fis.close();

        fos.close();

    }
3.3 Hadoop序列化技术
Hadoop是使用Writable接口下面的各种实现子类来实现序列化技术的,有IntWritable,LongWritable,Text等,查看Writable接口可知它的实现子类需要实现两个抽象方法
void write(DataOutput out) throws IOException;

void readFields(DataInput in) throws IOException;
再查看IntWritable类的实现关系可知,IntWritable,Text等都是实现了WritableComparable接口,而这个接口又继承了Comparable接口,其中有一个方法要实现
public int compareTo(T o);
自定义Student类
public class Student {

    private int id;

    private int age;

    public Student() {

    }

    public Student(int id, int age) {

        this.id = id;

        this.age = age;

    }

    public int getId() {

        return id;

    }

    public void setId(int id) {

        this.id = id;

    }

    public int getAge() {

        return age;

    }

    public void setAge(int age) {

        this.age = age;

    }

    @Override

    public String toString() {

        return "Student{" +

                "id=" + id +

                ", age=" + age +

                '}';

    }

}
自定义StudentWritable类实现Writable接口
import org.apache.hadoop.io.Writable;

import java.io.DataInput;

import java.io.DataOutput;

import java.io.IOException;

/*

    自定义一个类继承Writable接口

 */

public class StudentWritable implements Writable {

    private Student stu;

    public StudentWritable(Student stu) {

        this.stu = stu;

    }

    public Student get() {

        return stu;

    }

    public void set(Student stu) {

        this.stu = stu;

    }

    public void write(DataOutput out) throws IOException {

        out.writeInt(stu.getId());

        out.writeInt(stu.getAge());

    }

    public void readFields(DataInput in) throws IOException {

        //注意:在这里需要先初始化Student对象,再把该对象的成员变量当成容器获取读取到的值

        stu = new Student();

        stu.setId(in.readInt());

        stu.setAge(in.readInt());

    }

}
测试各种数据类型的序列化以及反序列化
import org.apache.hadoop.io.IntWritable;

import org.apache.hadoop.io.Text;

import org.junit.Test;

import java.io.DataInputStream;

import java.io.DataOutputStream;

import java.io.FileInputStream;

import java.io.FileOutputStream;

/*

    测试hadoop的序列化技术

 */

public class TestSerial {

    //序列化一个数字

    @Test

    public void testSerial1() throws Exception{

        //新建一个IntWritable对象

        IntWritable iw = new IntWritable(100);

        //新建一个数据流

        DataOutputStream dos = new DataOutputStream(new FileOutputStream("d:/test.h"));

        //调用iw的write方法将数据写出到磁盘

        iw.write(dos);

        //关流

        dos.close();

    }

    //反序列化

    @Test

    public void testDeserial1() throws Exception{

        //构造一个空的IntWritable对象,相当于是一个空蓝子

        IntWritable iw = new IntWritable();

        //新建一个数据输入流

        DataInputStream dis = new DataInputStream(new FileInputStream("d:/test.h"));

        //将数据装入篮子

        iw.readFields(dis);

        //从篮子获取数据

        System.out.println(iw.get());

        //关流

        dis.close();

    }

    //序列化一个字符串

    @Test

    public void testSerial2() throws Exception{

        Text text = new Text("helloworld");

        DataOutputStream dos = new DataOutputStream(new FileOutputStream("d:/test1.h"));

        text.write(dos);

        dos.close();

    }

    //反序列化

    @Test

    public void testDeserial2() throws Exception{

        Text text = new Text();

        DataInputStream dis = new DataInputStream(new FileInputStream("d:/test1.h"));

        text.readFields(dis);

        //Text对象调用的是toString方法

        System.out.println(text.toString());

    }

    //序列化一个对象

    @Test

    public void testSerial3() throws Exception{

        StudentWritable sw = new StudentWritable(new Student(1, 18));

        DataOutputStream dos = new DataOutputStream(new FileOutputStream("d:/test2.h"));

        sw.write(dos);

        dos.close();

    }

    //反序列化

    @Test

    public void testDeserial3() throws Exception{

        StudentWritable sw = new StudentWritable(new Student());

        DataInputStream dis = new DataInputStream(new FileInputStream("d:/test2.h"));

        sw.readFields(dis);

        System.out.println(sw.get().toString());

    }

}
compareTo方法:由于后续讲到hadoop的二次排序时会遇到需要重写compareTo方法 的场景,因此需要进行相应练习
import org.apache.hadoop.io.WritableComparable;

import java.io.DataInput;

import java.io.DataOutput;

import java.io.IOException;

/*

    自定义一个类继承WritableComparable接口

 */

public class StudentWritable2 implements WritableComparable<StudentWritable2> {

    private Student stu;

    public StudentWritable2(Student stu) {

        this.stu = stu;

    }

    public Student get() {

        return stu;

    }

    public void set(Student stu) {

        this.stu = stu;

    }

    public void write(DataOutput out) throws IOException {

        out.writeInt(stu.getId());

        out.writeInt(stu.getAge());

    }

    public void readFields(DataInput in) throws IOException {

        //注意:在这里需要先初始化Student对象,再把该对象的成员变量当成容器获取读取到的值

        stu = new Student();

        stu.setId(in.readInt());

        stu.setAge(in.readInt());

    }

    public int compareTo(StudentWritable2 o) {

        //实现二次排序功能,id不一样就升序比较id,否则就比较age,降序排列

        return this.stu.getId() == o.stu.getId()? o.stu.getAge() - o.stu.getAge(): this.stu.getId() - o.stu.getId();

    }

}
大数据学习笔记——Hadoop编程实战之HDFS的更多相关文章
- 大数据学习笔记——Hadoop编程实战之Mapreduce
Hadoop编程实战——Mapreduce基本功能实现 此篇博客承接上一篇总结的HDFS编程实战,将会详细地对mapreduce的各种数据分析功能进行一个整理,由于实际工作中并不会过多地涉及原理,因此 ...
- 大数据学习笔记——Hadoop编程之SequenceFile
SequenceFile(Hadoop序列文件)基础知识与应用 上篇编程实战系列中本人介绍了基本的使用HDFS进行文件读写的方法,这一篇将承接上篇重点整理一下SequenceFile的相关知识及应用 ...
- 大数据学习笔记——Hadoop高可用完全分布式模式完整部署教程(包含zookeeper)
高可用模式下的Hadoop集群搭建 本篇博客将会在之前写过的Linux的完整部署的基础上进行,暂时不会涉及到伪分布式或者完全分布式模式搭建,由于HA模式涉及到的配置文件较多,维护起来也较为复杂,相信学 ...
- 大数据学习笔记之Hadoop(一):Hadoop入门
文章目录 大数据概论 一.大数据概念 二.大数据的特点 三.大数据能干啥? 四.大数据发展前景 五.企业数据部的业务流程分析 六.企业数据部的一般组织结构 Hadoop(入门) 一 从Hadoop框架 ...
- 大数据学习之Hadoop快速入门
1.Hadoop生态概况 Hadoop是一个由Apache基金会所开发的分布式系统集成架构,用户可以在不了解分布式底层细节情况下,开发分布式程序,充分利用集群的威力来进行高速运算与存储,具有可靠.高效 ...
- 大数据学习笔记——Linux完整部署篇(实操部分)
Linux环境搭建完整操作流程(包含mysql的安装步骤) 从现在开始,就正式进入到大数据学习的前置工作了,即Linux的学习以及安装,作为运行大数据框架的基础环境,Linux操作系统的重要性自然不言 ...
- 大数据学习笔记——Java篇之集合框架(ArrayList)
Java集合框架学习笔记 1. Java集合框架中各接口或子类的继承以及实现关系图: 2. 数组和集合类的区别整理: 数组: 1. 长度是固定的 2. 既可以存放基本数据类型又可以存放引用数据类型 3 ...
- 大数据学习笔记——Java篇之网络编程基础
Java网络编程学习笔记 1. 网络编程基础知识 1.1 网络分层图 网络分层分为两种模型:OSI模型以及TCP/IP网络模型,前者模型分为7层,是一个理论的,参考的模型:后者为实际应用的模型,具体对 ...
- 大数据学习笔记1-大数据处理架构Hadoop
Hadoop:一个开源的.可运行于大规模集群上的分布式计算平台.实现了MapReduce计算模型和分布式文件系统HDFS等功能,方便用户轻松编写分布式并行程序. Hadoop生态系统: HDFS:Ha ...
随机推荐
- QQ是怎样创造出来的?——解密好友系统的设计
本篇介绍笔者接触的第一个后台系统,从自身见闻出发,因此涉及的内容相对比较基础,后台大牛请自觉略过. 什么是好友系统? 简单的说,好友系统是维护用户好友关系的系统.我们最熟悉的好友系统案例当属QQ,实际 ...
- Maven系列第9篇:多环境构建支持,核心开发必备!
maven系列目标:从入门开始开始掌握一个高级开发所需要的maven技能. 这是maven系列第9篇. 整个maven系列的内容前后是有依赖的,如果之前没有接触过maven,建议从第一篇看起,本文尾部 ...
- Json模块和Pickle模块的使用
在对数据进行序列化和反序列化是常见的数据操作,Python提供了两个模块方便开发者实现数据的序列化操作,即 json 模块和 pickle 模块.这两个模块主要区别如下: json 是一个文本序列化格 ...
- Centos7 搭建LAMP环境(编译安装)
1.查看系统版本 [niemx@localhost ~]$ cat /etc/redhat-release CentOS Linux release 7.6.1810 (Core) 2.安装软件准备 ...
- linux字符集修改
首先介绍一下变量. 1.变量类型:本地变量.环境变量.局部变量.特殊变量(内置).参数变量.只读变量. 2.bash的配置文件:profile类和bashrc类 profile类:为交互式登录的she ...
- css优先级之important
css优先级之important
- C#异步案例一则
场景 生产者和消费者队列, 生产者有多个, 消费者也有多个, 生产到消费需要异步. 下面用一个Asp.NetCore Web-API项目来模拟 创建两个API, 一个Get(), 一个Set(), G ...
- Java语法进阶10-多线程
多线程 并发与并行.进程,线程调度自行百度 线程(thread):是一个进程中的其中一条执行路径,CPU调度的最基本调度的单位.同一个进程中线程可以共享一些内存(堆.方法区),每一个线程又有自己的独立 ...
- kube-nginx 和 keepalived 部署安装
目录 简介 nginx 安装配置 下载编译nginx 配置Nginx文件,开启4层透明转发 配置Nginx启动文件 keepalived 安装配置 安装keeplive服务 配置keeplive服务 ...
- CentOS 7 Cobbler 配置 YUM仓库
通过Cobbler配置内网YUM仓库 在上一篇Cobbler 安装中,配置好了Cobbler 下面来通过Cobbler来配置内网的YUM仓库 这里可以同步所有版本的yum源,增加内网的yum安装下载速 ...