如何使用sharding-sphere完成读写分离和分库分表?
一.sharding-sphere配置读写分离
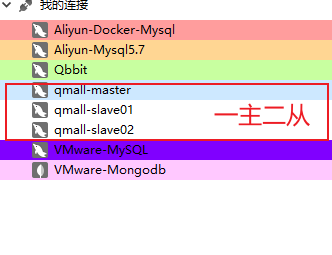
1.先搭建好一个MySQL的主从集群,可以参考[MySQL主从集群搭建]
2.在项目中导入相关依赖(记得刷新Maven)
<!--读写分离-->

<dependency>

	<groupId>org.apache.shardingsphere</groupId>

	<artifactId>shardingsphere-jdbc-core-spring-boot-starter</artifactId>

	<version>5.1.0</version>

</dependency>
3.编写一个application-sharding.yml配置文件,可以参考官方文档.但是推荐参考最新版本的,不然很多坑.当然也可以使用下面配置好的,亲测可用!!!
spring:

  shardingsphere:

    datasource:

      names: master1,slave1,slave2  # 指定所有数据源的名字

      master1:

        type: com.zaxxer.hikari.HikariDataSource # 数据源类型

        url: jdbc:mysql://192.168.137.137:3306/qmall_product?useSSL=false # 数据库连接地址

        username: root # 用户名

        password: root # 密码

        driver-class-name: com.mysql.jdbc.Driver # 数据库驱动

      slave1:

        type: com.zaxxer.hikari.HikariDataSource # 数据源类型

        url: jdbc:mysql://192.168.137.137:3307/qmall_product?useSSL=false

        username: root

        password: root

        driver-class-name: com.mysql.jdbc.Driver

      slave2:

        type: com.zaxxer.hikari.HikariDataSource # 数据源类型

        url: jdbc:mysql://192.168.137.137:3308/qmall_product?useSSL=false

        username: root

        password: root

        driver-class-name: com.mysql.jdbc.Driver

    rules:

      readwrite-splitting:  # 配置读写分离规则

        data-sources:

          ds_0:   # 给一套集群起个名

            type: static

            props:

              auto-aware-data-source-name: master1

              write-data-source-name: master1

              read-data-source-names: slave1,slave2

            load-balancer-name: read-random

        load-balancers:

          read-random:

            type: ROUND_ROBIN # 轮询负载均衡

    props:

      sql-show: true # 是否打印sql

      sql-simple: true # 打印简单的sql
- 写完上面的配置文件别忘了在application.yml中激活引入一下
spring:

  profiles:

    include: sharding # 引入application-sharding.yml
4.编写测试代码
package com.qbb.qmall;

import com.qbb.qmall.model.product.BaseCategory1;

import com.qbb.qmall.product.ProductApplication;

import com.qbb.qmall.product.mapper.BaseCategoryMapper;

import org.junit.jupiter.api.Test;

import org.springframework.beans.factory.annotation.Autowired;

import org.springframework.boot.test.context.SpringBootTest;

/**

 * @author QiuQiu&LL (个人博客:https://www.cnblogs.com/qbbit)

 * @version 1.0

 * @date 2022-05-29  15:48

 * @Description:

 */

@SpringBootTest(classes = ProductApplication.class)

public class ShardingTest {

    @Autowired

    private BaseCategoryMapper baseCategoryMapper;

    @Test

    public void write() {

        BaseCategory1 baseCategory1 = new BaseCategory1();

        baseCategory1.setName("qiuqiu");

        baseCategoryMapper.insert(baseCategory1);

    }

}
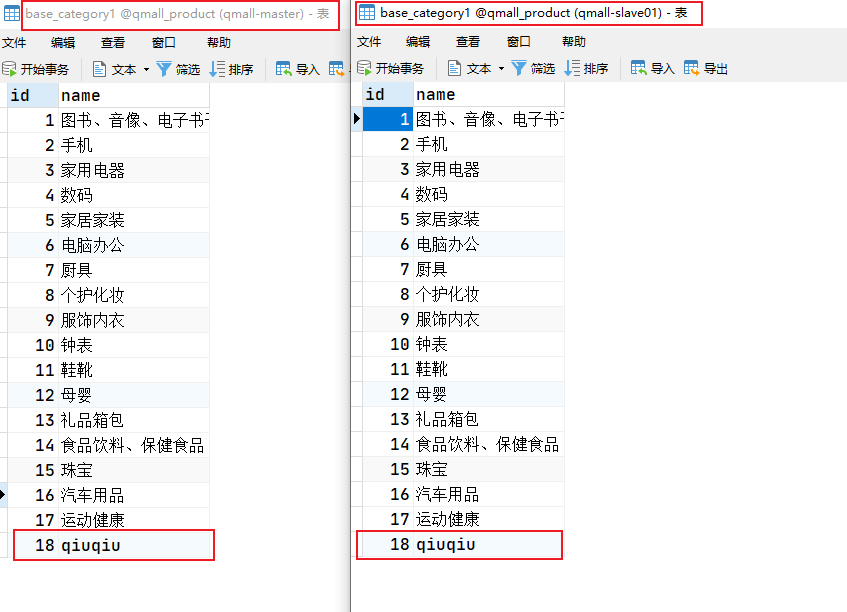
写数据是操作的master1库

下面测试一下读数据
 @Test

public void read() {

	BaseCategory1 one = baseCategoryMapper.selectById(18);

	System.out.println("one = " + one);

	BaseCategory1 two = baseCategoryMapper.selectById(18);

	System.out.println("two = " + two);

	BaseCategory1 three = baseCategoryMapper.selectById(18);

	System.out.println("three = " + three);

	BaseCategory1 four = baseCategoryMapper.selectById(18);

	System.out.println("four = " + four);

}
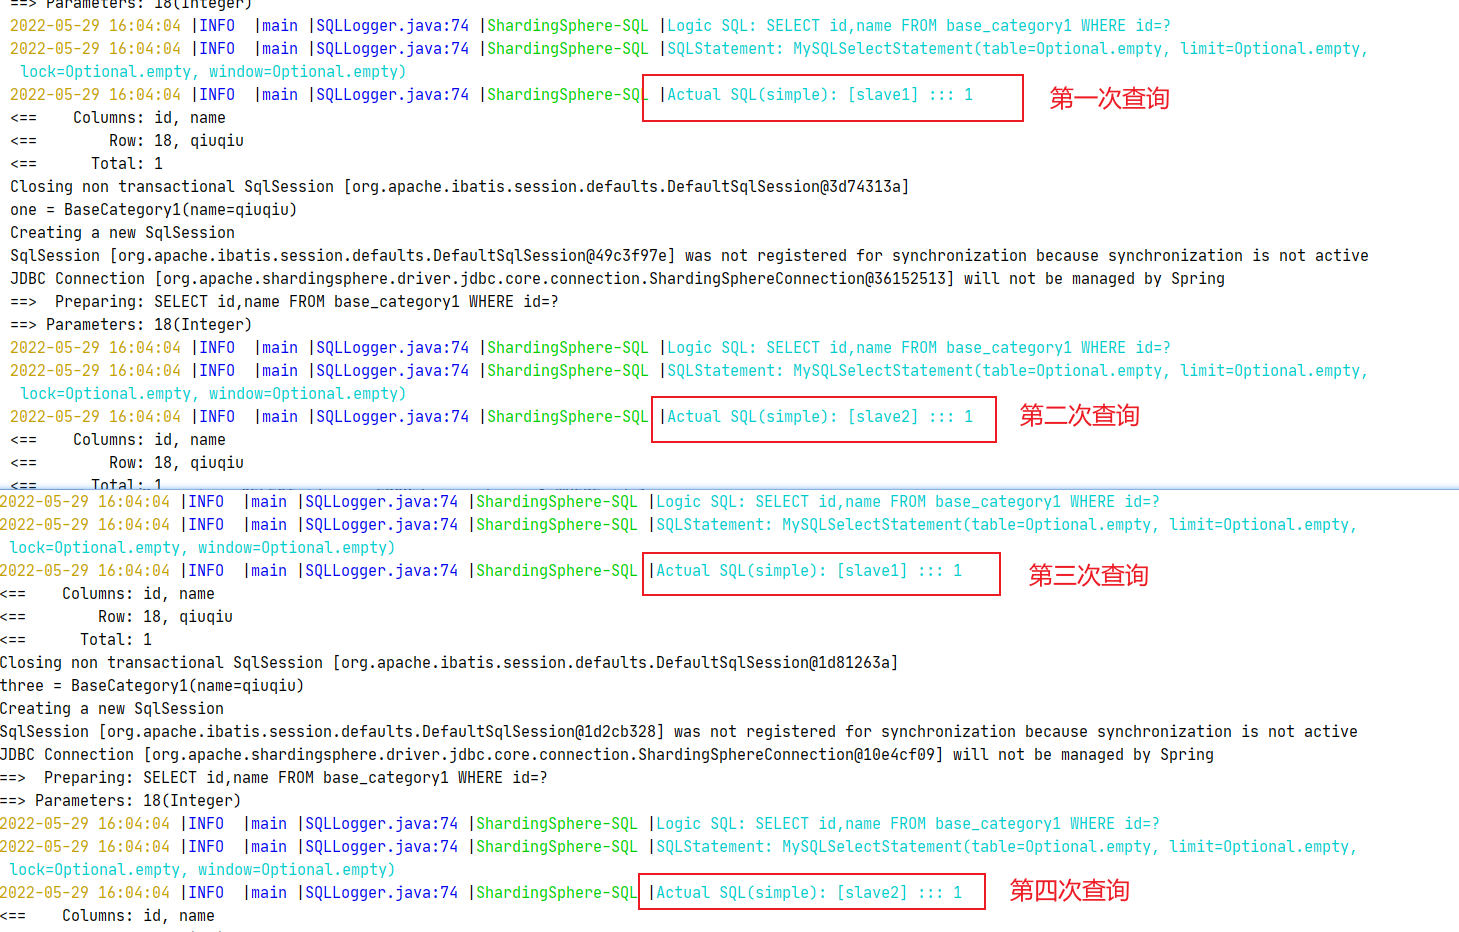
- 因为我们上面配置的是轮询的负载均衡策略,所以是如上效果
二.sharding-sphere配置分库分表
- 话不多说在上面的基础上直接修改配置文件,如下
spring:
shardingsphere:
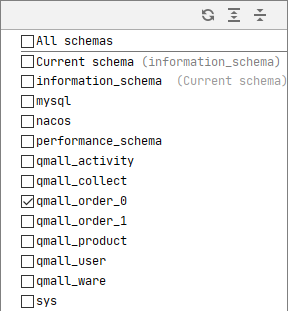
datasource: # 分库分两个库,分表分三张表
names: order-0-w,order-0-r1,order-0-r2,order-1-w,order-1-r1,order-1-r2 #指定所有数据源的名字
order-0-w:
type: com.zaxxer.hikari.HikariDataSource #数据源类型
url: jdbc:mysql://192.168.137.137:3306/qmall_order_0?useSSL=false # 数据库连接地址
username: root # 用户名
password: root # 密码
driver-class-name: com.mysql.jdbc.Driver # 数据库驱动
order-0-r1:
type: com.zaxxer.hikari.HikariDataSource #数据源类型
url: jdbc:mysql://192.168.137.137:3307/qmall_order_0?useSSL=false # 数据库连接地址
username: root # 用户名
password: root # 密码
driver-class-name: com.mysql.jdbc.Driver # 数据库驱动
order-0-r2:
type: com.zaxxer.hikari.HikariDataSource #数据源类型
url: jdbc:mysql://192.168.137.137:3308/qmall_order_0?useSSL=false # 数据库连接地址
username: root # 用户名
password: root # 密码
driver-class-name: com.mysql.jdbc.Driver # 数据库驱动
order-1-w:
type: com.zaxxer.hikari.HikariDataSource #数据源类型
url: jdbc:mysql://192.168.137.137:3306/qmall_order_1?useSSL=false # 数据库连接地址
username: root # 用户名
password: root # 密码
driver-class-name: com.mysql.jdbc.Driver # 数据库驱动
order-1-r1:
type: com.zaxxer.hikari.HikariDataSource #数据源类型
url: jdbc:mysql://192.168.137.137:3307/qmall_order_1?useSSL=false # 数据库连接地址
username: root # 用户名
password: root # 密码
driver-class-name: com.mysql.jdbc.Driver # 数据库驱动
order-1-r2:
type: com.zaxxer.hikari.HikariDataSource #数据源类型
url: jdbc:mysql://192.168.137.137:3307/qmall_order_1?useSSL=false # 数据库连接地址
username: root # 用户名
password: root # 密码
driver-class-name: com.mysql.jdbc.Driver # 数据库驱动
rules:
readwrite-splitting: #配置读写分离规则
data-sources:
order_0_rw: #给一套集群起个名
type: static
props:
write-data-source-name: order-0-w
read-data-source-names: order-0-r1,order-0-r2
load-balancer-name: read-random
order_1_rw: #给一套集群起个名
type: static
props:
write-data-source-name: order-1-w
read-data-source-names: order-1-r1,order-1-r2
load-balancer-name: read-random
load-balancers:
read-random:
type: ROUND_ROBIN #轮询负载均衡
#配置数据分片规则
sharding:
default-database-strategy:
standard:
sharding-column: user_id
shardingAlgorithmName: user-id-db-shard
tables: #指定逻辑表规则
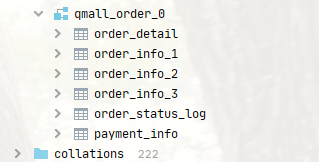
order_info:
actualDataNodes: order-$->{0..1}-w.order_info_$->{1..3}
tableStrategy:
standard:
shardingColumn: user_id #告诉sharing如果插入或者查询数据。根据那一列去那张表
shardingAlgorithmName: user-id-table-shard
sharding-algorithms:
# 库分片规则
user-id-db-shard:
type: INLINE
props:
algorithm-expression: order-$->{user_id%2}-w
# 表的分片规则
user-id-table-shard:
type: INLINE
props:
algorithm-expression: order_info_$->{user_id % 3 + 1}
props:
sql-show: true # 是否打印sql
sql-simple: true # 打印简单的sql
- 分库
- 分表
如何使用sharding-sphere完成读写分离和分库分表?的更多相关文章
- spring boot sharding-jdbc实现分佈式读写分离和分库分表的实现
分布式读写分离和分库分表采用sharding-jdbc实现. sharding-jdbc是当当网推出的一款读写分离实现插件,其他的还有mycat,或者纯粹的Aop代码控制实现. 接下面用spring ...
- mycat+mysql集群:实现读写分离,分库分表
1.mycat文档:https://github.com/MyCATApache/Mycat-doc 官方网站:http://www.mycat.org.cn/ 2.mycat的优点: 配 ...
- Mycat数据库中间件对Mysql读写分离和分库分表配置
Mycat是一个开源的分布式数据库系统,不同于oracle和mysql,Mycat并没有存储引擎,但是Mycat实现了mysql协议,前段用户可以把它当做一个Proxy.其核心功能是分表分库,即将一个 ...
- MyCat读写分离、分库分表
系统开发中,数据库是非常重要的一个点.除了程序的本身的优化,如:SQL语句优化.代码优化,数据库的处理本身优化也是非常重要的.主从.热备.分表分库等都是系统发展迟早会遇到的技术问题问题.Mycat是一 ...
- Mycat实现读写分离、分库分表
系统开发中,数据库是非常重要的一个点.除了程序的本身的优化,如:SQL语句优化.代码优化,数据库的处理本身优化也是非常重要的.主从.热备.分表分库等都是系统发展迟早会遇到的技术问题问题.Mycat是一 ...
- sharing-jdbc实现读写分离及分库分表
需求: 分库:按业务线business_id将不同业务线的订单存储在不同的数据库上: 分表:按user_id字段将不同用户的订单存储在不同的表上,为方便直接用非分片字段order_id查询,可使用基因 ...
- Mysql之Mycat读写分离及分库分表
## 什么是mycat ```basic 1.一个彻底开源的,面向企业应用开发的大数据库集群 2.支持事务.ACID.可以替代MySQL的加强版数据库 3.一个可以视为MySQL集群的企业级数据库,用 ...
- Tbase读写分离与分库分表
一.读写分离 1.1 what 读写分离 读写分离,基本的原理是让主数据库处理事务性增.改.删操作(INSERT.UPDATE.DELETE),而从数据库处理SELECT查询操作.数据库复制被用来把事 ...
- sharding demo 读写分离 U (分库分表 & 不分库只分表)
application-sharding.yml sharding: jdbc: datasource: names: ds0,ds1,dsx,dsy ds0: type: com.zaxxer.hi ...
- Ameba读写分离_mycat分库分表_redis缓存
1 数据库的读写分离 1.1 Amoeba实现读写分离 1.1.1 定义 Amoeba是一个以MySQL为底层数据存储,并对应用提供MySQL协议接口的proxy 优点: 配置读写分离时较为简单.配置 ...
随机推荐
- 《数据结构-C语言》顺序表
@ 目录 顺序表 结构定义 初始化 创建表 求表长 判断表是否为空 取值 查找 插入 删除 逆置 清空 销毁 遍历打印 测试 顺序表 结构定义 #include <stdio.h> #in ...
- 腾讯事务处理技术验证系统3TS-Coo模块的项目环境安装使用说明
本篇文章将详细说明3TS-Coo模板的安装和使用,帮助您快速上手项目 第一部分是简单的基础Docker相关概念,精炼的几句小白话快速理解即可: 第二部分是快速安装项目环境的安装文档,简单几行命令搞定, ...
- 使用JAVA调用KRPANO加密XML
KRPano自带的命令行工具krpanotools可以加密XML,具体的参数说明如下语法: krpanotools32.exe encrypt [OPTIONS] inputfiles input ...
- CVE-2018-8120 漏洞复现
CVE-2018-8120 漏洞复现 漏洞描述 win32k.sys中函数 SetImeInfoEx未对指针进行合法性检查,从而导致一个任意地址写. 漏洞分析 漏洞成因 int __stdcall S ...
- 云原生(docker jenkins k8s)docker篇
docker (1)架构 ● Docker_Host: ○ 安装Docker的主机 ● Docker Daemon: ○ 运行在Docker主机上的Docker后台进程 ● Client: ○ 操作D ...
- MySQL实战实战系列 00 开篇词 这一次,让我们一起来搞懂MySQL
你好,我是林晓斌,网名"丁奇",欢迎加入我的专栏,和我一起开始 MySQL 学习之旅.我曾先后在百度和阿里任职,从事 MySQL 数据库方面的工作,一步步地从一个数据库小白成为 M ...
- 5.2 磁盘CRC32完整性检测
CRC校验技术是用于检测数据传输或存储过程中是否出现了错误的一种方法,校验算法可以通过计算应用与数据的循环冗余校验(CRC)检验值来检测任何数据损坏.通过运用本校验技术我们可以实现对特定内存区域以及磁 ...
- ArcGIS地图投影与坐标系转换的方法
本文介绍在ArcMap软件中,对矢量图层或栅格图层进行投影(即将地理坐标系转为投影坐标系)的原理与操作方法. 首先,地理坐标系与投影坐标系最简单的区别就是,地理坐标系用经度.纬度作为空间衡量指 ...
- VS Code代码提示( AcWing算法模板,C++实现)
算法模板提取于AcWing上的代码提示 作者:yxc 链接:https://www.acwing.com/file_system/file/content/whole/index/content/21 ...
- CF1336A
题目简化和分析: 明确一点这是一棵树. 为了保证每个工业城市的设置效益最大,应该设在最深的节点. 从深到浅,可以使用优先队列去实现. 设置一个的价值为 \(dep_u-siz_u-1\). 关于作者一 ...