.NetCore下构建自己的文件服务管理(UosoOSS)
Web开发系统文件默认存储在wwwroot目录下面,现在越来越多的系统服务化了,UI也更加多元化,当然文件可以用第三方的文件服务,但是这里准备文件分离出来构建自己的文件服务配合数据库表来实现(UosoOSS)
思路:
1、构建自己的文件夹及文件管理(包括私有权限)这里需要结合IdentityServer4的客户端模式中的一些客户端ID设计到文件管理中去
2、实现一个类似 AliyunOSS的文件管理及客户端类库,帮助实现上传,以及文件地址的生成
3、处理文件的访问权限
首先来实现服务部分,构建自己的API文件服务
配置文件的根目录以及文件访问的根路径
 public class LYMFileServerOptions

    {

        /// <summary>

        /// 文件存储路径

        /// </summary>

        public string PhyicalFilePath { get; set; }

        /// <summary>

        /// 文件访问的路径 必须以"/"开始

        /// </summary>

        public string RequestPath { get; set; }

    }
 public static IServiceCollection AddUosoFile(this IServiceCollection services, Action<LYMFileServerOptions> serverOptions)

        {
//LYMFileServerOptions  配置处理
//相关服务处理

       }
接下来就是处理中间件了,这里需要用到UseFileServer,处理相关的路径就可以了
               var fileProvider = new PhysicalFileProvider(ppath);

                var fileServerOptions = new FileServerOptions();

                fileServerOptions.DefaultFilesOptions.DefaultFileNames = new[] { "" };

                fileServerOptions.FileProvider = fileProvider;

                fileServerOptions.RequestPath = options.RequestPath;

                applicationBuilder.UseFileServer(fileServerOptions);
1、接下来我们还需要构建自己的文件上次及文件访问限制设置
 applicationBuilder.UseEndpoints(endpoint =>

                {

                    endpoint.MapPost("/upload", async context =>

                    {

                        var clientId = context.User.Claims.Where(c => c.Type == "client_id").FirstOrDefault()?.Value;

                        var fileRepository = context.RequestServices.GetService<IFileRepository>();

                        #region FormData上传

                        var bucketname = context.Request.Form["bucketname"];

                        if (context.Request.Form.Files == null || context.Request.Form.Files.Count == 0)

                        {

                            context.Response.ContentType = "application/json";

                            await context.Response.WriteAsync(JsonConvert.SerializeObject(new { status = 1, message = "上传文件不存在", filename = "" }));

                            return;

                        }

                        try

                        {

                            #region 验证文件夹

                           //验证文件夹相关逻辑....#endregion

                            var file = context.Request.Form.Files[0];

                            var filename = context.Request.Form["filename"]; //可以没传服务端可以生成,为了客户端自定义的文件名称using (var stream = file.OpenReadStream())

                            {

                                const int FILE_WRITE_SIZE = 84975;

                                var basepath = PlatformServices.Default.Application.ApplicationBasePath;

                                var ppath = Path.Combine(basepath, options.PhyicalFilePath, bucketname);

                                if (!Directory.Exists(ppath))

                                {

                                    Directory.CreateDirectory(ppath);

                                }

                                using (FileStream fileStream = new FileStream(Path.Combine(ppath, filename), FileMode.Create, FileAccess.Write, FileShare.Write, FILE_WRITE_SIZE, true))

                                {

                                    byte[] byteArr = new byte[FILE_WRITE_SIZE];

                                    int readCount = 0;

                                    while ((readCount = await stream.ReadAsync(byteArr, 0, byteArr.Length)) > 0)

                                    {

                                        await fileStream.WriteAsync(byteArr, 0, readCount);

                                    }

                                }

                            };                        //添加文件数据 ......

                            context.Response.ContentType = "application/json";

                            await context.Response.WriteAsync(JsonConvert.SerializeObject(new { status = 0, message = "上传成功", filename = filename }));

                        }

                        catch (Exception ex)

                        {

                            context.Response.ContentType = "application/json";

                            await context.Response.WriteAsync(JsonConvert.SerializeObject(new { status = 1, message = "上传失败", filename = "" }));

                        }

                        #endregion

                    }).RequireAuthorization();

                });
2、获取访问文件的地址 ,根据自己的规则来获取,这里可以结合IdentityServer4的token来处理,但是有一点不好每次都需IdentityServer4去校验,所以这里还是自定义规则 把前面生成到地址栏通过某种算法校验
  applicationBuilder.UseEndpoints(endpoint =>

                {

                    endpoint.MapPost("/getfileurl", async context =>

                    {

                      //根据自己的规则来获取,这里可以结合IdentityServer4的token来处理,但是有一点不好每次都需identityServer去校验,所以这里还是自定义规则 把前面生成到地址栏通过某种算法校验

                        context.Response.ContentType = "application/json";

                        await context.Response.WriteAsync(url);

                    }).RequireAuthorization();

                });
3、匹配文件访问的路由了
     applicationBuilder.UseEndpoints(endpoint =>

                {

                    //{**slug}

                    var builder = endpoint.MapGet(options.RequestPath + "/{filename}.{ext?}", async context =>

                        {

                            object filename = string.Empty;

                            context.Request.RouteValues.TryGetValue("filename", out filename);

                            object ext = string.Empty;

                            context.Request.RouteValues.TryGetValue("ext", out ext);

                            //处理文件夹权限以及文件访问权限算法验签业务逻辑
                           // 成功 await context.Response.SendFileAsync(fileurl);
                           //文件不存在或者 没有权限 可以返回404 401


                        });

                });
4、服务端的配置基本结束了,接下来我们来处理客户端库的处理,包括文件上传、访问地址获取,文件夹的管理等等,这里需要注意文件上传带参数的坑


 public class UosoFileOSS

    {

        private string authurl;

        private string ossserverurl;

        private string clientid;

        private string clientsecret;

        public UosoFileOSS(string _authurl, string _clientid, string _clientsecret, string _ossserverurl)

        {

            this.authurl = _authurl;

            this.clientid = _clientid;

            this.clientsecret = _clientsecret;

            this.ossserverurl = _ossserverurl;

        }

        /// <summary>

        /// 文件信息

        /// </summary>

        /// <param name="stream">文件流</param>

        /// <param name="bucketName"></param>

        /// <param name="fileName"></param>

        public async Task<HttpResponseMessage> UosoPutObjectAsync(Stream stream, string bucketName, string fileOldName, string fileName = "")

        {

            HttpMessageHandler httpMessageHandler = new HttpClientHandler

            {

                AutomaticDecompression =

    System.Net.DecompressionMethods.GZip | System.Net.DecompressionMethods.Deflate

            };

            using (var client = new HttpClient(httpMessageHandler))

            {

                var requestoptions = new ClientCredentialsTokenRequest

                {

                    Address = this.authurl + "/connect/token",

                    ClientId = this.clientid,

                    ClientSecret = this.clientsecret,

                    Scope = "fileapi"

                };

                var request =await client.RequestClientCredentialsTokenAsync(requestoptions);

                if (request.IsError)

                {

                    throw new Exception(request.Error);

                }

                var content = new MultipartFormDataContent();

                var fileContent = new StreamContent(stream);

                fileContent.Headers.Add("Content-Disposition", "form-data; name=\"file\"; filename=\"" + fileOldName + "\"");

                content.Add(fileContent);

                var stringContent = new StringContent(bucketName);

                stringContent.Headers.Add("Content-Disposition", "form-data; name=\"bucketname\"");

                content.Add(stringContent);

                var stringContent1 = new StringContent(fileName);

                stringContent1.Headers.Add("Content-Disposition", "form-data; name=\"filename\"");

                content.Add(stringContent1);

                client.SetBearerToken(request.AccessToken);

                var respose =await client.PostAsync(this.ossserverurl + "/upload", content);

                return respose;

            }

        }

        public async Task<Uri> UosoGeneratePresignedUriAsync(UosoGeneratePresignedUriRequest req)

        {

            HttpMessageHandler httpMessageHandler = new HttpClientHandler

            {

                AutomaticDecompression =

   System.Net.DecompressionMethods.GZip | System.Net.DecompressionMethods.Deflate

            };

            using (var client = new HttpClient(httpMessageHandler))

            {

                var requestoptions = new ClientCredentialsTokenRequest

                {

                    Address = this.authurl + "/connect/token",

                    ClientId = this.clientid,

                    ClientSecret = this.clientsecret,

                    Scope = "fileapi"

                };

                var request = await client.RequestClientCredentialsTokenAsync(requestoptions);

                if (request.IsError)

                {

                    throw new Exception(request.Error);

                }

                var dic = new Dictionary<string, string> {

                   { "Expires",req.Expiration.Ticks.ToString()},

                   { "Key",req.key}

               };

                var content = new FormUrlEncodedContent(dic);

                client.SetBearerToken(request.AccessToken);

                var respose =await client.PostAsync(this.ossserverurl + "/getfileurl", content);

                var result =await respose.Content.ReadAsStringAsync();

                return new Uri(result);

            }

        }

        /// <summary>

        /// 文件信息

        /// </summary>

        /// <param name="stream">文件流</param>

        /// <param name="bucketName"></param>

        /// <param name="fileName"></param>

        public HttpResponseMessage UosoPutObject(Stream stream, string bucketName, string fileOldName, string fileName = "")

        {

            HttpMessageHandler httpMessageHandler = new HttpClientHandler

            {

                AutomaticDecompression =

    System.Net.DecompressionMethods.GZip | System.Net.DecompressionMethods.Deflate

            };

            using (var client = new HttpClient(httpMessageHandler))

            {

                var requestoptions = new ClientCredentialsTokenRequest

                {

                    Address = this.authurl + "/connect/token",

                    ClientId = this.clientid,

                    ClientSecret = this.clientsecret,

                    Scope = "fileapi"

                };

                var request = client.RequestClientCredentialsTokenAsync(requestoptions).Result;

                if (request.IsError)

                {

                    throw new Exception(request.Error);

                }

                var content = new MultipartFormDataContent();

                var fileContent = new StreamContent(stream);

                fileContent.Headers.Add("Content-Disposition", "form-data; name=\"file\"; filename=\"" + fileOldName + "\"");

                content.Add(fileContent);

                var stringContent = new StringContent(bucketName);

                stringContent.Headers.Add("Content-Disposition", "form-data; name=\"bucketname\"");

                content.Add(stringContent);

                var stringContent1 = new StringContent(fileName);

                stringContent1.Headers.Add("Content-Disposition", "form-data; name=\"filename\"");

                content.Add(stringContent1);

                client.SetBearerToken(request.AccessToken);

                var respose = client.PostAsync(this.ossserverurl + "/upload", content).Result;

                return respose;

            }

        }

        public Uri UosoGeneratePresignedUri(UosoGeneratePresignedUriRequest req)

        {

            HttpMessageHandler httpMessageHandler = new HttpClientHandler

            {

                AutomaticDecompression =

   System.Net.DecompressionMethods.GZip | System.Net.DecompressionMethods.Deflate

            };

            using (var client = new HttpClient(httpMessageHandler))

            {

                var requestoptions = new ClientCredentialsTokenRequest

                {

                    Address = this.authurl + "/connect/token",

                    ClientId = this.clientid,

                    ClientSecret = this.clientsecret,

                    Scope = "fileapi"

                };

                var request = client.RequestClientCredentialsTokenAsync(requestoptions).Result;

                if (request.IsError)

                {

                    throw new Exception(request.Error);

                }

                var dic = new Dictionary<string, string> {

                   { "Expires",req.Expiration.Ticks.ToString()},

                   { "Key",req.key}

               };

                var content = new FormUrlEncodedContent(dic);

                client.SetBearerToken(request.AccessToken);

                var respose = client.PostAsync(this.ossserverurl + "/getfileurl", content).Result;

                var result = respose.Content.ReadAsStringAsync().Result;

                return new Uri(result);

            }

        }

    }
FileClientOSS
注意:MultipartFormDataContent 处理文件上传,如果段都传文件没问题,如果带有参数情况,可能写法就有点坑了,其他参数的描述不要直接加到 xxxContent中,需要单独加头文件描述,我也是Fiddler抓取了PostMan上传的描述解析到,应该比较靠谱
5、通过引用客户端类库来编写自己的文件上传帮助类,之类授权地址以及文件地址确定的情况下可以封装好,这里指定客户端的信息以及文件夹信息,这里我指定了OSSTest


 public class CustomOSSHelper

    {

        private readonly UosoFileOSS uosoFileOSS;

        private const string oauthurl = "http://localhost:3000";

        private const string ossserverurl = "http://localhost:3005";

        private const string clientid = "fileclient";

        private const string clientsecret = "fileclient";

        private const string cbucketName = "OSSTest";

        public CustomOSSHelper()

        {

            uosoFileOSS = new UosoFileOSS(oauthurl, clientid, clientsecret, ossserverurl);

        }

        public HttpResponseMessage Upload(Stream stream, string bucketName, string fileName)

        {

            var result = uosoFileOSS.UosoPutObject(stream, bucketName, fileName);

            return result;

        }

        public HttpResponseMessage Upload(Stream stream, string fileName)

        {

            var result = uosoFileOSS.UosoPutObject(stream, cbucketName, fileName);

            return result;

        }

        public HttpResponseMessage UploadKey(Stream stream, string oldfileName,string fileName)

        {

            var result = uosoFileOSS.UosoPutObject(stream, cbucketName, oldfileName,fileName);

            return result;

        }

        public string GetFileUrl(string bucketName, string fileName)

        {

            var req = new UosoGeneratePresignedUriRequest(ossserverurl, bucketName, fileName, SignHttpMethod.Get)

            {

                Expiration = DateTime.Now.AddHours(1)

            };

            return uosoFileOSS.UosoGeneratePresignedUri(req).AbsoluteUri;

        }

        public string GetFileUrl(string fileName)

        {

            var req = new UosoGeneratePresignedUriRequest(ossserverurl, cbucketName, fileName, SignHttpMethod.Get)

            {

                Expiration = DateTime.Now.AddHours(1)

            };

            return uosoFileOSS.UosoGeneratePresignedUri(req).AbsoluteUri;

        }

    }
CustomOSSHelper
6、接下来我们构建一个文件服务管理的界面来添加管理文件夹、文件信息,添加一个私用的OSSTest文件夹

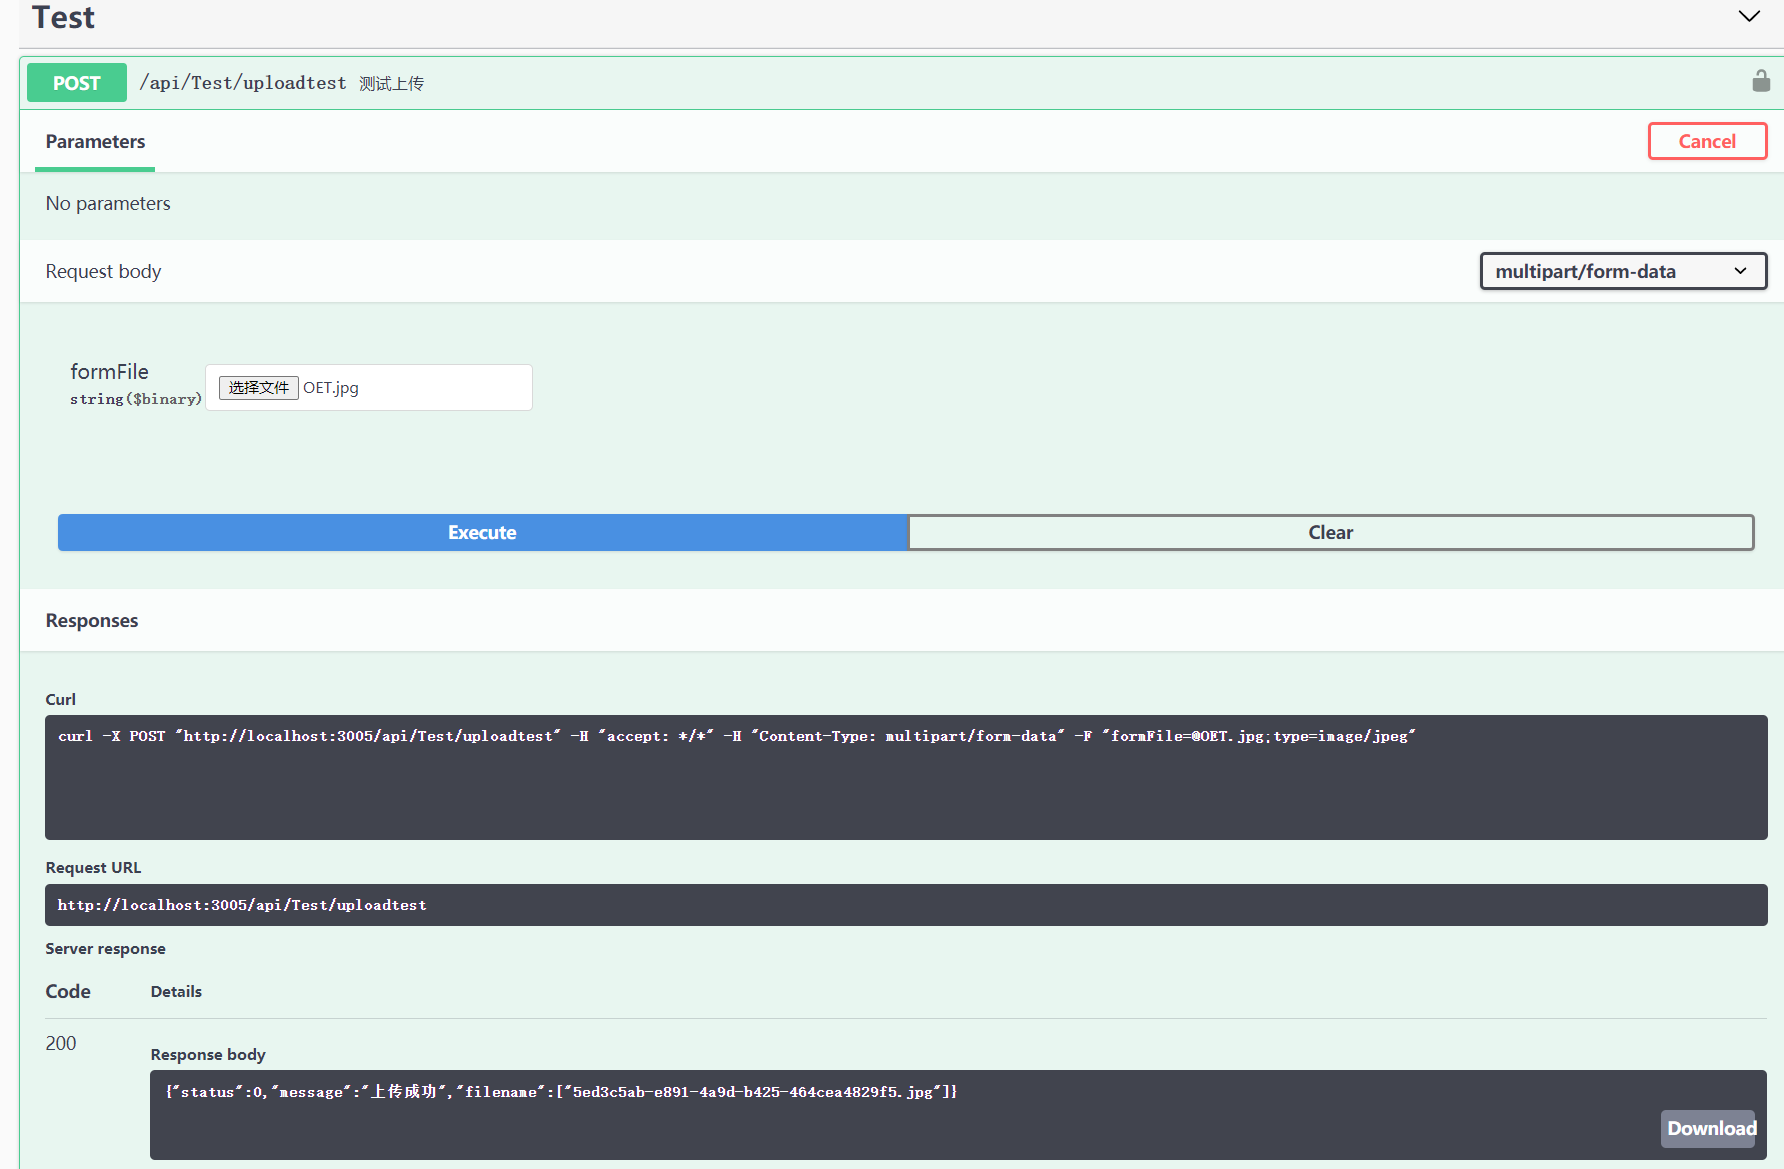
7、接下来我们通过api来测试下,如果客户端指定一个没有的文件夹 会提示 {"status":1,"message":"你不具有文件夹权限","filename":""},这里必须上传自己管理的已有的文件夹,直接来正确的吧

提示上传成功了,得到文件名称,文件名称可以业务端自定义可以服务端生成
通过下面的文件管理可以看到文件的一些信息

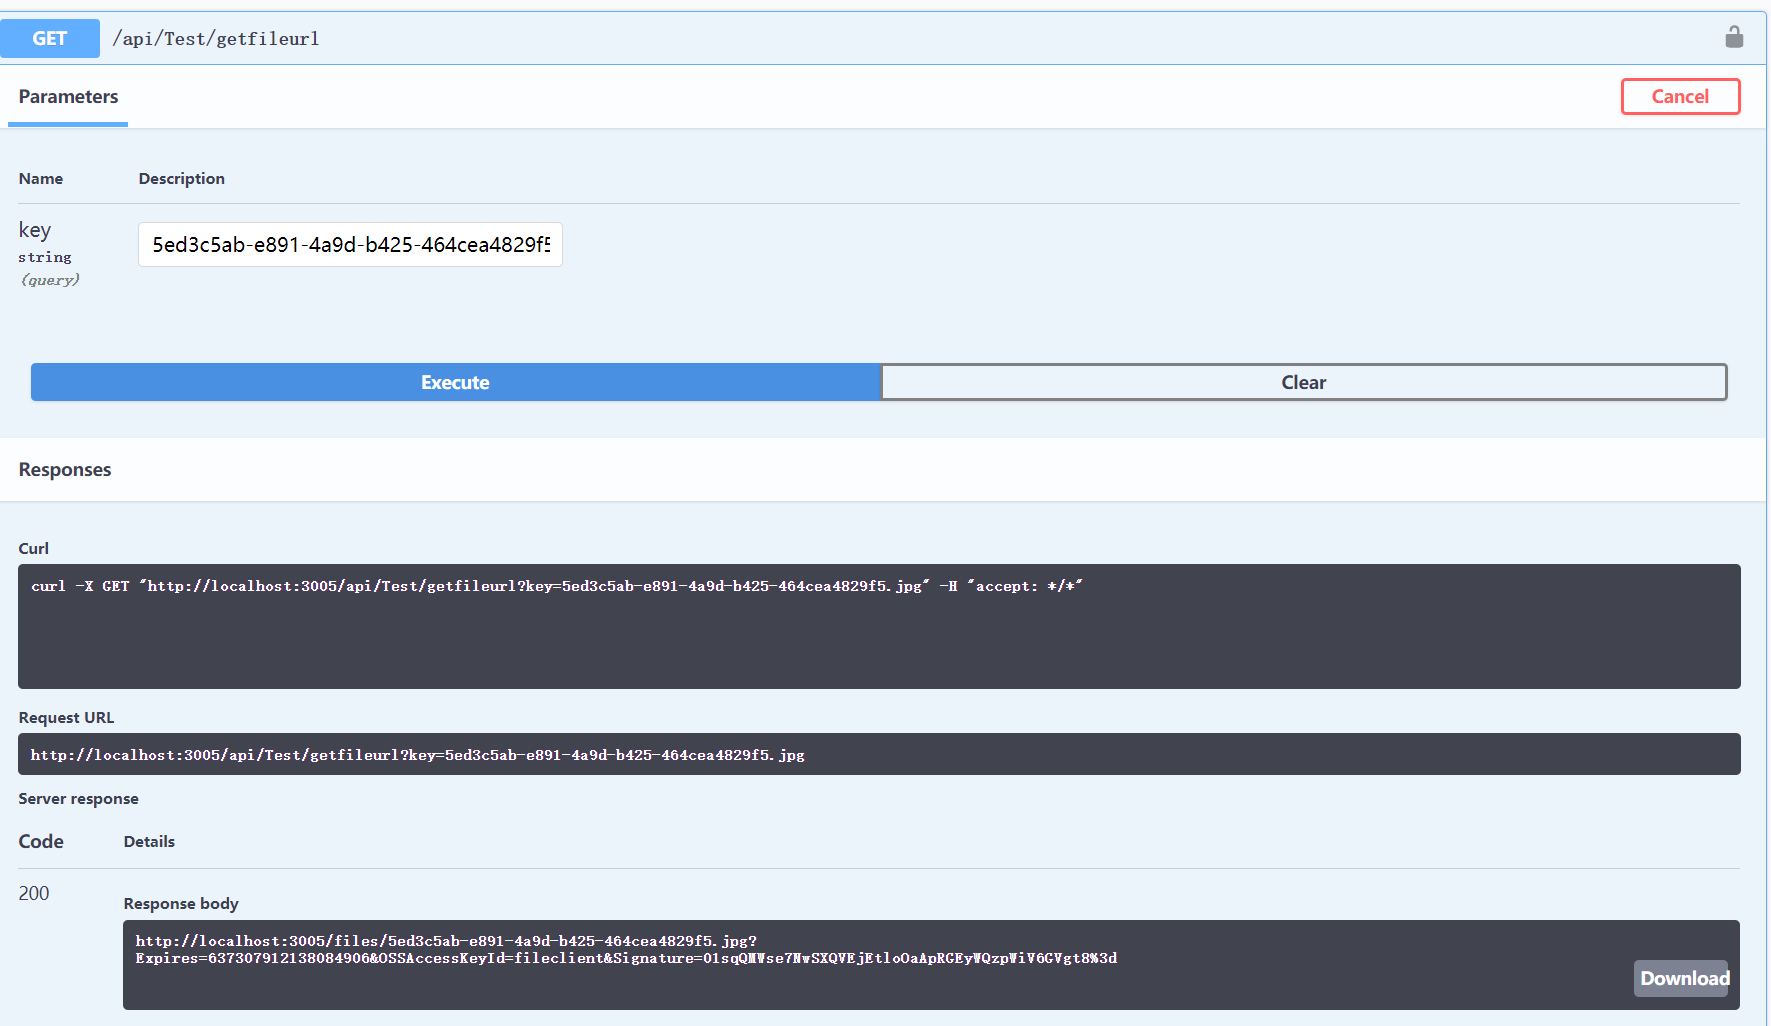
8、通过文件名称来获取访问地址,这里是为了方便客户端获取到具有访问权限的地址的路径

http://localhost:3005/files/5ed3c5ab-e891-4a9d-b425-464cea4829f5.jpg?Expires=637307912138084906&OSSAccessKeyId=fileclient&Signature=01sqQMWse7NwSXQVEjEtloOaApRGEyWQzpWiV6GVgt8%3d
获取到指定生成地址的路径,下面把地址拷贝到浏览器中看下能不能正确访问且验证下自己的权限验证是否有效

下面我们来改一改路径将fileclient改成了fileclient1,然后访问,同时这个地址是带有过期时间的,过期后也不会有访问权限,这里不贴图了

接下来我们来验证下文件夹的权限,在这之前文件设置的 私有,设置共有后,该文件夹下所有文件都可以访问,再用之前的fileclient1修改的地址访问,可以看到文件可以访问,后面的参数地址就会进入校验,所以http://localhost:3005/files/5ed3c5ab-e891-4a9d-b425-464cea4829f5.jpg 也是可以直接访问的

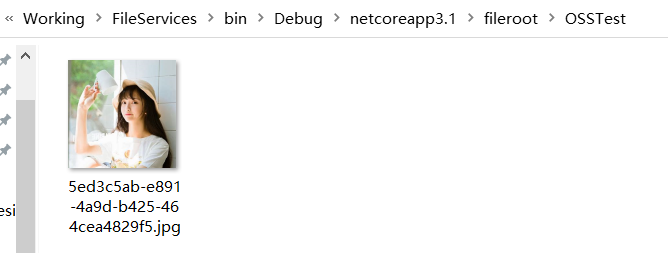
10、接下来我们来看下文件服务的文件也是按照我们预期生成的,访问路径也是ok的


总结:此文件服务虽不能文件同步,但是可以根据业务不同分离文件,同时此文件服务可以部署多个地址来减小服务器压力,这个文件服务模仿了AliyunOSS 文件管理来做的,也是为了公司的客户不想使用第三方的文件服务编写的
.NetCore下构建自己的文件服务管理(UosoOSS)的更多相关文章
- .NetCore下构建自己的服务配置中心-手动造轮子
本人主要利用IdentityServer4以及SignalR来实现,IdentityServer4作为认证,SignalR来交互配置,这里一些代码可能就是部分提出来,主要介绍实现原理及方法 实现配置中 ...
- Linux文件服务管理之vsftpd
简介 vsftpd是 "very secure FTP deamon"的缩写,是一个完全免费,开源的ftp服务器软件. 特点 小巧轻快,安全易用,支持虚拟用户.支持带宽限制等功能. ...
- Homebrew下安装的软件自启动服务管理工具:Launchrocket
帮助管理Homebrew安装的服务的软件,比如使用Homebrew安装的Mysql.Redis.MongoDB,传统方式需要使用命令行的命令,而使用LaunchRocket则可以在图形界面中进行管理. ...
- 在VMware下进行的使用ssh服务管理远程主机
基于密钥的安全验证--sshd服务的配置文件解析(两台linux) 首先你有两台虚拟机 并且能够ping通(该实验的目的是通过客户端访问服务端) 打开终端进入到这个界面 看一下服务 如果有这三个服 ...
- Linux文件服务管理之nfs
NFS(Network File System)即网络文件系统, 是FreeBSD支持的文件系统中的一种,它允许网络中的计算机之间通过TCP/IP网络共享资源. 在NFS的应用中,本地NFS的客户端应 ...
- Linux文件服务管理之Samba
Linux文件服务器的搭建 Samba vsftpd nfs Samba服务 作用:共享目录 ...
- Linux软件服务管理
学习该课程之前先学习linux的软件安装管理 1.linux的运行级别有下面几种类型 在后面的服务启动管理之中会被使用到 [root@weiyuan httpd-2.4.20]# runlevel N ...
- CentOS 7下MySQL5.7.23的服务配置参数测试
CentOS 7默认安装MySQL5.7.23,服务管理发生了变化,从sysvinit(service mysql start)变化为systemd(systemctl start mysqld.se ...
- .netcore下的微服务、容器、运维、自动化发布
原文:.netcore下的微服务.容器.运维.自动化发布 微服务 1.1 基本概念 1.1.1 什么是微服务? 微服务架构是SOA思想某一种具体实现.是一种将单应用程序作为一套小型 ...
随机推荐
- spring boot 启动卡半天
测试服务器到期,把环境切了,早上过来 ios 和 安卓 都说 测试环境连不上,ps -ef | grep app.jar 查看了一下进程,发现没有启动,于是 重新打包.部署,一顿骚操作后,监控启动日志 ...
- centos7.4 64位安装 git
参考博客:Linux Jenkins配置Git 1. git --version 查看有没有安装 过 git,没有则 继续 2. git 压缩包下载地址:https://mirrors.edge.ke ...
- springboot中如何向redis缓存中存入数据
package com.hope;import com.fasterxml.jackson.core.JsonProcessingException;import com.fasterxml.jack ...
- 【C/C++】例题5-4 反片语/算法竞赛入门经典/C++与STL入门/映射:map
本题是映射:map的例题. map:键值对. [题目] 输入一些单词,找出所有满足如下条件的单词:该单词不能通过字母重排,得到输入文本中的另外一个单词. 在判断是否满足条件时,字母不分大小写,但在输出 ...
- Java基础语法与流程控制
Java基础语法与流程控制 跟着狂神学Java的第二天O(∩_∩)O~,养成一个总结的习惯 志同道合的小伙伴可以一起学习狂神的视频 本节地址:https://www.kuangstudy.com/co ...
- Mysql-5.6 二进制多实例部署
目录 一.简介 二.环境声明 三.程序部署 一.简介 MySQL多实例就是在一台机器上开启多个不同的服务端口(如:3306,3307),运行多个MySQL服务进程,通过不同的socket监听不同的服务 ...
- PHP数组函数总结与使用
array_change_key_case(数组,CASE_LOWER/CASE_UPPER) 数组键值转化为小写CASE_LOWER/大写CASE_UPPER array_chunk(数组,分割 ...
- HGAME2021 week3 pwn writeup
一共放出五道题,都不是很难. blackgive 考栈转移,值得注意的一点是转移过去先填充几个ret,因为如果直接在转移过去的地方写rop链,执行起来会覆盖到上面的一些指针,导致程序不能正常输入和输出 ...
- Kafka从入门到放弃(三) —— 详说生产者
上一篇对Kafka做了简单介绍,还没看的朋友可以点击下方链接. Kafka从入门到放弃(一) -- 初识别Kafka 消息中间件必须与生产者和消费者一起存在才有意义,这次先来聊聊Kafka的生产者. ...
- CF106A Card Game 题解
Content 一种纸牌游戏有许多张卡牌,每张卡牌有一个套装(S,H,D和 C)和一个等级(按升序排列6,7,8,9,T, J,Q,K,A). 规定以下情况卡牌 A 才能赢卡牌 B: A 有王牌套装, ...
