kubeadm部署高可用版Kubernetes1.21[更新]
环境规划
| 主机名 | IP地址 | 说明 |
|---|---|---|
| k8s-master01 ~ 03 | 192.168.3.81 ~ 83 | master节点 * 3 |
| k8s-master-lb | 192.168.3.200 | keepalived虚拟IP |
| k8s-node01 ~ 02 | 192.168.3.84 ~ 85 | worker节点 * 2 |
| 配置信息 | 备注 |
|---|---|
| 系统版本 | CentOS 7.6 |
| Docker版本 | 19.03.x |
| Pod网段 | 172.16.0.0/12 |
| Service网段 | 192.168.0.0/16 |
基本环境配置
Kubeadm安装方式自1.14版本以后,安装方法几乎没有任何变化,此文档可以尝试安装最新的k8s集群,centos采用的是7.x版本
K8S官网:https://kubernetes.io/docs/setup/
最新版高可用安装:https://kubernetes.io/docs/setup/production-environment/tools/kubeadm/high-availability/
VIP(虚拟IP)不要和公司内网IP重复,首先去ping一下,不通才可用。VIP需要和主机在同一个局域网内!公有云上搭建VIP是公有云的负载均衡的IP,比如阿里云的内网SLB的地址,腾讯云内网ELB的地址。
服务器基础定义
配置在部署机执行
变量定义
#定义变量:

KUBE_MASTER=(192.168.3.81 192.168.3.82 192.168.3.83)

KUBE_NODE=(192.168.3.84 192.168.3.85)

VIP=192.168.3.200
hosts文件配置:
cat > /etc/hosts << EOF

${KUBE_MASTER[0]} k8s-master01

${KUBE_MASTER[1]} k8s-master02

${KUBE_MASTER[2]} k8s-master03

${KUBE_NODE[0]} k8s-node01

${KUBE_NODE[1]} k8s-node02

${VIP} k8s-vip

EOF
免密配置:
ssh-keygen -t rsa

for i in ${KUBE_MASTER[@]} ${KUBE_NODE[@]} ;do ssh-copy-id -i .ssh/id_rsa.pub $i;done
配置阿里云yum源,安装基本软件
rm -f /etc/yum.repos.d/*

curl -o /etc/yum.repos.d/CentOS-Base.repo https://mirrors.aliyun.com/repo/Centos-7.repo

yum install -y yum-utils device-mapper-persistent-data lvm2

yum-config-manager --add-repo https://mirrors.aliyun.com/docker-ce/linux/centos/docker-ce.repo

cat <<EOF > /etc/yum.repos.d/kubernetes.repo

[kubernetes]

name=Kubernetes

baseurl=https://mirrors.aliyun.com/kubernetes/yum/repos/kubernetes-el7-x86_64/

enabled=1

gpgcheck=1

repo_gpgcheck=1

gpgkey=https://mirrors.aliyun.com/kubernetes/yum/doc/yum-key.gpg https://mirrors.aliyun.com/kubernetes/yum/doc/rpm-package-key.gpg

EOF

sed -i -e '/mirrors.cloud.aliyuncs.com/d' -e '/mirrors.aliyuncs.com/d' /etc/yum.repos.d/CentOS-Base.repo

for ip in ${KUBE_MASTER[@]} ${KUBE_NODE[@]}; do

  \scp -r /etc/yum.repos.d/* ${ip}:/etc/yum.repos.d/

  yum clean all

  yum install -y yum-utils device-mapper-persistent-data lvm2

  yum install wget jq psmisc vim net-tools telnet yum-utils device-mapper-persistent-data lvm2 git -y

done

#阿里源:

wget -O /etc/yum.repos.d/CentOS-Base.repo http://mirrors.aliyun.com/repo/Centos-7.repo

wget -P /etc/yum.repos.d/ http://mirrors.aliyun.com/repo/epel-7.repo
修改主机名
cat >host.txt<<EOF

192.168.3.81,k8s-master01

192.168.3.82,k8s-master02

192.168.3.83,k8s-master03

192.168.3.84,k8s-node01

192.168.3.85,k8s-node02

EOF

for i in $(cat host.txt);do a=$(echo ${i} | awk -F, '{print $1}');b=$(echo ${i} | awk -F, '{print $2}');ssh $a "hostnamectl set-hostname $b";done

#for ip in ${KUBE_MASTER[@]} ${KUBE_NODE[@]}; do

#  ssh ${ip} "hostnamectl set-hostname \$(grep \$(hostname -I) /etc/hosts | awk '{print \$2}')"

#done
关闭交换分区
for ip in ${KUBE_MASTER[@]} ${KUBE_NODE[@]}; do

  ssh ${ip} "swapoff -a

  sed -i '/swap.*swap/d' /etc/fstab

  "

done
配置时间同步
for ip in ${KUBE_MASTER[@]} ${KUBE_NODE[@]}; do

  ssh ${ip} "yum -y install chrony

  sed -i 's/^server/#server/g' /etc/chrony.conf

  sed -i '2aserver 2.cn.pool.ntp.org iburst' /etc/chrony.conf

  sed -i '2aserver ntp1.aliyun.com iburst' /etc/chrony.conf

  systemctl start chronyd

  systemctl enable chronyd

  "

done
内核配置:
for ip in ${KUBE_MASTER[@]} ${KUBE_NODE[@]}; do

  cat > /etc/sysctl.d/k8s.conf << EOF

net.ipv4.ip_forward = 1

net.bridge.bridge-nf-call-ip6tables = 1

net.bridge.bridge-nf-call-iptables = 1

EOF

  scp /etc/sysctl.d/k8s.conf ${ip}:/etc/sysctl.d/k8s.conf

  ssh ${ip} "sysctl --system

  "

done
所有节点关闭防火墙、selinux、dnsmasq、swap服务器配置如下
for ip in ${KUBE_MASTER[@]} ${KUBE_NODE[@]}; do

systemctl disable --now firewalld

systemctl disable --now dnsmasq

systemctl disable --now NetworkManager

setenforce 0

sed -i 's#SELINUX=enforcing#SELINUX=disabled#g' /etc/sysconfig/selinux

sed -i 's#SELINUX=enforcing#SELINUX=disabled#g' /etc/selinux/config

swapoff -a && sysctl -w vm.swappiness=0

sed -ri '/^[^#]*swap/s@^@#@' /etc/fstab

done
安装ntpdate
for ip in ${KUBE_MASTER[@]} ${KUBE_NODE[@]}; do

rpm -ivh http://mirrors.wlnmp.com/centos/wlnmp-release-centos.noarch.rpm

yum install ntpdate -y

done

for ip in ${KUBE_MASTER[@]} ${KUBE_NODE[@]}; do

ulimit -SHn 65535

\scp /etc/security/limits.conf ${ip}:/etc/security/limits.conf

done
所有节点同步时间。时间同步配置如下:
# 配置时间同步,并加入到crontab

for ip in ${KUBE_MASTER[@]} ${KUBE_NODE[@]}; do

ln -sf /usr/share/zoneinfo/Asia/Shanghai /etc/localtime

echo 'Asia/Shanghai' >/etc/timezone

ntpdate time2.aliyun.com

echo '*/5 * * * * /usr/sbin/ntpdate time2.aliyun.com' >/var/spool/cron/root

systemctl restart crond

done
所有节点配置limit
cat >>/etc/security/limits.conf<<EOF

# 末尾添加如下内容

* soft nofile 655360

* hard nofile 131072

* soft nproc 655350

* hard nproc 655350

* soft memlock unlimited

* hard memlock unlimited

EOF

for ip in ${KUBE_MASTER[@]} ${KUBE_NODE[@]}; do

ulimit -SHn 65535

\scp /etc/security/limits.conf ${ip}:/etc/security/limits.conf

done
下载源码文件
cd /root ; git clone https://gitee.com/dukuan/k8s-ha-install.git
升级内核
#CentOS7需要升级,CentOS8可以按需升级系统

#所有节点升级系统并重启,此处升级没有升级内核,下节会单独升级内核:

for ip in ${KUBE_MASTER[@]} ${KUBE_NODE[@]}; do

ssh ${ip} 'yum update -y --exclude=kernel* && reboot'

done

yum update -y --exclude=kernel* && reboot
配置内核
CentOS7 需要升级内核至4.18+,本地升级的版本为4.19:

cd /root

wget http://193.49.22.109/elrepo/kernel/el7/x86_64/RPMS/kernel-ml-devel-4.19.12-1.el7.elrepo.x86_64.rpm

wget http://193.49.22.109/elrepo/kernel/el7/x86_64/RPMS/kernel-ml-4.19.12-1.el7.elrepo.x86_64.rpm

#从master01节点传到其他节点:

cd /root

for i in ${KUBE_MASTER[@]} ${KUBE_NODE[@]};do

scp -r kernel-ml-4.19.12-1.el7.elrepo.x86_64.rpm kernel-ml-devel-4.19.12-1.el7.elrepo.x86_64.rpm $i:/root

done

#所有节点安装内核

for i in ${KUBE_MASTER[@]} ${KUBE_NODE[@]};do

ssh $i 'yum localinstall -y kernel-ml*'

done

#所有节点更改内核启动顺序

for i in ${KUBE_MASTER[@]} ${KUBE_NODE[@]};do

ssh $i '

grub2-set-default  0 && grub2-mkconfig -o /etc/grub2.cfg

grubby --args="user_namespace.enable=1" --update-kernel="$(grubby --default-kernel)"

'

done

#修改完成后检查现在的默认内核是否是4.19

for i in ${KUBE_MASTER[@]} ${KUBE_NODE[@]};do

ssh $i '

grubby --default-kernel

'

done

[root@k8s-master01 ~]# grubby --default-kernel

/boot/vmlinuz-4.19.12-1.el7.elrepo.x86_64

#通过uname -a 看到当前内核是 3.10 需要重启系统让新内核生效

#所有服务器重启,让新内核生效

[root@k8s-master01 ~]# uname -a

Linux k8s-master01 4.19.12-1.el7.elrepo.x86_64 #1 SMP Fri Dec 21 11:06:36 EST 2018 x86_64 x86_64 x86_64 GNU/Linux
ipvs配置[所有节点安装ipvsadm]
yum install ipvsadm ipset sysstat conntrack libseccomp -y

#所有节点配置ipvs模块,在内核4.19+版本nf_conntrack_ipv4已经改为nf_conntrack,4.18以下使用nf_conntrack_ipv4即可

modprobe -- ip_vs

modprobe -- ip_vs_rr

modprobe -- ip_vs_wrr

modprobe -- ip_vs_sh

modprobe -- nf_conntrack

#配置写入ipvs配置文件:

cat >/etc/modules-load.d/ipvs.conf <<EOF

ip_vs

ip_vs_lc

ip_vs_wlc

ip_vs_rr

ip_vs_wrr

ip_vs_lblc

ip_vs_lblcr

ip_vs_dh

ip_vs_sh

ip_vs_fo

ip_vs_nq

ip_vs_sed

ip_vs_ftp

ip_vs_sh

nf_conntrack

ip_tables

ip_set

xt_set

ipt_set

ipt_rpfilter

ipt_REJECT

ipip

EOF

systemctl enable --now systemd-modules-load.service

# shell

for i in ${KUBE_MASTER[@]} ${KUBE_NODE[@]};do

yum install ipvsadm ipset sysstat conntrack libseccomp -y

modprobe -- ip_vs

modprobe -- ip_vs_rr

modprobe -- ip_vs_wrr

modprobe -- ip_vs_sh

modprobe -- nf_conntrack

cat >/etc/modules-load.d/ipvs.conf <<EOF

ip_vs

ip_vs_lc

ip_vs_wlc

ip_vs_rr

ip_vs_wrr

ip_vs_lblc

ip_vs_lblcr

ip_vs_dh

ip_vs_sh

ip_vs_fo

ip_vs_nq

ip_vs_sed

ip_vs_ftp

ip_vs_sh

nf_conntrack

ip_tables

ip_set

xt_set

ipt_set

ipt_rpfilter

ipt_REJECT

ipip

EOF

systemctl enable --now systemd-modules-load.service

done
内核参数优化
#开启一些k8s集群中必须的内核参数,所有节点配置k8s内核:

for i in ${KUBE_MASTER[@]} ${KUBE_NODE[@]};do

ssh $i '

cat <<EOF > /etc/sysctl.d/k8s.conf

net.ipv4.ip_forward = 1

net.bridge.bridge-nf-call-iptables = 1

net.bridge.bridge-nf-call-ip6tables = 1

fs.may_detach_mounts = 1

net.ipv4.conf.all.route_localnet = 1

vm.overcommit_memory=1

vm.panic_on_oom=0

fs.inotify.max_user_watches=89100

fs.file-max=52706963

fs.nr_open=52706963

net.netfilter.nf_conntrack_max=2310720

net.ipv4.tcp_keepalive_time = 600

net.ipv4.tcp_keepalive_probes = 3

net.ipv4.tcp_keepalive_intvl =15

net.ipv4.tcp_max_tw_buckets = 36000

net.ipv4.tcp_tw_reuse = 1

net.ipv4.tcp_max_orphans = 327680

net.ipv4.tcp_orphan_retries = 3

net.ipv4.tcp_syncookies = 1

net.ipv4.tcp_max_syn_backlog = 16384

net.ipv4.ip_conntrack_max = 65536

net.ipv4.tcp_max_syn_backlog = 16384

net.ipv4.tcp_timestamps = 0

net.core.somaxconn = 16384

EOF

sysctl --system

'

done

#所有节点配置完内核后,重启服务器,保证重启后内核依旧加载

for i in ${KUBE_MASTER[@]} ${KUBE_NODE[@]};do

ssh $i '

reboot

'

done

#所有服务器重启完成后检查

KUBE_MASTER=(192.168.3.81 192.168.3.82 192.168.3.83)

KUBE_NODE=(192.168.3.84 192.168.3.85)

for i in ${KUBE_MASTER[@]} ${KUBE_NODE[@]};do

ssh $i '

lsmod |& grep --color=auto -e ip_vs -e nf_conntrack

'

done

#重启前:

[root@k8s-master01 ~]# lsmod | grep --color=auto -e ip_vs -e nf_conntrack

ip_vs_sh               16384  0

ip_vs_wrr              16384  0

ip_vs_rr               16384  0

ip_vs                 151552  6 ip_vs_rr,ip_vs_sh,ip_vs_wrr

nf_conntrack          143360  1 ip_vs

nf_defrag_ipv6         20480  1 nf_conntrack

nf_defrag_ipv4         16384  1 nf_conntrack

libcrc32c              16384  3 nf_conntrack,xfs,ip_vs

#重启后:

[root@k8s-master01 ~]# lsmod | grep --color=auto -e ip_vs -e nf_conntrack

ip_vs_ftp              16384  0

nf_nat                 32768  1 ip_vs_ftp

ip_vs_sed              16384  0

ip_vs_nq               16384  0

ip_vs_fo               16384  0

ip_vs_sh               16384  0

ip_vs_dh               16384  0

ip_vs_lblcr            16384  0

ip_vs_lblc             16384  0

ip_vs_wrr              16384  0

ip_vs_rr               16384  0

ip_vs_wlc              16384  0

ip_vs_lc               16384  0

ip_vs                 151552  24 ip_vs_wlc,ip_vs_rr,ip_vs_dh,ip_vs_lblcr,ip_vs_sh,ip_vs_fo,ip_vs_nq,ip_vs_lblc,ip_vs_wrr,ip_vs_lc,ip_vs_sed,ip_vs_ftp

nf_conntrack          143360  2 nf_nat,ip_vs

nf_defrag_ipv6         20480  1 nf_conntrack

nf_defrag_ipv4         16384  1 nf_conntrack

libcrc32c              16384  4 nf_conntrack,nf_nat,xfs,ip_vs
基本组件安装[所有节点]
docker安装和源配置
KUBE_MASTER=(192.168.3.81 192.168.3.82 192.168.3.83)

KUBE_NODE=(192.168.3.84 192.168.3.85)

for i in ${KUBE_MASTER[@]} ${KUBE_NODE[@]};do

ssh  $i '

yum install docker-ce-20.10.* docker-cli-20.10.* -y

mkdir -p /etc/docker

cat > /etc/docker/daemon.json <<EOF

{

  "registry-mirrors": ["https://ajvcw8qn.mirror.aliyuncs.com"],

  "exec-opts": ["native.cgroupdriver=systemd"]

}

EOF

systemctl daemon-reload && systemctl enable --now docker

'

done
kubernetes组件安装
#所有节点安装kubeadm:

#yum install kubeadm-1.21* kubelet-1.21* kubectl-1.21* -y

# 默认配置的pause镜像使用gcr.io仓库,国内可能无法访问,所以这里配置Kubelet使用阿里云的pause镜像:

cat >/etc/sysconfig/kubelet<<EOF

KUBELET_EXTRA_ARGS="--pod-infra-container-image=registry.cn-hangzhou.aliyuncs.com/google_containers/pause:3.4.1"

EOF

#设置Kubelet开机自启动:

systemctl daemon-reload

systemctl enable --now kubelet

---------------------------------------------------

# 所有节点安装kubeadm

for i in ${KUBE_MASTER[@]} ${KUBE_NODE[@]};do

ssh  $i '

#所有节点安装kubeadm:

yum install kubeadm-1.21* kubelet-1.21* kubectl-1.21* -y

# 默认配置的pause镜像使用gcr.io仓库,国内可能无法访问,所以这里配置Kubelet使用阿里云的pause镜像:

cat >/etc/sysconfig/kubelet<<EOF

KUBELET_EXTRA_ARGS="--pod-infra-container-image=registry.cn-hangzhou.aliyuncs.com/google_containers/pause:3.4.1"

EOF

'

done
高可用组件部署
KUBE_MASTER=(192.168.3.81 192.168.3.82 192.168.3.83)

KUBE_NODE=(192.168.3.84 192.168.3.85)

VIP=192.168.3.200

for i in ${KUBE_MASTER[@]};do

#所有Master节点通过yum安装HAProxy和KeepAlived

ssh $i "

rm -f /etc/yum.repos.d/CentOS-Base.repo*  /etc/yum.repos.d/epel-7.repo*

wget -O /etc/yum.repos.d/CentOS-Base.repo http://mirrors.aliyun.com/repo/Centos-7.repo

wget -P /etc/yum.repos.d/ http://mirrors.aliyun.com/repo/epel-7.repo

yum clean all

yum install keepalived haproxy -y

mkdir -p /etc/haproxy

cat >/etc/haproxy/haproxy.cfg<<EOF

global

 maxconn 2000

 ulimit-n 16384

 log 127.0.0.1 local0 err

 stats timeout 30s

defaults

 log global

 mode http

 option httplog

 timeout connect 5000

 timeout client 50000

 timeout server 50000

 timeout http-request 15s

 timeout http-keep-alive 15s

frontend monitor-in

 bind *:33305

 mode http

 option httplog

 monitor-uri /monitor

frontend k8s-master

 bind 0.0.0.0:16443

 bind 127.0.0.1:16443

 mode tcp

 option tcplog

 tcp-request inspect-delay 5s

 default_backend k8s-master

backend k8s-master

 mode tcp

 option tcplog

 option tcp-check

 balance roundrobin

 default-server inter 10s downinter 5s rise 2 fall 2 slowstart 60s maxconn 250 maxqueue 256 weight 100

 server k8s-master01  ${KUBE_MASTER[0]}:6443 check

 server k8s-master02  ${KUBE_MASTER[1]}:6443 check

 server k8s-master03  ${KUBE_MASTER[2]}:6443 check

EOF

"

done
keepalived部署:
#

KUBE_MASTER=(192.168.3.81 192.168.3.82 192.168.3.83)

KUBE_NODE=(192.168.3.84 192.168.3.85)

VIP=192.168.3.200

#所有Master节点配置KeepAlived,配置不一样,注意区分 ,注意每个节点的IP和网卡(interface参数)

mkdir /etc/keepalived

#传递到其他高可用服务器,并修改配置:

for i in ${KUBE_MASTER[@]};do

ssh $i '

VIP=192.168.3.200

mkdir -p /etc/keepalived

cat >/etc/keepalived/keepalived.conf<<EOF

! Configuration File for keepalived

global_defs {

    router_id LVS_DEVEL

script_user root

    enable_script_security

}

vrrp_script chk_apiserver {

    script "/etc/keepalived/check_apiserver.sh"

    interval 5

    weight -5

    fall 2

rise 1

}

vrrp_instance VI_1 {

    state MASTER

    interface eth0

    mcast_src_ip 123456

    virtual_router_id 51

    priority 101

    advert_int 2

    authentication {

        auth_type PASS

        auth_pass K8SHA_KA_AUTH

    }

    virtual_ipaddress {

        ${VIP}

    }

    track_script {

       chk_apiserver

    }

}

EOF

'

done

for i in ${KUBE_MASTER[@]};do

ssh $i '

sed -i 's#123456#$(hostname -i|awk '{print $1}')#g' /etc/keepalived/keepalived.conf

'

done
健康检查:
KUBE_MASTER=(192.168.3.81 192.168.3.82 192.168.3.83)

for i in ${KUBE_MASTER[@]};do

ssh $i '

cat >/etc/keepalived/check_apiserver.sh<<EOF

#!/bin/bash

err=0

for k in $(seq 1 3)

do

    check_code=$(pgrep haproxy)

    if [[ $check_code == "" ]]; then

        err=$(expr $err + 1)

        sleep 1

        continue

    else

        err=0

        break

    fi

done

if [[ $err != "0" ]]; then

    echo "systemctl stop keepalived"

    /usr/bin/systemctl stop keepalived

    exit 1

else

    exit 0

fi

EOF

chmod +x /etc/keepalived/check_apiserver.sh

'

done

for i in ${KUBE_MASTER[@]};do

ssh $i '

systemctl daemon-reload

systemctl enable --now haproxy

systemctl enable --now keepalived

'

done

#提示:

#如果ping不通且telnet没有出现 ] ,则认为VIP不可以,不可在继续往下执行,需要排查keepalived的问题,比如防火墙和selinux,haproxy和keepalived的状态,监听端口等

#所有节点查看防火墙状态必须为disable和inactive:systemctl status firewalld

#所有节点查看selinux状态,必须为disable:getenforce

#master节点查看haproxy和keepalived状态:systemctl status keepalived haproxy

#master节点查看监听端口:netstat -lntp
集群初始化:
#通过kubectl --version获取版本号:

[root@k8s-master01 ~]# kubectl version

Client Version: version.Info{Major:"1", Minor:"21", GitVersion:"v1.21.2", GitCommit:"092fbfbf53427de67cac1e9fa54aaa09a28371d7", GitTreeState:"clean", BuildDate:"2021-06-16T12:59:11Z", GoVersion:"go1.16.5", Compiler:"gc", Platform:"linux/amd64"}

The connection to the server localhost:8080 was refused - did you specify the right host or port?

#版本号为: v1.21.2

vim kubeadm-config.yaml

#内容如下:

#------------------------------------------------------------------#

apiVersion: kubeadm.k8s.io/v1beta2

bootstrapTokens:

- groups:

  - system:bootstrappers:kubeadm:default-node-token

  token: 7t2weq.bjbawausm0jaxury

  ttl: 24h0m0s

  usages:

  - signing

  - authentication

kind: InitConfiguration

localAPIEndpoint:

  advertiseAddress: 192.168.3.81

  bindPort: 6443

nodeRegistration:

  criSocket: /var/run/dockershim.sock

  name: k8s-master01

  taints:

  - effect: NoSchedule

    key: node-role.kubernetes.io/master

---

apiServer:

  certSANs:

  - 192.168.3.200

  timeoutForControlPlane: 4m0s

apiVersion: kubeadm.k8s.io/v1beta2

certificatesDir: /etc/kubernetes/pki

clusterName: kubernetes

controlPlaneEndpoint: 192.168.3.200:16443

controllerManager: {}

dns:

  type: CoreDNS

etcd:

  local:

    dataDir: /var/lib/etcd

imageRepository: registry.cn-hangzhou.aliyuncs.com/google_containers

kind: ClusterConfiguration

kubernetesVersion: v1.20.0

networking:

  dnsDomain: cluster.local

  podSubnet: 172.16.0.0/12

  serviceSubnet: 192.168.0.0/16

scheduler: {}

#------------------------------------------------------------------#

注意点:

kubernetesVersion: v1.20.0  这里的版本改为 v1.21.2

advertiseAddress: 192.168.3.81   改为master01 节点IP

#更新kubeadm文件:

kubeadm config migrate --old-config kubeadm-config.yaml --new-config new.yaml

#将new.yaml文件复制到其他master节点:

for i in k8s-master02 k8s-master03; do scp new.yaml $i:/root/; done

#之后所有Master节点提前下载镜像,可以节省初始化时间(其他节点不需要更改任何配置,包括IP地址也不需要更改):

kubeadm config images pull --config /root/new.yaml

#这很可能会下载失败,所以建议用下面的:

KUBE_MASTER=(192.168.3.81 192.168.3.82 192.168.3.83)

KUBE_NODE=(192.168.3.84 192.168.3.85)

#更新kubeadm-config.yaml

kubeadm config migrate --old-config kubeadm-config.yaml --new-config new.yaml

for i in  ${KUBE_MASTER[@]} ${KUBE_NODE[@]};do ssh $i '

docker pull registry.cn-beijing.aliyuncs.com/dotbalo/coredns:1.8.0

docker tag registry.cn-beijing.aliyuncs.com/dotbalo/coredns:1.8.0 registry.cn-hangzhou.aliyuncs.com/google_containers/coredns/coredns:v1.8.0

'; done

#由于kubelet还没初始化所以暂时不能直接启动,只需要设置开机启动即可

#配置kubelet开机启动 这个步骤时间比较长:

for i in ${KUBE_MASTER[@]} ${KUBE_NODE[@]};do

ssh $i '

systemctl enable --now kubelet

'

done

#Master01节点初始化,初始化以后会在/etc/kubernetes目录下生成对应的证书和配置文件,之后其他Master节点加入Master01即可:

kubeadm init --config /root/new.yaml  --upload-certs

#初始化详细信息:
#初始化信息:

[root@k8s-master01 ~]# kubeadm init --config /root/new.yaml  --upload-certs

[init] Using Kubernetes version: v1.21.2

[preflight] Running pre-flight checks

[preflight] Pulling images required for setting up a Kubernetes cluster

[preflight] This might take a minute or two, depending on the speed of your internet connection

[preflight] You can also perform this action in beforehand using 'kubeadm config images pull'

[certs] Using certificateDir folder "/etc/kubernetes/pki"

[certs] Generating "ca" certificate and key

[certs] Generating "apiserver" certificate and key

[certs] apiserver serving cert is signed for DNS names [k8s-master01 kubernetes kubernetes.default kubernetes.default.svc kubernetes.default.svc.cluster.local] and IPs [192.168.0.1 192.168.3.81 192.168.3.200]

[certs] Generating "apiserver-kubelet-client" certificate and key

[certs] Generating "front-proxy-ca" certificate and key

[certs] Generating "front-proxy-client" certificate and key

[certs] Generating "etcd/ca" certificate and key

[certs] Generating "etcd/server" certificate and key

[certs] etcd/server serving cert is signed for DNS names [k8s-master01 localhost] and IPs [192.168.3.81 127.0.0.1 ::1]

[certs] Generating "etcd/peer" certificate and key

[certs] etcd/peer serving cert is signed for DNS names [k8s-master01 localhost] and IPs [192.168.3.81 127.0.0.1 ::1]

[certs] Generating "etcd/healthcheck-client" certificate and key

[certs] Generating "apiserver-etcd-client" certificate and key

[certs] Generating "sa" key and public key

[kubeconfig] Using kubeconfig folder "/etc/kubernetes"

[endpoint] WARNING: port specified in controlPlaneEndpoint overrides bindPort in the controlplane address

[kubeconfig] Writing "admin.conf" kubeconfig file

[endpoint] WARNING: port specified in controlPlaneEndpoint overrides bindPort in the controlplane address

[kubeconfig] Writing "kubelet.conf" kubeconfig file

[endpoint] WARNING: port specified in controlPlaneEndpoint overrides bindPort in the controlplane address

[kubeconfig] Writing "controller-manager.conf" kubeconfig file

[endpoint] WARNING: port specified in controlPlaneEndpoint overrides bindPort in the controlplane address

[kubeconfig] Writing "scheduler.conf" kubeconfig file

[kubelet-start] Writing kubelet environment file with flags to file "/var/lib/kubelet/kubeadm-flags.env"

[kubelet-start] Writing kubelet configuration to file "/var/lib/kubelet/config.yaml"

[kubelet-start] Starting the kubelet

[control-plane] Using manifest folder "/etc/kubernetes/manifests"

[control-plane] Creating static Pod manifest for "kube-apiserver"

[control-plane] Creating static Pod manifest for "kube-controller-manager"

[control-plane] Creating static Pod manifest for "kube-scheduler"

[etcd] Creating static Pod manifest for local etcd in "/etc/kubernetes/manifests"

[wait-control-plane] Waiting for the kubelet to boot up the control plane as static Pods from directory "/etc/kubernetes/manifests". This can take up to 4m0s

[apiclient] All control plane components are healthy after 21.016274 seconds

[upload-config] Storing the configuration used in ConfigMap "kubeadm-config" in the "kube-system" Namespace

[kubelet] Creating a ConfigMap "kubelet-config-1.21" in namespace kube-system with the configuration for the kubelets in the cluster

[upload-certs] Storing the certificates in Secret "kubeadm-certs" in the "kube-system" Namespace

[upload-certs] Using certificate key:

0058686d77ca01df79db171e61746f7ca5cf0d8740a0e88bda2b3a63c9b6b692

[mark-control-plane] Marking the node k8s-master01 as control-plane by adding the labels: [node-role.kubernetes.io/master(deprecated) node-role.kubernetes.io/control-plane node.kubernetes.io/exclude-from-external-load-balancers]

[mark-control-plane] Marking the node k8s-master01 as control-plane by adding the taints [node-role.kubernetes.io/master:NoSchedule]

[bootstrap-token] Using token: 7t2weq.bjbawausm0jaxury

[bootstrap-token] Configuring bootstrap tokens, cluster-info ConfigMap, RBAC Roles

[bootstrap-token] configured RBAC rules to allow Node Bootstrap tokens to get nodes

[bootstrap-token] configured RBAC rules to allow Node Bootstrap tokens to post CSRs in order for nodes to get long term certificate credentials

[bootstrap-token] configured RBAC rules to allow the csrapprover controller automatically approve CSRs from a Node Bootstrap Token

[bootstrap-token] configured RBAC rules to allow certificate rotation for all node client certificates in the cluster

[bootstrap-token] Creating the "cluster-info" ConfigMap in the "kube-public" namespace

[kubelet-finalize] Updating "/etc/kubernetes/kubelet.conf" to point to a rotatable kubelet client certificate and key

[addons] Applied essential addon: CoreDNS

[endpoint] WARNING: port specified in controlPlaneEndpoint overrides bindPort in the controlplane address

[addons] Applied essential addon: kube-proxy

Your Kubernetes control-plane has initialized successfully!

To start using your cluster, you need to run the following as a regular user:

  mkdir -p $HOME/.kube

  sudo cp -i /etc/kubernetes/admin.conf $HOME/.kube/config

  sudo chown $(id -u):$(id -g) $HOME/.kube/config

Alternatively, if you are the root user, you can run:

  export KUBECONFIG=/etc/kubernetes/admin.conf

You should now deploy a pod network to the cluster.

Run "kubectl apply -f [podnetwork].yaml" with one of the options listed at:

  https://kubernetes.io/docs/concepts/cluster-administration/addons/

You can now join any number of the control-plane node running the following command on each as root:

  kubeadm join 192.168.3.200:16443 --token 7t2weq.bjbawausm0jaxury \

	--discovery-token-ca-cert-hash sha256:d2fab5e614dc53f1abfb5ab5820d63541bf45bf04a733feaef483764a5724d9d \

	--control-plane --certificate-key 0058686d77ca01df79db171e61746f7ca5cf0d8740a0e88bda2b3a63c9b6b692

Please note that the certificate-key gives access to cluster sensitive data, keep it secret!

As a safeguard, uploaded-certs will be deleted in two hours; If necessary, you can use

"kubeadm init phase upload-certs --upload-certs" to reload certs afterward.

Then you can join any number of worker nodes by running the following on each as root:

kubeadm join 192.168.3.200:16443 --token 7t2weq.bjbawausm0jaxury \

	--discovery-token-ca-cert-hash sha256:d2fab5e614dc53f1abfb5ab5820d63541bf45bf04a733feaef483764a5724d9d
master加入集群:
mkdir -p $HOME/.kube

sudo cp -i /etc/kubernetes/admin.conf $HOME/.kube/config

sudo chown $(id -u):$(id -g) $HOME/.kube/config

cat <<EOF >> /root/.bashrc

export KUBECONFIG=/etc/kubernetes/admin.conf

EOF

source /root/.bashrc

#master 加入集群:

  kubeadm join 192.168.3.200:16443 --token 7t2weq.bjbawausm0jaxury \

	--discovery-token-ca-cert-hash sha256:d2fab5e614dc53f1abfb5ab5820d63541bf45bf04a733feaef483764a5724d9d \

	--control-plane --certificate-key 0058686d77ca01df79db171e61746f7ca5cf0d8740a0e88bda2b3a63c9b6b692

#node 加入集群:

kubeadm join 192.168.3.200:16443 --token 7t2weq.bjbawausm0jaxury \

	--discovery-token-ca-cert-hash sha256:d2fab5e614dc53f1abfb5ab5820d63541bf45bf04a733feaef483764a5724d9d
calico网络配置
cd k8s-ha-install/

git checkout manual-installation-v1.21.x && cd calico/

[root@k8s-master01 calico]# ls

calico-etcd.yaml

KUBE_MASTER=(192.168.3.81 192.168.3.82 192.168.3.83)

sed -i 's#etcd_endpoints: "http://<ETCD_IP>:<ETCD_PORT>"#etcd_endpoints: "https://192.168.3.81:2379,https://192.168.3.82:2379,https://192.168.3.83:2379"#g' calico-etcd.yaml

ETCD_CA=`cat /etc/kubernetes/pki/etcd/ca.crt | base64 | tr -d '\n'`

ETCD_CERT=`cat /etc/kubernetes/pki/etcd/server.crt | base64 | tr -d '\n'`

ETCD_KEY=`cat /etc/kubernetes/pki/etcd/server.key | base64 | tr -d '\n'`

sed -i "s@# etcd-key: null@etcd-key: ${ETCD_KEY}@g; s@# etcd-cert: null@etcd-cert: ${ETCD_CERT}@g; s@# etcd-ca: null@etcd-ca: ${ETCD_CA}@g" calico-etcd.yaml

sed -i 's#etcd_ca: ""#etcd_ca: "/calico-secrets/etcd-ca"#g; s#etcd_cert: ""#etcd_cert: "/calico-secrets/etcd-cert"#g; s#etcd_key: "" #etcd_key: "/calico-secrets/etcd-key" #g' calico-etcd.yaml

POD_SUBNET=`cat /etc/kubernetes/manifests/kube-controller-manager.yaml | grep cluster-cidr= | awk -F= '{print $NF}'`

# 注意下面的这个步骤是把calico-etcd.yaml文件里面的CALICO_IPV4POOL_CIDR下的网段改成自己的Pod网段,也就是把192.168.x.x/16改成自己的集群网段,并打开注释:

#所以更改的时候请确保这个步骤的这个网段没有被统一替换掉,如果被替换掉了,还请改回来:

#注意对齐,最好进去看一下:

sed -i 's@# - name: CALICO_IPV4POOL_CIDR@- name: CALICO_IPV4POOL_CIDR@g; s@#  value: 172.16.0.0/12@  value: '"${POD_SUBNET}"'@g' calico-etcd.yaml

#修改完成,执行:

kubectl apply -f calico-etcd.yaml

#检查:

[root@k8s-master01 calico]# kubectl get pod -n kube-system

NAME                                      READY   STATUS    RESTARTS   AGE

calico-kube-controllers-cdd5755b9-lhn8v   1/1     Running   0          10m

calico-node-4msfq                         1/1     Running   0          10m

calico-node-jrnf9                         1/1     Running   0          10m

calico-node-q4s4l                         1/1     Running   5          10m

calico-node-wql4q                         1/1     Running   0          10m

calico-node-zpnk4                         1/1     Running   0          10m

coredns-6f6b8cc4f6-njzqt                  1/1     Running   0          4h52m

coredns-6f6b8cc4f6-xhrrg                  1/1     Running   0          4h52m

etcd-k8s-master01                         1/1     Running   0          4h52m

etcd-k8s-master02                         1/1     Running   0          4h

etcd-k8s-master03                         1/1     Running   1          4h3m

kube-apiserver-k8s-master01               1/1     Running   0          4h52m

kube-apiserver-k8s-master02               1/1     Running   0          4h

kube-apiserver-k8s-master03               1/1     Running   1          4h3m

kube-controller-manager-k8s-master01      1/1     Running   2          4h52m

kube-controller-manager-k8s-master02      1/1     Running   0          4h

kube-controller-manager-k8s-master03      1/1     Running   1          4h3m

kube-proxy-9f7g9                          1/1     Running   2          4h3m

kube-proxy-c4x9s                          1/1     Running   0          4h52m

kube-proxy-gdkjp                          1/1     Running   0          4h14m

kube-proxy-h5b4d                          1/1     Running   0          4h45m

kube-proxy-vrb9j                          1/1     Running   0          4h

kube-scheduler-k8s-master01               1/1     Running   2          4h52m

kube-scheduler-k8s-master02               1/1     Running   0          4h

kube-scheduler-k8s-master03               1/1     Running   2          4h3m

#必须要是都起来的状态
Metrics部署
#在新版的Kubernetes中系统资源的采集均使用Metrics-server,可以通过Metrics采集节点和Pod的内存、磁盘、CPU和网络的使用率

#将Master01节点的front-proxy-ca.crt复制到所有Node节点

KUBE_MASTER=(192.168.3.81 192.168.3.82 192.168.3.83)

KUBE_NODE=(192.168.3.84 192.168.3.85)

for i in ${KUBE_MASTER[1]} ${KUBE_MASTER[2]} ${KUBE_NODE[@]};do

\scp -r /etc/kubernetes/pki/front-proxy-ca.crt $i:/etc/kubernetes/pki/front-proxy-ca.crt;

done

cd /root/k8s-ha-install/metrics-server-0.4.x-kubeadm/

kubectl  create -f comp.yaml

[root@k8s-master01 metrics-server-0.4.x-kubeadm]# kubectl top node --use-protocol-buffers

NAME           CPU(cores)   CPU%   MEMORY(bytes)   MEMORY%

k8s-master01   127m         1%     1839Mi          23%

k8s-master02   123m         1%     1488Mi          18%

k8s-master03   126m         1%     1755Mi          22%

k8s-node01     61m          0%     928Mi           11%

k8s-node02     67m          0%     956Mi           12%

[root@k8s-master01 metrics-server-0.4.x-kubeadm]# kubectl top pod  --use-protocol-buffers -A

NAMESPACE     NAME                                      CPU(cores)   MEMORY(bytes)

kube-system   calico-kube-controllers-cdd5755b9-lhn8v   2m           22Mi

kube-system   calico-node-4msfq                         25m          73Mi

kube-system   calico-node-jrnf9                         19m          77Mi

kube-system   calico-node-q4s4l                         26m          73Mi

kube-system   calico-node-wql4q                         19m          72Mi

kube-system   calico-node-zpnk4                         20m          69Mi

kube-system   coredns-6f6b8cc4f6-njzqt                  2m           20Mi

kube-system   coredns-6f6b8cc4f6-xhrrg                  2m           17Mi

kube-system   etcd-k8s-master01                         22m          68Mi

kube-system   etcd-k8s-master02                         26m          66Mi

kube-system   etcd-k8s-master03                         22m          84Mi

kube-system   kube-apiserver-k8s-master01               24m          460Mi

kube-system   kube-apiserver-k8s-master02               32m          389Mi

kube-system   kube-apiserver-k8s-master03               29m          419Mi

kube-system   kube-controller-manager-k8s-master01      1m           26Mi

kube-system   kube-controller-manager-k8s-master02      1m           30Mi

kube-system   kube-controller-manager-k8s-master03      8m           72Mi

kube-system   kube-proxy-9f7g9                          1m           25Mi

kube-system   kube-proxy-c4x9s                          1m           23Mi

kube-system   kube-proxy-gdkjp                          1m           25Mi

kube-system   kube-proxy-h5b4d                          1m           27Mi

kube-system   kube-proxy-vrb9j                          1m           27Mi

kube-system   kube-scheduler-k8s-master01               2m           26Mi

kube-system   kube-scheduler-k8s-master02               2m           27Mi

kube-system   kube-scheduler-k8s-master03               2m           30Mi

kube-system   metrics-server-d6c46b546-jx6cp            3m           24Mi
dashboard 部署:
cd /root/k8s-ha-install/dashboard/

[root@k8s-master01 dashboard]# kubectl  create -f .

serviceaccount/admin-user created

clusterrolebinding.rbac.authorization.k8s.io/admin-user created

namespace/kubernetes-dashboard created

serviceaccount/kubernetes-dashboard created

service/kubernetes-dashboard created

secret/kubernetes-dashboard-certs created

secret/kubernetes-dashboard-csrf created

secret/kubernetes-dashboard-key-holder created

configmap/kubernetes-dashboard-settings created

role.rbac.authorization.k8s.io/kubernetes-dashboard created

clusterrole.rbac.authorization.k8s.io/kubernetes-dashboard created

rolebinding.rbac.authorization.k8s.io/kubernetes-dashboard created

clusterrolebinding.rbac.authorization.k8s.io/kubernetes-dashboard created

deployment.apps/kubernetes-dashboard created

service/dashboard-metrics-scraper created

deployment.apps/dashboard-metrics-scraper created

#创建用户:

vim admin.yaml

apiVersion: v1

kind: ServiceAccount

metadata:

  name: admin-user

  namespace: kube-system

---

apiVersion: rbac.authorization.k8s.io/v1

kind: ClusterRoleBinding

metadata:

  name: admin-user

  annotations:

    rbac.authorization.kubernetes.io/autoupdate: "true"

roleRef:

  apiGroup: rbac.authorization.k8s.io

  kind: ClusterRole

  name: cluster-admin

subjects:

- kind: ServiceAccount

  name: admin-user

  namespace: kube-system

#应用:

[root@k8s-master01 dashboard]# kubectl apply -f admin.yaml -n kube-system

serviceaccount/admin-user created

clusterrolebinding.rbac.authorization.k8s.io/admin-user created

#创建dashboard

kubectl apply -f   https://raw.githubusercontent.com/kubernetes/dashboard/v2.0.3/aio/deploy/recommended.yaml
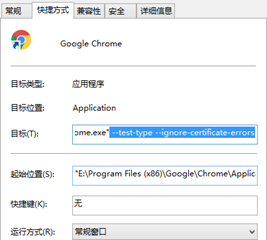
登录dashboard:
在谷歌浏览器(Chrome)启动文件中加入启动参数,用于解决无法访问Dashboard的问题
--test-type --ignore-certificate-errors
参考图:
#更改dashboard的svc为NodePort:
kubectl edit svc kubernetes-dashboard -n kubernetes-dashboard
找到: type: ClusterIP
改为: type: NodePort
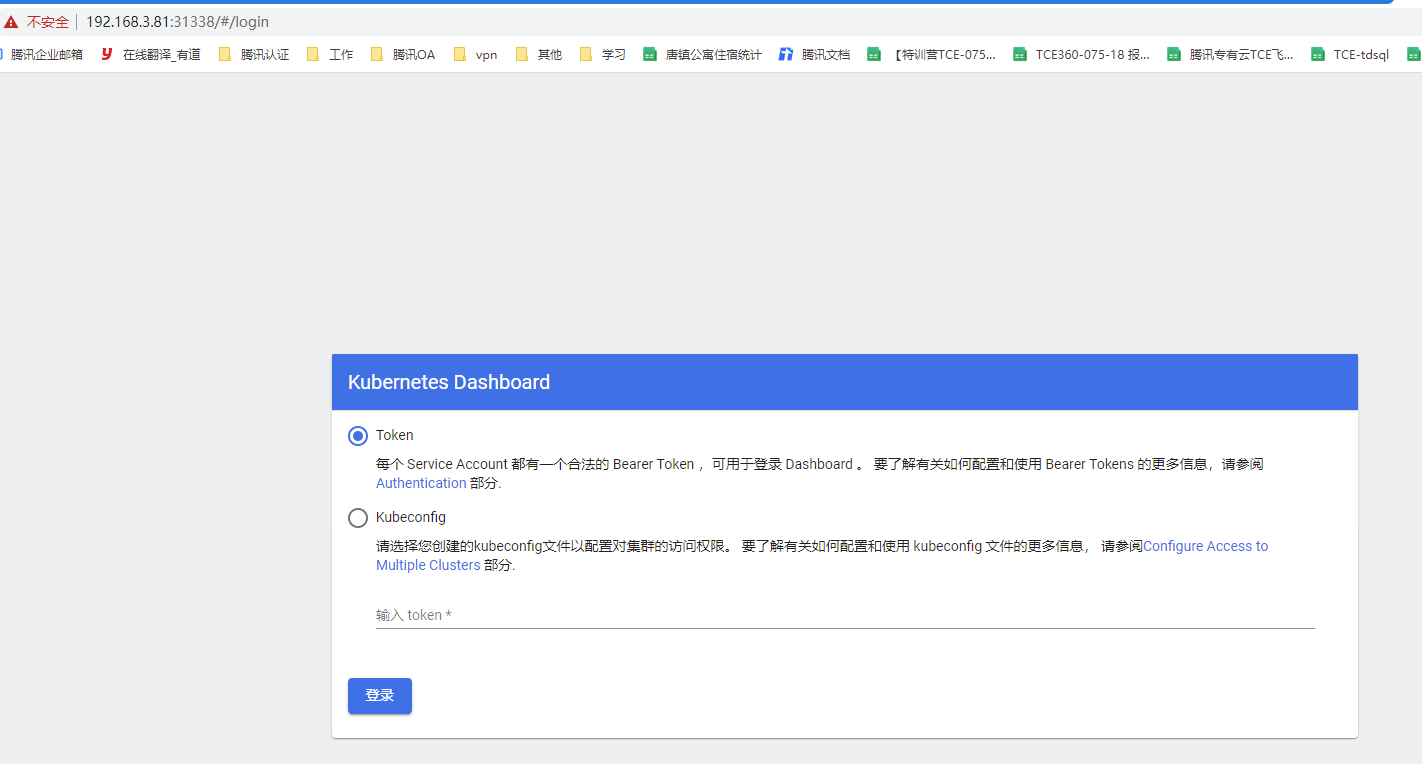
#获取访问端口号:
kubectl get svc kubernetes-dashboard -n kubernetes-dashboard
[root@k8s-master01 dashboard]# kubectl get svc kubernetes-dashboard -n kubernetes-dashboard
NAME TYPE CLUSTER-IP EXTERNAL-IP PORT(S) AGE
kubernetes-dashboard NodePort 192.168.157.22 <none> 443:31338/TCP 101s
# https://192.168.3.81:31338/#/login
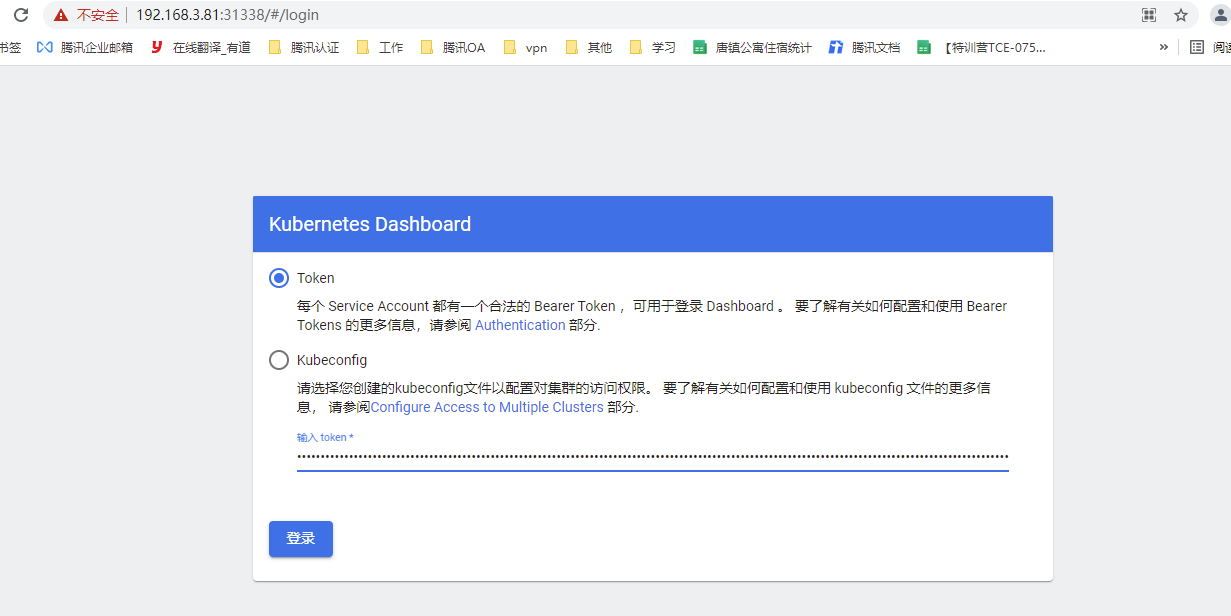
#获取登录token:

kubectl -n kube-system describe secret $(kubectl -n kube-system get secret | grep admin-user | awk '{print $1}')
将Kube-proxy改为ipvs模式
在master01节点执行

kubectl edit cm kube-proxy -n kube-system

搜索: mode

找到: mode: ""

改为: mode: "ipvs"

#更新Kube-Proxy的Pod:

kubectl patch daemonset kube-proxy -p "{\"spec\":{\"template\":{\"metadata\":{\"annotations\":{\"date\":\"`date +'%s'`\"}}}}}" -n kube-system

#验证Kube-Proxy模式:

[root@k8s-master01 1.1.1]# curl 127.0.0.1:10249/proxyMode

ipvs
注意:
注意:kubeadm安装的集群,证书有效期默认是一年。master节点的kube-apiserver、kube-scheduler、kube-controller-manager、etcd都是以容器运行的。可以通过kubectl get po -n kube-system查看。

启动和二进制不同的是,

kubelet的配置文件在/etc/sysconfig/kubelet和/var/lib/kubelet/config.yaml

其他组件的配置文件在/etc/Kubernetes/manifests目录下,比如kube-apiserver.yaml,该yaml文件更改后,kubelet会自动刷新配置,也就是会重启pod。不能再次创建该文件

Kubeadm安装后,master节点默认不允许部署pod,可以通过以下方式打开:

#查看Taints:

[root@k8s-master01 ~]# kubectl  describe node -l node-role.kubernetes.io/master=  | grep Taints

Taints:             node-role.kubernetes.io/master:NoSchedule

Taints:             node-role.kubernetes.io/master:NoSchedule

Taints:             node-role.kubernetes.io/master:NoSchedule

删除Taint:

[root@k8s-master01 ~]# kubectl  taint node  -l node-role.kubernetes.io/master node-role.kubernetes.io/master:NoSchedule-

node/k8s-master01 untainted

node/k8s-master02 untainted

node/k8s-master03 untainted

[root@k8s-master01 ~]# kubectl  describe node -l node-role.kubernetes.io/master=  | grep Taints

Taints:             <none>

Taints:             <none>

Taints:             <none>
kubeadm部署高可用版Kubernetes1.21[更新]的更多相关文章
- kubernetes kubeadm部署高可用集群
k8s kubeadm部署高可用集群 kubeadm是官方推出的部署工具,旨在降低kubernetes使用门槛与提高集群部署的便捷性. 同时越来越多的官方文档,围绕kubernetes容器化部署为环境 ...
- 附012.Kubeadm部署高可用Kubernetes
一 kubeadm介绍 1.1 概述 参考<附003.Kubeadm部署Kubernetes>. 1.2 kubeadm功能 参考<附003.Kubeadm部署Kubernetes& ...
- kubeadm部署高可用K8S集群(v1.14.2)
1. 简介 测试环境Kubernetes 1.14.2版本高可用搭建文档,搭建方式为kubeadm 2. 服务器版本和架构信息 系统版本:CentOS Linux release 7.6.1810 ( ...
- Kubeadm部署高可用K8S集群
一 基础环境 1.1 资源 节点名称 ip地址 VIP 192.168.12.150 master01 192.168.12.48 master02 192.168.12.242 master03 1 ...
- kubeadm部署高可用集群Kubernetes 1.14.1版本
Kubernetes高可用集群部署 部署架构: Master 组件: kube-apiserver Kubernetes API,集群的统一入口,各组件协调者,以HTTP API提供接口服务,所有对象 ...
- 企业运维实践-还不会部署高可用的kubernetes集群?使用kubeadm方式安装高可用k8s集群v1.23.7
关注「WeiyiGeek」公众号 设为「特别关注」每天带你玩转网络安全运维.应用开发.物联网IOT学习! 希望各位看友[关注.点赞.评论.收藏.投币],助力每一个梦想. 文章目录: 0x00 前言简述 ...
- Kubernetes 部署 1.9.7 高可用版
转载于https://codegreen.cn/2018/08/30/kubernetes-cluster-1.9.7/ 前言 在部署之前,首先感谢 手动搭建高可用的kubernetes 集群 博文的 ...
- kubernetes实战(二十五):kubeadm 安装 高可用 k8s v1.13.x
1.系统环境 使用kubeadm安装高可用k8s v.13.x较为简单,相比以往的版本省去了很多步骤. kubeadm安装高可用k8s v.11 和 v1.12 点我 主机信息 主机名 IP地址 说明 ...
- 容器云平台No.2~kubeadm创建高可用集群v1.19.1
通过kubernetes构建容器云平台第二篇,最近刚好官方发布了V1.19.0,本文就以最新版来介绍通过kubeadm安装高可用的kubernetes集群. 市面上安装k8s的工具很多,但是用于学习的 ...
随机推荐
- 关于ajax的数据传输类型,字符串传输
- str.isdigit()可以判断变量是否为数字
字符串.isdigit()可以判断变量是否为数字 是则输出True 不是则输出False 好像只能字符串
- Visual Studio/VS中任务列表的妙用
一.任务列表开启方法 首先说下开启的方法:视图-任务列表,即可打开任务列表. 快捷键Ctrl+'\'+T,熟练了可以快速开启.注意,'\'键是回车键上面的'',不要按成了'/' 二.任务列表标签设置 ...
- Excel导出数据Excel.Application组件权限设置方法
很多网络应用系统都会涉及到数据采用Excel方式导出的模块,部分朋友问我到底怎么弄,其实方式很多种,目前比较优秀的方式还是直接用Excel的Excel.Application方式比较合适. 采用Exc ...
- (Dubbo架构)基于MDC+Filter的跨应用分布式日志追踪解决方案
在单体应用中,日志追踪通常的解决方案是给日志添加 tranID(追踪ID),生成规则因系统而异,大致效果如下: 查询时只要使用 grep 命令进行追踪id筛选即可查到此次调用链中所有日志,但是在 du ...
- [bug] Hive:Caused by: MetaException(message:Hive Schema version 2.1.0 does not match metastore's schema version 1.2.0 Metastore is not upgraded or corrupt)
参考 https://www.cnblogs.com/liupuLearning/p/6610307.html 少了创建hive数据库一步
- 上,打开SSH服务的配置文件:/etc/ssh/sshd_config 加上如下两行: ClientAliveInterval 120 ClientAliveCountMax 720 第一行,表示每隔120秒向客户端
SSH的默认过一段时间会超时,有时候正在执行着脚本,出去一会回来就断开了,输出信息都看不到了... 禁止SSH自动超时最简单的办法就是,每隔一段时间在客户端和服务器之间发送一个"空包&quo ...
- k8s健康检查(9)
一.默认的健康检查 强大的自愈能力是 Kubernetes 这类容器编排引擎的一个重要特性.自愈的默认实现方式是自动重启发生故障的容器.除此之外,用户还可以利用 Liveness 和 Readines ...
- 043.Python线程基本介绍
一 线程的基本概念 1.1 进程和线程 进程是资源分配的最小单位 线程是计算机中调度的最小单位 进程池: 开启过多的进程并不一走提高你的效率, 如果cp负载任务过多,平均单个任务执行的效率就会低,反而 ...
- CentOS 7网络配置
修改配置文件 CentOS 7下的网络配置文件路径为:/etc/sysconfig/network-scripts/ifcfg-interfacename 配置文件ifcfg-interface-na ...