Inno Setup使用
Inno Setup是一个开源的安装包打包软件,下载地址是:http://www.jrsoftware.org/isdl.php
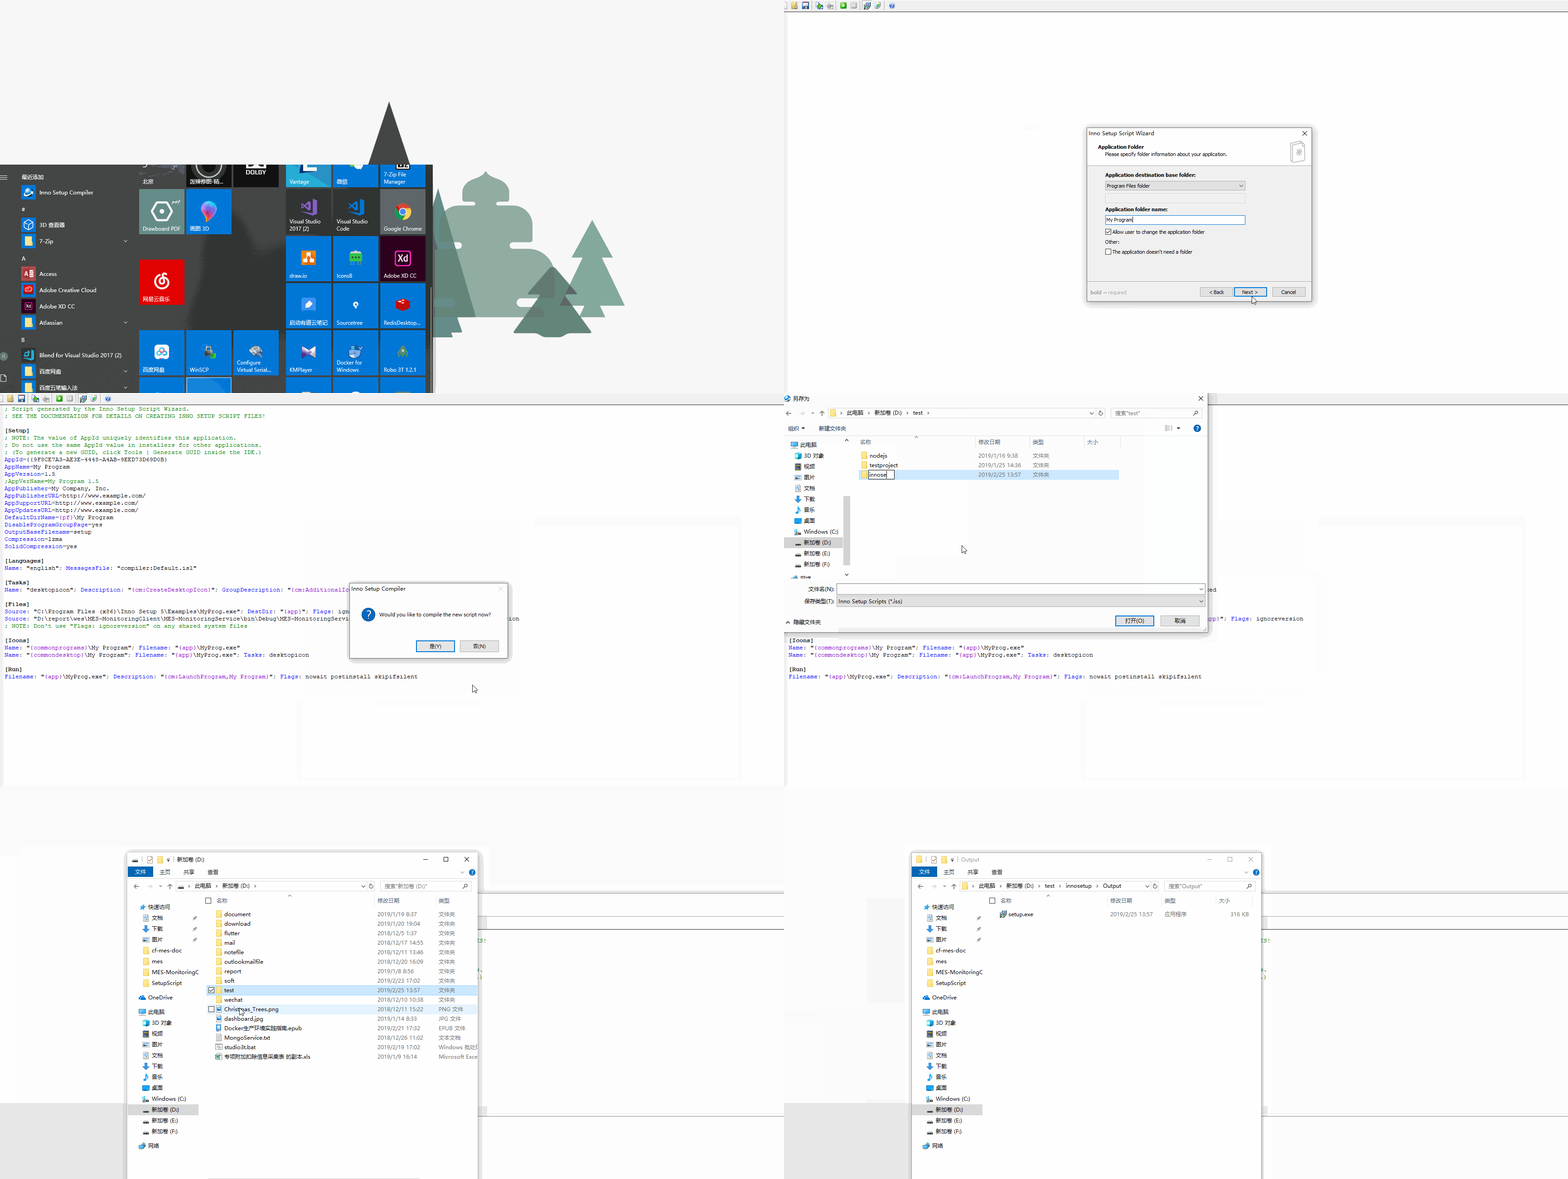
使用引导界面创建一个安装包打包

配置参考官方文档:http://www.jrsoftware.org/ishelp/index.php
我的配置
; Script generated by the Inno Setup Script Wizard.

; SEE THE DOCUMENTATION FOR DETAILS ON CREATING INNO SETUP SCRIPT FILES!

[Setup]

; NOTE: The value of AppId uniquely identifies this application.

; Do not use the same AppId value in installers for other applications.

; (To generate a new GUID, click Tools | Generate GUID inside the IDE.)

AppId={{F6C5E189-481C-4249-96B0-D30C7E6CB320}

;应用名称

AppName=MES Monitoring Client

;应用版本号

AppVersion=1.0

;AppVerName=MES Monitoring Client 1.0

;应用发布方

AppPublisher=广东翠峰机器人股份有限公司

;安装目录名称

DefaultDirName={pf64}\MES-Monitoring-Client

;安装目录不可选择

DisableDirPage=auto

;安装后不会出现在开始应用菜单

DisableProgramGroupPage=no

;安装包文件名

OutputBaseFilename=MES-MonitoringClient-Setup

;压缩包

Compression=lzma

SolidCompression=yes

;安装包图标文件

SetupIconFile=D:\document\mes\setup.ico

;安装时需要提供管理员权限

PrivilegesRequired=admin

;许可文件

LicenseFile=D:\report\wes\MES-MonitoringClient\SetupScript\License.txt

[Languages]

Name: "english"; MessagesFile: "compiler:Default.isl"

Name: "chs"; MessagesFile: "compiler:Languages\ChineseSimplified.isl"

[Tasks]

;桌面增加快捷图标

Name: "desktopicon"; Description: "{cm:CreateDesktopIcon}"; GroupDescription: "{cm:AdditionalIcons}"; Flags: unchecked

;快捷方式

Name: quicklaunchicon; Description: "{cm:CreateQuickLaunchIcon}"; GroupDescription: "{cm:CreateQuickLaunchIcon}"; Flags: unchecked

[Files]

;安装文件

;Client的文件夹

;Source: "D:\report\wes\MES-MonitoringClient\MES-MonitoringClient\bin\Debug\*"; DestDir: "{app}\Client"; Flags: ignoreversion recursesubdirs createallsubdirs

Source: "D:\report\wes\MES-MonitoringClient\MES-MonitoringClient\bin\Debug\DnsClient.dll"; DestDir: "{app}\Client"; Flags: ignoreversion;  Components: Client

Source: "D:\report\wes\MES-MonitoringClient\MES-MonitoringClient\bin\Debug\DnsClient.xml"; DestDir: "{app}\Client"; Flags: ignoreversion;  Components: Client

Source: "D:\report\wes\MES-MonitoringClient\MES-MonitoringClient\bin\Debug\LiveCharts.dll"; DestDir: "{app}\Client"; Flags: ignoreversion;  Components: Client

Source: "D:\report\wes\MES-MonitoringClient\MES-MonitoringClient\bin\Debug\LiveCharts.pdb"; DestDir: "{app}\Client"; Flags: ignoreversion;  Components:Client

Source: "D:\report\wes\MES-MonitoringClient\MES-MonitoringClient\bin\Debug\LiveCharts.WinForms.dll"; DestDir: "{app}\Client"; Flags: ignoreversion; Components:Client

Source: "D:\report\wes\MES-MonitoringClient\MES-MonitoringClient\bin\Debug\LiveCharts.WinForms.pdb"; DestDir: "{app}\Client"; Flags: ignoreversion; Components:Client

Source: "D:\report\wes\MES-MonitoringClient\MES-MonitoringClient\bin\Debug\LiveCharts.WinForms.xml"; DestDir: "{app}\Client"; Flags: ignoreversion; Components:Client

Source: "D:\report\wes\MES-MonitoringClient\MES-MonitoringClient\bin\Debug\LiveCharts.Wpf.dll"; DestDir: "{app}\Client"; Flags: ignoreversion; Components:Client

Source: "D:\report\wes\MES-MonitoringClient\MES-MonitoringClient\bin\Debug\LiveCharts.Wpf.pdb"; DestDir: "{app}\Client"; Flags: ignoreversion; Components:Client

Source: "D:\report\wes\MES-MonitoringClient\MES-MonitoringClient\bin\Debug\LiveCharts.Wpf.xml"; DestDir: "{app}\Client"; Flags: ignoreversion; Components:Client

Source: "D:\report\wes\MES-MonitoringClient\MES-MonitoringClient\bin\Debug\LiveCharts.xml"; DestDir: "{app}\Client"; Flags: ignoreversion; Components:Client

Source: "D:\report\wes\MES-MonitoringClient\MES-MonitoringClient\bin\Debug\MES-MonitoringClient.exe"; DestDir: "{app}\Client"; Flags: ignoreversion;  Components:Client

Source: "D:\report\wes\MES-MonitoringClient\MES-MonitoringClient\bin\Debug\MES-MonitoringClient.exe.config"; DestDir: "{app}\Client"; Flags: ignoreversion; Components:Client

Source: "D:\report\wes\MES-MonitoringClient\MES-MonitoringClient\bin\Debug\MES-MonitoringClient.pdb"; DestDir: "{app}\Client"; Flags: ignoreversion; Components:Client

Source: "D:\report\wes\MES-MonitoringClient\MES-MonitoringClient\bin\Debug\MongoDB.Bson.dll"; DestDir: "{app}\Client"; Flags: ignoreversion; Components:Client

Source: "D:\report\wes\MES-MonitoringClient\MES-MonitoringClient\bin\Debug\MongoDB.Bson.xml"; DestDir: "{app}\Client"; Flags: ignoreversion; Components:Client

Source: "D:\report\wes\MES-MonitoringClient\MES-MonitoringClient\bin\Debug\MongoDB.Driver.Core.dll"; DestDir: "{app}\Client"; Flags: ignoreversion; Components:Client

Source: "D:\report\wes\MES-MonitoringClient\MES-MonitoringClient\bin\Debug\MongoDB.Driver.Core.xml"; DestDir: "{app}\Client"; Flags: ignoreversion; Components:Client

Source: "D:\report\wes\MES-MonitoringClient\MES-MonitoringClient\bin\Debug\MongoDB.Driver.dll"; DestDir: "{app}\Client"; Flags: ignoreversion; Components:Client

Source: "D:\report\wes\MES-MonitoringClient\MES-MonitoringClient\bin\Debug\MongoDB.Driver.xml"; DestDir: "{app}\Client"; Flags: ignoreversion; Components:Client

Source: "D:\report\wes\MES-MonitoringClient\MES-MonitoringClient\bin\Debug\RabbitMQ.Client.dll"; DestDir: "{app}\Client"; Flags: ignoreversion; Components:Client

Source: "D:\report\wes\MES-MonitoringClient\MES-MonitoringClient\bin\Debug\RabbitMQ.Client.xml"; DestDir: "{app}\Client"; Flags: ignoreversion; Components:Client

Source: "D:\report\wes\MES-MonitoringClient\MES-MonitoringClient\bin\Debug\System.Buffers.dll"; DestDir: "{app}\Client"; Flags: ignoreversion; Components:Client

Source: "D:\report\wes\MES-MonitoringClient\MES-MonitoringClient\bin\Debug\System.Runtime.InteropServices.RuntimeInformation.dll"; DestDir: "{app}\Client"; Flags: ignoreversion; Components:Client

;Service的文件夹

;Source: "D:\report\wes\MES-MonitoringClient\MES-MonitoringService\bin\Debug\*"; DestDir: "{app}\Service"; Flags: ignoreversion recursesubdirs createallsubdirs

Source: "D:\report\wes\MES-MonitoringClient\MES-MonitoringService\bin\Debug\DnsClient.dll"; DestDir: "{app}\Service"; Flags: ignoreversion; Components:Service

Source: "D:\report\wes\MES-MonitoringClient\MES-MonitoringService\bin\Debug\DnsClient.xml"; DestDir: "{app}\Service"; Flags: ignoreversion; Components:Service

Source: "D:\report\wes\MES-MonitoringClient\MES-MonitoringService\bin\Debug\MES-MonitoringService.exe"; DestDir: "{app}\Service"; Flags: ignoreversion; Components:Service

Source: "D:\report\wes\MES-MonitoringClient\MES-MonitoringService\bin\Debug\MES-MonitoringService.exe.config"; DestDir: "{app}\Service"; Flags: ignoreversion; Components:Service

Source: "D:\report\wes\MES-MonitoringClient\MES-MonitoringService\bin\Debug\MES-MonitoringService.pdb"; DestDir: "{app}\Service"; Flags: ignoreversion; Components:Service

Source: "D:\report\wes\MES-MonitoringClient\MES-MonitoringService\bin\Debug\MongoDB.Bson.dll"; DestDir: "{app}\Service"; Flags: ignoreversion; Components:Service

Source: "D:\report\wes\MES-MonitoringClient\MES-MonitoringService\bin\Debug\MongoDB.Bson.xml"; DestDir: "{app}\Service"; Flags: ignoreversion; Components:Service

Source: "D:\report\wes\MES-MonitoringClient\MES-MonitoringService\bin\Debug\MongoDB.Driver.Core.dll"; DestDir: "{app}\Service"; Flags: ignoreversion; Components:Service

Source: "D:\report\wes\MES-MonitoringClient\MES-MonitoringService\bin\Debug\MongoDB.Driver.Core.xml"; DestDir: "{app}\Service"; Flags: ignoreversion; Components:Service

Source: "D:\report\wes\MES-MonitoringClient\MES-MonitoringService\bin\Debug\MongoDB.Driver.dll"; DestDir: "{app}\Service"; Flags: ignoreversion; Components:Service

Source: "D:\report\wes\MES-MonitoringClient\MES-MonitoringService\bin\Debug\MongoDB.Driver.xml"; DestDir: "{app}\Service"; Flags: ignoreversion; Components:Service

Source: "D:\report\wes\MES-MonitoringClient\MES-MonitoringService\bin\Debug\Newtonsoft.Json.dll"; DestDir: "{app}\Service"; Flags: ignoreversion; Components:Service

Source: "D:\report\wes\MES-MonitoringClient\MES-MonitoringService\bin\Debug\Newtonsoft.Json.pdb"; DestDir: "{app}\Service"; Flags: ignoreversion; Components:Service

Source: "D:\report\wes\MES-MonitoringClient\MES-MonitoringService\bin\Debug\Newtonsoft.Json.xml"; DestDir: "{app}\Service"; Flags: ignoreversion; Components:Service

Source: "D:\report\wes\MES-MonitoringClient\MES-MonitoringService\bin\Debug\RabbitMQ.Client.dll"; DestDir: "{app}\Service"; Flags: ignoreversion; Components:Service

Source: "D:\report\wes\MES-MonitoringClient\MES-MonitoringService\bin\Debug\RabbitMQ.Client.xml"; DestDir: "{app}\Service"; Flags: ignoreversion; Components:Service

Source: "D:\report\wes\MES-MonitoringClient\MES-MonitoringService\bin\Debug\System.Buffers.dll"; DestDir: "{app}\Service"; Flags: ignoreversion; Components:Service

Source: "D:\report\wes\MES-MonitoringClient\MES-MonitoringService\bin\Debug\System.Runtime.InteropServices.RuntimeInformation.dll"; DestDir: "{app}\Service"; Flags: ignoreversion; Components:Service

Source: "D:\report\wes\MES-MonitoringClient\MES-MonitoringService\bin\Debug\Topshelf.dll"; DestDir: "{app}\Service"; Flags: ignoreversion; Components:Service

Source: "D:\report\wes\MES-MonitoringClient\MES-MonitoringService\bin\Debug\Topshelf.xml"; DestDir: "{app}\Service"; Flags: ignoreversion; Components:Service

;如果有日志,则复制日志,如果没有,则不复制

Source: "D:\report\wes\MES-MonitoringClient\MES-MonitoringService\bin\Debug\log.log"; DestDir: "{app}\Service"; Flags: ignoreversion skipifsourcedoesntexist; Components:Service

;NOTE: Don't use "Flags: ignoreversion" on any shared system files

[Icons]

;桌面图标

Name: "{commondesktop}\MES Monitoring Client"; Filename: "{app}\Client\MES-MonitoringClient.exe"; Tasks: desktopicon

;在“开始”--“程序”里,添加一个开始的快捷方式

Name: "{commonprograms}\MES Client\MES Monitoring Client"; Filename: "{app}\Client\MES-MonitoringClient.exe"

;在“开始”--“程序”里,添加一个卸载的快捷方式

Name: "{commonprograms}\MES Client\Uninstall Application"; Filename: "{uninstallexe}"

[Registry]

;开机启动

Root: HKLM; Subkey: "SOFTWARE\Microsoft\Windows\CurrentVersion\Run"; ValueType: string; ValueName: "MES Monitoring Client"; ValueData: """{app}\Client\MES-MonitoringClient.exe"""; Flags: uninsdeletevalue

[run]

;两种方法都可以安装服务,上面的可以将服务安装好,但不能直接运行

;Filename: {sys}\sc.exe; Parameters: "create MESUploadDataService start= auto binPath= ""{app}\Service\MES-MonitoringService.exe""" ; Flags: runhidden

;以下的方式可以直接运行,其中有Components:Service;当选中了服务才会安装服务

;Flags:postinstall点击完成后,才会进行服务的安装,因为在处理RabbitMQ的服务器参数时,不会直接替换参数的

Filename: "{app}\Service\MES-MonitoringService.exe"; Description:"安装并运行MES客户端数据上传服务"; Parameters: " install start"; Components:Service; Flags:postinstall runhidden hidewizard;

;安装完成后启动应用

Filename: "{app}\Client\MES-MonitoringClient.exe"; Description: "{cm:LaunchProgram,MES Monitoring Client}"; Flags:postinstall skipifsilent unchecked

[UninstallRun]

;卸载时,停止服务并删除服务

Filename: {sys}\sc.exe; Parameters: "stop MESUploadDataService" ; Flags: runhidden; Components:Service

Filename: {sys}\sc.exe; Parameters: "delete MESUploadDataService" ; Flags: runhidden; Components:Service

[Messages]

;安装时,windows任务栏提示标题

SetupAppTitle=MES Monitoring Client Setup

;安装时,安装引导标题

SetupWindowTitle=MES Monitoring Client Setup

;在界面左下角加文字

BeveledLabel=广东翠峰机器人股份有限公司

;卸载对话框说明

ConfirmUninstall=您真的想要从电脑中卸载 %1 吗?%n%n按 [是] 则完全删除 %1 以及它的所有组件;%n按 [否]则让软件继续留在您的电脑上.

[Types]

Name: "normaltype"; Description: "Normal Setup"

Name: "custom";     Description: "Custom Installation"; Flags: iscustom

[Components]

Name: "Client";     Description: "应用界面";  Types: normaltype custom

Name: "Service";    Description: "后台服务";  Types: normaltype custom

[Code]

var CustomPage: TInputQueryWizardPage;

//设置Rabbit Server Host

function NextButtonClick(CurPage: Integer): Boolean;

var

  str: string;

  strFilename: string;

  HostEmptyChecked: Boolean;

begin

  Result := true;

  if CurPage = wpSelectComponents then

   begin

      // if IsComponentSelected('full') then

      if (CustomPage = nil) then

      begin

        // Set Custom Page initial values

        CustomPage := CreateInputQueryPage(wpSelectComponents,

        'RabbitMQ 配置', 'MES服务信息配置',

        '请输入Rabbit Server Host地址,然后点击 下一步 按钮');

        CustomPage.Add('Server Host:', False);

        CustomPage.Values[0] := '172.19.0.153';

        //CustomPage.Values[0] := '';

      end;

   end;

  if CurPage = wpFinished then

   begin

      //找到文件地下

      strFilename := ExpandConstant('{app}\Service\MES-MonitoringService.exe.config');

      if FileExists(strFilename) then

      begin

        // Replace the values in the .config file and save it

        LoadStringFromFile(strFilename, str);

        //通过替换完整的key,找到所有<add key="RabbitMQServerHostName" value="localhost"/>内容并替换成以下值

        StringChangeEx(str, '<add key="RabbitMQServerHostName" value="localhost"/>','<add key="RabbitMQServerHostName" value="'+CustomPage.Values[0]+'"/>', True);

        SaveStringToFile(strFilename, str, False);

      end;

   end;

end;

[Code]

//设置界面文字颜色

procedure InitializeWizard();

begin

  //WizardForm.WELCOMELABEL1.Font.Color:= clGreen;//设置开始安装页面第一段文字的颜色为绿色

  //WizardForm.WELCOMELABEL2.Font.Color:= clOlive;//设置开始安装页面第二段文字的颜色为橄榄绿

  //WizardForm.PAGENAMELABEL.Font.Color:= clRed;//设置许可协议页面第一段文字的颜色为红色

  //WizardForm.PAGEDESCRIPTIONLABEL.Font.Color:= clBlue; //设置许可协议页面第二段文字的颜色为蓝色

  WizardForm.MainPanel.Color:= clWhite;//设置窗格的颜色为白色

end;

//卸载后打开网址

procedure CurUninstallStepChanged(CurUninstallStep: TUninstallStep);

var

  ErrorCode: Integer;

begin

  case CurUninstallStep of

    usUninstall:

      begin

        // 正在卸载

      end;

    usPostUninstall:

      begin

        //卸载完成

        //ShellExec('open', 'http://www.cfmm.com.cn/', '', '', SW_SHOW, ewNoWait, ErrorCode)

      end;

  end;

end;
Inno Setup使用的更多相关文章
- C/S打包 客户端/windows程序 Inno Setup
之前介绍过InstallShield打包工具,本文再介绍更加方便的打包工具Inno Setup Inno Setup相对来说,比InstallShield更容易使用,不需要去等VS去创建项目,只要提供 ...
- [Tool]Inno Setup创建软件安装程序。
这篇博客将介绍如何使用Inno Setup创建一个软件安装程序. Inno Setup官网:http://www.jrsoftware.org/isinfo.php. 可以下载到最新的Inno Set ...
- inno setup读取注册表遇到的一个坑
一.背景 目前,公司针对PR开发的一个插件需要发布到64位系统上.该插件包括一个prm格式的文件和若干个DLL文件.其中,prm文件需要复制到PR公共插件目录下,DLL需要复制到Windows系统目录 ...
- 一个简单的inno setup模板
一.模板代码 基本功能包括多路径安装.多语言.自定义图标. [Setup] ShowLanguageDialog=yes AppCopyright=Copyright Reserved(C) , 36 ...
- Inno Setup 版本 5.5.3+ 简体中文语言包
; *** Inno Setup 版本 + 简体中文消息 *** [LangOptions] LanguageName=<7B80><4F53><> Languag ...
- 解决Inno Setup制作中文安装包在非中文系统上显示乱码的问题
尼玛,好几个月没更新了.囧... 目前我司新的客户端开发已经接近尾声,该改的bug已经改完,该重构的地方也都差不多了.视觉效果也已经根据美工的样式改完了.所以,就差制作安装包了.正所谓万事俱备,只欠东 ...
- Inno Setup怎样创建一个自动申请管理员身份运行的快捷
如果你使用的是 Unicode 版本的 Inno Setup,那么以下是更为专业的解决方法. 这是 mlaan 提及的再一种方法. QUOTE( CodeAutomation3.iss) ...
- Inno Setup制作安装包的几个问题
1. 卸载时,如何判断应用程序是否运行 InnoSetup 提供变量AppMutex,用来保存应用程序的Mutex名称.现在很多应用程序都是唯一实例运行.这样避免配置文件被错误修改以及其他很多衍 ...
- Inno setup中定制安装路径
我的程序修改了安装界面,所以我的界面中提供了更改安装路径的方法. 用户修改后的路径会被传回inno setup脚本,脚本中需要做的事情如下: 1,写一个函数,来返回新的安装路径,如: function ...
- Inno setup定制安装界面
Innosetup功能很强大,可以通过它提供的Wizard接口来定制界面,但我对PASCAL语言不熟悉,也不清楚通过那种接口可改动的范围有多大,最后做出来的效果是否好,所以选择了通过一个DLL来实现我 ...
随机推荐
- 监控Elasticsearch的插件【check_es_system】
监控Elasticsearch的插件推荐 强大的shell脚本 #!/bin/bash ####################################################### ...
- git push时报错fatal: Could not read from remote repository.
后来发现,出现这个问题是因为仓库地址不对 使用如下命令先查看一下: $ git remote -v 发现跟github的地址不一致 然后在终端输入:git remote set-url origin ...
- Elasticsearch之Java实战
资料 http://www.cnblogs.com/kamong/p/6099914.html 搭建Elasticsearch服务器
- 【转】Graphics.DrawImage 方法 IntPtr 结构 GDI 句柄 知识收集
Graphics.DrawImage 方法 在指定的位置使用原始物理大小绘制指定的 Image. 命名空间:System.Drawing 程序集:System.Drawing(在 system.dra ...
- 【leetcode 简单】 第一百四十六题 最长和谐子序列
和谐数组是指一个数组里元素的最大值和最小值之间的差别正好是1. 现在,给定一个整数数组,你需要在所有可能的子序列中找到最长的和谐子序列的长度. 示例 1: 输入: [1,3,2,2,5,2,3,7] ...
- Inline函数使用注意事项
Inline函数使用注意事项 1.在一个文件中定义的inline函数不能再另一个文件中使用 2.inline函数应简洁,只有少数几个语句. 3.在inline函数中不能有循环,if,switch语句. ...
- python内置模块之itertools
前言 itertools模块是python内置的迭代器模块,定义了可生成多种迭代器的函数,用来代替可迭代对象的遍历等操作,节约内存. 迭代器函数的类型 无限迭代器:包括count.cycle.repe ...
- Flask小demo---代码统计系统
功能要求: 管理员登录 # 第一天 班级管理 # 第一天 学生管理 # 第一天 学生登录 上传代码(zip文件和.py文件) 查看个人提交记录列表 highchar统计 学生列表上方使用柱状图展示现班 ...
- jQuery基本筛选器-表单筛选器-关系筛选器
一.基本筛选器 :first // 第一个 :last // 最后一个 :eq(index)// 索引等于index的那个元素 :even // 匹配所有索引值为偶数的元素,从 0 开始计数 :odd ...
- haproxy支持的负载均衡算法详解
目前haproxy支持的负载均衡算法有如下8种: 1.roundrobin 表示简单的轮询,每个服务器根据权重轮流使用,在服务器的处理时间平均分配的情况下这是最流畅和公平的算法.该算法是动态的,对于实 ...
