nexus 组件下载和上传
一、 重写 super pom
修改 maven 的 settings.xml
Configuring Maven to Use a Single Repository Group
<settings>

  <mirrors>

    <mirror>

      <!--This sends everything else to /public -->

      <id>nexus</id>

      <mirrorOf>*</mirrorOf>

      <url>http://localhost:8081/nexus/content/groups/public</url>

    </mirror>

  </mirrors>

  <profiles>

    <profile>

      <id>nexus</id>

      <!--Enable snapshots for the built in central repo to direct -->

      <!--all requests to nexus via the mirror -->

      <repositories>

        <repository>

          <id>central</id>

          <url>http://central</url>

          <releases><enabled>true</enabled></releases>

          <snapshots><enabled>true</enabled></snapshots>

        </repository>

      </repositories>

     <pluginRepositories>

        <pluginRepository>

          <id>central</id>

          <url>http://central</url>

          <releases><enabled>true</enabled></releases>

          <snapshots><enabled>true</enabled></snapshots>

        </pluginRepository>

      </pluginRepositories>

    </profile>

  </profiles>

  <activeProfiles>

    <!--make the profile active all the time -->

    <activeProfile>nexus</activeProfile>

  </activeProfiles>

</settings>
补充:
目的是只使用nexus
http://maven.apache.org/ref/3.0.4/maven-model-builder/super-pom.html
二、修改项目中pom文件
1. 指定仓库
    <repositories>

        <repository>

            <id>nexus</id>

            <name>nexus</name>

            <url>http://localhost:8081/nexus/content/groups/public/</url>

            <releases>

                <enabled>true</enabled>

            </releases>

            <snapshots>

                <enabled>true</enabled>

            </snapshots>

        </repository>

    </repositories>

    <pluginRepositories>

        <pluginRepository>

            <id>nexus</id>

            <name>nexus</name>

            <url>http://localhost:8081/nexus/content/groups/public/</url>

            <releases>

                <enabled>true</enabled>

            </releases>

            <snapshots>

                <enabled>true</enabled>

            </snapshots>

        </pluginRepository>

    </pluginRepositories>
2. 设置部署
项目中pom.xml文件
    <distributionManagement>

        <repository>

            <id>user-releases</id>

            <name>user-releases</name>

            <url>http://localhost:8081/nexus/content/repositories/releases/</url>

        </repository>

        <snapshotRepository>

            <id>user-snapshots</id>

            <name>user-snapshots</name>

            <url>http://localhost:8081/nexus/content/repositories/snapshots/</url>

        </snapshotRepository>

    </distributionManagement>
maven的setting.xml
  <servers>

    <server>

      <id>user-releases</id>

      <username>admin</username>

      <password>admin123</password>

    </server>

    <server>

      <id>user-snapshots</id>

      <username>admin</username>

      <password>admin123</password>

    </server>

  </servers>
补充:
目的是 mvn clean deploy 时自动部署到私服
http://maven.apache.org/ref/3.0.4/maven-model/maven.html#class_distributionManagement
关于部署到 repository OR snapshotRepository
查询资料
Prepare a Release

Preparing a release goes through the following release phases:

Check that there are no uncommitted changes in the sources

Check that there are no SNAPSHOT dependencies

Change the version in the POMs from x-SNAPSHOT to a new version (you will be prompted for the versions to use)

Transform the SCM information in the POM to include the final destination of the tag

Run the project tests against the modified POMs to confirm everything is in working order

Commit the modified POMs

Tag the code in the SCM with a version name (this will be prompted for)

Bump the version in the POMs to a new value y-SNAPSHOT (these values will also be prompted for)

Commit the modified POMs
实际测试
<version>0.0.1-SNAPSHOT</version>
版本号加-SNAPSHOT 会自动部署到Snapshots仓库,格式必须为 【版本号-SNAPSHOT】
生的jar包自动添加时间戳 例如:0.0.1-20160315.073435-1.jar
去掉-SNAPSHOT 则会部署到releases 仓库
http://maven.apache.org/maven-release/maven-release-plugin/examples/prepare-release.html
三、手动上传组件
1. 登录nexus
2. 选择目标仓库
3. 选择Tab [Artifact Upload]
4. 完善组件信息
备注:Snapshots 仓库不能手动上传
四、设置代理
1. 登录nexus
2. 进入仓库管理添加代理

五、仓库类型
group、hosted、proxy、virtual
group由三类组成
宿主再分三类
代理一开始有3个
http://books.sonatype.com/nexus-book/reference/confignx-sect-manage-repo.html

六、删除私服中的组件
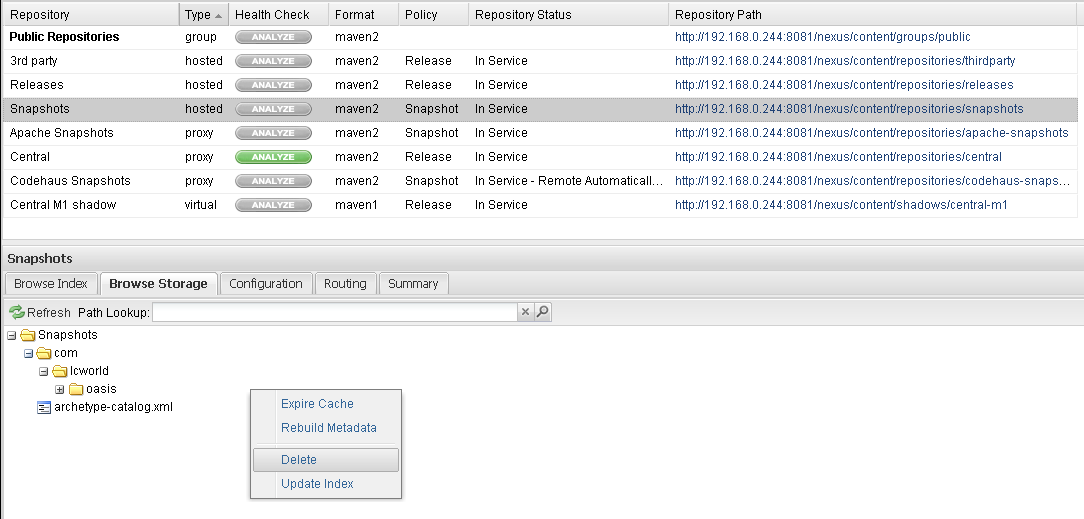
右键删除即可
七、查找并使用组件
登录 nexus
search
就看到组件坐标了
nexus 组件下载和上传的更多相关文章
- 从Nexus私服下载和上传资源(一)
从私服中下载资源 首先要明确将资源下载到哪里 找到maven 配置文件settings.xml 文件,添加如下配置:1.添加镜像配置:将所有访问外网仓库的请求指向私服: <mirror> ...
- 从Nexus私服下载和上传资源(二)
上传资源到私服 当项目完成后如果需要deploy 部署jar 包到私服,则可以添加如下配置: 1.在项目的 pom.xml 文件中添加上传部署的路径: 注意:如果需要对 releases版本进行多次部 ...
- 重新想象 Windows 8 Store Apps (66) - 后台任务: 下载和上传
[源码下载] 重新想象 Windows 8 Store Apps (66) - 后台任务: 下载和上传 作者:webabcd 介绍重新想象 Windows 8 Store Apps 之 后台任务 后台 ...
- 重新想象 Windows 8.1 Store Apps (91) - 后台任务的新特性: 下载和上传的新特性, 程序启动前预下载网络资源, 后台任务的其它新特性
[源码下载] 重新想象 Windows 8.1 Store Apps (91) - 后台任务的新特性: 下载和上传的新特性, 程序启动前预下载网络资源, 后台任务的其它新特性 作者:webabcd 介 ...
- github下载和上传项目
git下载和上传项目 下载: git clone +地址 上传: 1.git init 在当前项目的目录中生成本地的git管理(多一个.git文件夹,为隐藏文件) 2.git add .(注意最后面有 ...
- 使用MFC提供的Http类下载和上传文件
1.下载文件 Download(const CString& strFileURLInServer, //待下载文件的URL const CString & strFileLocalF ...
- 2.4 利用FTP服务器下载和上传目录
利用FTP服务器下载目录 import os,sys from ftplib import FTP from mimetypes import guess_type nonpassive = Fals ...
- 2.3 利用FTP服务器下载和上传文件
二.利用FTP服务器的下载文件 from ftplib import FTP from os.path import exists def getfile(file,site,dir,user=(), ...
- 在XShell中使用sz和rz命令下载和上传文件
借助XShell,使用linux命令sz可以很方便的将服务器上的文件下载到本地,使用rz命令则是把本地文件上传到服务器 工具/原料 XShell CentOS 6.5 使用sz下载文件 1 输 ...
随机推荐
- Python之风湿理论值函数即变量
一,风湿历练:函数即变量,这样执行程序是不会报错的 def foo(): print ("from foo") bar() def bar(): print "form ...
- Asp.Net Core参考资料
Every day up!!!!!! 1.Asp.Net官方文档 2.<Professional C# 6 and .NET Core 1.0> 翻译 3.ASP.NET Core中文文档 ...
- 获取tomcat源码
1.安装环境 工欲善其事必先利其器,在开始工作之前,先准备好环境和工具:jdk.eclipse.并配置eclipse的svn插件.ant,具体怎么配置就不说了,网上都有. 2.下载源码 打开eclip ...
- sql查询job
use msdb go --if object_id('tempdb..#SqlAgentJob') is not null -- drop table #SqlAgentJob --go decla ...
- all any some
SQLServer中有三个关键字可以修改比较运算符:All.Any和Some,其中Some和Any等价. 他们作用于比较运算符和子查询之间,作用类似Exists.not exists.in.not i ...
- angularjs动态添加节点时,绑定到$scope中
<html> <head> <meta charset="utf-8"/> <script src="https://cdn.b ...
- Control(拆点+最大流)
Control http://acm.hdu.edu.cn/showproblem.php?pid=4289 Time Limit: 2000/1000 MS (Java/Others) Mem ...
- Super Star(最小球覆盖)
Super Star http://poj.org/problem?id=2069 Time Limit: 1000MS Memory Limit: 65536K Total Submission ...
- 215. Kth Largest Element in an Array(QuickSort)
Find the kth largest element in an unsorted array. Note that it is the kth largest element in the so ...
- 对ubuntu初学感想
感觉对ubuntu一头雾水...作为什么都不懂得小菜鸟,感觉以后还有很多要学习的.fighting