2、corosync集群初步
配置高可用集群
配置环境:两台centos7 192.168.184.141 192.168.184.142
corosync v2 + pacemaker
corosync v2:vote system
pacemaker:独立服务
配置集群的两种方式:
1、手动安装配置
2、借助于集群的全生命周期管理工具:
pcs: agent(pcsd)
crmsh: agentless (pssh)
crmsh的全生命周期管理在centos上进行安装配置不是特别好用,所以先使用pcs安装配置集群,然后使用crmsh来管理进群,因为crmsh管理集群比较方便,最后在使用pcs来管理集群。
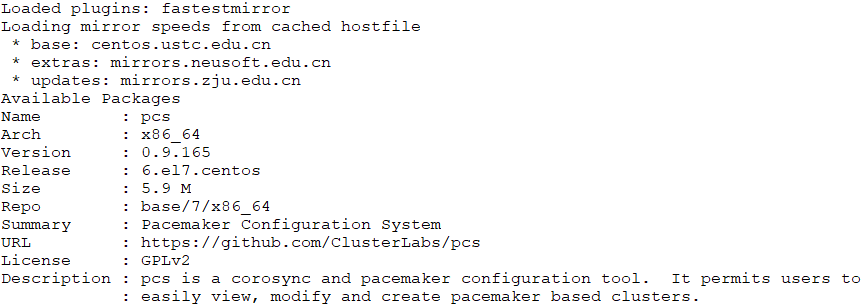
# yum info pcs
配置集群的前提:
(1) 时间同步;
(2) 基于当前正在使用的主机名互相访问,同时本地配置的主机名和DNS解析的主机名必须要保持一致,不然可能会出问题(可借助于/etc/hosts);
(3) 是否会用到仲裁设备,如果用到ping node就不需要提前准备,如果是qdisk就需要提前准备;
注意:红帽7的pcs可以安装并启动集群,但是红帽6也存在pcs,但是没有安装并启动集群的功能。
前提:
1)本配置共有两个测试节点,分别node1和node2,相应IP地址分别为192.168.184.141和192.168.184.142;
2)集群服务为nginx服务;
3)提供web服务的地址为192.168.184.143,即vip;
4)系统为CentOS 7.6 x86_64
# yum install -y redhat-lsb //查看系统版本
# lsb_release -a

为了配置一台Linux主机成为HA的节点,通常需要做出如下的准备工作:
1) 所有节点的主机名称和对应的IP地址解析服务可以正常工作,且每个节点的主机名称需要跟"uname -n"命令的结果保持一致;
因此,需要保证两个节点上的/etc/hosts文件均为下面的内容:
127.0.0.1 localhost localhost.localdomain localhost4 localhost4.localdomain4
::1 localhost localhost.localdomain localhost6 localhost6.localdomain6
192.168.184.141 node1
192.168.184.142 node2
192.168.184.143 node3
为了是主机名永久有效,需要另外配置
Node1:
# hostnamectl set-hostname node1
# hostname node1
Node2:
# hostnamectl set-hostname node2
# hostname node2
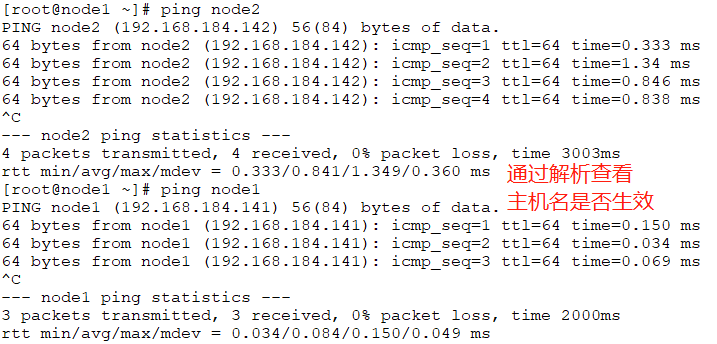
测试两台主机解析的域名是否与主机名保持一致
2) 设定两个节点可以基于密钥进行ssh通信,这可以通过类似如下的命令实现:
Node1:
# ssh-keygen -t rsa -P ''
# ssh-copy-id -i ~/.ssh/id_rsa.pub root@node2
Node2:
# ssh-keygen -t rsa -P ''
# ssh-copy-id -i ~/.ssh/id_rsa.pub root@node1
3) 多节点时间同步
# crontab -l
#Ansible: sync time from ntpserver
*/10 * * * * /sbin/ntpdate -u 133.100.11.8 &>/dev/null
2、安装并启动集群
2.1 安装并启动pcsd
pcs客户端程序是通过跟服务器端联系从而完成服务管理的即pcsd之下的corosync和pacemaker管理。因此只要是集群内的主机,都要确保主机安装并开机启动pcsd,
Node1 AND Node2:都要安装
# yum install -y pacemaker pcs psmisc policycoreutils-python //只安装pcs即可,其他不是必须
# yum install pcs //pcs依赖于pacemaker的功能,pacemaker又依赖于corosync的功能,两个节点都要安装


# rpm -ql pcs //查看安装列表
/usr/lib/systemd/system/pcsd.service //程序控制文件
/etc/sysconfig/pcsd //配置文件
# systemctl start pcsd.service //启动pcs
# systemctl enable pcsd.service //设置开机启动
这里把启动和定义开机启动利用ansible来启动
# vim /etc/ansible/hosts //定义ha集群组
[ha]
192.168.184.141
192.168.184.142
# ansible ha -m service -a 'name=pcsd state=started enabled=yes' //即可启动并开机启动
# ansible ha -m shell -a 'echo "123456" | passwd --stdin hacluster' //为hacluster用户添加密码
2.2 配置corosync
pcs是客户端工具,pcsd是每一个集群节点要启动的守护进程,pcs就是通过联系每一个守护进程来实现集群的配置和管理的
# pcs --help pcs命令可以使用pacemaker集群的全生命周期管理,每一种管理功能均通过相应的子命令实现。
- Usage: pcs [-f file] [-h] [commands]...
- Control and configure pacemaker and corosync.
- Options:
- -h, --help Display usage and exit.
- -f file Perform actions on file instead of active CIB.
- --debug Print all network traffic and external commands run.
- --version Print pcs version information. List pcs capabilities if
- --full is specified.
- --request-timeout Timeout for each outgoing request to another node in
- seconds. Default is 60s.
- --force Override checks and errors, the exact behavior depends on
- the command. WARNING: Using the --force option is
- strongly discouraged unless you know what you are doing.
- Commands:
- cluster Configure cluster options and nodes. //配置集群选项和节点
- resource Manage cluster resources. //管理集群资源
- stonith Manage fence devices. //管理隔离设备的
- constraint Manage resource constraints. //定义资源约束的
- property Manage pacemaker properties. //定义pacemaker的集群属性的
- acl Manage pacemaker access control lists. //定义访问控制列表的
- qdevice Manage quorum device provider on the local host.
- quorum Manage cluster quorum settings.
- booth Manage booth (cluster ticket manager).
- status View cluster status. //查看集群状态
- config View and manage cluster configuration. //查看集群的整体配置
- pcsd Manage pcs daemon.
- node Manage cluster nodes.
- alert Manage pacemaker alerts.
# pcs cluster --help
- Usage: pcs cluster [commands]...
- Configure cluster for use with pacemaker
- Commands:
- auth [<node>[:<port>]] [...] [-u <username>] [-p <password>] [--force] [--local] //认证并连接至指定节点,-u表示以哪个用户认证,默认是hacluster
- Authenticate pcs to pcsd on nodes specified, or on all nodes
- configured in the local cluster if no nodes are specified (authorization
- tokens are stored in ~/.pcs/tokens or /var/lib/pcsd/tokens for root).
- By default all nodes are also authenticated to each other, using
- --local only authenticates the local node (and does not authenticate
- the remote nodes with each other). Using --force forces
- re-authentication to occur.
setup [--start [--wait[=<n>]]] [--local] [--enable] --name <cluster name> //设置集群
[--addr0 <addr/net> [[[--mcast0 <address>] [--mcastport0 <port>] //--mcast0自己指定多播地址
# man corosync.conf //详细信息
start [--all | <node>... ] [--wait[=<n>]] [--request-timeout=<seconds>] //启动集群
stop [--all | <node>... ] [--request-timeout=<seconds>] //停止集群
Node1 OR Node2: //在node1或者node2上执行下面的命令都可以,这里是为了管理集群
# pcs cluster auth node1 node2 -u hacluster //如果两个节点的用户和密码一样,可以都认证通过的,如果pcs在每个节点运行,那么auth需要在每个节点上都运行
Password:
node1: Authorized
node2: Authorized
# pcs cluster setup --name mycluster auth node1 node2 -u hacluster
//--name为集群取名,把node1和node2创建成集群,创建集群后会自动分别把pacenaker服务和corosync服务启动起来
- Destroying cluster on nodes: node1, node2...
- node2: Stopping Cluster (pacemaker)...
- node1: Stopping Cluster (pacemaker)...
- node1: Successfully destroyed cluster
- node2: Successfully destroyed cluster
- Sending 'pacemaker_remote authkey' to 'node1', 'node2'
- node1: successful distribution of the file 'pacemaker_remote authkey'
- node2: successful distribution of the file 'pacemaker_remote authkey'
- Sending cluster config files to the nodes...
- node1: Succeeded
- node2: Succeeded
- Synchronizing pcsd certificates on nodes node1, node2... //显示同步成功
- node1: Success
- node2: Success
- Restarting pcsd on the nodes in order to reload the certificates... //重新启动pcsd守护进程
- node1: Success
- node2: Success
# ls /etc/corosync/ //那么同步之后有什么效果?切换目录到corosync的配置文件路径
corosync.conf //同步后自动生成的,默认是不存在的,是根据corosync.conf.example.udpu这个样本生成的
corosync.conf.example
corosync.conf.example.udpu //corosync的版本2是通过udpu通信的,版本1是通过udp协议上的组播、单播或多播方式通信的,默认是多播
corosync.xml.example uidgid.d
# cat corosync.conf //两个节点要相同
- totem { //定义集群所有节点之间是基于什么方式来传递集群心跳信息的以及集群事务信息的。totem是corosync专用心跳信息传送协议/模块
- version: 2 //模块版本
- cluster_name: mycluster
- secauth: off //安全认证功能默认是否开启,如果开启需要手动生成密钥文件
- transport: udpu
- }
- nodelist { //集群中的节点
- node {
- ring0_addr: node1 //ring0_addr表示环0地址,集群心跳信息直接可以送达的位置,环0是自己,即心跳信息不用传递,就是自己
- nodeid:
- }
- node {
- ring0_addr: node2
- nodeid:
- }
- }
- quorum { //仲裁机制,即法定票数的投票机制
- provider: corosync_votequorum //如何完成投票,要用corosync_votequorum(coroync自己的投票系统)
- two_node: 1 //当前节点是否是两个节点,是就是1,如果不是两个节点就是0
- }
- logging { //记录日志
- to_logfile: yes
- logfile: /var/log/cluster/corosync.log //要确定这个目录是存在的
- to_syslog: yes //是否发给系统日志
- }
2.3 启动集群
Nod1 OR Node2:
# pcs cluster start --all //启动集群的所有节点
node1: Starting Cluster (corosync)...
node2: Starting Cluster (corosync)...
node2: Starting Cluster (pacemaker)...
node1: Starting Cluster (pacemaker)...
# ps -aux
root 5186 0.9 5.1 196248 95944 ? SLsl 17:17 0:04 corosync
root 5223 0.0 0.3 104200 7156 ? Ss 17:17 0:00 /usr/sbin/pacemakerd -f
haclust+ 5224 0.0 0.7 106968 13964 ? Ss 17:17 0:00 /usr/libexec/pacemaker/cib
root 5225 0.0 0.3 107284 6084 ? Ss 17:17 0:00 /usr/libexec/pacemaker/stonithd
root 5226 0.0 0.2 94512 4320 ? Ss 17:17 0:00 /usr/libexec/pacemaker/lrmd
haclust+ 5227 0.0 0.3 123708 6512 ? Ss 17:17 0:00 /usr/libexec/pacemaker/attrd
haclust+ 5228 0.0 0.1 80432 3472 ? Ss 17:17 0:00 /usr/libexec/pacemaker/pengine
haclust+ 5229 0.0 0.4 136028 8612 ? Ss 17:17 0:00 /usr/libexec/pacemaker/crmd
上面的命令相当于在各节点分别执行如下命令:
# systemctl start corosync.service
# systemctl start pacemaker.service
2.4 检查集群启动状态
检查各节点通信状态(显示为no faults即为OK):
# corosync-cfgtool --help //查看帮助信息
# corosync-cfgtool -s
Printing ring status.
Local node ID 1
RING ID 0
id = 192.168.184.141
status = ring 0 active with no faults
检查集群成员关系及Quorum API:
# corosync-cmapctl -h //查看帮助信息
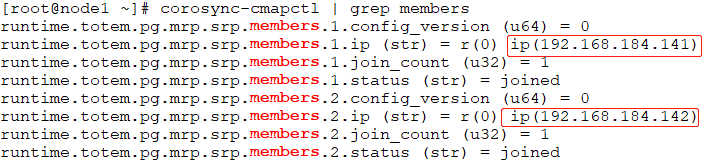
# corosync-cmapctl | grep members
# pcs status --help //查看当前集群或资源的状态
# pcs status corosync
- Cluster name: mycluster
- WARNINGS: //可以修改不启用stonith,
- No stonith devices and stonith-enabled is not false //关闭stonith是关闭集群全局属性
- Stack: corosync //显示底层传递集群事务的协议栈或者messaging layer是什么?这里可以是corosync也可以是heartbeat v3,
- Current DC: node2 (version 1.1.19-8.el7_6.2-c3c624ea3d) - partition with quorum //partition with quorum:一旦分区拥有法定票数的分区才能代表集群
//DC(Designated Coordinator)是自定协调员,整个集群内所有节点选举出来,用来做全局集群事务决策的节点。如果当前DC宕机,那么就需要重新选举
- Last updated: Sat Jan ::
- Last change: Sat Jan :: by hacluster via crmd on node2
- nodes configured //配置了两个节点
- resources configured //没有资源
- Online: [ node1 node2 ] //两个节点处于online状态
- No resources //没有资源
- Daemon Status: //各守护工作正常
- corosync: active/disabled
- pacemaker: active/disabled
- pcsd: active/enabled
配置集群属性
corosync有许多全局配置属性,例如修改stonith-enabled即为此类属性之一。pcs的property子命令可用于显示或设置集群的各属性。
下面的命令可以获取其详细使用帮助。
# pcs property --help //配置集群的全局属性
[list|show [<property> | --all | --defaults]] | [--all | --defaults]
set [--force | --node <nodename>] <property>=[<value>]
Examples:
pcs property set stonith-enabled=false
# pcs property list --all //显示所有可配置选项
# pcs property set stonith-enabled=false //这里把stonith关闭,因为没有stonith设备
# pcs property list //查看已经修改的
Cluster Properties:
cluster-infrastructure: corosync
cluster-name: mycluster
dc-version: 1.1.19-8.el7_6.2-c3c624ea3d
have-watchdog: false
stonith-enabled: false
# crm_verify -L -V //其中的WARNING信息是因为当前集群系统开启了stonith-enabled属性但却没有配置stonith设备所致。使用crm_verify命令也可检查出此错误。
- error: unpack_resources: Resource start-up disabled since no STONITH resources have been defined
- error: unpack_resources: Either configure some or disable STONITH with the stonith-enabled option
- error: unpack_resources: NOTE: Clusters with shared data need STONITH to ensure data integrity
- Errors found during check: config not valid
安装crmsh
这里两台高可用节点都安装了crmsh,由于centos7中没有自带crmsh,所以不能使用yum源安装
# cd /etc/yum.repo.d/ //切换目录
# OSVERSION=$(cat /etc/centos-release | sed -rn 's/.* ([[:digit:]]).*/\1/p') //取得系统的版本号
# wget http://download.opensuse.org/repositories/network:/ha-clustering:/Stable/CentOS_CentOS-${OSVERSION}/network:ha-clustering:Stable.repo //将变量OSVERSION换成系统版本号
# yum install crmsh
# yum install pssh //因为crmsh是基于ssh进行远程管理的,所以需要安装pssh,pssh依赖于python-pssh,安装时会自动解决依赖关系
# rpm -qi pssh
- Name : pssh
- Version : 2.3.
- Release : 7.4
- ...
- Summary : Parallel SSH to control large numbers of Machines simultaneously //并行ssh,表示可以利用一个客户端同时连接多个ssh
- Description :
- pssh provides parallel versions of the OpenSSH tools that are useful for
- controlling large numbers of machines simultaneously. It includes parallel
- versions of ssh, scp, and rsync, as well as a parallel kill command.
pssh命令是一个python编写可以在多台服务器上执行命令的工具,同时支持拷贝文件,是同类工具中很出色的,类似pdsh,个人认为相对pdsh更为简便,使用必须在各个服务器上配置好密钥认证访问。 http://man.linuxde.net/pssh
crmsh不依赖任何服务,它是基于ssh进行远程管理的。而pcs是有agent的,agent就是pcsd,pcsd守护进程在每个节点上都要运行。
# crm help //crm帮助文档
# crm status //查看集群状态
crm有两种风格:
1、直接在命令行中执行
# crm status
2、有交互式接口
- [root@node1 ~]# crm
- crm(live)# help
- crm(live)# resource
- crm(live)resource# ls
- .. operations status
- help show migrate
- move back cd
- meta demote quit
- ...
- crm(live)resource# cd
- crm(live)# node
- crm(live)node# cd
- crm(live)# configure
- crm(live)configure# show
- node : node1
- node : node2
- property cib-bootstrap-options: \
- have-watchdog=false \
- dc-version=1.1.-.el7_6.-c3c624ea3d \
- cluster-infrastructure=corosync \
- cluster-name=mycluster \
- stonith-enabled=false
- crm(live)configure# edit
- crm(live)configure#
crmsh结合corosync创建高可用httpd
web service高可用所需资源:
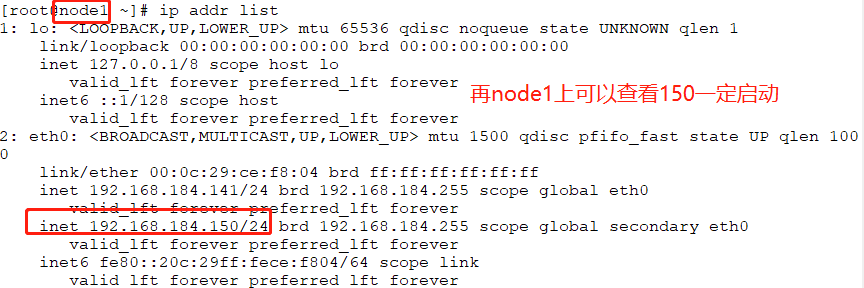
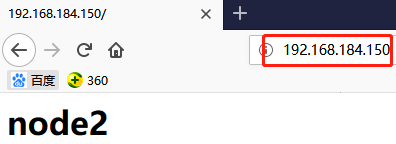
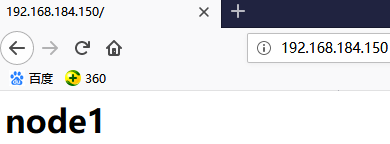
vip:192.168.184.150
httpd自行安装,两个节点都要安装并确保启动没有问题
需要将vip和httpd运行在同一个节点,因为集群默认式负载均衡法则,所以把这两个资源定义成组或者定义排列约束。
# yum install httpd -y //在两台节点上都安装httpd,这里为了展示效果所以设置的网页文件不一样,但是生产环境中网页可能来自共享存储,所以是一样的
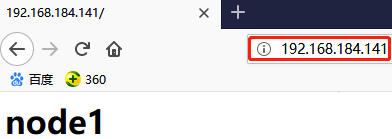
# echo "<h1>node1</h1>" > /var/www/html/index.html
# systemctl start httpd //测试网页是否可以访问,
注意:
1、上面启动的服务要停掉,因为需要资源管理器自动决定在哪个节点启动;
2、一定不能设置开机自动启动
# systemctl stop httpd
# systemctl disable httpd
下面就开始把vip和httpd配置成集群服务的资源,任何资源想要配置在集群上使用,只能通过资源代理来实现。
配置IP地址时,哪些资源代理可用?
- [root@node1 ~]# crm
- crm(live)# ra //resource agent
- crm(live)ra# help
- Resource Agents (RA) lists and documentation
- This level contains commands which show various information about
- the installed resource agents. It is available both at the top
- level and at the configure level.
- Commands:
- classes List classes and providers //查看有哪些资源代理的类型
- info Show meta data for a RA //查看资源代理如何使用
- list List RA for a class (and provider)
- providers Show providers for a RA and a class
- validate Validate parameters for RA
- cd Navigate the level structure
- help Show help (help topics for list of topics)
- ls List levels and commands
- quit Exit the interactive shell
- up Go back to previous level
- crm(live)ra# classes //显示资源代理类别
- lsb //centos6配置使用,/etc/rc.d/init.d
- ocf / .isolation heartbeat openstack pacemaker
- service //通用服务组件
- systemd
- crm(live)ra#
每一个类别下有多少资源代理可用?
在查看lsb类别下有哪些资源可用?当查看lsb类别下的有哪些资源可用时,他会自动加载/etc/rc.d/init.d/目录下的所有脚本。
- crm(live)ra# help list
- List RA for a class (and provider)
- List available resource agents for the given class. If the class
- is ocf, supply a provider to get agents which are available
- only from that provider.
- Usage:
- list <class> [<provider>]
- Example:
- list ocf pacemaker
crm(live)ra# list lsb //list后跟上资源代理的名称
netconsole network
crm(live)ra# list systemd //类别下会有httpd
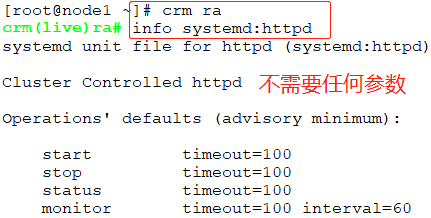
crm(live)ra# help info
info [<class>:[<provider>:]]<type> //info 类别:资源代理
info <type> <class> [<provider>] (obsolete)
示例:crm(live)ra# info ocf:heartbeat:IPaddr
下面开始配置资源,是在configure目录下进行配置,IP只能配置在一个节点上,叫做原始资源或者主资源
crm(live)configure# help primitive
Usage:
primitive <rsc> {[<class>:[<provider>:]]<type>|@<template>} //rsc:资源名字,class:指明使用哪个资源代理,type:资源代理的名称
[description=<description>]
[[params] attr_list] //这里是传递参数
Example: //示例
primitive apcfence stonith:apcsmart \
params ttydev=/dev/ttyS0 hostlist="node1 node2" \
op start timeout=60s \
op monitor interval=30m timeout=60s
primitive www8 apache \
configfile=/etc/apache/www8.conf \
operations $id-ref=apache_ops
示例:
crm(live)configure# primitive webip ocf:heartbeat:IPaddr params ip=192.168.184.150 //webip是资源代理定义的资源的名字,ocf:heartbeat:是资源代理,params指定参数
crm(live)configure# show
node 1: node1
node 2: node2
primitive webip IPaddr \
params ip=192.168.184.150
property cib-bootstrap-options: \
have-watchdog=false \
dc-version=1.1.19-8.el7_6.2-c3c624ea3d \
cluster-infrastructure=corosync \
cluster-name=mycluster \
stonith-enabled=false
crm(live)configure# verify //做校验
crm(live)configure# commit //校验没问题的话就提交
如何将IP资源转移到其他节点?
如何让node1重新上线?
如何定义web资源服务?
- crm(live)# configure //注意要在configure中定义
- crm(live)configure# primitive webserver systemd:httpd //这里没有要不要添加参数,可以使用#crm ra --> #info systemd:httpd
- crm(live)configure# verify //校验
- crm(live)configure# commit //提交
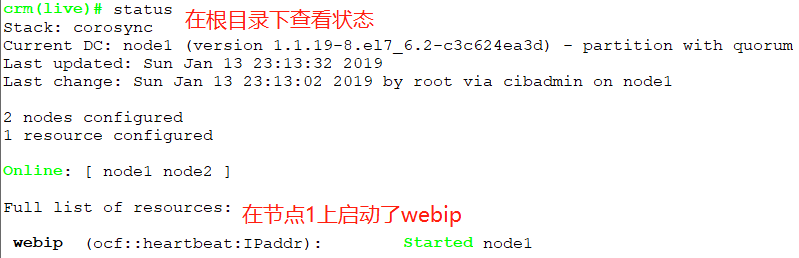
- crm(live)# status
- Stack: corosync
- Current DC: node1 (version 1.1.-.el7_6.-c3c624ea3d) - partition with quorum
- Last updated: Mon Jan ::
- Last change: Mon Jan :: by root via cibadmin on node1
- nodes configured
- resources configured
- Online: [ node1 node2 ]
- Full list of resources: //两个资源都启动了
- webip (ocf::heartbeat:IPaddr): Started node2 //IP启动在node2
- webserver (systemd:httpd): Started node1 //httpd就启动在了node1上
如何将IP资源和httpd资源运行在一起?
crm(live)configure# help group
- Usage:
- group <name> <rsc> [<rsc>...]
- [description=<description>]
- [meta attr_list]
- [params attr_list]
- attr_list :: [$id=<id>] <attr>=<val> [<attr>=<val>...] | $id-ref=<id>
- Example:
- group internal_www disk0 fs0 internal_ip apache \
- meta target_role=stopped
- group vm-and-services vm vm-sshd meta container="vm"
crm(live)configure# group webservice webip webserver //webservice是组名,组内有webip和webserver两个资源,次序很关键,有可能是启动次序
crm(live)configure# verify
crm(live)configure# commit
crm(live)configure# cd
crm(live)# status //查看状态
- Stack: corosync
- Current DC: node1 (version 1.1.-.el7_6.-c3c624ea3d) - partition with quorum
- Last updated: Mon Jan ::
- Last change: Mon Jan :: by root via cibadmin on node1
- nodes configured
- resources configured
- Online: [ node1 node2 ]
- Full list of resources:
- Resource Group: webservice
- webip (ocf::heartbeat:IPaddr): Started node2 //现在IP资源和httpd资源都在node2上,因为之前IP资源就在node2上,所有httpd资源也迁移到node2上了。
- webserver (systemd:httpd): Started node2 //如果先定义webserver,再定义webip,那么会把webip迁移到webserver所在的节点
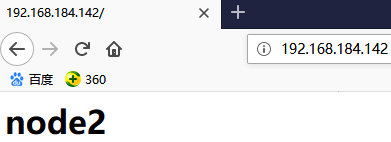
此时在浏览器中访问192.168.184.142即node2的IP是可以的,而node1是无法访问的,因为webip和webserver都是在node2上启动的。
强制将资源从node2迁移到node1上
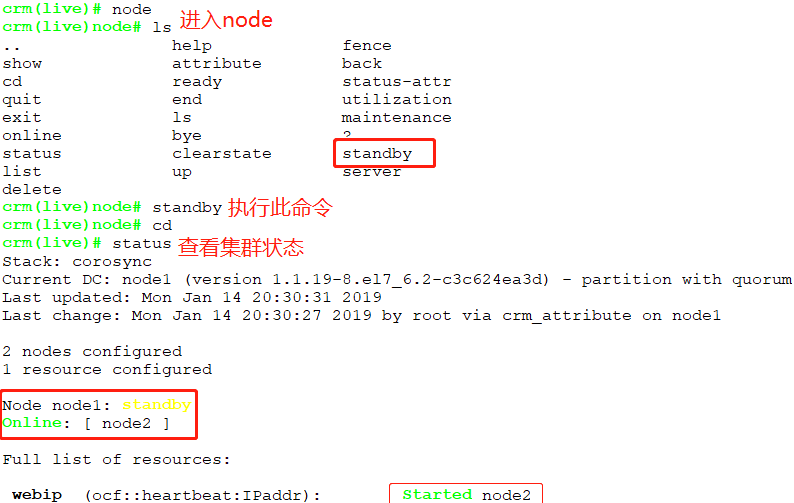
[root@node2 ~]# crm node standby //在node2上直接执行
[root@node2 ~]# crm status
- Stack: corosync
- Current DC: node1 (version 1.1.-.el7_6.-c3c624ea3d) - partition with quorum
- Last updated: Mon Jan ::
- Last change: Mon Jan :: by root via crm_attribute on node2
- nodes configured
- resources configured
- Node node2: standby //node2是备用节点
- Online: [ node1 ] //在线的是node1
- Full list of resources:
- Resource Group: webservice
- webip (ocf::heartbeat:IPaddr): Started node1 //在node1节点上
- webserver (systemd:httpd): Started node1
以上是两类资源的定义:primitive和group
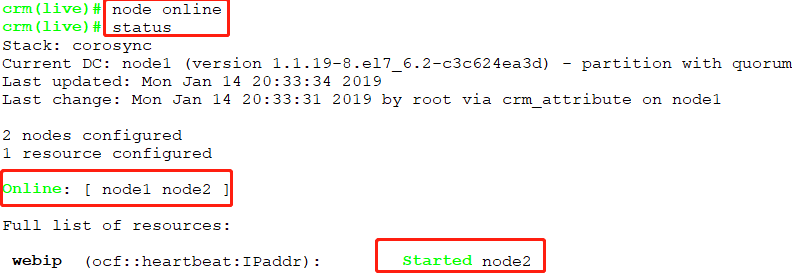
- [root@node2 ~]# crm node online //让node2上线
- [root@node2 ~]# crm status
- Stack: corosync
- Current DC: node1 (version 1.1.-.el7_6.-c3c624ea3d) - partition with quorum
- Last updated: Mon Jan ::
- Last change: Mon Jan :: by root via crm_attribute on node2
- nodes configured
- resources configured
- Online: [ node1 node2 ]
- Full list of resources:
- Resource Group: webservice
- webip (ocf::heartbeat:IPaddr): Started node1
- webserver (systemd:httpd): Started node1
如何配置资源的默认粘性?
- crm(live)configure# property //敲两下tab键,可以补全
- batch-limit= enable-startup-probes= node-health-strategy= startup-fencing=
- cluster-delay= have-watchdog= node-health-yellow= stonith-action=
- cluster-ipc-limit= is-managed-default= notification-agent= stonith-enabled=
- cluster-recheck-interval= load-threshold= notification-recipient= stonith-max-attempts=
- concurrent-fencing= maintenance-mode= pe-error-series-max= stonith-timeout=
- crmd-transition-delay= migration-limit= pe-input-series-max= stonith-watchdog-timeout=
- dc-deadtime= no-quorum-policy= pe-warn-series-max= stop-all-resources=
- default-action-timeout= node-action-limit= placement-strategy= stop-orphan-actions=
- default-resource-stickiness= node-health-base= remove-after-stop= stop-orphan-resources=
- election-timeout= node-health-green= shutdown-escalation= symmetric-cluster=
- enable-acl= node-health-red= start-failure-is-fatal=
- default-resource-stickiness= //默认资源粘性,这里是0,一般定义为正值
如果一个节点被宕机,资源是否会在另一个节点启动?
# crm status //可以看到现在资源在node1上
# systemctl stop pacemaker corosync //把服务停掉
- [root@node2 ~]# crm status //在node2上可以看到资源转移到node2上了
- Stack: corosync
- Current DC: node2 (version 1.1.-.el7_6.-c3c624ea3d) - partition with quorum
- Last updated: Mon Jan ::
- Last change: Mon Jan :: by root via crm_attribute on node2
- nodes configured //这里仍然显示两个节点
- resources configured
- Online: [ node2 ]
- OFFLINE: [ node1 ] //不在线
- Full list of resources:
- Resource Group: webservice
- webip (ocf::heartbeat:IPaddr): Started node2
- webserver (systemd:httpd): Started node2
下面直接把节点1关机
- [root@node2 ~]# crm status
- Stack: corosync
- Current DC: node2 (version 1.1.-.el7_6.-c3c624ea3d) - partition with quorum //这里只剩一个节点,应该是without quorum即没有仲裁节点
- Last updated: Mon Jan ::
- Last change: Mon Jan :: by root via crm_attribute on node2
- nodes configured
- resources configured
- Online: [ node2 ]
- OFFLINE: [ node1 ]
- Full list of resources:
- Resource Group: webservice
- webip (ocf::heartbeat:IPaddr): Started node2
2、corosync集群初步的更多相关文章
- corosync集群的选举算法
<Cluster Concepts> http://linux-ha.org/wiki/Cluster_Concepts <Managing Computers with Autom ...
- 3、基于多播、安全认证的corosync集群(VIP、Httpd、Filesystem)
Messaging Layer --> CRM --> RA systemd:/usr/lib/systemd/system systemd有一个特性,即便一个服务开机启动,但是在 ...
- Hadoop集群初步搭建:
自己整理了一下Hadoop集群简易搭建的过程,感谢尚观科技贾老师的授课和指导! 基本环境要求:能联网电脑一台:装有Centos系统的VMware虚拟机:Xmanager Enterprise 5软件. ...
- corosync+pacemaker高可用集群
高可用集群,是指以减少服务中断(如因服务器宕机等引起的服务中断)时间为目的的服务器集群技术.简单的说,集群就是一组计算机,它们作为一个整体向用户提供一组网络资源.这些单个的计算机系统就是集群的节点. ...
- 高可用集群之corosync+pacemaker
1.概念 在传统Linux集群种类,主要分了三类,一类是LB集群,这类集群主要作用是对用户的流量做负载均衡,让其后端每个server都能均衡的处理一部分请求:这类集群有一个特点就是前端调度器通常是单点 ...
- hadoop(二)hadoop集群的搭建
一.集群环境准备工作 1.修改主机名 在root 账户下 vi /etc/sysconfig/network 或者 sudo vi /etc/sysconfig/network 2.设置系统默认启 ...
- 大数据初级笔记二:Hadoop入门之Hadoop集群搭建
Hadoop集群搭建 把环境全部准备好,包括编程环境. JDK安装 版本要求: 强烈建议使用64位的JDK版本,这样的优势在于JVM的能够访问到的最大内存就不受限制,基于后期可能会学习到Spark技术 ...
- corosync+pacemaker实现高可用(HA)集群
corosync+pacemaker实现高可用(HA)集群(一) 重要概念 在准备部署HA集群前,需要对其涉及的大量的概念有一个初步的了解,这样在实际部署配置时,才不至于不知所云 资源.服务与 ...
- 基于corosync+pacemaker+drbd+LNMP做web服务器的高可用集群
实验系统:CentOS 6.6_x86_64 实验前提: 1)提前准备好编译环境,防火墙和selinux都关闭: 2)本配置共有两个测试节点,分别coro1和coro2,对应的IP地址分别为192.1 ...
随机推荐
- tiny4412 硬件解码
今天发现了一个好的资源,上面有三星的一些实例代码.http://git.infradead.org/users/kmpark/public-apps
- 设计模式之Interpreter(解释器)(转)
Interpreter定义: 定义语言的文法 ,并且建立一个解释器来解释该语言中的句子. Interpreter似乎使用面不是很广,它描述了一个语言解释器是如何构成的,在实际应用中,我们可能很少去构造 ...
- 根据IP获取所在的国家城市
根据IP获取所在的国家城市 新浪的IP地址查询接口:http://int.dpool.sina.com.cn/iplookup/iplookup.php?format=js 新浪多地域测试方法:htt ...
- OAuth2.0 知多少(好)
https://www.cnblogs.com/sheng-jie/p/6564520.html 简书集成的社交登录,大大简化了我们的注册登录流程,真是一号在手上网无忧啊.这看似简单的集成,但背后的技 ...
- ubuntu_python_environment
参考:http://blog.csdn.net/kingppy/article/details/13080919 参考:http://blog.csdn.net/zhaobig/article/det ...
- ubuntu 18.04下安装配置Hue问题记录
前段时间将Hadoop 在ubuntu环境下装好,接下来尝试安装Hue来管理Hadoop,参照的资料有: 1.高可用Hadoop平台-Hue In Hadoop 2.ubuntu16.04 安装单机H ...
- Python爬虫【四】Scrapy+Cookies池抓取新浪微博
1.设置ROBOTSTXT_OBEY,由true变为false 2.设置DEFAULT_REQUEST_HEADERS,将其改为request headers 3.根据请求链接,发出第一个请求,设置一 ...
- STM32L476应用开发之六:电池SOC检测(转)
源: STM32L476应用开发之六:电池SOC检测
- Linux环境nginx的安装
安装Nginx前需要编译环境和库文件支持: 1.安装make: yum -y install openssl openssl-devel yum -y install gcc automake aut ...
- MySQL按指定字段自定义列表排序
亲测实例: 1级排序:同城>异城 2级排序:未领养>以领养 3级排序:发布最新靠前 MYSQL语句如下: SELECT ura.id,ura.city,ura.uid,ura.rescue ...