Unity_飞机大战记录总结
记录步骤:win+R→PSR.exe
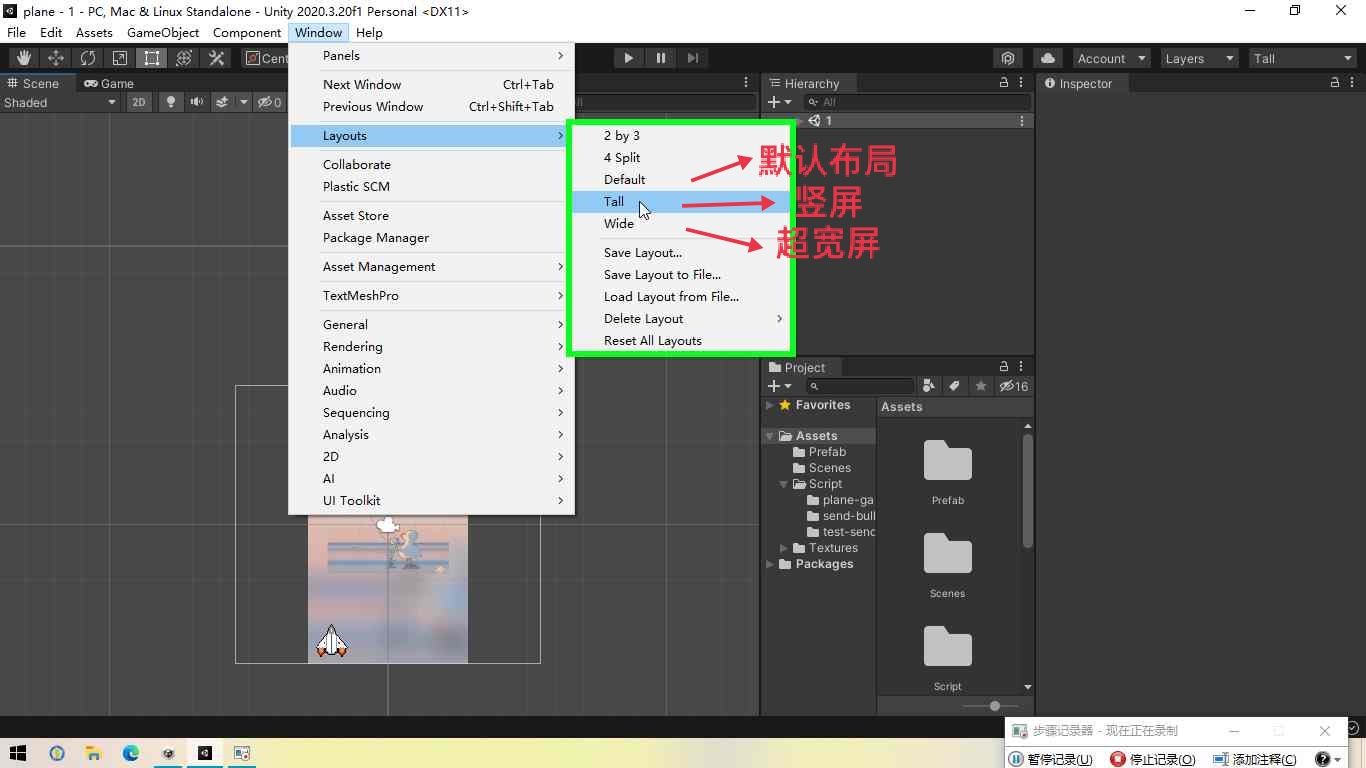
一、竖屏设置
 分辨率设为9:16
二、主控脚本
- 添加一个空节点,命名“游戏主控”
- 新建游戏的主控脚本,命名为MyGame.cs,方便管理(即,一些全局性的逻辑控制)
- 如有必要,修改主控脚本的Execution Order(优先级)
 1 using System.Collections;

 2 using System.Collections.Generic;

 3 using UnityEngine;

 4

 5 public class MyGame : MonoBehaviour

 6 {

 7     //添加全局性的设置

 8     // Start is called before the first frame update

 9     void Start()

10     {

11         Application.targetFrameRate = 60;//帧数设为60

12     }

13

14     // Update is called once per frame

15     void Update()

16     {

17

18     }

19 }
三、制作子弹
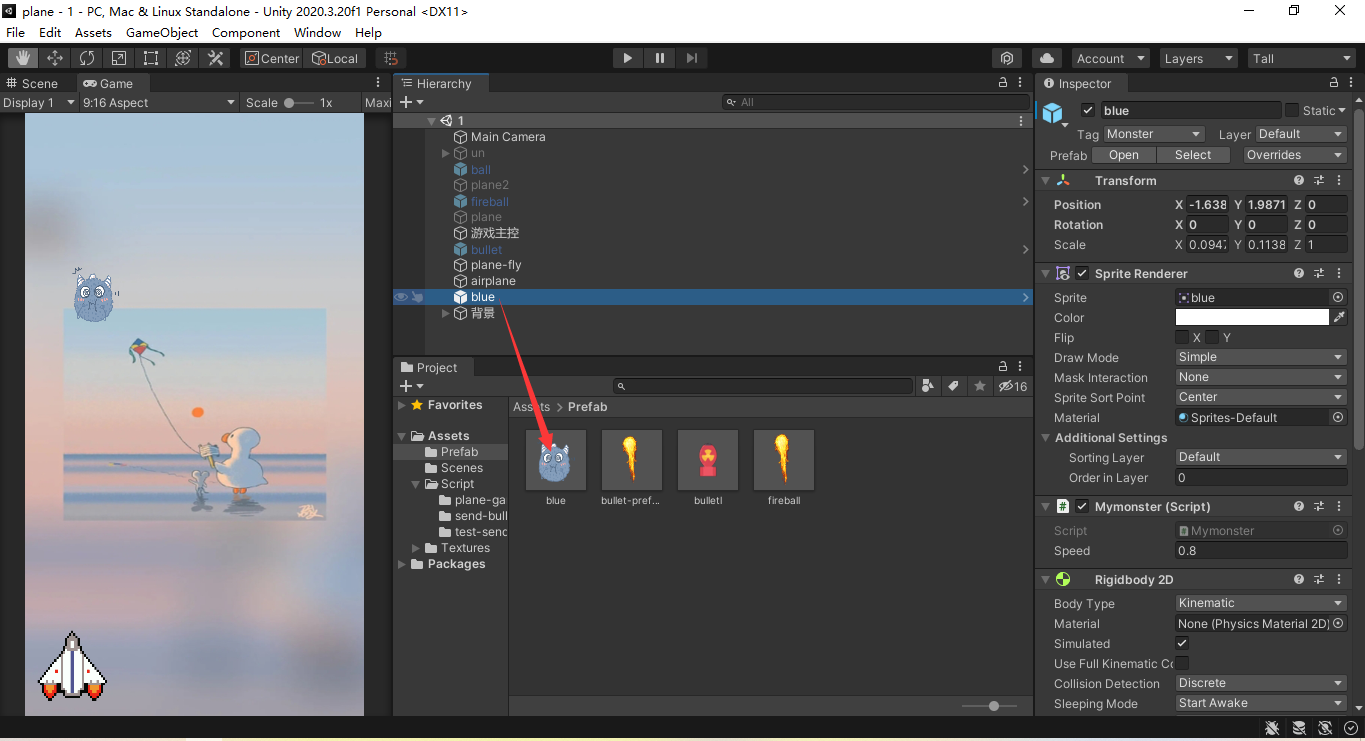
- 制作预制体

子弹运动:
 1 using System.Collections;

 2 using System.Collections.Generic;

 3 using UnityEngine;

 4

 5 public class Mybullet : MonoBehaviour

 6 {

 7     public float speed = 3.5f;

 8     // Start is called before the first frame update

 9     void Start()

10     {

11

12     }

13

14     // Update is called once per frame

15     void Update()

16     {

17         float dy = speed * Time.deltaTime;

18         transform.Translate(0, dy, 0, Space.Self);

19         Vector3 sp = Camera.main.WorldToScreenPoint(transform.position);

20         if (sp.y > Screen.height)

21         {

22             Destroy(this.gameObject);

23         }

24     }
四、制作飞机
- 控制飞机左右移动
- 添加预制体资源:public GameObject myPrefab;
- 断开预制体:unpack Prefab
 1 using System.Collections;

 2 using System.Collections.Generic;

 3 using UnityEngine;

 4

 5 public class Myplane : MonoBehaviour

 6 {

 7     public GameObject MyPrefab;

 8     private float interval=0.4f;//间隔时间

 9     private float count = 0;

10

11     // Start is called before the first frame update

12     void Start()

13     {

14         Application.targetFrameRate = 60;

15     }

16

17     // Update is called once per frame

18     void Update()

19     {

20         count += Time.deltaTime;

21         if (count >= interval)

22         {

23             count = 0;

24             Fire();

25         }

26         //键盘控制飞机的左右移动

27         float step = 2.5f * Time.deltaTime;

28         if (Input.GetKey(KeyCode.LeftArrow))

29         {

30             transform.Translate(-step, 0, 0);

31         }

32         if (Input.GetKey(KeyCode.RightArrow))

33         {

34             transform.Translate(step, 0, 0);

35         }

36     }

37     void Fire()

38     {

39         GameObject bullet = Instantiate(MyPrefab);

40         bullet.transform.position = transform.position + new Vector3(0, 1f, 0);

41     }

42 }
五、制作怪物
- 添加到游戏主控MonsterCtrl.cs
- 不断生成
- 随机头像
- 大小优化
- 随机位置
 1 using System.Collections;

 2 using System.Collections.Generic;

 3 using UnityEngine;

 4

 5 public class Mymonster : MonoBehaviour

 6 {

 7     public float speed = 1.0f;

 8     // Start is called before the first frame update

 9     void Start()

10     {

11

12     }

13

14     // Update is called once per frame

15     void Update()

16     {

17         float dy = speed * Time.deltaTime;

18         transform.Translate(0, -dy, 0,Space.Self);

19         Vector3 sp = Camera.main.WorldToScreenPoint(transform.position);

20         if (sp.y <0)

21         {

22             Destroy(this.gameObject);

23         }

24     }

25 }
 1 using System.Collections;

 2 using System.Collections.Generic;

 3 using UnityEngine;

 4

 5 public class MonsterCtrl : MonoBehaviour

 6 {

 7     public GameObject monsterPerfab;

 8

 9     public Sprite[] images;

10

11     // Start is called before the first frame update

12     void Start()

13     {

14         InvokeRepeating("CreatMonster", 0.1f, 2f);

15     }

16

17     // Update is called once per frame

18     void Update()

19     {

20

21     }

22

23    void CreatMonster()

24     {

25         float x = Random.Range(-2, 2);

26         float y = 5;

27         GameObject monster = Instantiate(monsterPerfab);

28         monster.transform.position = new Vector3(x, y, 0);

29

30

31         //随机怪物

32         int index = Random.Range(0, images.Length);

33

34         SpriteRenderer renderer = monster.GetComponent<SpriteRenderer>();

35         renderer.sprite = this.images[index];

36

37         //怪物大小设为100px(像素)

38         Sprite sprite = this.images[index];

39         float imgWidth = sprite.rect.width;     // 图像的实际宽度

40         float scale = 100/imgWidth;            //缩放比例

41         monster.transform.localScale = new Vector3(scale, scale, scale);

42     }

43 }
六、击中目标
- “子弹”与“怪物”之间的碰撞处理:
- 添加Rigidbody 2D及Collider 2D
- 添加Tag:player,Bullet,Monster(用于身份识别)
- 修改MyBullet.cs,添加碰撞处理
 1 using System.Collections;

 2 using System.Collections.Generic;

 3 using UnityEngine;

 4

 5 public class Mybullet : MonoBehaviour

 6 {

 7     public float speed = 3.5f;

 8     // Start is called before the first frame update

 9     void Start()

10     {

11

12     }

13

14     // Update is called once per frame

15     void Update()

16     {

17         float dy = speed * Time.deltaTime;

18         transform.Translate(0, dy, 0, Space.Self);

19         Vector3 sp = Camera.main.WorldToScreenPoint(transform.position);

20         if (sp.y > Screen.height)

21         {

22             Destroy(this.gameObject);

23         }

24     }

25     private void OnTriggerEnter2D(Collider2D collision)

26     {

27         if (collision.tag.Equals("Monster"))

28         {

29             Destroy(collision.gameObject);

30             Destroy(this.gameObject);

31         }

32     }

33 }
七、游戏背景
- 添加到游戏主控background.cs
- Order in Layor:-10
- 俩图片无缝连接:Deplicate(复制)
 1 using System.Collections;

 2 using System.Collections.Generic;

 3 using UnityEngine;

 4

 5 public class background : MonoBehaviour

 6 {

 7

 8     Transform bg1;

 9     Transform bg2;

10

11     public float speed = 1.0f;//向下运动速度

12     // Start is called before the first frame update

13     void Start()

14     {

15         //找出变化路径

16         bg1 = GameObject.Find("/背景/bg1").transform;

17         bg2 = GameObject.Find("/背景/bg2").transform;

18

19         //手动确定背景图片的位置从而无缝连接

20         bg1.position = new Vector3(0, 0, 0);

21         bg2.position = new Vector3(0, 10, 0);

22     }

23

24     // Update is called once per frame

25     void Update()

26     {

27         float dy = speed * Time.deltaTime;

28         bg1.Translate(0, -dy, 0);

29         bg2.Translate(0, -dy, 0);

30         //图片循环显示

31         if (bg1.position.y <= -10)

32         {

33             bg1.Translate(0, 20, 0);

34

35         }

36         if (bg2.position.y <= -10)

37         {

38             bg2.Translate(0, 20, 0);

39         }

40     }

41 }
- 物理系统:Physics
由物理规律起作用的系统:刚体(RigidBody)→指物理系统中的物体(具有质量、速度、可反弹...)
Add Component→Physics 2D→Rigidbody 2D
刚体有三种类型:
Dynamic:普通刚体,有质量,有速度
Static:静态刚体,质量无穷大,无速度(适用于建筑物、地面等固定不动的物体)
Kinematic:运动学刚体,无质量(忽略物理规律的刚体,一般用于碰撞检测)
只有添加撞体(Collider)组件后,才有碰撞的计算
Add Component→Physics 2D→Box Collider 2D
- 方形:Box Collider 2D
- 圆形:Circle Collider 2D
- 不规则边缘:Edge Collider 2D
- 胶囊形状:Capsule Collider 2D
刚体的反弹:
1.在project窗口里,Create→Physics Material 2D...
- Friction:摩擦系数
- Bounciness:弹性系数,设为1(完全反弹(无能量损耗))
2.选择“皮球”的Rigidbody2D组件
- Material:选择....材质
3.运行游戏,观察反弹
Unity_飞机大战记录总结的更多相关文章
- java版飞机大战 实战项目详细步骤.md
[toc] 分析 飞机大战 首先对这个游戏分析,在屏幕上的物体都是飞行物,我们可以把建一个类,让其他飞行物继承这个类.游戏中应有英雄机(也就是自己控制的飞机).敌人.而敌人应该分为打死给分的飞机(就是 ...
- 用面向对象的编程方式实现飞机大战小游戏,java版
概述 本文将使用java语言以面向对象的编程方式一步一步实现飞机大战这个小游戏 本篇文章仅供参考,如有写的不好的地方或者各位读者哪里没看懂可以在评论区给我留言 或者邮件8274551712@qq.co ...
- Java飞机大战MVC版
PlaneWar Java飞机大战MVC版 //无聊时偷的雷霆战机素材写了一个飞机大战,本意是练习mvc,但写得还是不清晰 github下载:https://github.com/dejavudwh/ ...
- python 飞机大战 实例
飞机大战 #coding=utf-8 import pygame from pygame.locals import * import time import random class Base(ob ...
- bayaim_杀神_全民飞机大战
bayaim_杀神_全民飞机大战 ------------------------ 系统:IOS QQ:7742469490 王者:30 游戏名:神 级别:98 装备:满鸡 + 新战魂+ 歼31 + ...
- python之基础总结(飞机大战)
一.学习python有一段时间了,总体上手还是挺好的,但是有些东西还是和Java存在着一定的区别,这里主要是通过学习,然后自己去编写一个案例.从中学习到的一些东西,这里分享出来,如果存在不正确的地方还 ...
- 23飞机大战__pygame 快速入门
1. 使用 pygame 创建图形窗口 小节目标 游戏的初始化和退出 理解游戏中的坐标系 创建游戏主窗口 简单的游戏循环 可以将图片素材 绘制 到 游戏的窗口 上, 开发游戏之前需要先知道 如何建 ...
- python版飞机大战代码简易版
# -*- coding:utf-8 -*- import pygame import sys from pygame.locals import * from pygame.font import ...
- 飞机大战-面向对象-pygame
飞机大战 最近学习了python的面向对象,对面向对象的理解不是很深刻. 面向对象是数据和函数的'打包整理',将相关数据和处理数据的方法集中在一个地方,方便使用和管理. 本着学习的目的,在网上找了这个 ...
- Java实现飞机大战游戏
飞机大战详细文档 文末有源代码,以及本游戏使用的所有素材,将plane2文件复制在src文件下可以直接运行. 实现效果: 结构设计 角色设计 飞行对象类 FlyObject 战机类 我的飞机 MyPl ...
随机推荐
- HttpClientFactory的一些参考资料
依赖关系注入指南 https://docs.microsoft.com/zh-cn/dotnet/core/extensions/dependency-injection-guidelines#di ...
- 给定一个包括 n 个整数的数组 nums 和 一个目标值 target。找出 nums 中的三个整数,使得它们的和与 target 最接近。返回这三个数的和。假定每组输入只存在唯一答案
var threeSumClosest = function(nums, target) { let ans = nums[0] + nums[1] + nums[2]; const len = nu ...
- Excel——解除工作表保护
策略:删除密码保护,而非破解密码 例 该工作簿有工作表保护,因忘记密码,无法更改内容. 解决方案 1.用压缩软件打开表格. 2.向下进入目录:xl/worksheets,选择sheet1.xml,用记 ...
- C++实现双向链表的相关操作代码
#include<iostream>#include<cstdlib>using namespace std;#define OK 1#define ERROR 0#defin ...
- python 的sys.argv 和 sys.path.append() 用法和PYTHONPATH环境变量
sys.argv 我们编写一个测试用例test.py ,内容如下 imoprt sys a = sys.argv b = len(sys.argv) c = sys.argv[0] d = sys.a ...
- 时间序列 data_range()
pd.date_range( start=None,#开始时间 end=None,#截止时间 periods=None,#总长度 freq=None,#时间间隔 tz=None,#时区 normali ...
- TypeScript Number
TypeScript Number TypeScript 与 JavaScript 类似,支持 Number 对象. Number 对象是原始数值的包装对象. 语法 var num = new Num ...
- Ubuntu tmux使用教程
sudo apt-get install tmux 安装tmux tmux new -s session_name 新开一个会话 tmux a -t session_name 查看指定会话 tmux ...
- 移动端及pc端适配
1.rem搭配CSS预处理器使用 这里我就用vue+less来简单操作一下,具体可以封装到底层,这里暂且演示一下原理. 这里推荐一下使用我的自制脚手架 (songyao-cli) 来快速生成一个vue ...
- JS篇(010)-JavaScript 继承的方式和优缺点
答案:六种方式 一.原型链继承 缺点: 引用类型的属性被所有实例共享 在创建 Child 的实例时,不能向 Parent 传参 二.借用构造函数(经典继承) 优点: 避免了引用类型的属性被所有实例共享 ...
