H5 password自动记录取消
最近完成一个项目时需要取消谷歌浏览器的密码自动填充功能,为了用户方便,大多浏览器都有保存某个网站的密码并在后面再打开这个网站且需要输入密码的时候自动填充。这个功能是方便,但是我们有时候不需要使用这个功能,怎么样通过前端代码的写法来实现禁用呢,这就是本文的重要内容。
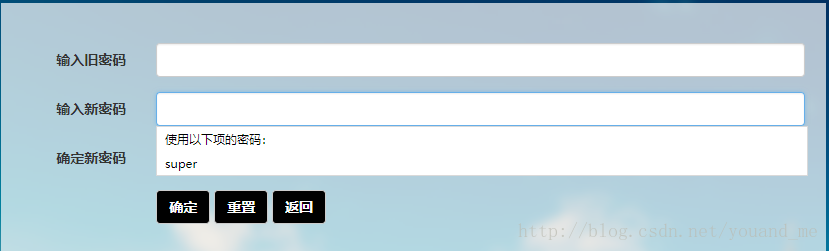
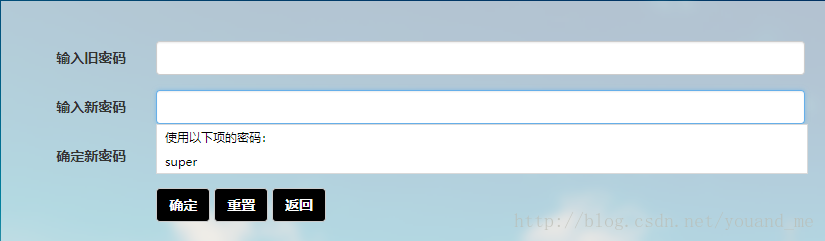
我在项目里遇到的就是这样一个情景,我打开项目网站的登录页面输入用户名密码登录成功,此时谷歌浏览器问是否保存密码,点击保存,然后在我项目里面有修改密码页面,其中包括了旧密码、新密码、重复新密码三个type为password的input标签,当我选中的时候它会有一个下拉选项把保存的密码填充进去(如下图),这显然不是我所需要的,将我用的方式记录下来,有用的话还请点个赞。
须知
登录页面可以是自动填充的,不需禁用,以下我只是用登录页面来举例,具体需要禁用的是类似修改密码页面。
- input标签
首先以下的都是在chorme浏览器上的运行结果,chorme在遇到type=’password’的时候才会有自动填充密码,一般只有单独的type=’text’的input标签是没有填充的。所以一旦我们包含type=’password’的input标签chorme就会把你在当前网站(注意不是网址,是你的整个项目)下保存的密码填充进去。
- autocomplete属性
网上大多数人都说只需要将input标签的autocomplete属性设置为off就行了,事实上呢在一些浏览器上是可以的,但是有些浏览器就不行了,比如chorme(其它浏览器没有试过),chorme老版本的浏览器。
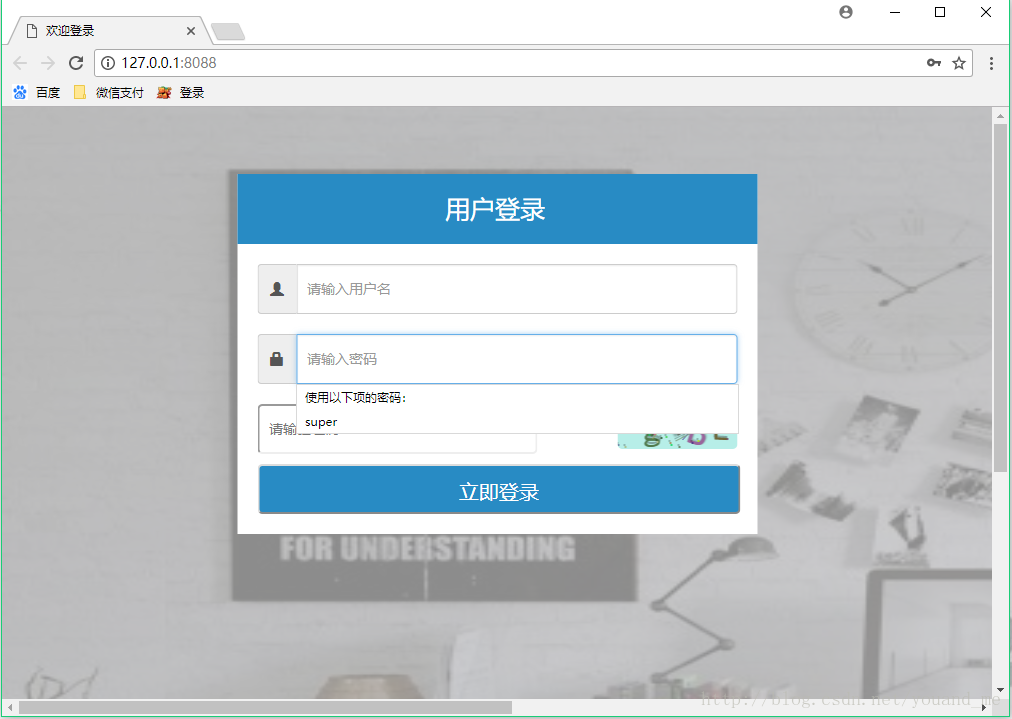
还有人说将autocomplete属性设置为new-password,这时候发现是没有自动填充了,但是点击输入时会有下拉选项选择填充密码(如下图),这不还是没取消吗。
还有说在初始化页面的时候设置type=’text’,在获取到焦点的时候再修改为type=’password’,效果和上面一样。
还有就是添加两个隐藏的input标签(要对应写name属性)来欺骗浏览器,且不说方法很低级(这里我就不贴出来了),最后效果和上面一样。
我的方法
由于自动填充密码是浏览器后面完成的,所以去修改源码不太现实,这和自己造轮子没什么区别。我们只需要让浏览器找不到填充的位置就可以了。具体方式就是先告诉浏览器我的type=passowrd的input标签是一个新创建的密码,也就是设置autocomplete=”new-password”,然后不给这个input标签设置id和name属性,这样就无法填充了,核心代码如下:
 <div class="input-group inputStyle">

    <span class="glyphicon glyphicon-lock dropdown-toggle input-group-addon" style="top: 0px"></span>

    <input class="form-control inputTextStyle" type="password" autocomplete="new-password" placeholder="请输入密码">

</div>- 1
- 2
- 3
- 4
没有id和name属性我们要获取这个标签的值的话可以使用classs属性或者通过父元素来获取:
# 通过父元素获取密码值

pwd = $('.inputStyle input[type=password]').val();- 1
- 2
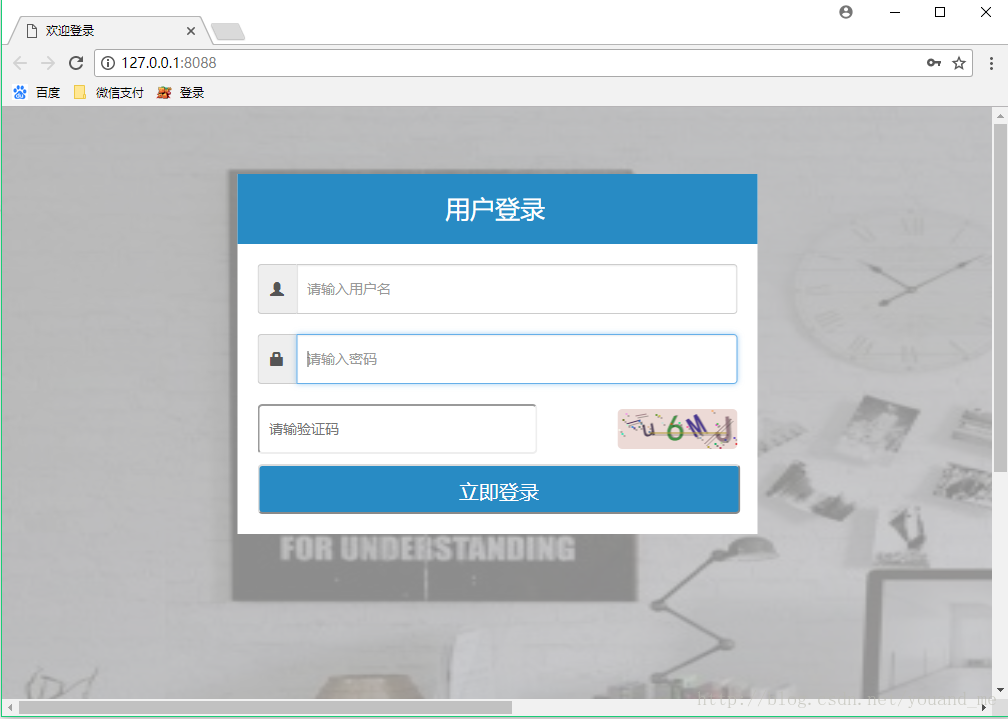
登录页面的完整代码和效果图如下:
<!DOCTYPE html>

<html lang="">

<head>

    <meta charset="utf-8">

    <meta http-equiv="X-UA-Compatible" content="IE=edge">

    <meta name="viewport" content="width=device-width, initial-scale=1">

    <title>欢迎登录</title>

    <!-- Bootstrap CSS -->

    <link href="/static/css/bootstrap.min.css" rel="stylesheet">

    <style type="text/css">

        @media (max-width: 768px) {

            body{

                margin: 0;

                padding: 0;

                background: #ddd;

            }

        }

        @media (min-width:768px) {

            body{

                margin: 0;

                padding: 0;

                background-size:1920px 949px;

                background-image: url('/static/img/桌面背景.jpg');

                width: 1920px;

                height: 949px;

            }

            #myLoginView{

                width: 665px;

                padding: 0 0px 20px 0px;

                position: absolute;

                z-index: 1;

                top: 40%;

                left: 50%;

                transform: translate(-50%, -50%);

            }

        }

        .code {

            font-family:Arial;

            font-style:italic;

            color:#ffffff;

            font-size:14px;

            border:0;

            cursor:pointer;

            width:120px;

            height:40px;

            line-height: 40px;

            text-align:center;

            vertical-align:center;

            display: inline-block;

            border-radius: 5px;

        }

        a {

            text-decoration:none;

            font-size:12px;

            color:#288bc4;

        }

        a:hover {

           text-decoration:underline;

        }

        .topTitle{

            position: relative;

            background: #288bc4;

            height: 70px;

            line-height: 70px;

            width: 100%;

            color: #ffffff;

            font-size: 25px;

        /*  text-align: center;*/

        }

        .inputStyle{

            margin-top: 10px;

            border-radius: 6px;

            margin: 20px 20px 0 20px;

        }

        .inputTextStyle

        {

            width: 400px;

            font-size: 14px;

            height: 50px;

            padding-left: 10px;

        }

        .inputCodeStyle{

            width: 280px;

            font-size: 14px;

            height: 50px;

            border-radius: 5px;

            padding-left: 10px;

        }

        .loginBtn{

            position: relative;

            color: #ffffff;

            background: #288bc4;;

            height: 50px;

            line-height: 50px;

            text-align: center;

            width: 93%;

            border-radius: 5px;

            font-size: 20px;

            margin: 10px 20px 0 20px;

        }

        input{

            outline:none;

        }

        .background{

           width: 100%;

           height: 100%;

           background: rgba(200,200,200,0.7);

      /*     background-image: url('/static/img/桌面背景.jpg') no-repeat;*/

           background-size:100% 100%;

        }

    </style>

    </head>

    <body>

        <div class="bg bg-blur"></div>

        <div class="background">

            <div class="col-md-4,col-sm-4,col-lg-4  center-block " id="myLoginView">

                <div style="background: #ffffff;width: 520px;padding-bottom: 20px;margin:40px 72.5px 0 72.5px;">

                    <div class="topTitle">

                        <div  style="display: inline-block;align-self: center;margin-left: 40%;">用户登录</div>

                    </div>

                    <div class="input-group inputStyle"><span class="glyphicon glyphicon-user dropdown-toggle input-group-addon" style="top: 0px"></span>

                        <input id="userId" class="inputTextStyle form-control" type="text" name="userId" placeholder="请输入用户名">

                    </div>

                    <div class="input-group inputStyle">

                        <span class="glyphicon glyphicon-lock dropdown-toggle input-group-addon" style="top: 0px"></span>

                        <input class="form-control inputTextStyle" type="password" autocomplete="new-password" placeholder="请输入密码">

                    </div>

                    <div class="input-group" style="display: flex;justify-content: space-between; align-items: center; margin: 20px 20px 0 20px;">

                        <input class="inputCodeStyle" type="text" name="controlId" placeholder="请输验证码" type="text" id="inputCode">

                        <div class="code" id="checkCode" onclick="createCode();">

                            <canvas id="verifyCanvas" width="120" height="40" style="cursor: pointer;border-radius: 5px;">您的浏览器版本不支持canvas</canvas>

                        </div>

                    </div>

                    <input class="loginBtn" id="Button1" onclick="validateCode();" type="button" value="立即登录"/>

                </div>

            </div>

        </div>

        <!-- jQuery -->

        <script src="/static/js/jquery-3.2.1.min.js"></script>

        <script>

            $.ajaxSetup({

                data: {csrfmiddlewaretoken: '{{ csrf_token }}' },

            });

        </script>

        <!-- jQuery -->

        <script src="/static/js/gVerify.js"></script>

        <!-- Bootstrap JavaScript -->

        <script src="/static/js/bootstrap.min.js"></script>

        <!-- code.js -->

        <script src="/static/js/loginCheck.js"></script>

    </body>

</html>- 1
- 2
- 3
- 4
- 5
- 6
- 7
- 8
- 9
- 10
- 11
- 12
- 13
- 14
- 15
- 16
- 17
- 18
- 19
- 20
- 21
- 22
- 23
- 24
- 25
- 26
- 27
- 28
- 29
- 30
- 31
- 32
- 33
- 34
- 35
- 36
- 37
- 38
- 39
- 40
- 41
- 42
- 43
- 44
- 45
- 46
- 47
- 48
- 49
- 50
- 51
- 52
- 53
- 54
- 55
- 56
- 57
- 58
- 59
- 60
- 61
- 62
- 63
- 64
- 65
- 66
- 67
- 68
- 69
- 70
- 71
- 72
- 73
- 74
- 75
- 76
- 77
- 78
- 79
- 80
- 81
- 82
- 83
- 84
- 85
- 86
- 87
- 88
- 89
- 90
- 91
- 92
- 93
- 94
- 95
- 96
- 97
- 98
- 99
- 100
- 101
- 102
- 103
- 104
- 105
- 106
- 107
- 108
- 109
- 110
- 111
- 112
- 113
- 114
- 115
- 116
- 117
- 118
- 119
- 120
- 121
- 122
- 123
- 124
- 125
- 126
- 127
- 128
- 129
- 130
- 131
- 132
- 133
- 134
- 135
- 136
- 137
- 138
- 139
- 140
- 141
- 142
- 143
- 144
- 145
- 146
- 147
- 148
- 149
- 150
- 151
- 152
- 153
- 154
注意,上诉代码你拿去运行是不会自动填充的,你得在你的项目中登录并在浏览器弹出保存用户密码的时候保存密码再打开你的登录页面才会自动填充。其次当你的页面中只包含type=password的input标签的时候上诉方法就有问题了,比如在修改密码页面,首先我们不需要它自动填充密码,而且修改密码页面一般只有旧密码、新密码、重复新密码三个需要type=password的input标签,这时候没有type=text的input标签,此时用上面的方法就有问题了,解决办法是加一个隐藏type=text的input标签,不加的效果如下:
下面是修改页面的body部分代码:
<div class="col-lg-10 col-lg-offset-1 col-md-offset-1 centerDiv col-md-10 col-sm-12  col-xs-12">

    <div class="form-horizontal">

        <div class="form-group">

            <label class="col-sm-2 control-label">输入旧密码</label>

            <div class="col-sm-10" id="oldPwd">

                <!-- 这里添加了一个隐藏的type=text的input标签 -->

                <input type="text" style="display: none;">

                <input type="password" class="form-control"  placeholder=""  autocomplete="new-password">

            </div>

        </div>

        <div class="form-group">

            <label class="col-sm-2 control-label">输入新密码</label>

            <div class="col-sm-10" id="pwd">

                <input type="password" class="form-control"  placeholder="" autocomplete="new-password">

            </div>

        </div>

        <div class="form-group">

          <label class="col-sm-2 control-label">确定新密码</label>

          <div class="col-sm-10" id="pwdMore">

              <input placeholder="" class="form-control" type="password" autocomplete="new-password">

          </div>

        </div>

        <div class="form-group">

          <div class="col-sm-offset-2 col-sm-10">

            <button type="button" class="btn btn-default btnStyle" id="eidtPwd">确定</button>

            <button type="button" class="btn btn-default btnStyle" id="reset">重置</button>

             <button type="button" class="btn btn-default btnStyle" id="goback">返回</button>

          </div>

        </div>

  </div>

</div>- 1
- 2
- 3
- 4
- 5
- 6
- 7
- 8
- 9
- 10
- 11
- 12
- 13
- 14
- 15
- 16
- 17
- 18
- 19
- 20
- 21
- 22
- 23
- 24
- 25
- 26
- 27
- 28
- 29
- 30
- 31
不加的效果就是前面第一张图片。
H5 password自动记录取消的更多相关文章
- 恢复PasswordChar 默认值、取消密码框设置
//三种都是清空 this.textBox1.PasswordChar = new char(); this.textBox1.PasswordChar = '\0'; this.textBox1.P ...
- CI 学习笔记、记录
[ci框架]ci框架目录结构分析 分类: [CodeIgniter深入研究]2013-05-09 00:24 7420人阅读 评论(5) 收藏 举报 [php] view plaincopy mysh ...
- 部署rfc5766-turn-server--谷歌推荐的开源穿透服务器 [复制链接]
谷歌推荐的开源穿透服务器,包含trun和stun服务,主页:https://code.google.com/p/rfc5766-turn-server/(个人觉得可以利用这个来进一步搭建VPN,有兴趣 ...
- 马士兵SVN.
下载 服务端:VisualSVN Server 和客户端:TortoiseSVN cmd,并cd 到 VisualSVN Server安装目录下的bin目录. 新建库: svnadmin create ...
- user密码
一.修改密码 alter user hr identified by hr; password/passw hr: SYS@test>password hr Changing password ...
- Oracle User Management FAQ翻译及学习笔记
转载 最近了解到AME 的东西,很迫切,先转载一篇 [@more@] Oracle User Management FAQ翻译及学习笔记 写在前面 本文主要是翻译的英文版的Oracle User Ma ...
- 模型转换[yolov3模型在keras与darknet之间转换]
首先借助qqwweee/keras-yolo3中的convert.py和tensorrt例子yolov3_onnx,并重新编写了代码,实现将darknet格式的yolov3的yolov3.cfg和yo ...
- Vue 给axios做个靠谱的封装(报错,鉴权,跳转,拦截,提示)
需求及实现 统一捕获接口报错 弹窗提示 报错重定向 基础鉴权 表单序列化 用法及封装 用法 // 服务层 , import默认会找该目录下index.js的文件,这个可能有小伙伴不知道可以去了解npm ...
- linux mount
挂载 mount //10.65.200.168/linux_bj /home/linux_bj -t cifs -o username=niu,password=ruanxiaopang ...
随机推荐
- Blog
http://www.cnblogs.com/digdeep/archive/2015/11/16/4968453.htmlhttp://it.dataguru.cn/article-8406-1.h ...
- httpclient 发送文件和字符串信息
HttpPost httpPost = new HttpPost(url); MultipartEntity reqEntity = new MultipartEntit ...
- HTML5 3D爱心动画及其制作过程
之前有看到过很多基于HTML5或者CSS3制作的爱心动画,不过基本上都是2D平面的,今天在国外的网站上看到一个基于HTML5 3D的爱心动画,对于HTML5爱好者来说,不免兴奋了一把.下面将分享一下这 ...
- SSL 证书服务推荐
最近要用到ssl.故做了一些搜索 1.Let's Encrypt:免费,快捷,支持多域名(不是通配符),三条命令即时签署+导出证书.缺点是暂时只有三个月有效期,到期需续签. 2.StartSSL免费D ...
- hive 1.2 配置
参考链接 http://www.cnblogs.com/yjmyzz/p/how-to-install-hive-1-2-0-on-mac.html
- JavaScript 使用穷举方式实现内容简繁转换
场景: 在Web开发中,有时存在对内容进行简体和繁体互相转换的需求,这时我们可以参考以下做法. <!DOCTYPE HTML PUBLIC "-//W3C//DTD HTML 4.01 ...
- 【ML】人脸识别
https://github.com/colipso/face_recognition https://medium.com/@ageitgey/machine-learning-is-fun-par ...
- ABBYY FineReader Pro for Mac系统要求
ABBYY FineReader Pro for Mac作为先进的OCR图文识别软件,为各种各样的任务提供全面的解决方案,可轻松将纸质文档.PDF文件和数字文本照片转换为可编辑和可搜索的文件,替代了手 ...
- VC++6.0远程调试(亲试成功)
0 前言 VS2008及以上远程调试上篇已经讲过,这里再讲下VC++6.0开发环境下的远程调试能力,仅需下面4步即可,更方便的就接着后面的5-6步. 因为目标程序需要在有采集卡等相关硬件支持下的工控机 ...
- 微信公众号支付-Common
using System.Web; /// <summary> /// 公共帮助类 /// </summary> public class Common { private H ...