前端框架之Vue(9)-组件基础&vue-cli
组件基础
基本示例
这里有一个 Vue 组件的示例:
<!DOCTYPE html>

<html lang="en">

<head>

    <meta charset="UTF-8">

    <title></title>

    <script src="https://cdn.jsdelivr.net/npm/vue/dist/vue.js"></script>

</head>

<body>

    <div id="components-demo">

        <button-counter></button-counter>

    </div>

    <script>

    // 定义一个名为 button-counter 的新组件

    Vue.component('button-counter', {

        data: function() {

            return {

                count: 0

            }

        },

        template: '<button v-on:click="count++">You clicked me {{ count }} times.</button>'

    })

    new Vue({ el: '#components-demo' })

    </script>

</body>

</html>
组件是可复用的 Vue 实例,且带有一个名字:在这个例子中是在一个通过 new Vue 创建的 Vue 根实例中,把这个组件作为自定义元素来使用。
因为组件是可复用的 Vue 实例,所以它们与 new Vue 接收相同的选项,例如 data 、 computed 、 watch 、 methods 以及生命周期钩子等。仅有的例外是像 el 这样根实例特有的选项。
data必须是一个函数
当我们定义这个 <button-counter> 组件时,你可能会发现它的 data 并不是像这样直接提供一个对象:
data: {

  count: 0

}
取而代之的是,一个组件的 data 选项必须是一个函数,因此每个实例可以维护一份被返回对象的独立的拷贝:
data: function () {

  return {

    count: 0

  }

}
组件的组织
通常一个应用会以一棵嵌套的组件树的形式来组织:
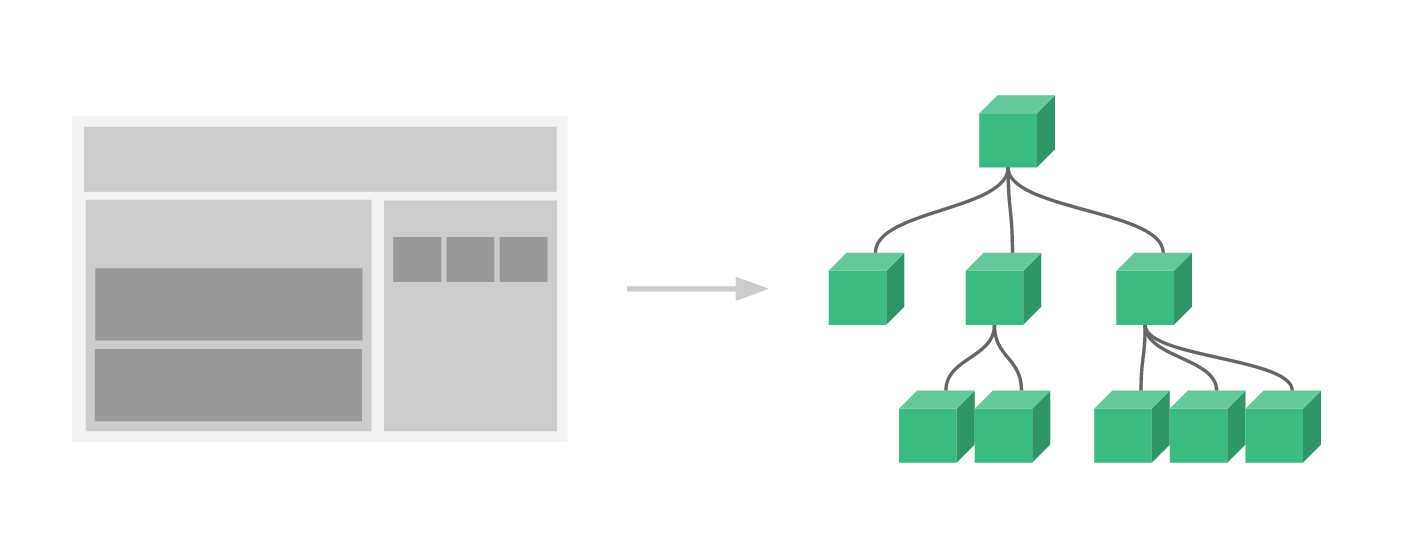
例如,你可能会有页头、侧边栏、内容区等组件,每个组件又包含了其它的像导航链接、博文之类的组件。
为了能在模板中使用,这些组件必须先注册以便 Vue 能够识别。这里有两种组件的注册类型:全局注册和局部注册。至此,我们的组件都只是通过 Vue.component 全局注册的。
Vue.component('my-component-name', {

  // ... options ...

})
全局注册的组件可以用在其被注册之后的任何 (通过 new Vue ) 新创建的 Vue 根实例,也包括其组件树中的所有子组件的模板中。
通过Prop向子组件传递数据
Prop 是你可以在组件上注册的一些自定义特性。当一个值传递给一个 prop 特性的时候,它就变成了那个组件实例的一个属性。为了给下面组件传递一个标题,我们可以用一个 props 选项将其包含在该组件可接受的 prop 列表中:
Vue.component('blog-post', {

  props: ['title'],

  template: '<h3>{{ title }}</h3>'

})
一个组件默认可以拥有任意数量的 prop ,任何值都可以传递给任何 prop 。在上述模板中,你会发现我们能够在组件实例中访问这个值,就像访问 data 中的值一样。
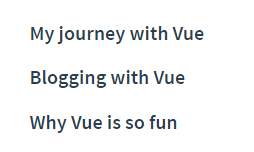
一个 prop 被注册之后,你就可以像这样把数据作为一个自定义特性传递进来:
<blog-post title="My journey with Vue"></blog-post>

<blog-post title="Blogging with Vue"></blog-post>

<blog-post title="Why Vue is so fun"></blog-post>
效果:
然而在一个典型的应用中,你可能在 data 里有一个博文的数组:
Vue.component('blog-post', {

    props: ['id','title'],

    template: '<h3>{{ id }}:{{ title }}</h3>'

})

new Vue({

    el: '#blog-post-demo',

    data: {

        posts: [

            { id: 1, title: 'My journey with Vue' },

            { id: 2, title: 'Blogging with Vue' },

            { id: 3, title: 'Why Vue is so fun' }

        ]

    }

})
并想要为每篇博文渲染一个组件:
<blog-post v-for="post in posts" v-bind:id="post.id" v-bind:title="post.title"></blog-post>
如上所示,你会发现我们可以使用 v-bind 来动态传递 prop 。这在你一开始不清楚要渲染的具体内容,比如从一个 API 获取博文列表的时候,是非常有用的。
单个根元素
当构建一个 <blog-post> 组件时,你的模板最终会包含的东西远不止一个标题,最最起码,会包含这篇博文的正文:
<h3>{{ title }}</h3>

<div v-html="content"></div>
然而如果你在模板中尝试这样写,Vue 会显示一个错误,并解释道 every component must have a single root element (每个组件必须只有一个根元素) 。你可以将模板的内容包裹在一个父元素内,来修复这个问题,例如:
<div class="blog-post">

  <h3>{{ title }}</h3>

  <div v-html="content"></div>

</div>
看起来当组件变得越来越复杂的时候,我们的博文不只需要标题和内容,还需要发布日期、评论等等。为每个相关的信息定义一个 prop 会变得很麻烦:
<blog-post

  v-for="post in posts"

  v-bind:key="post.id"

  v-bind:title="post.title"

  v-bind:content="post.content"

  v-bind:publishedAt="post.publishedAt"

  v-bind:comments="post.comments"

></blog-post>
所以是时候重构一下这个组件了,让它变成接受一个单独的 post prop :
<blog-post

  v-for="post in posts"

  v-bind:key="post.id"

  v-bind:post="post"

></blog-post>
Vue.component('blog-post', {

  props: ['post'],

  template: `

    <div class="blog-post">

      <h3>{{ post.title }}</h3>

      <div v-html="post.content"></div>

    </div>

  `

})
通过事件向父级组件发送消息
在我们开发 <blog-post> 组件时,它的一些功能可能要求我们和父级组件进行沟通。例如我们可能会引入一个可访问性的功能来放大博文的字号,同时让页面的其它部分保持默认的字号。
在其父组件中,我们可以通过添加一个 postFontSize 数据属性来支持这个功能,它可以在模板中用来控制所有博文的字号:
<div id="blog-posts-events-demo">

  <div :style="{ fontSize: postFontSize + 'em' }">

    <blog-post

      v-for="post in posts"

      v-bind:key="post.id"

      v-bind:post="post"

    ></blog-post>

  </div>

</div>
现在我们在每篇博文正文之前添加一个按钮来放大字号:
Vue.component('blog-post', {

    props: ['post'],

    template: `

             <div class="blog-post">

                <h3>{{ post.title }}</h3>

                <button @click="$emit('enlarge-text')">

                    Enlarge text

                </button>

                <div v-html="post.content"></div>

            </div>

            `

});

new Vue({

    el: '#blog-posts-events-demo',

    data: {

        posts: [

            { id: 1, title: 'My journey with Vue' },

            { id: 2, title: 'Blogging with Vue' },

            { id: 3, title: 'Why Vue is so fun' }

        ],

        postFontSize: 1

    }

});
当点击这个按钮时,我们需要告诉父级组件放大所有博文的文本。幸好 Vue 实例提供了一个自定义事件的系统来解决这个问题。我们可以调用内建的 $emit 方法并传入事件的名字,来向父级组件触发一个事件:
<button v-on:click="$emit('enlarge-text')">

  Enlarge text

</button>
然后我们可以用 v-on 在博文组件上监听这个事件,就像监听一个原生 DOM 事件一样:
<blog-post

  ...

  v-on:enlarge-text="postFontSize += 0.1"

></blog-post>
使用事件抛出一个值
有的时候用一个事件来抛出一个特定的值是非常有用的。例如我们可能想让 <blog-post> 组件决定它的文本要放大多少。这时可以使用 $emit 的第二个参数来提供这个值:
<button v-on:click="$emit('enlarge-text', 0.1)">

  Enlarge text

</button>
然后当在父级组件监听这个事件的时候,我们可以通过 $event 访问到被抛出的这个值:
<blog-post

  ...

  v-on:enlarge-text="postFontSize += $event"

></blog-post>
或者,如果这个事件处理函数是一个方法:
<blog-post

  ...

  v-on:enlarge-text="onEnlargeText"

></blog-post>
那么这个值将会作为第一个参数传入这个方法:
methods: {

  onEnlargeText: function (enlargeAmount) {

    this.postFontSize += enlargeAmount

  }

}
在组件上使用v-model
自定义事件也可以用于创建支持 v-model 的自定义输入组件。记住:
<input v-model="searchText">
等价于:
<input

  v-bind:value="searchText"

  v-on:input="searchText = $event.target.value"

>
当用在组件上时, v-model 则会这样:
<custom-input

  v-bind:value="searchText"

  v-on:input="searchText = $event"

></custom-input>- 为了让它正常工作,这个组件内的 <input> 必须:
- 将其 value 特性绑定到一个名叫 value 的 prop 上
- 在其 input 事件被触发时,将新的值通过自定义的 input 事件抛出
写成代码之后是这样的:
Vue.component('custom-input', {

  props: ['value'],

  template: `

    <input

      v-bind:value="value"

      v-on:input="$emit('input', $event.target.value)"

    >

  `

})
现在 v-model 就应该可以在这个组件上完美地工作起来了:
<!DOCTYPE html>

<html lang="en">

<head>

    <meta charset="UTF-8">

    <title></title>

    <script src="https://cdn.jsdelivr.net/npm/vue/dist/vue.js"></script>

</head>

<body>

    <div id='demo'>

        <custom-input v-bind:value="searchText" v-on:input="searchText = $event"></custom-input>

        <custom-input v-model='searchText'></custom-input>

        {{searchText}}

    </div>

    <script>

    Vue.component('custom-input', {

        props: ['value'],

        template: `

                    <input

                      v-bind:value="value"

                      v-on:input="$emit('input', $event.target.value)"

                    >

                  `

    });

    var vm = new Vue({

        el: "#demo",

        data: {

            searchText: ''

        }

    })

    </script>

</body>

</html>
例:
通过插槽分发内容
和 HTML 元素一样,我们经常需要向一个组件传递内容,像这样:
<alert-box>

  Something bad happened.

</alert-box>
可能会渲染出这样的东西:

幸好,Vue 自定义的 元素让这变得非常简单:
Vue.component('alert-box', {

  template: `

    <div class="demo-alert-box">

      <strong>Error!</strong>

      <slot></slot>

    </div>

  `

})
如你所见,我们只要在需要的地方加入插槽就行了——就这么简单!
<!DOCTYPE html>

<html lang="en">

<head>

    <meta charset="UTF-8">

    <title></title>

    <script src="https://cdn.jsdelivr.net/npm/vue/dist/vue.js"></script>

</head>

<body>

    <div id="components-demo">

        <alert-box>通过插件传入</alert-box>

    </div>

    <script>

    Vue.component('alert-box', {

        template: `

                <div class="demo-alert-box">

                    <strong>组件自己内容</strong>

                    <h3><slot></slot></h3>

                </div>

                `

    })

    new Vue({ el: '#components-demo' })

    </script>

</body>

</html>
例:
动态组件
有的时候,在不同组件之间进行动态切换是非常有用的,比如在一个多标签的界面里:
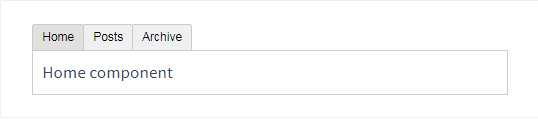
上述内容可以通过 Vue 的元素加一个特殊的 is 特性来实现:
<!-- 组件会在 `currentTabComponent` 改变时改变 -->

<component v-bind:is="currentTabComponent"></component>
在上述示例中, currentTabComponent 可以包括已注册组件的名字:
<!DOCTYPE html>

<html lang="en">

<head>

    <meta charset="UTF-8">

    <title></title>

    <script src="https://unpkg.com/vue"></script>

    <style>

    .tab-button {

        padding: 6px 10px;

        border-top-left-radius: 3px;

        border-top-right-radius: 3px;

        border: 1px solid #ccc;

        cursor: pointer;

        background: #f0f0f0;

        margin-bottom: -1px;

        margin-right: -1px;

    }

    .tab-button:hover {

        background: #e0e0e0;

    }

    .tab-button.active {

        background: #e0e0e0;

    }

    .tab {

        border: 1px solid #ccc;

        padding: 10px;

    }

    </style>

</head>

<body>

    <div id="dynamic-component-demo" class="demo">

        <button v-for="tab in tabs" v-bind:key="tab" v-bind:class="['tab-button', { active: currentTab === tab }]" v-on:click="currentTab = tab">{{ tab }}</button>

        <component v-bind:is="currentTabComponent" class="tab"></component>

    </div>

    <script>

    Vue.component('tab-home', {

        template: '<div>Home component</div>'

    })

    Vue.component('tab-posts', {

        template: '<div>Posts component</div>'

    })

    Vue.component('tab-archive', {

        template: '<div>Archive component</div>'

    })

    new Vue({

        el: '#dynamic-component-demo',

        data: {

            currentTab: 'Home',

            tabs: ['Home', 'Posts', 'Archive']

        },

        computed: {

            currentTabComponent: function() {

                return 'tab-' + this.currentTab.toLowerCase()

            }

        }

    })

    </script>

</body>

</html>
例:
或一个组件的选项对象:
<!DOCTYPE html>

<html lang="en">

<head>

    <meta charset="UTF-8">

    <title></title>

    <script src="https://unpkg.com/vue"></script>

    <style>

    .tab-button {

        padding: 6px 10px;

        border-top-left-radius: 3px;

        border-top-right-radius: 3px;

        border: 1px solid #ccc;

        cursor: pointer;

        background: #f0f0f0;

        margin-bottom: -1px;

        margin-right: -1px;

    }

    .tab-button:hover {

        background: #e0e0e0;

    }

    .tab-button.active {

        background: #e0e0e0;

    }

    .tab {

        border: 1px solid #ccc;

        padding: 10px;

    }

    </style>

</head>

<body>

    <script src="https://unpkg.com/vue"></script>

    <div id="dynamic-component-demo" class="demo">

        <button v-for="tab in tabs" v-bind:key="tab.name" v-bind:class="['tab-button', { active: currentTab.name === tab.name }]" v-on:click="currentTab = tab">{{ tab.name }}</button>

        <component v-bind:is="currentTab.component" class="tab"></component>

    </div>

    <script>

    var tabs = [{

            name: 'Home',

            component: {

                template: '<div>Home component</div>'

            }

        },

        {

            name: 'Posts',

            component: {

                template: '<div>Posts component</div>'

            }

        },

        {

            name: 'Archive',

            component: {

                template: '<div>Archive component</div>',

            }

        }

    ]

    new Vue({

        el: '#dynamic-component-demo',

        data: {

            tabs: tabs,

            currentTab: tabs[0]

        }

    })

    </script>

</body>

</html>
例:
通过vue-cli使用组件
准备
安装
npm install vue-cli -g
初始化项目目录
vue init webpack-simple [项目目录名]
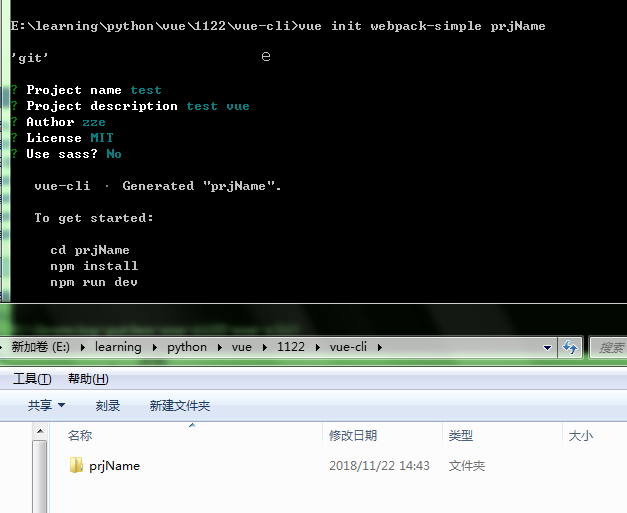
按提示依次执行
cd prjName

npm install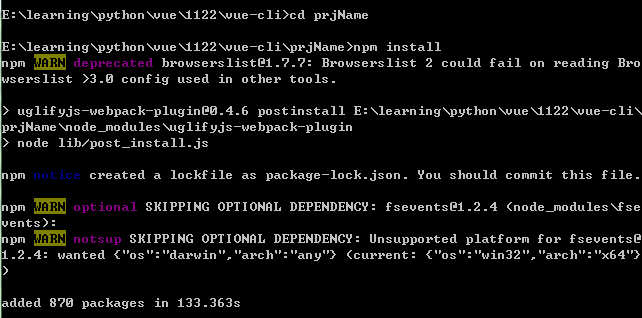
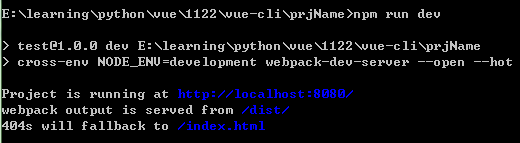
运行
npm run dev
使用
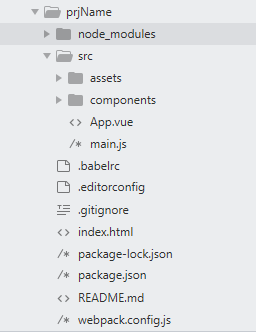
目录结构
完成上述准备后会生成如下目录结构:
新建组件
在 components 目录下新建如下组件:
 <template>

     <div>

         <h3>{{msg}}</h3>

     </div>

 </template>

 <script>

     export default{

         name:'header',

         data(){

             return {

                 msg:'这是头部分'

             }

         }

     }

 </script>

 <style scoped>

     h3{

         background-color: blue;

     }

 </style>
/src/components/VHeader.vue
 <template>

     <div>

         <h3>{{msg}}</h3>

     </div>

 </template>

 <script>

     export default{

         name:'content',

         data(){

             return {

                 msg:'这是内容部分'

             }

         }

     }

 </script>

 <!-- scoped可使当前样式块只对当前组件生效 -->

 <style scoped>

     h3{

         background-color: red;

     }

 </style>
/src/components/VContent.vue
 <template>

     <div>

         <h3>{{msg}}</h3>

     </div>

 </template>

 <script>

     export default{

         name:'header',

         data(){

             return {

                 msg:'这是尾部分'

             }

         }

     }

 </script>

 <style scoped>

     h3{

         background-color: yellow;

     }

 </style>
/src/components/VFooter.vue
 <template>

     <div>

         <h2>{{msg}}</h2>

         <VHeader></VHeader>

         <VContent></VContent>

         <VFooter></VFooter>

     </div>

 </template>

 <script>

     // 引入子组件

     import VHeader from './VHeader.vue'

     import VContent from './VContent.vue'

     import VFooter from './VFooter.vue'

     export default{

         name:'page',

         data(){

             return {

                  msg:'page组件'

             }

         },

         // 挂载子组件

         components:{

             VHeader,

             VContent,

             VFooter

         }

     }

 </script>

 <style></style>
/src/components/VPage.vue
在上述文件中的 style 块中有一个 scoped 属性(例如在 VContent.vue 的 17 行),这个属性的作用是让当前样式块只对当前组件生效。
配置组件
 import Vue from 'vue'

 import VPage from './components/VPage.vue'

 var page_vm = new Vue({

   el: "#page", //对应 /index.html 中div元素的id

   render: h => h(VPage) // 将指定组件(这里是VPage)渲染到上面el属性对应位置

 })

 console.info(page_vm.$children[0]); //VueComponent {_uid: 1, _isVue: true, $options: {…}, _renderProxy: Proxy, _self: VueComponent, …}
/src/main.js
<!DOCTYPE html>

<html lang="en">

  <head>

    <meta charset="utf-8">

    <title>test</title>

  </head>

  <body>

    <div id="page"></div>

    <script src="/dist/build.js"></script>

  </body>

</html>
/index.html
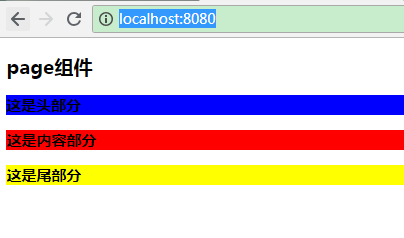
效果
访问运行时输出的地址,默认是 http://localhost:8080/ :
前端框架之Vue(9)-组件基础&vue-cli的更多相关文章
- vue的组件基础
组件分为全局组件和局部组件. 组件的核心是template:所有的数据都为template服务. 父组件子组件传值:因为子组件是父组件的个标签,完全等同于添加动态属性: 然后子组件能够通过props: ...
- vue入门——组件基础todolist
1. 以下是 todolist 的例子,没有用到组件:下面的3 会通过组件拆分todolist <!DOCTYPE html> <html lang="en"&g ...
- vue 父子组件 基础应用scrollball v-model sync
# 组件之间通信 可以通过 v-model 子组件可以通过 改变数据来改变父组件的数组 * v-model 子组件需要接受value属性,需要出发this.$emit("input&qu ...
- 前端框架Vue------>第一天学习、Vue学习的路径、Vue官网(1)
文章目录 1.学习目标 2.前端知识体系 2.1 前端三要素 2.2.MVVM 3.第一个Vue程序 4.Vue实例的生命周期 vue的官方文档:https://cn.vuejs.org/ 1.学习目 ...
- vue自定义组件(vue.use(),install)+全局组件+局部组件
相信大家都用过element-ui.mintui.iview等诸如此类的组件库,具体用法请参考:https://www.cnblogs.com/wangtong111/p/11522520.html ...
- vue自定义组件(通过Vue.use()来使用)即install的使用
在vue项目中,我们可以自定义组件,像element-ui一样使用Vue.use()方法来使用,具体实现方法: 1.首先新建一个loading.vue文件 // Cmponent.vue <te ...
- 【面试问题】—— 2019.3月前端面试之JS原理&CSS基础&Vue框架
前言:三月中旬面试了两家公司,一家小型公司只有面试,另一家稍大型公司笔试之后一面定夺.笔试部分属于基础类型,网上的复习资料都有. 面试时两位面试官都有考到一些实际工作中会用到,但我还没接触过的知识点. ...
- 组件基础—Vue学习笔记
ammm学习Vue有好几天了,今天遇到难点所以打算写一点随笔加深印象. 一.首先最简单的创建组件 1全局组件 Vue.component() Vue.component('hello',{ tem ...
- [转] vue自定义组件(通过Vue.use()来使用)即install的使用
在vue项目中,我们可以自定义组件,像element-ui一样使用Vue.use()方法来使用,具体实现方法: 1.首先新建一个Cmponent.vue文件 // Cmponent.vue<te ...
随机推荐
- 浅谈MVC、MVP、MVVM
MVC M: Model 模型——数据 (对于前台而言例如:ajax.jsonp等从后台获取数据的) V: View 视图——表现 ...
- go 的文件处理
准备一个文件 imooc.txt hello world! 一.使用 io/ioutil 包 定义一个 check 函数 func check(err error) { if err != nil { ...
- Django----认证系统和auth模块
COOKIE 与 SESSION 概念 cookie不属于http协议范围,由于http协议无法保持状态,但实际情况,我们却又需要“保持状态”,因此cookie就是在这样一个场景下诞生. cookie ...
- lxml基础
节点操作: from lxml import etree # 1.创建Element对象,参数即节点名称 root = etree.Element('root') print(root) # < ...
- .NET Core开发日志——配置
熟悉ASP.NET的开发者一定对web.config文件不陌生.在ASP.NET环境中,要想添加配置参数,一般也都会在此文件中操作.其中最常用的莫过于AppSettings与ConnectionStr ...
- {python--GIL锁}一 介绍 二 GIL介绍 三 GIL与Lock 四 GIL与多线程 五 多线程性能测试
python--GIL锁 GIL锁 本节目录 一 介绍 二 GIL介绍 三 GIL与Lock 四 GIL与多线程 五 多线程性能测试 一 背景知识 ''' 定义: In CPython, the gl ...
- LeetCode 11 - 盛最多水的容器 - [双指针暴力]
题目链接:https://leetcode-cn.com/problems/container-with-most-water/description/ 给定 n 个非负整数 $a_1,a_2,\cd ...
- [No0000EE]主要的宏观经济指标查询
主要的宏观经济指标查询 国内:东财>经济数据 _ 数据中心:http://data.eastmoney.com/center/macro.html东财>经济数据 :http://data. ...
- [No0000D3]bat当前路径currentPath.bat
@echo off echo 当前盘符:%~d0 echo 当前盘符和路径:%~dp0 echo 当前批处理全路径:%~f0 echo 当前盘符和路径的短文件名格式:%~sdp0 echo 当前CMD ...
- iOS 抽取app中的图片图标资源
iTunes 12.6之前的版本,我们手机连上MAC之后,可以在iTunes里看到应用选项,但是12.8之后的版本就不行了.无法通过iTunes 获取ipa文件进而获取APP图片资源. 不过还是有其他 ...