学习 Haproxy (一)
haproxy是一个开源的、高性能的基于tcp和http应用代理的HA的、LB服务软件,它支持双机热备、HA、LB、虚拟主机、图形界面查看状态信息等功能,其配置简单、维护方便,而且后端RS的health check功能有很好的支持(相当于keepalived的health check),当它代理的后端RS server故障时,haproxy会自动将该server移除,当故障的RS server恢复后,还会自动加入进来继续提供服务;
与nginx比,haproxy没有web server功能,只能用于代理,特别适用于高负载、访问量大,需要会话保持(LVS的-p和nginx的iphash会导致负载不均;haproxy会在会话中插入cookie用以保持会话)及七层应用代理的业务;
haproxy运行在当下普通的server上,不需优化就可支持数以万计的并发连接,并且它的运行模式使得它可以很简单、轻松、安全的整合到各种已有的网站架构中,同时它的代理模式可使所有应用服务器不暴露到公网上(也即它背后的node server不需公网IP);
frontend(可用acl规则匹配,让运维管理人员根据任意HTTP请求头内容做规则匹配,然后把请求定向到相关的backend);
backend(定义多个RS server pools,frontend把请求转过来交给此处定义的RS server处理);
通过frontend和backend可很容易的实现各种七层应用代理功能;
haproxy支持两种主要代理模式:
基于4层的tcp协议族应用代理(haproxy仅在client和server-side之间进行流量转发,如邮件服务、内部协议通信server、MySQL、https等);
基于7层的http应用代理(haproxy会分析应用层协议,通过允许、拒绝、交换、增加、修改、删除request请求或response回应指定内容来控制协议);
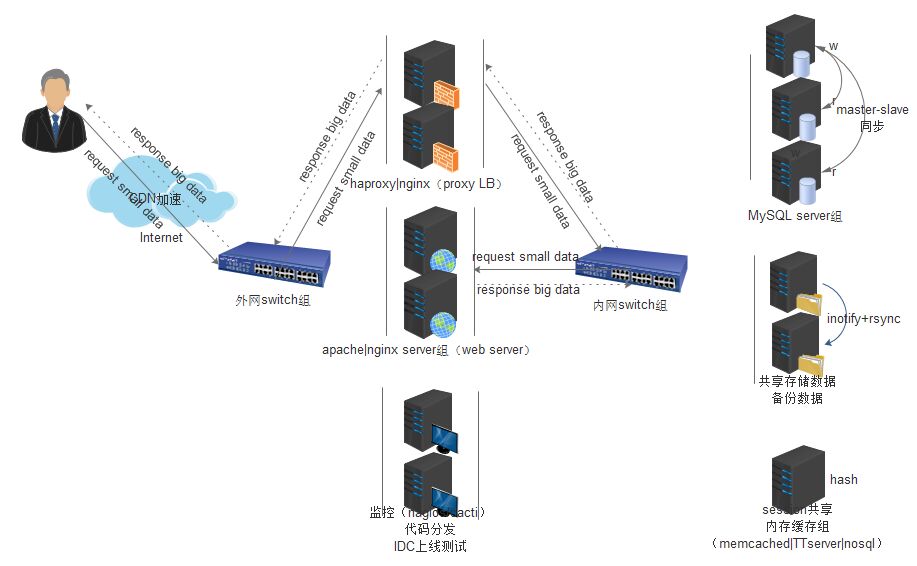
注:haproxy软件采用的是类NAT模式(与LVS的NAT模式本质不同),数据包来去都会经过haproxy,因此在流量特别大时(尤其门户网站),其效率不如LVS的DR模式,在一般的中小型公司(千万级PV以下)建议使用haproxy做LB,对于负责运维的管理人员来说配置简单、快速、维护方便,出问题好排查(运维使用软件的原则:简单、易用、高效);
注:
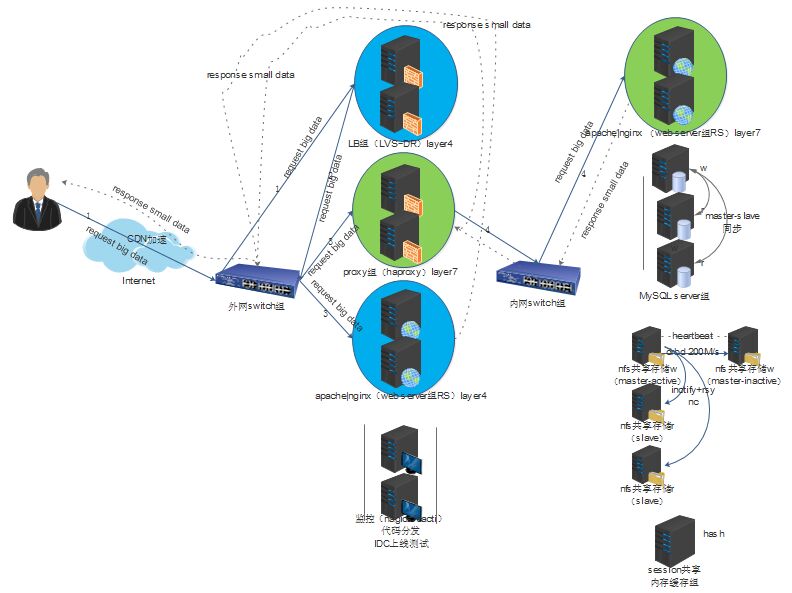
架构中L4和L7的位置;
haproxy软件的4层tcp应用代理非常优秀,配置比LVS和nginx简单、方便(不需要RS端做任何特殊配置,只要对应服务开启就可实现应用代理;配置语法和增加虚拟主机等功能要比LVS和nginx容易;而且和商业版的NetScaler(Citrix)、BIG-IP(F5)、Thunder系列(A10)等LB硬件设备在架构中的位置和使用方法一模一样);
haproxy的最大优势在于对7层的URL请求头应用过滤的功能及session功能,在门户网站的高并发生产架构中,haproxy的位置一般在4层LVS LB的下面,如官方推荐的也可在硬件LB器下使用,其表现非常好,09年taobao、jd的业务也大面积使用了haproxy作为7层cache应用代理
准备环境:
proxy-1-1(eth0:10.96.20.113,eth1:172.16.10.113)
proxy-1-2(eth0:10.96.20.114,eth1:172.16.10.114)
RS1(eth0:172.16.10.118)
RS2(eth0:172.16.10.119)
[root@proxy-1-1 ~]# cat /etc/redhat-release
Red Hat Enterprise Linux Server release 6.5(Santiago)
[root@proxy-1-1 ~]# uname -rm
2.6.32-642.3.1.el6.x86_64 x86_64
[root@proxy-1-1 ~]# vim /etc/sysctl.conf
net.ipv4.ip_forward = 1
[root@proxy-1-1 ~]# sysctl -p
net.ipv4.ip_forward = 1
net.ipv4.conf.default.rp_filter = 1
net.ipv4.conf.default.accept_source_route =0
kernel.sysrq = 0
kernel.core_uses_pid = 1
net.ipv4.tcp_syncookies = 1
error:"net.bridge.bridge-nf-call-ip6tables" is an unknown key
error: "net.bridge.bridge-nf-call-iptables"is an unknown key
error:"net.bridge.bridge-nf-call-arptables" is an unknown key
kernel.msgmnb = 65536
kernel.msgmax = 65536
kernel.shmmax = 68719476736
kernel.shmall = 4294967296
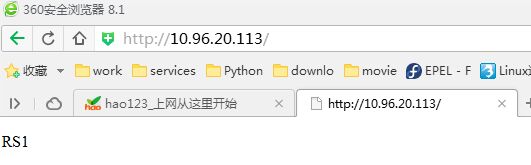
[root@proxy-1-1 haproxy]# elinks -dump http://172.16.10.118
RS1
[root@proxy-1-1 haproxy]# elinks -dump http://172.16.10.119
RS2
[root@proxy-1-1 ~]# yum -y install haproxy
[root@proxy-1-1 ~]# rpm -ql haproxy
/etc/haproxy
/etc/haproxy/haproxy.cfg
/etc/logrotate.d/haproxy
/etc/rc.d/init.d/haproxy
/etc/sysconfig/haproxy
/usr/bin/halog
/usr/bin/iprange
/usr/sbin/haproxy
/usr/share/doc/haproxy-1.5.4
/usr/share/doc/haproxy-1.5.4/CHANGELOG
……
[root@proxy-1-1 ~]# id haproxy
uid=188(haproxy) gid=188(haproxy)groups=188(haproxy)
[root@proxy-1-1 ~]# haproxy -h #(-sf可用于平滑重启)
HA-Proxy version 1.5.4 2014/09/02
Copyright 2000-2014 Willy Tarreau<w@1wt.eu>
Usage : haproxy [-f <cfgfile>]* [ -vdVD ] [ -n <maxconn> ] [ -N <maxpconn> ]
[ -p <pidfile> ] [ -m <max megs> ] [ -C <dir> ]
-v displays version ; -vv shows known build options.
-d enters debug mode ; -db only disables background mode.
-dM[<byte>] poisons memory with <byte> (defaults to 0x50)
-V enters verbose mode (disables quiet mode)
-D goes daemon ; -C changes to<dir> before loading files.
-q quiet mode : don't display messages
-c check mode : only check config filesand exit
-n sets the maximum total # of connections (2000)
-m limits the usable amount of memory (in MB)
-N sets the default, per-proxy maximum # of connections (2000)
-L set local peer name (default to hostname)
-p writes pids of all children to this file
-de disables epoll() usage even when available
-dp disables poll() usage even when available
-dS disables splice usage (broken on old kernels)
-dV disables SSL verify on servers side
-sf/-st [pid ]* finishes/terminates oldpids. Must be last arguments.
[root@proxy-1-1 ~]# cd /etc/haproxy/
[root@proxy-1-1 haproxy]# mv haproxy.cfg haproxy.cfg.ori
[root@proxy-1-1 haproxy]# egrep -v "#|^$" haproxy.cfg.ori > haproxy.cfg
[root@proxy-1-1 haproxy]# vim haproxy.cfg
global
log 127.0.0.1:514local0 info #(info会记录访问日志,生产中不要用,要用warning或error)
chroot /var/lib/haproxy
pidfile /var/run/haproxy.pid
maxconn 204800 #(定义每个haproxy进程的最大连接数,每个连接包括client和server-side,所以单个tcp会话最大数目是该值的两倍)
user haproxy
group haproxy
daemon
stats socket /var/lib/haproxy/stats
spread-checks 3
#tune.maxaccept 100
#tune.maxpollevents 180
#nbproc 8 #(设置haproxy启动时的进程数,最好与cpu数相同)
defaults
mode http #(语法:mode http|tcp|health)
log global
option httplog
option dontlognull
option http-server-close
option forwardfor except 127.0.0.0/8
option redispatch
retries 3
timeout http-request 10s
timeout queue 1m
timeout connect 10s #(设置成功连接到一台server的最长等待时间,默认单位ms可省,若非默认要跟单位,旧版本为contimeout)
timeout client 1m #(设置连接client发送数据时的成功连接最长等待时间,旧版本为clitimeout)
timeout server 1m #(设置服务端回应client数据发送的最长等待时间,旧版为srvtimeout)
timeout http-keep-alive 10s
timeout check 10s
maxconn 3000
listen test
bind *:80
mode http
no option splice-response
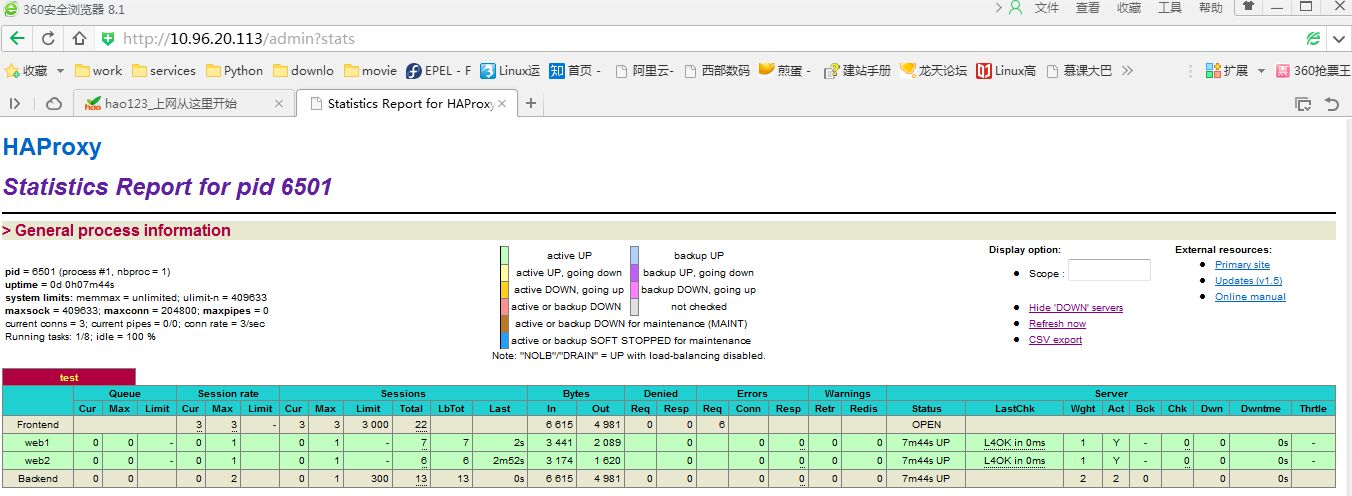
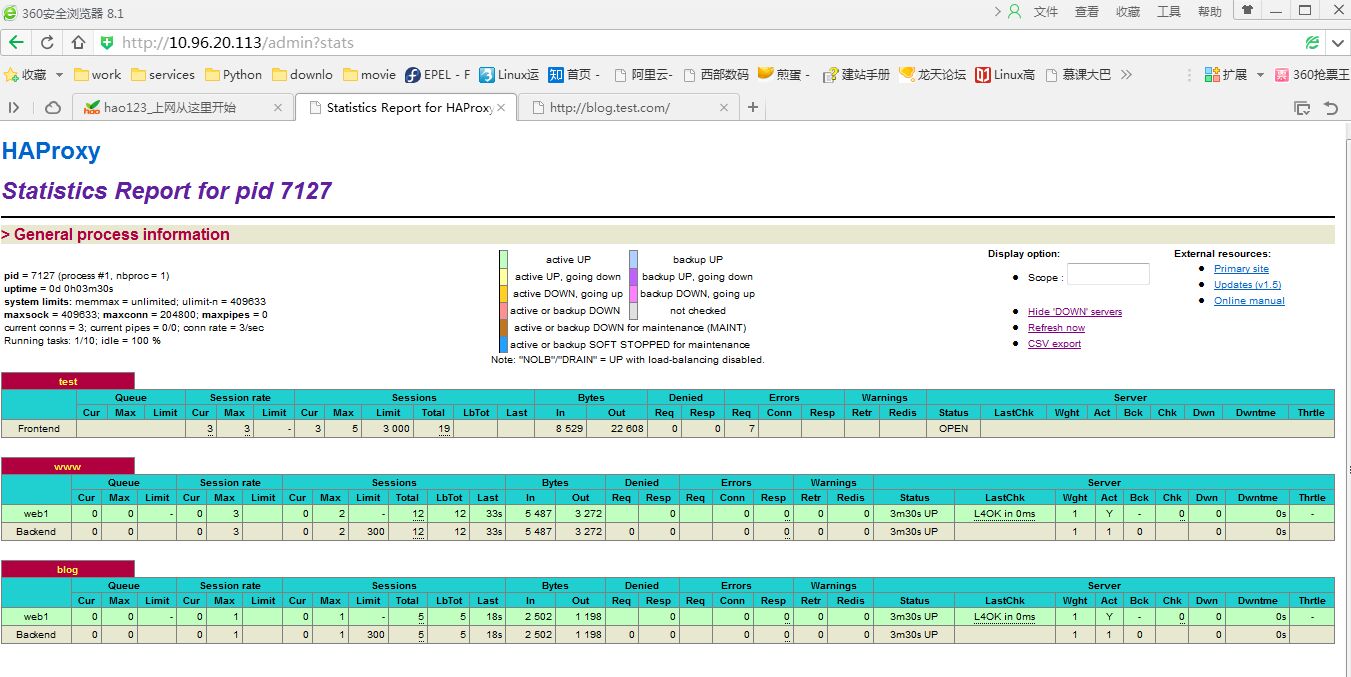
stats enable
stats hide-version
stats uri /admin?stats
stats auth admin:admin
balance roundrobin
option httpclose
option forwardfor
#option httpchk HEAD /check.html HTTP/1.0
timeout connect 15s
timeout server 15s
server web1 172.16.10.118:80 check
server web2 172.16.10.119:80 check
[root@proxy-1-1 haproxy]# vim /etc/rsyslog.conf
$ModLoad imudp
$UDPServerRun 514
local0.* /var/log/haproxy.log
[root@proxy-1-1 haproxy]# vim /etc/sysconfig/rsyslog
SYSLOGD_OPTIONS="-c2 -m 0 -r -x"
[root@proxy-1-1 haproxy]# service rsyslog restart
Shutting down system logger: [ OK ]
Starting system logger: [ OK ]
[root@proxy-1-1 haproxy]# lsof -i :514
COMMAND PID USER FD TYPE DEVICE SIZE/OFF NODE NAME
rsyslogd 6526 root 3u IPv4 81287 0t0 UDP *:syslog
rsyslogd 6526 root 4u IPv6 81288 0t0 UDP *:syslog
[root@proxy-1-1 haproxy]# ps aux | grepsyslog
root 6526 0.0 0.7 267752 1616 ? Sl 22:00 0:00 /sbin/rsyslogd -i /var/run/syslogd.pid -c 2 -m 0 -r -x
root 6535 0.0 0.3 103264 836 pts/0 S+ 22:00 0:00 grep syslog
[root@proxy-1-1 haproxy]# haproxy -c -f haproxy.cfg
Configuration file is valid
[root@proxy-1-1 haproxy]# service haproxy start
Starting haproxy: [ OK ]
[root@proxy-1-1 haproxy]# chkconfig --list rsyslog
rsyslog 0:off 1:off 2:on 3:on 4:on 5:on 6:off
[root@proxy-1-1 haproxy]# chkconfig haproxy on
[root@proxy-1-1 haproxy]# chkconfig --list haproxy
haproxy 0:off 1:off 2:on 3:on 4:on 5:on 6:off
[root@proxy-1-1 haproxy]# netstat -tnulp | grep :80
tcp 0 0 0.0.0.0:80 0.0.0.0:* LISTEN 6501/haproxy
[root@proxy-1-1 haproxy]# ps aux | grep haproxy
haproxy 6501 0.0 0.6 70696 1428 ? Ss 21:58 0:00 /usr/sbin/haproxy -D-f /etc/haproxy/haproxy.cfg -p /var/run/haproxy.pid
root 6551 0.0 0.3 103264 828 pts/0 S+ 22:01 0:00 grep haproxy

[root@proxy-1-1 haproxy]# tail /var/log/haproxy.log
Aug 14 22:02:29 127.0.0.1 haproxy[6501]:10.96.20.89:6109 [14/Aug/2016:22:02:29.645] test test/web2 0/0/1/0/1 200 270 -- ---- 2/2/0/0/0 0/0 "GET / HTTP/1.1"
Aug 14 22:03:12 127.0.0.1 haproxy[6501]:10.96.20.89:6114 [14/Aug/2016:22:03:12.597] test test/web1 1/0/0/1/2 200 270 -- ---- 2/2/0/0/0 0/0 "GET / HTTP/1.1"
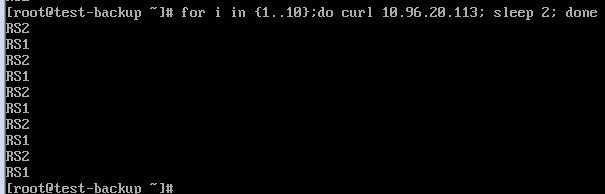
#for i in {1..10} ; do curl 10.96.20.113;sleep 2; done #(单独找一台主机测试当前算法)
haproxy多种health check方法:
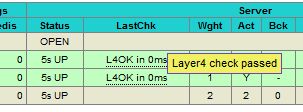
1、基于tcp的health check,haproxy只会去检查RS上服务对应的port,这并不能保证服务的完全可用,但这可作为辅助的检查手段,若不是非常严格的业务环境可用此种,keepalived向下的health check就是基于port
server web1 172.16.10.118:80 check port 80 inter 5000 fall 5
注:
check port 80(表示对80port进行health check,可简写为check)
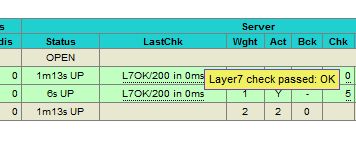
2、基于ip的http uri方式的health check:
option httpchk HEAD /check.html HTTP/1.0
语法:option httpchk METH URI VER
method有:GET和HEAD,GET相当于#wget http://10.96.20.113/check.html,HEAD相当于#curl -I http://10.96.20.113/check.html;
URI(站点目录下有check.html,此文件由开发提供)
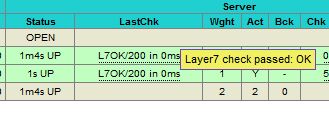
3、基于域名的URL的health check:
option httpchk HEAD /index.jsp HTTP/1.1\r\nHost:test.51cto.com
注:测试时需要在RS上配置基于域名的vhost,并创建index.jsp测试页面,此文件只要存在haproxy能检测到则显示正常,适用于更精细的基于具体业务的检测需求
注:其它服务的health check:
option smtpchk -> sends "HELO localhost"
option smtpchk EHLO mail.mydomain.com -> sends this ESMTP greeting
option ldap-check
option mysql-check [user USERNAME]
语法:
server <name> <address>[:port] [settings ...]
default-server [settings ...]
settings有:
check
inter <delay>(interval间隔,表示每5秒检查一次)
fall <count>(失败5次,仍有问题将其摘除)
rise <count>(检查后端RS共2次若正常,则将其加入进来)
weight <weight>
backup(高可用参数,仅当其它所有RS都挂掉有此参数的备机才启用;当有多个备机,可用option allbackups,当其它所有RS都挂掉,所有备机全部启用;最理想的情况是,有一个nomal RS server故障就启用一个备机,而不是等所有nomal RS server全部挂掉才启用备机,解决办法,使用acl做判断)
maxconn <maxconn>
maxqueue <maxqueue>
cookie <value>
注:
若结尾无inter 2000 fall 3,则按默认每2s检查一次共3次;
nginx中的upstream段中也有类似的配置;max_fails=2,最大尝试失败次数,默认为1,0表示禁止失败尝试;fail_timeout=2;
七层架构中,相对于server,越靠外(离用户近)health check次数越多(例如:CDN提供商蓝汛10次);越靠内(server自身)health check次数越少,提升用户体验,按2s检查一次共3次,则要耗费6s才能把出问题的RS踢掉;
举例:
option allbackups
server web7 172.16.10.7:80 check port 80 inter 5000 fall 5 backup
server web8 172.16.10.8:80 check port 80 inter 5000 fall 5 backup
基于域名中的指定字串做7层跳转(在frontend段中使用acl做更精细的转发):
语法:
acl <aclname> <criterion> [flags] [operator] [<value>] ...
注:frontend段中,acl先定义好规则,再用use_backend或default_backend对规则进行处理;hdr(host),hdr_beg(host),begin;-i,ignorecase;
举例:
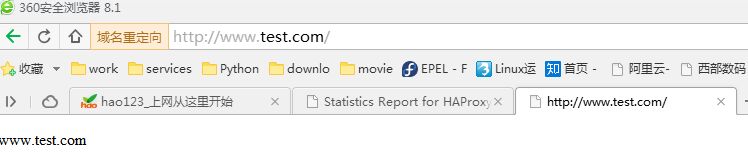
acl www_domain hdr(host)-i www.test.com
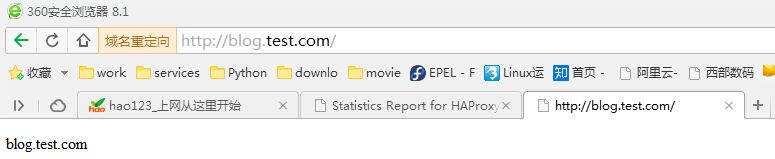
acl blog_domain hdr(host)-i blog.test.com
也可写成:
acl www_domain hdr_beg(host) -i www.
acl blog_domain hdr_beg(host) -i blog.
将后端两个RS做成基于域名的虚拟主机:
[root@proxy-1-1 haproxy]# vim /etc/hosts
[root@proxy-1-1 haproxy]# elinks -dump www.test.com
www.test.com
[root@proxy-1-1 haproxy]# elinks -dump blog.test.com
blog.test.com
[root@proxy-1-1 haproxy]# elinks -dump 172.16.10.118
www.test.com
[root@proxy-1-1 haproxy]# elinks -dump 172.16.10.119
blog.test.com
[root@proxy-1-1 haproxy]# vim haproxy.cfg
global
log 127.0.0.1:514 local0 info
chroot /var/lib/haproxy
pidfile /var/run/haproxy.pid
maxconn 204800
user haproxy
group haproxy
daemon
stats socket /var/lib/haproxy/stats
spread-checks3
#tune.maxaccept 100
#tune.maxpollevents 180
#nbproc 8
defaults
mode http
log global
option httplog
option dontlognull
option http-server-close
option forwardfor except 127.0.0.0/8
option redispatch
retries 3
timeout http-request 10s
timeout queue 1m
timeout connect 10s
timeout client 1m
timeout server 1m
timeout http-keep-alive 10s
timeout check 10s
maxconn 3000
frontend test
bind*:80
mode http
stats enable
stats hide-version
stats uri /admin?stats
stats authadmin:admin
acl www_domain hdr(host)-i www.test.com
acl blog_domain hdr(host)-i blog.test.com
use_backend www if www_domain
use_backend blogif blog_domain
default_backend www
backend www
balance leastconn
option httpclose
option forwardfor
server web1 172.16.10.118:80 check port 80 inter 1000 fall 1
backend blog
balance leastconn
option httpclose
option forwardfor
server web1 172.16.10.119:80 check port 80 inter 1000 fall 1
[root@proxy-1-1 haproxy]# haproxy -c -f haproxy.cfg
Configuration file is valid
[root@proxy-1-1 haproxy]# service haproxy restart
Stopping haproxy: [ OK ]
Starting haproxy: [ OK ]
在win的HOSTS文件加入:10.96.20.113 www.test.com blog.test.com
ctrl+F5强制刷新后依然
基于url地址目录做7层跳转:
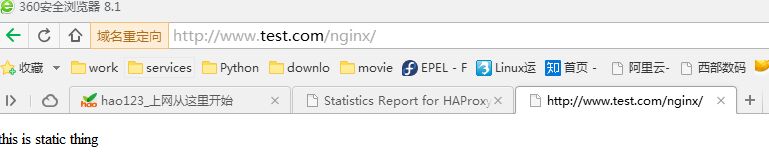
acl static_test path_beg /nginx/
acl dynamic_test path_beg /php/
注:例如在访问www.test.com/nginx/时交至后端nginxpools处理;访问www.test.com/php/时交至后端phppools处理
[root@proxy-1-1 haproxy]# vim haproxy.cfg
global
……
defaults
……
frontend test
bind *:80
mode http
stats enable
stats hide-version
stats uri /admin?stats
stats auth admin:admin
acl static_test path_beg /nginx/
acl dynamic_test path_beg /php/
use_backend www if static_test
use_backend blog if dynamic_test
default_backend www
backend www
balance leastconn
option httpclose
option forwardfor
server web1 172.16.10.118:80 check port 80 inter 1000 fall 1
backend blog
balance leastconn
option httpclose
option forwardfor
server web1 172.16.10.118:80 check port 80 inter 1000 fall 1
[root@proxy-1-1 haproxy]# haproxy -c -f haproxy.cfg
Configuration file is valid
[root@proxy-1-1 haproxy]# service haproxy restart
Stopping haproxy: [ OK ]
Starting haproxy: [ OK ]

注:在RS上创建相应的目录及文件

基于文件扩展名的7层跳转:
acl pic_test path_end .gif .png .jpg .css .js
也可写成:
acl pic_test path_end \.(gif|png|jpg|css?.*|js?.*)$
注:生产中通常,首页index.html用一组server;php、java等动态内容用一组server;js、css等静态内容用一组server;图片用一组server;通常打开网页是由多组server共同完成
[root@proxy-1-1 haproxy]# vim haproxy.cfg
……
frontend test
bind *:80
mode http
stats enable
stats hide-version
stats uri /admin?stats
stats auth admin:admin
acl pic_test path_end .gif .png .jpg .css .js
acl static_test path_beg /nginx/
acl dynamic_test path_beg /php/
use_backend www if pic_test
use_backend www if static_test
use_backend blog if dynamic_test
default_backend www
backend www
balance leastconn
option httpclose
option forwardfor
server web1 172.16.10.118:80 check port 80 inter 1000 fall 1
backend blog
balance leastconn
option httpclose
option forwardfor
server web1 172.16.10.118:80 check port 80 inter 1000 fall 1
[root@proxy-1-1 haproxy]# haproxy -c -f haproxy.cfg
Configuration file is valid
[root@proxy-1-1 haproxy]# service haproxy restart
Stopping haproxy: [ OK ]
Starting haproxy: [ OK ]
注:在RS-side上传图片
测试:

基于user-aggent做7层跳转:
acl iphone_users hdr_sub(user-agent) -i iphone
redirect prefix http://3g-iphone.test.com if iphone_users
acl android_users hdr_sub(user-agent) -i android
redirect prefix http://3g-android.test.com if android_users
注:本地要设置跳转后的地址页面;nginx中"$http_user_agent";httpd中\"%{user-agent}i\";
[root@proxy-1-1 haproxy]# vim haproxy.cfg
……
frontend test
bind *:80
mode http
stats enable
stats hide-version
stats uri /admin?stats
stats auth admin:admin
acl iphone_users hdr_sub(user-agent) -i iphone
redirect prefix http://3g-iphone.test.com if iphone_users
acl android_users hdr_sub(user-agent) -i android
redirect prefix http://3g-android.test.com if android_users
acl pic_test path_end \.(gif|png|jpg|css?.*|js?.*)$
acl static_test path_beg /nginx/
acl dynamic_test path_beg /php/
use_backend www if pic_test
use_backend www if static_test
use_backend blog if dynamic_test
default_backend www
backend www
balance leastconn
option httpclose
option forwardfor
server web1 172.16.10.118:80 check port 80 inter 1000 fall 1
backend blog
balance leastconn
option httpclose
option forwardfor
server web1 172.16.10.118:80 check port 80 inter 1000 fall 1
基于ip和port的访问控制:
frontend test
……
acl valid_ip src 10.96.20.0/24
http-request deny if ! valid_ip
注:1.5版本不能使用block取而代之的是http-request deny,将不符合指定网段内的client访问时报403 Forbidden;七层应用的匹配顺序是根据haproxy.cfg配置文件中frontend段中use_backend书写的先后顺序依次匹配,listen、frontend、backend中有的优先于defaults段中的
错误页面优雅显示(不支持404,status code 404 not handled,error relocation will be ignored):
语法:
errorfile <code> <file>
Example :
errorfile 400 /etc/haproxy/errorfiles/400badreq.http
errorfile 408 /dev/null # workaround Chrome pre-connect bug
errorfile 403 /etc/haproxy/errorfiles/403forbid.http
errorfile 503 /etc/haproxy/errorfiles/503sorry.http
errorloc <code> <url>
errorloc302 <code> <url>
errorloc303 <code> <url>
语法:
balance <algorithm> [ <arguments> ]
algorithm有:roundrobin,static-rr,leastconn,first,source,uri,url_param,hdr(<name>),rdp-cookie(<name>)
让后端RS记录前端访问的真实IP:
[root@proxy-1-1 haproxy]# vim haproxy.cfg
listen test
option forwardfor
[root@proxy-1-1 haproxy]# service haproxy restart
Stopping haproxy: [ OK ]
Starting haproxy: [ OK ]
[root@localhost ~]# vim /etc/httpd/conf/httpd.conf
LogFormat "\"%{X-Forwarded-For}i\" %l %u %t \"%r\" %>s %b" common
CustomLog logs/access_log common
[root@localhost ~]# service httpd restart
Stopping httpd: [ OK ]
Starting httpd: httpd: Could not reliably determine the server's fully qualified domain name, using localhost.localdomain for ServerName
[ OK ]
[root@localhost ~]# tail /etc/httpd/logs/access_log #(在win上访问,查看RS日志,之前记录的一直是代理server的172.16.10.113,之后记录的是win主机上的IP)
172.16.10.113 - - [14/Aug/2016:20:36:30 -0700] "GET / HTTP/1.1" 200 4 "-" "curl/7.19.7 (x86_64-redhat-linux-gnu) libcurl/7.19.7 NSS/3.14.3.0 zlib/1.2.3 libidn/1.18 libssh2/1.4.2"
172.16.10.113 - - [14/Aug/2016:20:36:30 -0700] "GET / HTTP/1.1" 200 4 "-" "curl/7.19.7 (x86_64-redhat-linux-gnu) libcurl/7.19.7 NSS/3.14.3.0 zlib/1.2.3 libidn/1.18 libssh2/1.4.2"
……
"-" - - [15/Aug/2016:01:22:46 -0700] "HEAD /check.html HTTP/1.0" 200 -
"10.96.20.89" - - [15/Aug/2016:01:22:47 -0700] "GET / HTTP/1.1" 200 4
"10.96.20.89" - - [15/Aug/2016:01:22:48 -0700] "GET / HTTP/1.1" 200 4
"-" - - [15/Aug/2016:01:22:51 -0700] "HEAD /check.html HTTP/1.0" 200 -
heartbeat+haproxy:
主备模式(heartbeat仅负责VIP飘移,两台server上haproxy配置相同,listen段绑定VIP,事先把haproxy启动);
[root@proxy-1-1 haproxy]# vim /etc/ha.d/haresources
proxy-1-1 IPaddr::10.96.20.8/24/eth0
[root@proxy-1-1 haproxy]# vim haproxy.cfg
listen test
bind 10.96.20.8:80
主主模式(heartbeat仅负责两VIP飘移,两台server上haproxy配置相同,有两段listen配置,分别绑定两个VIP,事先把haproxy启动);
[root@proxy-1-1 haproxy]# vim /etc/ha.d/haresources
proxy-1-1 IPaddr::10.96.20.8/24/eth0
proxy-1-2 IPaddr::10.96.20.9/24/eth0
[root@proxy-1-1 haproxy]# vim haproxy.cfg
listen test1
bind 10.96.20.8:80
……
listen test2
bind 10.96.20.9:80
……
常见的HTTP状态码:
200-OK(standard response for successful HTTP requests),服务成功返回网页;
301-Moved Permanently(this and all future requests should be directedto the given)永久跳转,请求的网页已永久跳转到新位置;
403-Forbidden(forbidden request(matches a deny filter),HTTP403;the request was a legal request,but the server is refusing to respond to it)禁止访问,服务拒绝请求;
404-Not Found(thre requested resource could not be found but may be available again in the future)服务器找不到请求的页面;
500-Internal Server Error(internal error in haproxy,HTTP500;a generic error message,given when no more specific message is suitable)内部服务器错误;
502-Bad Gateway(the server returned an invalid or in complete response,HTTP502,the server was acting as a gateway or proxy and received an invalid response from the upstream server)网关错误,一般是网关服务器请求后端时,后端服务器没有按HTTP协议返回正确结果;
503-Service Unavailable(no server was available to handle the request,HTTP503;the server is currently unavailable,because it is overloaded or down for maintenance)服务当前不可用,可能因为超载或停机维护;
504-Gateway Timeout(the server failed to reply in time,HTTP504;the server was acting as a gateway or proxy and did not receive a timely response from the upstream server)网关超时,一般是网关服务器请求后端时,后端服务器没有在指定时间内完成服务;
代码、软件在LB器(LVS、nginx、haproxy)层面上实现平滑上线:
后端RS分A、B两组;
LVS(通过命令ipvsadm -d -t|-u SERVICE_ADDRESS -r SERVER_ADDRESS;也可通过替换配置文件,但LVS没有平滑重启的方式);
nginx和haproxy(替换配置文件,#service nginx|haproxy reload达到平滑重启);
DB更新(改配置时>SET GLOBAL ……;同时改配置文件);
运维应关注两点:全网数据、7*24h不间断服务
全网数据备份解决方案:
1、数据库数据:
主从,仅在server物理故障时恢复,若手动drop误删则无法恢复,解决办法:备机开binlog保持1天以上,并按天做备份;
案例(baidu,一主多从,其中一个从不提供服务,专门做备份,半同步插件或drbd做到实时同步,事务提交)
2、图片资源:
全量(drbd;通过程序实现双写,提交数据时写到两个存储上;分布式存储nosql、MySQL、mongodb同步机制做存储;分布式架构方案);
增量(rsync,小文件比对时间很长;drbd,浪费资源,备node不可用;按时间增量,按月每月一个目录,如201607、201608;更新资源写LOG,rsync根据LOG直接同步变化的数据;inotify、sersync等)
3、程序、各配置文件都要放到SVN里,再向外发布,办公室SVN-->IDC测试-->IDC正式,关键要维护好SVN
注:需求分析(对每个项目都要事先写好备份规划,根据需求讨论最多可承受丢多长时间的数据;数据库、存储备份、测试数据)
7*24h不间断服务:
集群(LB(LVS、nginx、haproxy、BIG-IP、NetScaler)、HA(keepalived、heartbeat))
性能、扩展(优化、用户体验要好,业务易扩展)
监控(运维级别,业务级别(按产品线监控、流量、负载、访问、请求、错误日志、接口)
注:QPS每秒请求量、RT反馈时间,三个层面监控(基础监控-->应用监控-->业务层面监控)
学习 Haproxy (一)的更多相关文章
- 烂泥:高负载均衡学习haproxy之安装与配置
本文由秀依林枫提供友情赞助,首发于烂泥行天下 有关高负载均衡的软件,目前使用比较多的是haproxy.nginx和lvs.下面我们就开始学习haprxoy这款软件. 一.haproxy介绍 以下开始介 ...
- 烂泥:高负载均衡学习haproxy之TCP应用
本文由ilanniweb提供友情赞助,首发于烂泥行天下 在前几篇文章中,我们介绍了haproxy的配置参数,而且配置例子都是http协议(7层应用)的. 这篇文章,开始介绍haproxy的4层TCP应 ...
- 烂泥:高负载均衡学习haproxy之关键词介绍
本文由ilanniweb提供友情赞助,首发于烂泥行天下 上一篇文章我们简单讲解了有关haproxy的安装与搭建,在这篇文章我们把haproxy配置文件中使用到的关键词一一介绍下. 关注我微信ilann ...
- Linux服务器学习----haproxy+keepalived
实验需要4台虚拟机,两台做服务器,两台做代理服务器 www1:ip:10.30.40.11 hk1: 代理:10.30.40.13(hk1.netdj.net) www2:ip 10.3 ...
- 学习Haproxy (八)
Unix套接字命令(Unix Socket commands) socat是一个多功能的网络工具,名字来由是"Socket CAT",可以看作是netcat的N倍加强版,socat ...
- 学习Haproxy (七)
haproxy是个高性能的tcp和http的反向代理.它就是个代理.不像nginx还做web服务器 官网地址为www.haproxy.org nginx的优点和缺点 ? 1 2 3 4 5 6 7 8 ...
- 学习 Haproxy (六)
HAProxy HAProxy是免费 高效 可靠的高可用及负载均衡解决方案,该软件非常适合于处理高负载站点的七层数据请求,HAProxy的工作模式使其可以非常容易且安全地集成到我们现有的站点架构中.使 ...
- 学习 Haproxy (五)
1 Linux Haproxy 负载均衡 v1.8 ★★★ 类似于ningx的反向代理1.1 Haproxy 概述 Haproxy是一个开源的高性能的反向代理或者说是负载均衡服务软件之一,它支持双机热 ...
- 学习 Haproxy (四)
一. haproxy 的安装配置 # cat /etc/redhat-release CentOS release 6.6 (Final) # uname -r 2.6.32-504.el6.i686 ...
- 学习 Haproxy (三)
HAProxy安装 # wget http://www.haproxy.org/download/1.4/src/haproxy-1.4.24.tar.gz # tar xf haproxy-1.4. ...
随机推荐
- PyTorch 如何理解张量:一维张量、二维张量、行/列向量、矩阵
理解张量,并将张量与线性代数的知识连接起来,我认为最重要的是理解 tensor 的两个属性:shape 和 ndim . ndim 表示张量的维度,一维张量的 ndim 值为 1,二维张量的 ndim ...
- 【C# Parallel】ParallelLoopState
总结 总之,要编写一个健壮的并行循环,必须在并行循环体中检测 ParallelLoopState 对象的 IsExceptional, IsStopped 和 LowestBreakIteration ...
- C# 操作字符串注意事项
下面是常见的一个例子 static void Main(string[] args) { string str = "test"+9; string str2 = "te ...
- oj教程--栈
栈(stack)又名堆栈,它是一种运算受限的线性表.其限制是仅允许在表的一端进行插入和删除运算.这一端被称为栈顶,相对地,把另一端称为栈底.向一个栈插入新元素又称作进栈.入栈或压栈,它是把新元素放到栈 ...
- Centos6.x安装之后的9件事
Centos6.x安装之后的9件事 这些不是必须都做的,只不过是我个人的习惯,在此记录一下. 1.修改yum源到国内 CentOS系统更换软件安装源 备份你的原镜像文件,以免出错后可以恢复. mv / ...
- Leaflet:Marker、Popup类
Marker.Popup.Tooltip类都是继承自Layer类:Event与Layer Marker 1.用例 L.marker([41,123]).addTo(map); 2.实例化 L.mark ...
- svelte组件:Svelte3自定义Navbar+Tabbr组件|svelte自定义插件
基于Svelte3自定义组件Navbar+Tabbar沉浸式导航条|底部凸起菜单栏 Svelte 一种全新的构建用户界面的框架.当下热门的 Vue 和 React 在浏览器中需要做大量的工作,而 Sv ...
- git 回滚方式
git push 命用于从将本地的分支版本上传到远程并合并. 命令格式如下: git push <远程主机名> <本地分支名>:<远程分支名> 如果本地分支名与远程 ...
- ybt1130:找第一个只出现一次的字符
1130:找第一个只出现一次的字符 时间限制: 1000 ms 内存限制: 65536 KB提交数: 62333 通过数: 23786 [题目描述] 给定一个只包含小写字母的字 ...
- GE PACSystems RX3i 输入验证漏洞
受影响系统:General Electric CPE100 < R9.85General Electric CPE115 < R9.85General Electric CPE302 &l ...