3DTouch - iOS新特性
概述
详细
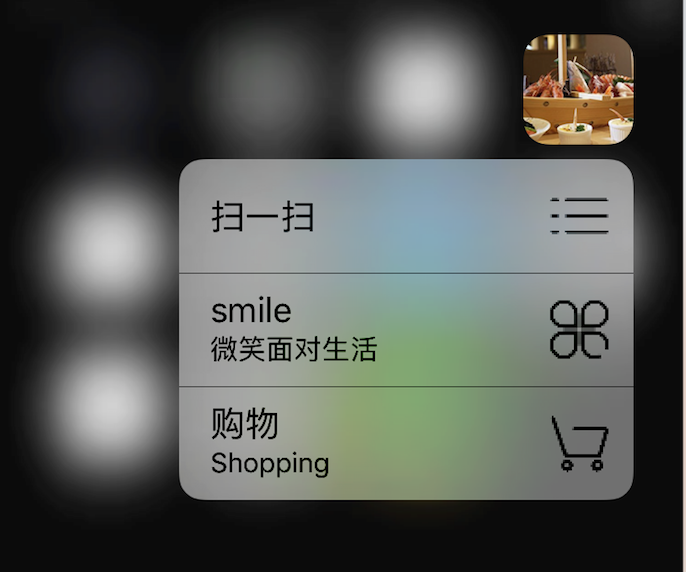
6s和6s plus之后特有效果,对着应用图标用力按会触发3DTouch .
一、程序实现
第一步 : 3DTouch 设备支持检测:
检测当前的设备是否支持3DTouch
//  在iOS9中有一个新的枚举

 typedef NS_ENUM(NSInteger, UIForceTouchCapability) {

            UIForceTouchCapabilityUnknown        = 0,  // 未知的支持属性

            UIForceTouchCapabilityUnavailable    = 1,  // 不支持

            UIForceTouchCapabilityAvailable      = 2 // 支持

  };
一般我们都在每个ViewController的生命周期中这样做:
定义一个是否设备支持的BOOL值属性
@property (nonatomic , assign) BOOL support3DTouch;
在生命周期函数中检测支持与否
  - (void)viewWillAppear:(BOOL)animated {

     [super viewWillAppear:animated];

      //检测当前是否支持3DTouch

      self.support3DTouch = [self support3DTouch];

  }
在生命周期外检测支持与否(因为有可能出了生命周期函数而发生了变化)
  - (void)traitCollectionDidChange:(nullable UITraitCollection *)previousTraitCollection NS_AVAILABLE_IOS(8_0) {

      self.support3DTouch = [self support3DTouch];

  }
检测是否支持3DTouch的方法
 - (BOOL)support3DTouch

  {

      // 如果开启了3D touch

      if (self.traitCollection.forceTouchCapability == UIForceTouchCapabilityAvailable)

      {

          return YES;

      }

          return NO;

      }

  }
第二步 : 配置快捷视图列表
创建快捷视图列表有两种方法:
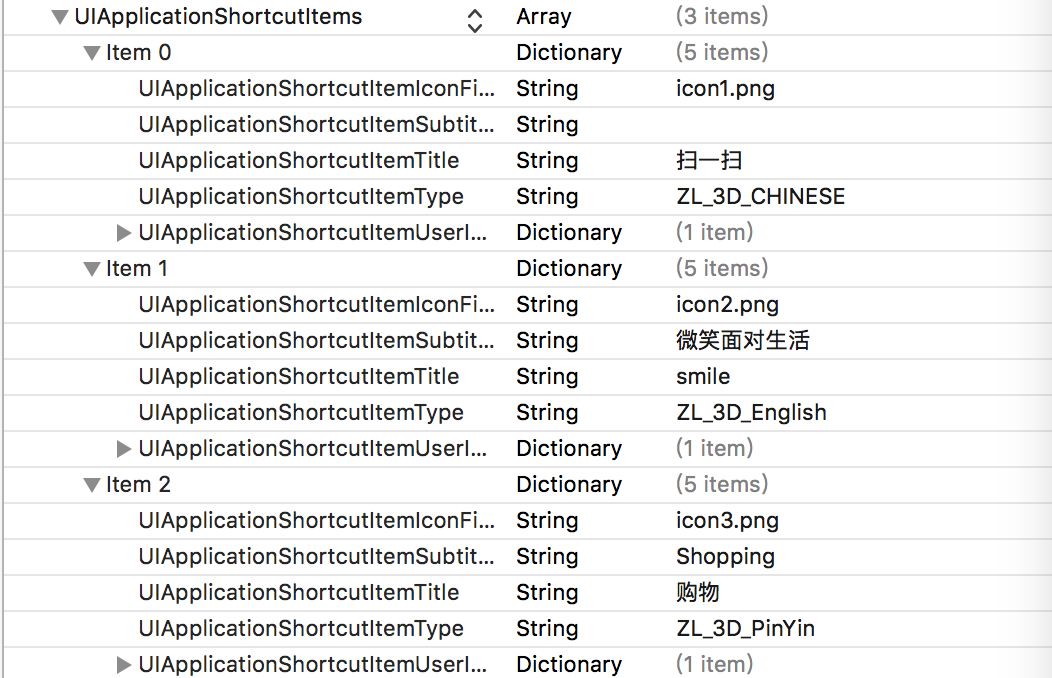
1,一种是编辑info.plist文件中的UIApplicationShortcutItems,
通过可视化的界面添加键值对直接配置info.plist
2,另一种是使用代码在工程中加入items
在工程的 AppDelegate.m
- (BOOL)application:(UIApplication *)application didFinishLaunchingWithOptions:(NSDictionary *)launchOptions {

    self.window = [[UIWindow alloc] initWithFrame:[[UIScreen mainScreen] bounds]];

    self.window.rootViewController = [[UINavigationController alloc] initWithRootViewController:[[HomeViewController alloc] init]];

    [self.window makeKeyAndVisible];

    //  代码创建快捷视图列表的方法,

     [self create3DTouchShotItems];

    return YES;

}
代码创建快捷视图列表的方法:
- (void)create3DTouchShotItems {

    //创建快捷item的icon UIApplicationShortcutItemIconFile

    UIApplicationShortcutIcon *icon1 = [UIApplicationShortcutIcon iconWithTemplateImageName:@"icon1"];

    UIApplicationShortcutIcon *icon2 = [UIApplicationShortcutIcon iconWithTemplateImageName:@"icon2"];

    UIApplicationShortcutIcon *icon3 = [UIApplicationShortcutIcon iconWithTemplateImageName:@"icon3"];

    //创建快捷item的userinfo UIApplicationShortcutItemUserInfo

    NSDictionary *info1 = @{@"url":@"url1"};

    NSDictionary *info2 = @{@"url":@"url2"};

    NSDictionary *info3 = @{@"url":@"url3"};

    //创建ShortcutItem

    UIMutableApplicationShortcutItem *item1 = [[UIMutableApplicationShortcutItem alloc]initWithType:@"XS_3DTocuh_1" localizedTitle:@"扫一扫" localizedSubtitle:@"" icon:icon1 userInfo:info1];

    UIMutableApplicationShortcutItem *item2 = [[UIMutableApplicationShortcutItem alloc]initWithType:@"XS_3DTocuh_2" localizedTitle:@"smile" localizedSubtitle:@"微笑面对生活" icon:icon2 userInfo:info2];

    UIMutableApplicationShortcutItem *item3 = [[UIMutableApplicationShortcutItem alloc]initWithType:@"XS_3DTocuh_3" localizedTitle:@"购物" localizedSubtitle:@"Shopping" icon:icon3 userInfo:info3];

    NSArray *items = @[item1, item2, item3];

    [UIApplication sharedApplication].shortcutItems = items;

}
第三步 : 给列表视图中的cell注册 3DTouch 事件
1,首先,在首页当前控制器里遵守UIViewControllerPreviewingDelegate协议
UIViewControllerPreviewingDelegate
2,在注册前先判断是否设备支持(也就是第一步)
3,注册: [self registerForPreviewingWithDelegate:self sourceView:cell];
 - (UITableViewCell *)tableView:(UITableView *)tableView cellForRowAtIndexPath:(NSIndexPath *)indexPath {

    ZLTableViewCell *cell = [tableView dequeueReusableCellWithIdentifier:@"ZLTableViewCell"];

    if (cell == nil) {

        cell = [ZLTableViewCell cellWithTableView:tableView];

    }

    cell.dataFrame = self.dataSource[indexPath.row];

    //给cell注册代理,使其支持3DTouch手势

    if (self.support3DTouch) {

        [self registerForPreviewingWithDelegate:self sourceView:cell];

    }

    return cell;

}
第四步: 完成UIViewControllerPreviewingDelegate 协议回调,实现Peek Pop
在首页当前控制器里,
#pragma mark - 3DTouch UIViewControllerPreviewingDelegate
Peek 实现代码:
此方法是轻按控件时,跳出peek的代理方法
- (UIViewController *)previewingContext:(id<UIViewControllerPreviewing>)previewingContext viewControllerForLocation:(CGPoint)location {

    //防止重复加入

    if ([self.presentedViewController isKindOfClass:[ZLPeekViewController class]])

    {

        return nil;

    }

    else

    {

        ZLTableViewCell *cell = (ZLTableViewCell *)previewingContext.sourceView;

        ZLCellData * cellData = cell.dataFrame.cellData;

        ZLPeekViewController *peekViewController = [[ZLPeekViewController alloc] init];

        peekViewController.cellData = cellData;

        peekViewController.delegate = self;

        return peekViewController;

    }

}
Pop 代码:
此方法是重按peek时,跳入pop的代理方法
- (void)previewingContext:(id<UIViewControllerPreviewing>)previewingContext

    commitViewController:(UIViewController *)viewControllerToCommit {

    ZLTableViewCell *cell = (ZLTableViewCell *)previewingContext.sourceView;

    ZLCellData * cellData = cell.dataFrame.cellData;

    ZLPopViewController *popViewController = [[ZLPopViewController alloc] init];

    popViewController.cellData = cellData;

    // 以prentViewController的形式展现

    [self showViewController:popViewController sender:self];

    // 以push的形势展现

//    [self.navigationController pushViewController:popViewController animated:YES];

}
第五步 : 在Peek状态下向上滑动出现的按钮配置方法
在 ZLPeekViewController.m 里, 实现 - (NSArray> *)previewActionItems 回调方法
#pragma mark - Preview Actions

- (NSArray<id<UIPreviewActionItem>> *)previewActionItems {

    // 生成UIPreviewAction

    UIPreviewAction *action1 = [UIPreviewAction actionWithTitle:@"事件 1" style:UIPreviewActionStyleDefault handler:^(UIPreviewAction * _Nonnull action, UIViewController * _Nonnull previewViewController) {

        NSLog(@"Action 1 selected");

        [self.delegate pushToPopViewControllerWithCellData:self.cellData];

    }];

    UIPreviewAction *action2 = [UIPreviewAction actionWithTitle:@"事件 2" style:UIPreviewActionStyleDestructive handler:^(UIPreviewAction * _Nonnull action, UIViewController * _Nonnull previewViewController) {

        NSLog(@"Action 2 selected");

    }];

    UIPreviewAction *action3 = [UIPreviewAction actionWithTitle:@"事件 3" style:UIPreviewActionStyleSelected handler:^(UIPreviewAction * _Nonnull action, UIViewController * _Nonnull previewViewController) {

        NSLog(@"Action 3 selected");

    }];

    UIPreviewAction *tap1 = [UIPreviewAction actionWithTitle:@"按钮 1" style:UIPreviewActionStyleDefault handler:^(UIPreviewAction * _Nonnull action, UIViewController * _Nonnull previewViewController) {

        NSLog(@"tap 1 selected");

    }];

    UIPreviewAction *tap2 = [UIPreviewAction actionWithTitle:@"按钮 2" style:UIPreviewActionStyleDestructive handler:^(UIPreviewAction * _Nonnull action, UIViewController * _Nonnull previewViewController) {

        NSLog(@"tap 2 selected");

    }];

    UIPreviewAction *tap3 = [UIPreviewAction actionWithTitle:@"按钮 3" style:UIPreviewActionStyleSelected handler:^(UIPreviewAction * _Nonnull action, UIViewController * _Nonnull previewViewController) {

        NSLog(@"tap 3 selected");

    }];

    NSArray *actions = @[action1, action2, action3];

    NSArray *taps = @[tap1, tap2, tap3];

    UIPreviewActionGroup *group1 = [UIPreviewActionGroup actionGroupWithTitle:@"一组事件" style:UIPreviewActionStyleDefault actions:actions];

    UIPreviewActionGroup *group2 = [UIPreviewActionGroup actionGroupWithTitle:@"一组按钮" style:UIPreviewActionStyleDefault actions:taps];

    NSArray *group = @[group1,group2];

    //当然你也可以返回三个单独的action对象的数组,而不是group,具体效果,可以自己试一下

    return group;

}
二、运行效果与文件截图
1、运行效果截图:
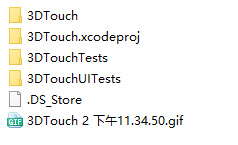
2、文件截图:
三、其他补充
界面性问题可以根据自己项目需求调整即可, 具体可参考代码, 项目能够直接运行!
注:本文著作权归作者,由demo大师发表,拒绝转载,转载需要作者授权
3DTouch - iOS新特性的更多相关文章
- iOS新特性引导页
有一个注意点: 获取版本号 个叫做Version,一个叫做Build,这两个值都可以在Xcode 中选中target,点击"Summary"后看到. Version在plist文件 ...
- ios新特性
@import 在xcode 5 下,为了更易于开发,增加了modules和 auto-linking 这两个新特性: 在以前,如果你要使用MapKit这个框架,你要这样做 1) 使用语句 #imp ...
- ios新特性(泛型)
协变 子类转父类 逆变父类给子类赋值
- iOS 新特性关键字
1.用来修饰属性,或者方法的参数,方法的返回值 /** nullable:表示可以传空 */ //@property (nonatomic, strong, nullable) NSString *n ...
- 开发者所需要知道的 iOS 10 SDK 新特性
转自:https://onevcat.com/2016/06/ios-10-sdk/ 写的很好啊.哈哈哈 总览 距离 iPhone 横空出世已经过去了 9 个年头,iOS 的版本号也跨入了两位数.在我 ...
- fir.im Weekly - 从 iOS 10 SDK 新特性说起
从 iOS 7 翻天覆地的全新设计,iOS 8 中 Size Classes 的出现,应用扩展,以及 Cloud Kit 的加入,iOS 9 的分屏多任务特性,今年的 WWDC iOS 10 SDK ...
- iOS开发实用技巧—项目新特性页面的处理
iOS开发实用技巧篇—项目新特性页面的处理 说明:本文主要说明在项目开发中会涉及到的最最简单的新特性界面(实用UIScrollView展示多张图片的轮播)的处理. 代码示例: 新建一个专门的处理新特性 ...
- iOS - OC 语言新特性
前言 相对于 Java,OC 语言是一门古老的语言了,而它又是一门不断发展完善的语言.一些新的编译特性,为 OC 语言带来了许多新的活力.在 Xcode7 中,iOS9 的 SDK 已经全面兼容了 O ...
- iOS - Swift Swift 语言新特性
1.Swift 2.0 带来哪些新变化 常规变化: 1.OS X 10.11.iOS 9 和 watchOS 2 SDK 采纳了一些 Objective-C 的特性用来提高 Swift 的编程体验, ...
随机推荐
- .NET:为什么需要逆变和协变
为啥需要协变和逆变? 我目前想到的理由是:逆变和协变的目的是支持多态. 一个小例子 不明白为啥输出的是false和true. using System; using System.Collection ...
- 利用UIWebView获取userAgent需要注意的地方
网络通信有时候需要传递参数userAgent,iOS中获取userAgent很简单. UIWebView* webView = [[UIWebView alloc] initWithFrame:CGR ...
- 开启hadoop和Hbase集群的lzo压缩功能(转)
原文链接:开启hadoop和Hbase集群的lzo压缩功能 问题导读: 1.如何启动hadoop.hbase集群的压缩功能? 2.lzo的作用是什么? 3.hadoop配置文件需要做哪些修改? 首先我 ...
- MySQL中的模糊查询和通配符转义
MySQL中实现模糊查询有2种方式:一是用LIKE/NOT LIKE,二是用REGEXP/NOT REGEXP(或RLIKE/NOT RLIKE,它们是同义词). 第一种是标准的SQL模式匹配.它有2 ...
- Informatica 常用组件Lookup之五 转换属性
查找转换的属性标识数据库源.PowerCenter 如何处理转换,以及它如何处理高速缓存和多项匹配. 创建映射时,为每个查找转换指定属性.创建会话时,您可在会话属性中覆盖某些属性,如每个转换的索引和数 ...
- windows media server 组件安装后流媒体服务器启动失败
做好的web应用,去客户现场部署的时候发现流媒体服务器不能启动.(现场服务器系统为windows server2008 R2) 自己测试的时候搭建环境没什么问题.从来没有遇到安装windows med ...
- 跨平台app开发(引擎)工具的选择【转】
跨平台app开发(引擎)工具的选择 1.html5执行速度慢,用户体验不好 2.原生应用开发,即ios和安卓分别开发,需要两种技术人员,后期代码维护困难,很难达到统一. 3.xamarin是一款c#的 ...
- Dropwizard框架入门
最近项目用到了Dropwizard框架,个人感觉还不错,那么这里就从他们官网入手,然后加上自己的实现步骤让大家初步了解这个框架. 官网对DW(Dropwizard)的定义是跨越了一个库和框架之间的界限 ...
- GIT 恢复已删除的提交
在Git中一切的操作都是可以恢复的,包括已经删除的提交,今天在做一个项目时就遇到了这种问题,也不知道是怎么回事不小心就把上午提交的所有代码都删除了,于是赶紧通过git log来查看日志,但奇怪的是当时 ...
- ntpdate设置
ntpdate设置 学习了:https://www.cnblogs.com/ibnode/p/3573302.html http://www.blogjava.net/spray/archive/20 ...