docker 启动 容器----bootstrap checks failed
错误信息:
bootstrap checks failed
解决方法:
1.修改elasticsearch.yml配置文件,允许外网访问。
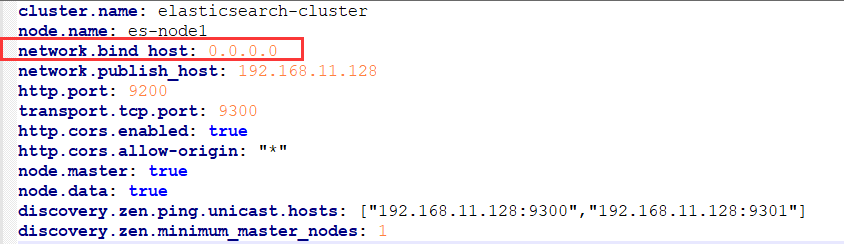
vim config/elasticsearch.yml,增加 network.bind_host: 0.0.0.0 或者是 network.host: 0.0.0.0。
2.启动失败,检查没有通过,报错
[2019-07-14T17:44:59,658][INFO ][o.e.b.BootstrapChecks ] [gFOuNlS] bound or publishing to a non-loopback address, enforcing bootstrap checks
ERROR: [2] bootstrap checks failed
[1]: max file descriptors [4096] for elasticsearch process is too low, increase to at least [65536]
[2]: max virtual memory areas vm.max_map_count [65530] is too low, increase to at least [262144]
[1]: max file descriptors [4096] for elasticsearch process is too low, increase to at least [65536]
编辑 /etc/security/limits.conf,再配置文件下面追加以下内容;
* soft nofile 65536
* hard nofile 65536
此文件修改后需要重新登录用户,才会生效。
[2]: max virtual memory areas vm.max_map_count [65530] is too low, increase to at least [262144]
编辑 /etc/sysctl.conf,追加以下内容:
vm.max_map_count=655360
保存后,执行:
sysctl -p
重新启动容器,成功。
参考博客:https://www.cnblogs.com/yehui/p/9087845.html
docker 启动 容器----bootstrap checks failed的更多相关文章
- ElasticSearch启动报错,bootstrap checks failed
修改elasticsearch.yml配置文件,允许外网访问. vim config/elasticsearch.yml# 增加 network.host: 0.0.0.0 启动失败,检查没有通过,报 ...
- 启动Sonar报错,ERROR: [1] bootstrap checks failed [1]: system call filters failed to install
错误提示信息: ERROR: [1] bootstrap checks failed[1]: system call filters failed to install; check the logs ...
- 【已解决】ERROR: bootstrap checks failed memory locking requested for elasticsearch process but memory is not locked
官网说明: elasticsearch官网建议生产环境需要设置bootstrap.memory_lock: true 官网的解释 是:发生系统swapping的时候ES节点的性能会非常差,也会影响节点 ...
- ES解决bootstrap checks failed, memory locking requested for elasticsearch process but memory is not locked问题
问题描述: ERROR: [1] bootstrap checks failed[1]: memory locking requested for elasticsearch process but ...
- Error response from daemon ... no space left on device docker启动容器服务报错
docker 启动容器服务的时候,报错no space left on device 1. 检查磁盘是否用光 3.检查inode是否耗光,从截图看到是inode耗光导致出现问题: 进入到/run里面看 ...
- MySQL安装+Navicat_Premium(安装+破解)+Navicat_Premium中MySQL的localhost不能正常连接+不能连接Docker启动容器中的MySQL
MySQL安装 安装MySQL 我这里安装的是 MySQL 8.0 Command Line Client 下载+安装 详情见 https://www.cnblogs.com/taopanfeng/p ...
- docker启动容器报错:iptables failed
问题描述: 启动Docker容器的时候 Error response / --dport -j DNAT --to-destination ! -i docker0: iptables: No cha ...
- Centos 7 docker 启动容器 iptables 报 No chain/target/match by that name
我也遇到这个问题,原因时启动docker服务时没有启动iptables服务导致的(有些docker需要再iptables开放有些端口)解决方法1.启动iptables服务 CentOS 7 以下版本 ...
- docker启动报错iptables failed: -重建docker0网络恢复
# docker启动报错 [root@localhost mysqlconf]# docker run -d -p 8080:8080 --link zookeeper:zookeeper -e du ...
随机推荐
- (转)AutoML 与轻量模型大列表: awesome-AutoML-and-Lightweight-Models
Awesome-AutoML-and-Lightweight-Models 原文:http://bbs.cvmart.net/articles/414/zi-yuan-automl-yu-qing-l ...
- 阿里云yii2 composer update 很慢的解决办法
先执行如下语句 composer global require "fxp/composer-asset-plugin:dev-master" 再执行 composer update
- python 设计模式之适配器模式 Adapter Class/Object Pattern
#写在前面 看完了<妙味>和<华医>,又情不自禁的找小说看,点开了推荐里面随机弹出的<暗恋.橘生淮南>,翻了下里面的评论,有个读者从里面摘了一段自己很喜欢的话出来, ...
- 产品经理 写SQL
产品经理必备技能:写SQL - 云+社区 - 腾讯云https://cloud.tencent.com/developer/news/3177 产品经理学SQL(一)一个小时上手SQL | 人人都是产 ...
- SqStack进制计算
基于SqStack 进制计算 #include<malloc.h> #include<stdio.h> #include<stdlib.h> typedef int ...
- URL相关的工具类
package com.opslab.util.web; import com.opslab.util.CharUtil;import com.opslab.util.CharsetUtil;impo ...
- Apache Flink 开发环境搭建和应用的配置、部署及运行
https://mp.weixin.qq.com/s/noD2Jv6m-somEMtjWTJh3w 本文是根据 Apache Flink 系列直播课程整理而成,由阿里巴巴高级开发工程师沙晟阳分享,主要 ...
- SAP 增强篇 Method1 BADI增强的查找方法
查找BADI的方法:(1)通过SE24,输入CL_EXITHANDLER,然后在方法GET_INSTANCE中设置断点,然后运行事务代码判断 exit_name的值,操作过程如下:输入se24,然后输 ...
- pytorch 中Dataloader中的collate_fn参数
一般的,默认的collate_fn函数是要求一个batch中的图片都具有相同size(因为要做stack操作),当一个batch中的图片大小都不同时,可以使用自定义的collate_fn函数,则一个b ...
- anywhere随启随用的静态文件服务器
手机移动端调试,也可以使用anywhere anywhere -p 8080 指定端口 anywhere -s 保持浏览器关闭 anywhere -h localhost -p 8080 通过主机名 ...