Android——excise(用线性布局、表格布局、相对布局做发送邮件界面)
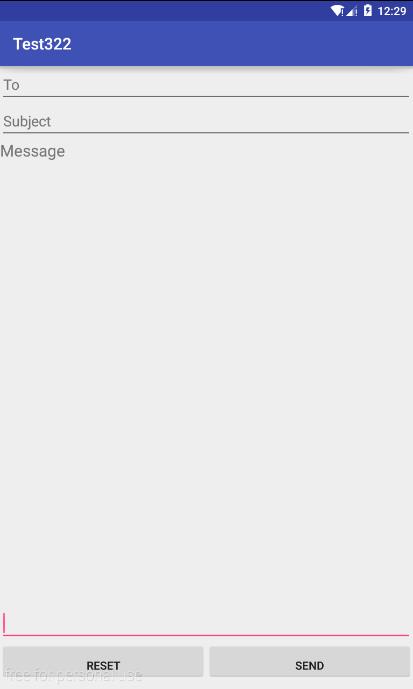
LinearLayout
<?xml version="1.0" encoding="utf-8"?>

<LinearLayout xmlns:android="http://schemas.android.com/apk/res/android"

    android:layout_width="match_parent"

    android:layout_height="match_parent"

    android:orientation="vertical">

        <EditText

            android:layout_width="match_parent"

            android:layout_height="wrap_content"

            android:hint="To"

            />

        <EditText

            android:layout_width="match_parent"

            android:layout_height="wrap_content"

            android:hint="Subject"

            />

        <TextView

            android:layout_width="match_parent"

            android:layout_height="wrap_content"

            android:text="Message"

            android:textSize="20dp"/>

        <EditText

            android:layout_width="match_parent"

            android:layout_height="0dp"

            android:layout_weight="1"

            android:gravity="bottom"

            />

    <LinearLayout

        android:layout_width="match_parent"

        android:layout_height="wrap_content"

        android:orientation="horizontal">

        <Button

            android:layout_width="0dp"

            android:layout_height="wrap_content"

            android:text="Reset"

            android:layout_weight="1"/>

        <Button

            android:layout_width="0dp"

            android:layout_height="wrap_content"

            android:text="Send"

            android:layout_weight="1"

            />

    </LinearLayout>

</LinearLayout>

TableLayout
<?xml version="1.0" encoding="utf-8"?>

<TableLayout xmlns:android="http://schemas.android.com/apk/res/android"

    android:layout_width="match_parent"

    android:layout_height="match_parent"

    android:stretchColumns="1,2">

    <TableRow>

        <EditText

            android:layout_width="match_parent"

            android:layout_height="wrap_content"

            android:hint="To"

            android:layout_span="2"/>

    </TableRow>

    <TableRow>

        <EditText

            android:layout_width="match_parent"

            android:layout_height="wrap_content"

            android:hint="Subject"

            android:layout_span="2"/>

    </TableRow>

    <TableRow>

        <TextView

            android:layout_width="match_parent"

            android:layout_height="wrap_content"

            android:hint="Message"

            android:textSize="20dp"/>

    </TableRow>

    <TableRow

        android:layout_marginTop="550dp">

        <EditText

            android:layout_width="match_parent"

            android:layout_height="wrap_content"

            android:layout_span="2"

            />

    </TableRow>

    <TableRow>

        <Button

            android:layout_width="0dp"

            android:layout_height="wrap_content"

            android:paddingBottom="0dp"

            android:text="reset"

            android:layout_weight="1"/>

        <Button

            android:layout_width="0dp"

            android:layout_height="wrap_content"

            android:paddingBottom="0dp"

            android:text="send"

            android:layout_weight="1"/>

    </TableRow>

</TableLayout>
RelativeLayout
<?xml version="1.0" encoding="utf-8"?>

<RelativeLayout xmlns:android="http://schemas.android.com/apk/res/android"

    android:layout_width="match_parent"

    android:layout_height="match_parent">

    <EditText

        android:layout_width="match_parent"

        android:layout_height="wrap_content"

        android:hint="To"

        android:id="@+id/to"/>

    <EditText

        android:layout_width="match_parent"

        android:layout_height="wrap_content"

        android:hint="Subject"

        android:layout_below="@id/to"

        android:id="@+id/sub"

        />

    <TextView

        android:layout_width="match_parent"

        android:layout_height="wrap_content"

        android:hint="Message"

        android:textSize="20dp"

        android:layout_below="@id/sub"

        />

    <Button

        android:layout_width="190dp"

        android:layout_height="wrap_content"

        android:text="send"

        android:layout_alignParentBottom="true"

        android:layout_alignParentRight="true"

        android:id="@+id/sen"

       />

    <Button

        android:layout_width="190dp"

        android:layout_height="wrap_content"

        android:text="reset"

        android:layout_alignParentBottom="true"

        android:layout_alignParentLeft="true"

        />

    <EditText

        android:layout_width="match_parent"

        android:layout_height="wrap_content"

        android:layout_above="@id/sen"

        />

</RelativeLayout>

Android——excise(用线性布局、表格布局、相对布局做发送邮件界面)的更多相关文章
- Android -- UI布局管理,相对布局,线性布局,表格布局,绝对布局,帧布局
1. 相对布局 <RelativeLayout xmlns:android="http://schemas.android.com/apk/res/android" xmln ...
- Android精通:View与ViewGroup,LinearLayout线性布局,RelativeLayout相对布局,ListView列表组件
UI的描述 对于Android应用程序中,所有用户界面元素都是由View和ViewGroup对象构建的.View是绘制在屏幕上能与用户进行交互的一个对象.而对于ViewGroup来说,则是一个用于存放 ...
- 【Android开发学习笔记之一】5大布局方式详解
Android中常用的5大布局方式有以下几种: 线性布局(LinearLayout):按照垂直或者水平方向布局的组件. 帧布局(FrameLayout):组件从屏幕左上方布局组件. 表格布局(Tabl ...
- Android初级教程理论知识(第二章布局&读写文件)
常见布局 相对布局 RelativeLayout 组件默认左对齐.顶部对齐 设置组件在指定组件的右边 android:layout_toRightOf="@id/tv1" 设置在指 ...
- android开发_ViewGroup(组视图)-- 五大布局
view组--ViewGroup(组视图) ViewGroup的作用:在view中添加子控件.ViewGroup的5个子类,就是五大布局: (1) LinearLayout 线性布局(常用) (2) ...
- 学习android开发之路(一)页面布局
Android页面布局 1.Android页面布局一共分为6种: LinearLayout(线性布局).RelativeLayout(相对布局).TableLayout(表格布局).FrameLayo ...
- Android精通:TableLayout布局,GridLayout网格布局,FrameLayout帧布局,AbsoluteLayout绝对布局,RelativeLayout相对布局
在Android中提供了几个常用布局: LinearLayout线性布局 RelativeLayout相对布局 FrameLayout帧布局 AbsoluteLayout绝对布局 TableLayou ...
- Android布局_布局概述和LinearLayout布局
一.布局概述: 布局为UI提供了一个可视化的结构,比如对于一个activity或者app widget的UI,你可以用两种方式声明布局: 在XML中声明UI元素 在运行时实例化布局元素(在java代码 ...
- 第24讲 UI_布局 之帧布局 表格布局 绝对布局
第24讲 UI_布局 之帧布局 表格布局 绝对布局 3. FrameLayout(帧布局) 帧布局是从屏幕的左上角(0,0)坐标开始布局,多个组件层叠排序,后一个组件总会将前一个组件所覆盖,除非最后一 ...
随机推荐
- Transformer中引用iqd作为数据源导入报错TR1907与TR3312
好久没和transform接触了,初次接触就给我送了个大礼,在选择好iqd文件执行最后一步导入的时候,要求我对数据源输入用户名密码,我连续输入了三次用户名和密码,在我十分肯定用户名和密码没错的情况下, ...
- [React + Functional Programming ADT] Create Redux Middleware to Dispatch Actions with the Async ADT
We would like the ability to group a series of actions to be dispatched with single dispatching func ...
- Activiti 流程启动及节点流转源代码分析
作者:jiankunking 出处:http://blog.csdn.net/jiankunking 本文主要是以activiti-study中的xiaomage.xml流程图为例进行跟踪分析 详细的 ...
- static对象
1.static对象包括: global对象 namespace作用域下的对象 在class,function,file作用域内的static对象 2.在方法内的static对象成为 local st ...
- python命令行參数解析实例
闲言少述,直接上代码 #!/usr/bin/env python # # import json import getopt, sys def usage(): print sys.argv[ ...
- UNIX网络编程读书笔记:原始套接口
概述 应用程序可以绕过传输层而直接使用IPv4和IPv6,这称为原始套接口(raw socket).http://www.cnblogs.com/nufangrensheng/p/3583435.ht ...
- UNIX网络编程读书笔记:基本UDP套接口编程
概述 使用UDP编写的一些流行的应用程序有:DNS(域名系统).NFS(网络文件系统)和SNMP(简单网络管理协议). 如下图所示,给出了典型的UDP客户/服务器程序的函数调用: 客户不与服务器建立连 ...
- 七彩花都手机客户部分测试源码Phonegap+html5
个人建设广州花都论坛,七彩花都(http://www.w30.cn)包含传值回复楼层的jsonp 可以加入我们的QQ群讨论 专注phonepap 核心加载 jsonp返回格式为 jsonp([{&qu ...
- 转:sock_ev——linux平台socket事件框架(socket代理类) .
前面分析了对socket基本操作的封装,并按照数据的传送方式写了两个类,本篇将写一个代理类提供给库的使用者使用的类. /**************************************** ...
- 【windows7】解决IIS 80端口占用问题(亲测)
1.默认你win机器已经安装并启用了80端口 2.现在你要安装并启用apache服务器 3.首先进行80端口占用检测:netstat -aon|findstr 80 4.找到进程号为404的服务名称, ...