Install Open vSwitch on CentOS
转载:http://cloud-mate.org/2015/06/installing-open-vswitch-centos-cloudstack/
Installing Open vSwitch on CentOS 6.6
I would like to use Open vSwitch on my KVM nodes in my CloudStack deployment. I will download and build the Open vSwitch rpms on my deployment server, which is just a CentOS VM which i use for deploying packages etc.
Create a directory to download the Open vSwitch tar to (You can find the most recent OVS here:http://openvswitch.org/download/):
cd ~
mkdir -p rpmbuild/SOURCES
wget http://openvswitch.org/releases/openvswitch-2.3.1.tar.gz

tar xvfz openvswitch–2.3.1.tar.gz

cd openvswitch–2.3.1/
cp ../openvswitch–2.3.1.tar.gz ~/rpmbuild/SOURCES/
cp rhel/openvswitch-kmod.files ~/rpmbuild/SOURCES/

Then to build the rpms. This can take a few minutes:
rpmbuild -bb rhel/openvswitch.spec
rpmbuild -bb rhel/openvswitch-kmod-rhel6.spec
※如果没有rpmbuild命令,则yum install rpm-build 安装
※ openssl-devel is needed by openvswitch-2.5.0-1.x86_64,如果 没有openssl-devel,则yum install openssl-devel 安装
Now the rpms are sitting on my deployment server ready to be copied to my KVM nodes.

Copy the Open vSwitch rpms to the KVM node, using SCP.
scp -r root@sgdeploy:/root/rpmbuild/RPMS/x86_64 .

Change directory to x86_64/ by
cd x86_64/
Then install kmod-openvswitch-2.3.1-1.el16.x86_64.rpm using
yum -y localinstall kmod-openvswitch-2.3.1-1.e16.x86_64.rpm

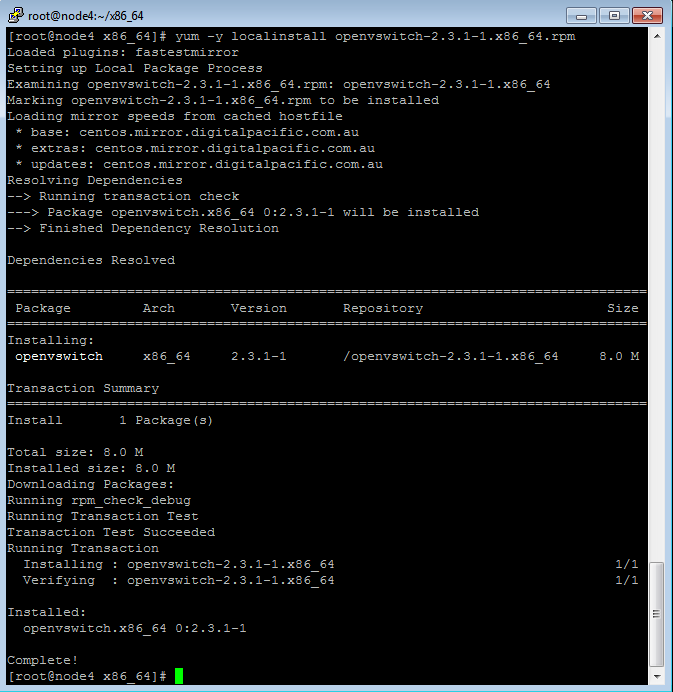
Install openvswitch-2.3.1-1.x86_64.rpm using
yum -y localinstall openvswitch-2.3.1-1.x86_64.rpm

Once both rpms are installed reboot the host. Then to verify openvswitch is installed run ovs-vsctl -V and ovs-vsctl show.

Once verified that Open vSwitch is installed we need to configure the network interfaces for use with CloudStack (This KVM node has 4 physical network adapters but i am only configuring two:
rm -f /etc/sysconfig/network-scripts/ifcfg-eth0
echo “DEVICE=eth0” >> /etc/sysconfig/network-scripts/ifcfg-eth0
echo “BOOTPROTO=none” >> /etc/sysconfig/network-scripts/ifcfg-eth0
echo “IPV6INIT=no” >> /etc/sysconfig/network-scripts/ifcfg-eth0
echo “NM_CONTROLLED=no” >> /etc/sysconfig/network-scripts/ifcfg-eth0
echo “ONBOOT=yes” >> /etc/sysconfig/network-scripts/ifcfg-eth0
echo “TYPE=OVSPort” >> /etc/sysconfig/network-scripts/ifcfg-eth0
echo “DEVICETYPE=ovs” >> /etc/sysconfig/network-scripts/ifcfg-eth0
echo “OVS_BRIDGE=cloudbr0” >> /etc/sysconfig/network-scripts/ifcfg-eth0
rm -f /etc/sysconfig/network-scripts/ifcfg-eth1
echo “DEVICE=eth1” >> /etc/sysconfig/network-scripts/ifcfg-eth1
echo “BOOTPROTO=none” >> /etc/sysconfig/network-scripts/ifcfg-eth1
echo “IPV6INIT=no” >> /etc/sysconfig/network-scripts/ifcfg-eth1
echo “NM_CONTROLLED=no” >> /etc/sysconfig/network-scripts/ifcfg-eth1
echo “ONBOOT=yes” >> /etc/sysconfig/network-scripts/ifcfg-eth1
echo “TYPE=OVSPort” >> /etc/sysconfig/network-scripts/ifcfg-eth1
echo “DEVICETYPE=ovs” >> /etc/sysconfig/network-scripts/ifcfg-eth1
echo “OVS_BRIDGE=cloudbr1” >> /etc/sysconfig/network-scripts/ifcfg-eth1
rm -f /etc/sysconfig/network-scripts/ifcfg-cloudbr0
echo “DEVICE=cloudbr0” >> /etc/sysconfig/network-scripts/ifcfg-cloudbr0
echo “ONBOOT=yes” >> /etc/sysconfig/network-scripts/ifcfg-cloudbr0
echo “DEVICETYPE=ovs” >> /etc/sysconfig/network-scripts/ifcfg-cloudbr0
echo “TYPE=OVSBridge” >> /etc/sysconfig/network-scripts/ifcfg-cloudbr0
echo “BOOTPROTO=static” >> /etc/sysconfig/network-scripts/ifcfg-cloudbr0
echo “IPADDR=10.20.28.181” >> /etc/sysconfig/network-scripts/ifcfg-cloudbr0
echo “GATEWAY=10.20.28.254” >> /etc/sysconfig/network-scripts/ifcfg-cloudbr0
echo “NETMASK=255.255.255.0” >> /etc/sysconfig/network-scripts/ifcfg-cloudbr0
echo “DNS1=10.20.16.15” >> /etc/sysconfig/network-scripts/ifcfg-cloudbr0
echo “DNS2=10.20.16.16” >> /etc/sysconfig/network-scripts/ifcfg-cloudbr0
echo “HOTPLUG=no” >> /etc/sysconfig/network-scripts/ifcfg-cloudbr0
rm -f /etc/sysconfig/network-scripts/ifcfg-cloudbr1
echo “DEVICE=cloudbr1” >> /etc/sysconfig/network-scripts/ifcfg-cloudbr1
echo “ONBOOT=yes” >> /etc/sysconfig/network-scripts/ifcfg-cloudbr1
echo “DEVICETYPE=ovs” >> /etc/sysconfig/network-scripts/ifcfg-cloudbr1
echo “TYPE=OVSBridge” >> /etc/sysconfig/network-scripts/ifcfg-cloudbr1
echo “BOOTPROTO=none” >> /etc/sysconfig/network-scripts/ifcfg-cloudbr1
echo “HOTPLUG=no” >> /etc/sysconfig/network-scripts/ifcfg-cloudbr1
echo ‘blacklist bridge’ >> /etc/modprobe.d/blacklist.conf
echo “network.bridge.type=openvswitch” >> /etc/cloudstack/agent/agent.properties
echo “libvirt.vif.driver=com.cloud.hypervisor.kvm.resource.OvsVifDriver” >> /etc/cloudstack/agent/agent.properties
References:
https://cwiki.apache.org/confluence/display/CLOUDSTACK/KVM+with+OpenVSwitch
CentOS 7 – Installing Openvswitch 2.3.0 LTSCentOS 7 – Installing Openvswitch 2.3.0 LTS
https://n40lab.wordpress.com/2014/09/04/openvswitch-2-3-0-lts-and-centos-7/
Install Open vSwitch on CentOS的更多相关文章
- Install .Net Core For CentOS
Install .NET Core SDK Before you start, please remove any previous versions of .NET Core from your s ...
- [转载]How to Install Firefox 33 on CentOS, Redhat and Other Linux Distributions
FROM: http://tecadmin.net/install-firefox-on-linux/ Firefox 33 has been released for Systems and And ...
- Install RabbitMQ server in CentOS 7
About RabbitMQ RabbitMQ is an open source message broker software, also sometimes known as message-o ...
- Install Docker Engine on CentOS 在CentOS 7 上安装Docker
Install Docker Engine on CentOS OS Requirements 系统要求 To install Docker Engine,you need a maintained ...
- Centos 7.5 通过yum安装GNOME Desktop时出现:file /boot/efi/EFI/centos from install of fwupdate-efi-12-5.el7.centos.x86_64 conflicts with file from package grub2-common-1:2.02-0.65.el7.centos.2.noarch
系统版本为: [root@s10 ~]# cat /etc/redhat-release CentOS Linux release 7.5.1804 (Core) 由于管理kvm虚拟机的需求,需要安装 ...
- Open vSwitch for CentOS
原文发表于cu:2016-06-02 本文属于重发,ovs当前的安装方式可能略有不同. 参考文档: 官方文档: http://openvswitch.org/support/dist-docs-2.5 ...
- 转载--How to Install VMware Tools on CentOS 6.3
源地址:http://www.ehowstuff.com/how-to-install-vmware-tools-on-centos-6-3/ VMware Tools is a group of u ...
- install keepalived on RedHat/CentOS to provide IP failover for web cluster
Contents [hide] 1 Introduction 2 Our Sample Setup 3 Install Keepalived 4 Install Kernel Headers 5 C ...
- install erlang environment on centos
#(erlide in linux can't detect the runtime if build from source, but erlang shell works correctly)su ...
随机推荐
- unix下网络编程之I/O复用(一)
什么是I/O复用? What we need is the capability to tell the kernel that we want to be notified if one or mo ...
- ABP 学习系列 - 目录
一.ABP 学习系列 - 入门介绍之单表 http://www.cnblogs.com/yabu007/p/8067694.html 二.ABP 学习系列 - 入门介绍之多表 http://www.c ...
- 接口方式[推荐]/动态SQL语句
MVC目录结构: Src -- com.shxt.servlet[控制层] --com.shxt.service[业务逻辑层] --com.shxt.model[实体Bean,用来承载数据] --co ...
- Swing编程把图片放入frame里。先不作为背景图片
总结: 总之遵循一条,所有的组件都不是直接放入frame里的.还要label的重要性,panel.面板类 虽然我还是不会做,但总算出了个图片出来~~~~~~~~~~~~~ package com.kk ...
- L2-013. 红色警报(dfs)
L2-013. 红色警报 时间限制 400 ms 内存限制 65536 kB 代码长度限制 8000 B 判题程序 Standard 作者 陈越 战争中保持各个城市间的连通性非常重要.本题要求你编写一 ...
- c# 使用GetPrivateProfileString 读ini数据 失败
项目中用到 GetPrivateProfileString但是使用中, 发现 无法读出 ini 配置中的值, 比如Enable_log =3 我读到的是 API设置的默认值. 网上说可能时字符集编码的 ...
- 已有项目使用Asset Pipeline管理静态资源
1. 修改项目中指向静态资源文件的链接 a) 访问静态资源文件 <%= stylesheet_link_tag "application", media: " ...
- 有关Backgroundworker
(一)Backgroundworker取消时应该用的有关代码: CancelAsync方法是在前台主线程用的,CancellationPending属性是在后台子线程用的.实际的使用方式应该是这样的: ...
- 很详细的Nginx配置说明
这篇文章主要为大家分享了一篇很详细的Nginx配置说明,主要内容包括Nginx常用功能.Nginx配置文件结构,想要了解Nginx配置的朋友不要错过,参考一下 Nginx是lgor Sysoev为 ...
- ORACLE——日期时间格式化参数详解 之一
2.日期格式化参数详解 2.1 -/,.;: 指定返回字串分隔符 SQL> select to_char(sysdate,'yyyy.mm.dd') from dual; TO_CHAR(SYS ...
