MVC开发模式以及Smarty模板引擎的使用
Linux 全局安装 composer
将目录切换到/usr/local/bin/目录

    cd /usr/local/bin/

在 bin 目录中下载 composer

    curl -sS https://getcomposer.org/installer | php

通过 composer.phar -v 查看 composer

修改为中国镜像

    composer.phar config -g repo.packagist composer https://packagist.phpcomposer.com

最后我把composer.phar复制了一份,重命名为composer

以后可以直接用composer
MVC架构模式
控制器(Controller)- 负责转发请求,对请求进行处理
视图(View) - 界面设计人员进行图形界面设计
模型(Model) - 程序员编写程序应有的功能(实现算法等等)、数据库专家进行数据管理和数据库设计(可以实现具体的功能)
实现简易模板引擎:
composer.json
    {

      // 自动加载

      // 可以在composer.json的autoload字段找那个添加自己的autoloader

      "autoload": {

        "psr-4": {

          "App\\Controllers\\": "Controllers/",

          "App\\Models\\": "Models/",

          "Tools\\": "Tools/"

        }

      }

    }
Models/Users.php
    <?php

    // model层数据库操作演示

    namespace App\Models;

    class Users

    {

        // 数据存入数据库演示

        public function store()

        {

            echo 'store into database';

        }

        // 查询数据库演示

        public function getUsername()

        {

            // 查询数据库

            return 'test-data';

        }

    }
Controllers/UserController.php
    <?php

    namespace App\Controllers;

    use Tools\Tpl;

    use App\Models\Users;

    class UserController extends Tpl

    {

        public function create()

        {

            echo 'User create';

        }

        public function getUser()

        {

            // 通过Model查询数据

            $userModel = new Users;

            $username = $userModel->getUsername();

            // 将$username显示在对应的一个HTML文件当中,并且显示出来

            // 表现层 user/user.html

            // 将变量发送给模板(html文件)

            $this->assign('username', $username);

            $this->assign('age', );

            // 显示模板

            $this->display('user/user.html');

        }

    }
Views/user/user.html
    <!DOCTYPE html>

    <html lang="en">

    <head>

        <meta charset="UTF-8">

        <title>Title</title>

    </head>

    <body>

        <h2>

            {$username}

        </h2>

        <h3>

            {$age}

        </h3>

    </body>

    </html>
Tools/Tpl.php
    <?php

    // 分配变量

    // 将变量发送给模板

    namespace Tools;

    class Tpl

    {

        protected $assign_vars = [];

        public function assign($tpl_var_name, $val)

        {

            $this->assign_vars[$tpl_var_name] = $val;

        }

        public function display($tpl_name)

        {

            // Views/user/$tpl_name

            $className = get_called_class(); // App\Controllers\UserController

            $dirName = strtolower(substr(substr($className, ), , -)); // user

            $dir = dirname(__DIR__) . '/Views/' . $dirName . '/' . $tpl_name;

            // file_get_contents

            $content = file_get_contents($dir);

            // preg_replace

            foreach ($this->assign_vars as $tpl_var_name => $val) {

                $content = preg_replace('/\{\$' . $tpl_var_name . '\}/', '<?php echo $this->assign_vars["' . $tpl_var_name . '"]; ?>', $content);

            }

            // compile

            $compile = dirname(__DIR__) . '/runtime/Compile/' . md5($tpl_name) . '.php';

            file_put_contents($compile, $content);

            // include

            include $compile;

        }

    }
Smarty模板引擎的使用
服务端开发部分演示
Smarty引擎的安装
变量的分配和加载显示模板
以插件形式扩展Smarty
缓存控制技术
smarty.php
<?php
/**
* Created by PhpStorm.
*/
session_start();
require './libs/Smarty.class.php'; $smarty = new Smarty(); // 简单配置 初始化设置
$smarty->setTemplateDir('./Views');
$smarty->setCompileDir('./runtime/Compile');
$smarty->setConfigDir('./Config');
$smarty->addPluginsDir('./Plugins');
$smarty->setCacheDir('./runtime/Cache'); $smarty->caching = 1;//开启缓存
$smarty->setCacheLifetime(60*60*24);
$smarty->left_delimiter = '{';
$smarty->right_delimiter = '}'; // 缓存机制
if (!$smarty->isCached('extends.html', $_SERVER['REQUEST_URI'])) { // 数据库查询
$data = [[]]; // 使用
$smarty->assign([
'username' => 'test-data',
'age' => 20
]); // 数组
$smarty->assign('arr1', [1, 2, 3]);
$smarty->assign('arr2', ['id' => 1, 'username' => 'zhangsan', 'age' => 30]);
$smarty->assign('users', [
['id' => 1, 'username' => 'zhangsan', 'age' => 30],
['id' => 2, 'username' => 'lisi', 'age' => 40]
]); $smarty->assign('hobby_ids', [1, 2, 3]);
$smarty->assign('hobby_output', ['看书', '敲代码', '看视频']);
$smarty->assign('options', [
1 => '看书',
2 => '敲代码',
3 => '看视频'
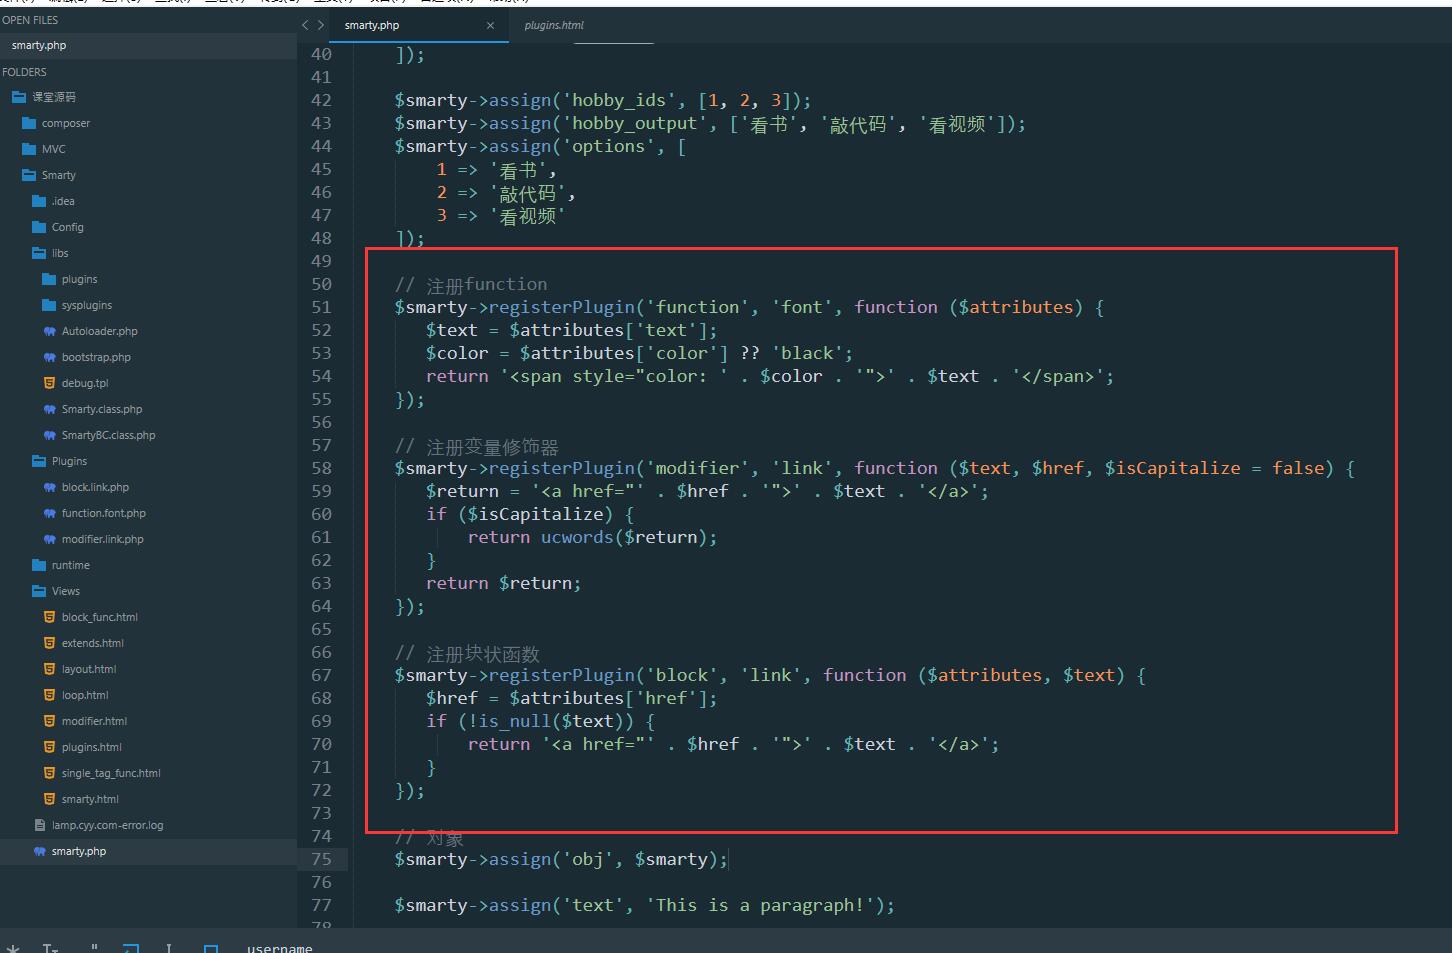
]); // 注册function
$smarty->registerPlugin('function', 'font', function ($attributes) {
$text = $attributes['text'];
$color = $attributes['color'] ?? 'black';
return '<span style="color: ' . $color . '">' . $text . '</span>';
}); // 注册变量修饰器
$smarty->registerPlugin('modifier', 'link', function ($text, $href, $isCapitalize = false) {
$return = '<a href="' . $href . '">' . $text . '</a>';
if ($isCapitalize) {
return ucwords($return);
}
return $return;
}); // 注册块状函数
$smarty->registerPlugin('block', 'link', function ($attributes, $text) {
$href = $attributes['href'];
if (!is_null($text)) {
return '<a href="' . $href . '">' . $text . '</a>';
}
}); // 对象
$smarty->assign('obj', $smarty); $smarty->assign('text', 'This is a paragraph!'); $smarty->display('smarty.html');
$smarty->display('loop.html');
$smarty->display('single_tag_func.html');
$smarty->display('modifier.html');
$smarty->display('block_func.html');
$smarty->display('plugins.html');
$smarty->assign('users', $data);
}
$smarty->clearCache('extends.html', $_SERVER['REQUEST_URI']);
$smarty->clearAllCache();
$smarty->display('extends.html', $_SERVER['REQUEST_URI']);
前端开发部分演示
注释和变量的使用smarty.html
<!DOCTYPE html>

<html lang="en">

<head>

    <meta charset="UTF-8">

    <title>Title</title>

</head>

<body>

    <h2>

        <!-- 模板注释被*星号包围,而两边的星号又被定界符包围 -->

        {*$username*}

        {$username}

    </h2>

    <h3>

        <!-- 变量 -->

        {$age}

    </h3>

    <hr>

        <!-- 索引数组 -->

        arr1:

        {$arr1[1]}

    <hr>

        <!-- 关联数组 -->

        arr2:

        {$arr2['username']}

        {$arr2.username}

    <hr>

        <!-- 对象 -->

        Object:

        {var_dump($obj->getTemplateDir())}

    <hr>

        <!-- 变量的运算 -->

        {$var = 100}

        {$var}

        {$foo = $var + 200}

        {$foo}

    <hr>

        {$foo}

    <hr>

        <!-- 保留变量的使用 -->

        $_GET:

        {var_dump($smarty.get)}

    <hr>

        $_POST:

        {var_dump($smarty.post)}

    <hr>

        $_REQUEST:

        {var_dump($smarty.request)}

    <hr>

        COOKIE:

        {var_dump($smarty.cookies)}

    <hr>

        SESSION:

        {var_dump($smarty.session)}

    <hr>

        SERVER:

        {var_dump($smarty.server)}

    <hr>

        ENV:

        {var_dump($smarty.env)}

    <hr>

        {time()}

        {$smarty.now}

    <hr>

        <!-- 加载配置文件后,配置文件中的变量需要用两个井号“#”包围或者是 smarty的保留变量$smarty.config.来调用 -->

        {config_load file='base.conf'}

        {#FONT_SIZE#}

        {$smarty.config.FONT_COLOR}

</body>

</html>
流程控制的使用loop.html
<!DOCTYPE html>

<html lang="en">

<head>

    <meta charset="UTF-8">

    <title>流程控制</title>

</head>

<body>

   <!--  使用{if}处理分支结构 -->

    {$number = 200}

    {if $number === 100}

        gt

    {else if $number == 200}

        This number is 200

    {else}

        This number is not 100

    {/if}

    {$bool = false}

    {if not $bool}

        not

    {/if}

    {if $number is not even}

        odd

    {/if}

    {if $number is not odd}

        even

    {/if}

    {if $number mod 2 == 0}

        even

    {/if}

    {if $number is not odd by 3}

        odd

    {/if}

    <!-- 使用{for}处理循环 -->

    {for $i = 5 to 4 step 2}

        {$i}

    {forelse}

        no loop

    {/for}

    <!-- 使用{while}处理循环 -->

    {while $number > 195}

        {$number--}

    {/while}

    <!-- 使用{foreach}遍历数组 -->

    {foreach $arr2 as $key => $val}

        {if $val@first}

            {*break*}

            {continue}

        {/if}

        {$key}:{$val}

        {$val@key}

        {$val@index}

        {$val@iteration}

        {$val@first}

        {$val@last}

        {$val@show}

        {$val@total}

    {foreachelse}

        data does not exist

    {/foreach}

    <!-- 使用{section}遍历数组 -->

    {section name=key loop=$arr1}

        {$arr1[key]}

    {/section}

    {section name=key loop=$users2 step=-1 max=2}

        id: {$users[key].id}

        username: {$users[key].username}

        age: {$users[key].age}

        {$smarty.section.key.index}

        {$smarty.section.key.iteration}

        {$smarty.section.key.rownum}

        {$smarty.section.key.index_prev}

        {$smarty.section.key.index_next}

    {sectionelse}

        no loop

    {/section}

</body>

</html>
常用标签函数的使用single_tag_func.html
<!DOCTYPE html>

<html lang="en">

<head>

    <meta charset="UTF-8">

    <title>常用标签函数的使用</title>

</head>

<body>

    {assign var="name" value="Jason"}

    {assign "name" "Jason Lee"}

    {$name}

    {append var="arr1" value=4 index="3"}

    {var_dump($arr1)}

    {ldelim}$name{rdelim}

    {html_checkboxes name="hobby" values=$hobby_ids output=$hobby_output selected=$hobby_ids}

    {html_checkboxes name="hobby" options=$options selected=$hobby_ids}

    {html_image width="50" height="50" alt="Google" href="http://www.google.com" file="https://www.google.com/images/branding/googlelogo/1x/googlelogo_color_272x92dp.png"}

    {html_options name="hobby" values=$hobby_ids output=$hobby_output selected=2}

    {html_options name="hobby" options=$options selected=2}

    {html_radios name="hobby" options=$options selected=2}

    {html_select_date}

    {html_select_time}

    {html_table loop=$arr1 cols=2 rows=3}

    {mailto address="86267659@qq.com" subject="test" text="给我发邮件" cc="123123@qq.com"}

    {math equation="x + y" x = 100 y = 200}

</body>

</html>
变量修饰器的使用modifier.html
<!DOCTYPE html>

<html lang="en">

<head>

    <meta charset="UTF-8">

    <title>变量修饰器的使用</title>

</head>

<body>

    {$str="123123\nthIs is string."}

    <hr>

    {$str|capitalize:true:true}

    <hr>

    {$str|capitalize:true:true|cat:'.'}

    <hr>

    {$str|count_characters}

    <hr>

    {$str|count_paragraphs}

    <hr>

    {$str|count_sentences}

    <hr>

    {$str|count_words}

    <hr>

    {$str2|default:'Not Data Yet'}

    <hr>

    {time()|date_format:'%Y-%m-%d %H:%M:%S'}

    <hr>

    {$chinese = '中文'}

    {$chinese|from_charset:'utf-8'|to_charset:'gb2312'}

    <hr>

    {$str|indent:10:'---'}

    <hr>

    {$str|lower|upper}

    <hr>

    {$str2="This is p1.\nThis is p2."}

    {$str2|nl2br}

    <hr>

    {$str|regex_replace:'/\d+/':' '}

    <hr>

    {$str|replace:'123123':'000'}

    <hr>

    {$str|spacify:'-'}

    <hr>

    {$float='10.0020398475'}

    {$float|string_format:'%.2f'}

    <hr>

    {$str3='a     b     c'}

    {$str3|strip:'-'}

    <hr>

    {$tag='<b>Font</b>'}

    {$tag|strip_tags}

    <hr>

    {$bigstr='123123123123123123ahjfdashfksdhfkjsdhjkfshfjkhsd'}

    {$bigstr|truncate:10:'---':true:true}

    <hr>

    {$tag|escape|unescape}

    <hr>

    {$bigstr|wordwrap:10:"\n":true}

</body>

</html>
块函数的使用block_func.html
<!DOCTYPE html>

<html lang="en">

<head>

    <meta charset="UTF-8">

    <title>块函数的使用</title>

</head>

<body>

    {textformat indent='4' indent_first='10' indent_char='-' wrap='10' wrap_char='<hr>' wrap_cut=true assign='var'}

    aaaaaaaaaaaaaaa

    aaaaaaaaaaaaaaa

    aaaaaaaaaaaaaaa

    aaaaaaaaaaaaaaa

    aaaaaaaaaaaaaaa

    aaaaaaaaaaaaaaa

    aaaaaaaaaaaaaaa

    {/textformat}

    {*$var*}

    {nocache}

        {time()}

    {/nocache}

    <hr>

    {time()}

</body>

</html>
插件的开发plugins.html
<!DOCTYPE html>

<html lang="en">

<head>

    <meta charset="UTF-8">

    <title>Title</title>

</head>

<body>

    {font text=$text color='#123123'}

    {$text|link:'http://www.baidu.com'}

    {link href='http://www.baidu.com'}

        aaaaaaaaaaaaaaaaa

        aaaaaaaaaaaaaaaaa

        aaaaaaaaaaaaaaaaa

        aaaaaaaaaaaaaaaaa

        aaaaaaaaaaaaaaaaa

        aaaaaaaaaaaaaaaaa

        aaaaaaaaaaaaaaaaa

    {/link}

</body>

</html>
Smarty模板引擎插件的开发:
1、使用registerPlugin( )方法扩充插件格式
2、在smarty模板的libs/plugins/目录下创建函数插件文件
block.link.php
function smarty_block_link($attributes, $text)

{

    $href = $attributes['href'];

    if (!is_null($text)) {

        return '<a href="' . $href . '">' . $text . '</a>';

    }

}
function.font.php
function smarty_function_font($attributes)

{

    $text = $attributes['text'];

    $color = $attributes['color'] ?? 'black';

    return '<span style="color: ' . $color . '">' . $text . '</span>';

}
modifier.link.php
function smarty_modifier_link($text, $href, $isCapitalize = false)

{

    $return = '<a href="' . $href . '">' . $text . '</a>';

    if ($isCapitalize) {

        return ucwords($return);

    }

    return $return;

}
模板继承的使用
extends.html
!-- 使用{extends}函数实现模板继承

合并子模板和父模板的{block}标签内容 -->

{extends file="layout.html"}

{block name="title"}

    Article {$smarty.block.parent}

{/block}

{block name="content"}

    Article List

    {$smarty.get.page}

    {*nocache*}

        {time()}

    {*/nocache*}

    {time()|date_format:'%H:%M:%S' nocache}

{/block}
layout.html
<!DOCTYPE html>

<html lang="en">

<head>

    <meta charset="UTF-8">

    <title>{block name="title"} - Imooc{/block}</title>

</head>

<body>

    <header>

        menu

    </header>

    {block name="content"}{/block}

    <footer>

        copyright

    </footer>

</body>

</html>
缓存机制
开启缓存
$smarty -> caching = 1|2|0;
$smarty -> setCacheDir("./cache");
$smarty->setCacheLifetime(300); // 5分钟,以秒为单位,-1永不过期
$smarty -> display('index.tpl');
$smarty -> display('index.tpl', $_SERVER['REQUEST_URI']);
相关函数
isCached()
clearCache()
clearAllCache()
MVC开发模式以及Smarty模板引擎的使用的更多相关文章
- 写一个迷你版Smarty模板引擎,对认识模板引擎原理非常好(附代码)
前些时间在看创智博客韩顺平的Smarty模板引擎教程,再结合自己跟李炎恢第二季开发中CMS系统写的tpl模板引擎.今天就写一个迷你版的Smarty引擎,虽然说我并没有深入分析过Smarty的源码,但是 ...
- Smarty模板引擎的使用
Smarty模板引擎的使用 Smarty是PHP中一个基于MVC模式的模板引擎. Download: http://www.smarty.net/download 特点 1. 最快速度的程序开发 ...
- smarty模板引擎(一)基础知识
一.基本概念 1.什么是mvc? mvc是一种开发模式,核心思想是:数据的输入.数据的处理.数据显示的强制分离. 2.什么是smarty? smarty是一个php的模板引擎.更明白的 ...
- 深入浅出之Smarty模板引擎工作机制(二)
源代码下载地址:深入浅出之Smarty模板引擎工作机制 接下来根据以下的Smarty模板引擎原理流程图开发一个自己的模板引擎用于学习,以便加深理解. Smarty模板引擎的原理,其实是这么一个过程: ...
- 深入浅出之Smarty模板引擎工作机制(一)
深入浅出Smarty模板引擎工作机制,我们将对比使用smarty模板引擎和没使用smarty模板引擎的两种开发方式的区别,并动手开发一个自己的模板引擎,以便加深对smarty模板引擎工作机制的理解. ...
- Smarty模板引擎技术
Smarty模板引擎技术 什么是模板引擎? 什么是Smarty模板引擎? 为何选择Smarty模板引擎? 如何使用Smarty模板引擎? 一.历史背景 场景一:回顾之前编写PHP项目的方式 //链接数 ...
- 迷你版 smarty --模板引擎和解析
http://blog.ipodmp.com/archives/php-write-a-mini-smarty-template-engine/ 迷你版Smarty模板引擎目录结构如下: ① 要开发一 ...
- Extjs 6 MVC开发模式(二)
1.Extjs MVC开发模式 在JS的开发过程中,大规模的JS脚本难以组织和维护,这一直是困扰前端开发人员的头等问题.Extjs为了解决这种问题,在Extjs4.x版本中引入了MVC开发模式,开始将 ...
- 前端学PHP之Smarty模板引擎
前面的话 对PHP来说,有很多模板引擎可供选择,但Smarty是一个使用PHP编写出来的,是业界最著名.功能最强大的一种PHP模板引擎.Smarty像PHP一样拥有丰富的函数库,从统计字数到自动缩进. ...
随机推荐
- Codeforces_338_D
http://codeforces.com/problemset/problem/338/D 中国剩余定理的应用,思路是确定可能符合的最小行和最小列,然后判断是否符合.若不符合则后面的(最小的倍数)也 ...
- Springboot笔记(二)整合
1.整合Freemarker 一种模板引擎,前端渲染模板的,类似于EL,jsp,不过比前两个好用 导入很简单 pom.xml <dependency> <groupId>o ...
- python之字典遍历方法
字典遍历分为三种: 遍历key 遍历value 遍历key-value key遍历: >>> person={','city':'BeiJing'} >>> for ...
- Python应用——多变量的灵活处理
本文始发于个人公众号:TechFlow,原创不易,求个关注 我们都知道Python是一个非常灵活的语言,以至于如果它不是你的第一门语言,你会发现它总能给你各种各样的惊喜,让你忍不住惊叹:woc,还有这 ...
- 031.Python类中的方法
一 类中的方法 1.1 介绍 (1) 普通方法(2) 绑定方法 绑定到对象 (自动传递对象参数) 绑定到类 (自动传递类参数) (3) 静态方法 (无论类还是对象,都可以调用) class Plane ...
- css3 动画 示例
/* animation */ .a-bounce,.a-flip,.a-flash,.a-shake,.a-swing,.a-wobble,.a-ring{-webkit-animation:1s ...
- 搭建grafana+telegraf+influxdb服务器性能监控平台
最近在学习性能测试,了解到一套系统资源使用率低的监控环境,也就是grafana+telegraf+influxdb. InfluxDB是一款优秀的时间序列数据库,适合存储设备性能.日志.物联网传感器等 ...
- 20200105--python学习数据类型总结
总结 python中的数据类型:整型/布尔类型/字符串/元组/列表/字典/集合 注意:列表,字典,集合都不能作为字典中的key,也不能作为集合中的元素 数据类型: (1)整型 (2)布尔类型:只有两个 ...
- Ubuntu mysql踩坑记录
安装: 1.sudo apt-get install mysql-server 2. apt-get isntall mysql-client 3. sudo apt-get install lib ...
- WebSocket协议分析
WebSocket协议分析 1.什么是WebSocket协议 WebScoket协议是基于TCP协议建立的全双工通信,所谓的全双工通信就是双向同时通信. 2.WebSocket协议优点 WebSock ...