nginx php-fpm安装配置
nginx本身不能处理PHP,它只是个web服务器,当接收到请求后,如果是php请求,则发给php解释器处理,并把结果返回给客户端。
nginx一般是把请求发fastcgi管理进程处理,fascgi管理进程选择cgi子进程处理结果并返回被nginx
本文以php-fpm为例介绍如何使nginx支持PHP
一、编译安装php-fpm
什么是PHP-FPM
PHP-FPM是一个PHP FastCGI管理器,是只用于PHP的,可以在 http://php-fpm.org/download下载得到.
PHP-FPM其实是PHP源代码的一个补丁,旨在将FastCGI进程管理整合进PHP包中。必须将它patch到你的PHP源代码中,在编译安装PHP后才可以使用。
新版PHP已经集成php-fpm了,不再是第三方的包了,推荐使用。PHP-FPM提供了更好的PHP进程管理方式,可以有效控制内存和进程、可以平滑重载PHP配置,比spawn-fcgi具有更多优点,所以被PHP官方收录了。在./configure的时候带 –enable-fpm参数即可开启PHP-FPM,其它参数都是配置php的,具体选项含义可以查看这里。
安装前准备
centos下执行
yum -y install gcc automake autoconf libtool make

yum -y install gcc gcc-c++ glibc

yum -y install libmcrypt-devel mhash-devel libxslt-devel \

libjpeg libjpeg-devel libpng libpng-devel freetype freetype-devel libxml2 libxml2-devel \

zlib zlib-devel glibc glibc-devel glib2 glib2-devel bzip2 bzip2-devel \

ncurses ncurses-devel curl curl-devel e2fsprogs e2fsprogs-devel \

krb5 krb5-devel libidn libidn-devel openssl openssl-devel
新版php-fpm安装(推荐安装方式)
wget http://cn2.php.net/distributions/php-5.6.13.tar.gz

tar zvxf php-5.6.13.tar.gz

cd php-5.6.13

./configure --prefix=/usr/local/php5.6  --enable-fpm --with-mcrypt=/usr/local/libmcrypt-2.5.3/ \

--enable-mbstring --enable-pdo --with-curl --enable-debug  --enable-rpath \

--enable-inline-optimization --with-bz2  --with-zlib --enable-sockets \

--enable-sysvsem --enable-sysvshm --enable-pcntl --enable-mbregex \

--with-mhash --enable-zip --with-pcre-regex --with-mysql --with-mysqli --with-pdo-mysql \

--with-gd --with-jpeg-dir

make all install
旧版手动打补丁php-fpm安装(旧版程序已经没有了,大家新版的吧,这里做个展示)
wget http://cn2.php.net/get/php-5.2.17.tar.gz

wget http://php-fpm.org/downloads/php-5.2.17-fpm-0.5.14.diff.gz

tar zvxf php-5.2..tar.gz

gzip -cd php-5.2.-fpm-0.5..diff.gz | patch -d php-5.2. -p1

cd php-5.2.

./configure --prefix=/usr/local/php -with-config-file-path=/usr/local/php/etc\

-with-mysql=/usr/local/mysql\

-with-mysqli=/usr/local/mysql/bin/mysql_config -with-openssl -enable-fpm -enable-mbstring\

-with-freetype-dir -with-jpeg-dir -with-png-dir -with-zlib-dir -with-libxml-dir=/usr -enable-xml\

-with-mhash -with-mcrypt -enable-pcntl -enable-sockets  -with-bz2 -with-curl -with-curlwrappers\

-enable-mbregex -with-gd -enable-gd-native-ttf -enable-zip -enable-soap -with-iconv -enable-bcmath\

-enable-shmop -enable-sysvsem -enable-inline-optimization -with-ldap -with-ldap-sasl -enable-pdo\

-with-pdo-mysql

make all install
以上两种方式都可以安装php-fpm,安装后内容放在/usr/local/php目录下

以上就完成了php-fpm的安装。
下面是对php-fpm运行用户进行设置
cd /usr/local/php

cp etc/php-fpm.conf.default etc/php-fpm.conf

vi etc/php-fpm.conf
修改
user = www-data

group = www-data
如果www-data用户不存在,那么先添加www-data用户
groupadd www-data

useradd -g www-data www-data -s /sibn/nologin
二、编译安装nginx
然后按照http://www.nginx.cn/install 安装nginx
三、修改nginx配置文件以支持php-fpm
nginx安装完成后,修改nginx配置文件为,nginx.conf
其中server段增加如下配置,注意标红内容配置,否则会出现No input file specified.错误
# pass the PHP scripts to FastCGI server listening on 127.0.0.1:

#

location ~ \.php$ {

root html;

fastcgi_pass 127.0.0.1:;

fastcgi_index index.php;

fastcgi_param SCRIPT_FILENAME $document_root$fastcgi_script_name;

include fastcgi_params;

}
四、创建测试php文件
创建php文件
在/usr/local/nginx/html下创建index.php文件,输入如下内容
<?php

    echo phpinfo();

?>
五、启动服务
启动php-fpm和nginx
/usr/local/php/sbin/php-fpm

#手动打补丁的启动方式/usr/local/php/sbin/php-fpm start

sudo /usr/local/nginx/nginx
php-fpm关闭重启见文章结尾
六、浏览器访问
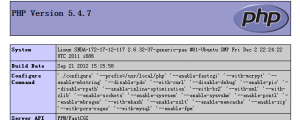
访问http://你的服务器ip/index.php,皆可以见到php信息了。

安装php-fpm时可能遇到的错误:
1. php configure时出错
configure: error: XML configuration could not be found
apt-get install libxml2 libxml2-dev  (ubuntu下)

yum -y install libxml2 libxml2-devel(centos下)
2. Please reinstall the BZip2 distribution
wget http://www.bzip.org/1.0.5/bzip2-1.0.5.tar.gz

tar -zxvf bzip2-1.0..tar.gz

cd bzip2-1.0.

make

make install
3. php的配置文件中有一行--with-mysql=/usr。
安装的时候提示:
configure: error: Cannot find MySQL header files under yes.

Note that the MySQL client library is not bundled anymore.
这是由于安装mysql时没有安装mysql头文件,或者是路径指定不正确,php找不到mysql的头文件引起的错误提示。
解决方法。
(1.) 查看你的系统有没有安装mysql header
find / -name mysql.h
如果有。请指定--with-mysql=/跟你的正常路径。
如果没有。请看下一步。
(2.)redhat安装
rpm -ivh MySQL-devel-4.1.-.i386.rpm
(3.)ubuntu安装
apt-get install libmysqlclient15-dev
(4.)最后一步php的配置选项添加--with-mysql=/usr即可!
4.No input file specified.
location ~ \.php$ {

root html;

fastcgi_pass 127.0.0.1:;

fastcgi_index index.php;

fastcgi_param SCRIPT_FILENAME $document_root$fastcgi_script_name;

include fastcgi_params;

}
5. 如果php configure时缺库,可以先安装库(ubuntu下)
sudo apt-get install make bison flex gcc patch autoconf subversion locate

sudo apt-get install libxml2-dev libbz2-dev libpcre3-dev libssl-dev zlib1g-dev libmcrypt-dev libmhash-dev libmhash2 libcurl4-openssl-dev libpq-dev libpq5 libsyck0-dev
6. mcrypt.h not found. Please reinstall libmcrypt
apt-get install libmcrypt-dev
或者
cd /usr/local/src

wget http://softlayer.dl.sourceforge.net/sourceforge/mcrypt/libmcrypt-2.5.8.tar.gz

tar -zxvf libmcrypt-2.5..tar.gz

cd /usr/local/src/libmcrypt-2.5.

./configure --prefix=/usr/local

make

make install
7. php-fpm 5.4.7 如何关闭 重启?
php 5.4.7 下的php-fpm 不再支持 php-fpm 以前具有的 /usr/local/php/sbin/php-fpm (start|stop|reload)等命令,需要使用信号控制:
master进程可以理解以下信号
INT, TERM 立刻终止 QUIT 平滑终止 USR1 重新打开日志文件 USR2 平滑重载所有worker进程并重新载入配置和二进制模块
示例:
php-fpm 关闭:
kill -INT `cat /usr/local/php/var/run/php-fpm.pid`
php-fpm 重启:
kill -USR2 `cat /usr/local/php/var/run/php-fpm.pid`
查看php-fpm进程数:
ps aux | grep -c php-fpm
8.命令行下执行php,提示找不到命令
-bash: /usr/bin/php: No such file or directory

vi /etc/profile
在文件底部增加一行配置
export PATH=/usr/local/php/bin:$PATH
保存退出
source /etc/profile
nginx php-fpm安装配置的更多相关文章
- nginx,php-fpm的安装配置
在centos7.2的系统下安装nginx和php-fpm nginx 安装 yum install -y nginx 即可完成安装 配置 由于之前项目使用的是apache,所以项目目录在var/ww ...
- Nginx概述及安装配置
1.概述 Nginx是一款开源的,高性能的Http和反向代理服务器,同时也是一个IMAP.POP3.SMTP代理服务器:Nginx可以作为一个HTTP服务器进行网站的发布处理,也可以作为反向代理进行负 ...
- CentOS7下搭建Nginx+PHP7的安装配置
一.安装编译工具及库文件: yum -y install make zlib zlib-devel gcc-c++ libtool openssl openssl-devel 环境要求 nginx是C ...
- nginx+php windows安装配置
https://blog.csdn.net/zjiang1994/article/details/72876193 https://blog.csdn.net/bruce_wang_janet/art ...
- Nginx的基本安装配置
Centos7安装nginx 升级nginx 升级可能遇到问题(我没有遇到, 参考的另一篇文章描述的) 检查nginx版本, 确认安装成功 nginx配置文件 虚拟主机配置 配置文件中可以用的全局变量 ...
- Nginx源码安装配置
Nginx web服务器简介 Nginx ("engine x") 是一个高性能HTTP 和 反向代理 服务器.IMAP.POP3.SMTP 服务器. Nginx 是由 Igor ...
- nginx 源码安装配置详解(./configure)
在"./configure"配置中,"--with"表示启用模块,也就是说这些模块在编译时不会自动构建,"--without"表示禁用模块, ...
- Linux系统下Nginx+PHP 环境安装配置
一.编译安装Nginx 官网:http://wiki.nginx.org/Install 下载:http://nginx.org/en/download.html # tar -zvxf nginx- ...
- thinkphp nginx+phpcgj安装配置
环境:mysql-5.6.26 nginx-1.9.4.tar.gz php-5.6.13 程序框架ThinkPHP 客户要求必须使用nginx + php 1.首先安装n ...
- [Nginx]Ubuntu18.04 安装配置Nginx1.13.6+FastDFS
一. 安装fastdfs依赖包 1. 解压缩libfastcommon-master.zip 2. 进入到libfastcommon-master的目录中 3. 执行 ./make.sh 4. 执行 ...
随机推荐
- 第一天 :学习node.js
① node.js环境配置 我学过的语言最简单的一门 直接百度就可以配置 ② 每个入门 的程序都是从helloworld开始 代码如下 : var http=require('http'); http ...
- Jquery ajax请求
$.ajax({ type: "POST", url: renderUrl, data: { openId: this.openId, }, success: function(d ...
- temp_web
使用vs2010创建.发布.部署.调用 WebService http://blog.sina.com.cn/s/blog_45eaa01a0102vp8z.html c#简易Http服务器 http ...
- php工作笔记4-mysql笔记1
1.Mysql中数值的长度和最大值是没有关系的,它仅仅只代表了数据的宽度,比如:int(4)和int(8)可以存储的数据长度是一样的,她两的大小都是4Byte, 在存储上数据的时候比如Int(4) | ...
- springMVC学习笔记(五)
一.使用Ajax调用 1.1 Controller返回的类型为text类型的方式. @RequestMapping("/getPerson") public void getPer ...
- 对象化前端表单(Form)提交
很常见的业务场景,就是前端一个表单,submit给后台,在web.form时代,有from 的runat="server" 配合submit 自动会提交给服务端,然后服务端解析Re ...
- makefile:2: *** 遗漏分隔符 。 停止
from http://hi.baidu.com/��֮��/blog/item/8ec00e2aca65a525d42af11b.html 我们在编写完makefile,然后在终端中 $make出现 ...
- 《Pro Git》阅读随想
之前做版本管理,我使用最多的是SVN,而且也只是在用一些最常用的操作.最近公司里很多项目都开始上Git,借这个机会,我计划好好学习一下Git的操作和原理,以及蕴含在其中的设计思想.同事推荐了一本< ...
- 错误“Sources”参数中指定了多次。“Sources”参数不支持重复项。
在“Sources”参数中指定了项“”多次.“Sources”参数不支持重复项. Asp.Net关于错误“Sources”参数中指定了多次.“Sources”参数不支持重复项. “Sources”参数 ...
- Qt链接网站SLOT
void BottomToolWidget::openLink() { QString link = "http://www.baidu.com";//在.h中添加slot声明,在 ...
