使用canvas实现对图片的批量打码
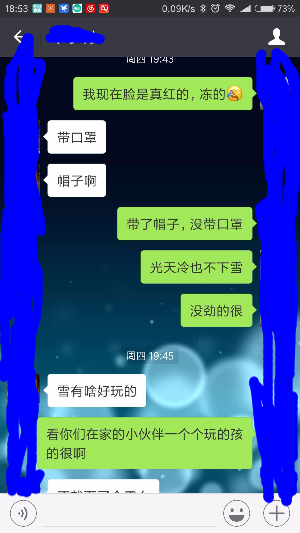
最近有个需求,利用h5的canvas对图片一些涉及个人隐私的地方进行打码再上传,而且最好能实现批量打码.意思是在一张图片上对哪些地方做了打码,后续的所有图片都在同样的地方也可以自动打上码,不用人工一张一张进行图片涂抹了.
例如:

首先想到的是利用canvas的drawImage方法将图片加载进来,然后在利用鼠标的点击移动事件在画布上面划线,很容易就实现了这个功能.但是当载入其他图片的时候,之前画的线就全部消失了,因为canvas使用drawImage方法后会清空画布,所以这个方法只能对一张图片进行打码.
后来就琢磨能不能将图片和涂鸦分开,不放在一个canvas里面,将两个canvas重叠起来,大小一样,暂时设定为canvas1和canvas2,canvas1在底层,用于载入图片的容器,canvas2在上层,用于用户的涂抹层,当用户在canvas2上面进行涂抹的时候,因为canvas1和canvas2是完全重叠的,看起来就像是在图片上涂抹一样,涂抹完成之后,用户点击保存按钮时,将canvas2转化为image对象,然后使用canvas1的drawImage的方法将这个image对象加载近canvas1,于是canvas1就成了两个canvas的结合画面,然后在将canvas1转为image对象保存起来即可,因为现在canvas2的画布还没有被清空,此时我们只需要在canvas1载入另外一张图片,在点击保存又能对这张图片进行一模一样的打码工作了,后续只需要将所有需要打码的图片放入一个数组,利用for循环就能够实现批量图片打码的工作了.
但是此方法对于所有的图片的要求是大小必须一样,因为项目对于打码的图片大都是来自于手机截图,图片大小都是一样的,所以这个方法完全可以胜任此工作.
下面贴上源码
js代码
function Doodle() {

    this.mousePressed = false;//鼠标是否按下

    this.imgWidth = 300;

    this.imgHeight = "";

    this.lastX;

    this.lastY;

    this.cPushArray = [];//存储画布仓库

    this.cStep = -1;//当前步数

    this.c1;//  图片画布

    this.ctx1;//canvas对象1

    this.c2;//涂鸦画布

    this.ctx2;//canvas对象2

    this.importMuban = function(imgUrl) {//载入模板图片,以此图片的宽高比例来对后面所有的图片做预设.

        var self = this;

        var image = new Image();

        image.src = imgUrl;

        $(image).load(function () {

            self.imgHeight = (300/image.width)*image.height;

            self.c1.height = self.imgHeight;

            self.c2.height = self.imgHeight;

            $(".canvas-box").css({

                width: 300,

                height: self.imgHeight

            });

            self.ctx1.drawImage(image, 0, 0, self.imgWidth, self.imgHeight);

        });

    };

    this.importImg = function(imgUrl) {//载入其他图片

        var self = this;

        var image = new Image();

        image.src = imgUrl;

        $(image).load(function () {

            self.ctx1.drawImage(image, 0, 0, self.imgWidth, self.imgHeight);

        });

    };

    this.saveImg = function() {//保存图片

        var self = this;

        var newImg = this.c2.toDataURL("image/png");

        var Img = new Image();

        Img.src = newImg;

        $(Img).load(function (){

            self.ctx1.drawImage(Img, 0, 0, self.imgWidth, self.imgHeight);

            var img = self.c1.toDataURL("image/png");

            var ele = document.createElement("img");

            ele.src = img;

            document.body.appendChild(ele);

        });

    };

    this.clearCanvas = function () {//清空画布

        this.ctx2.clearRect(0,0,this.c1.width,this.c1.height);

    };

    this.Draw = function (x, y, isDown) {

        if (isDown) {

            this.ctx2.beginPath();

            this.ctx2.strokeStyle = $('#selColor').val();

            this.ctx2.lineWidth = $('#selWidth').val();

            this.ctx2.lineJoin = "round";

            this.ctx2.moveTo(this.lastX, this.lastY);

            this.ctx2.lineTo(x, y);

            this.ctx2.closePath();

            this.ctx2.stroke();

        }

        this.lastX = x;

        this.lastY = y;

    };

    this.cPush = function() {

        this.cStep++;

        if (this.cStep < this.cPushArray.length) { this.cPushArray.length = this.cStep; }

        this.cPushArray.push(document.getElementById('myCanvas2').toDataURL());

    };

    this.cUndo = function() {

        var self = this;

        if (self.cStep > 0) {

            self.cStep--;

            var canvasPic = new Image();

            canvasPic.src = self.cPushArray[self.cStep];

            canvasPic.onload = function () {

                console.log(self.cStep,self.cPushArray);

                self.ctx2.clearRect(0,0,self.c1.width,self.c1.height);

                self.ctx2.drawImage(canvasPic, 0, 0, self.imgWidth, self.imgHeight);

            }

        }

    };

    this.cRedo = function() {

        var self = this;

        if (self.cStep < self.cPushArray.length-1) {

            self.cStep++;

            var canvasPic = new Image();

            canvasPic.src = self.cPushArray[self.cStep];

            canvasPic.onload = function () {

                self.ctx2.clearRect(0,0,self.c1.width,self.c1.height);

                self.ctx2.drawImage(canvasPic, 0, 0, self.imgWidth, self.imgHeight);

            }

        }

    };

    this.initFn = function (cId1,cId2){

        var self = this;

        this.c1 = $(cId1)[0];

        this.c2 = $(cId2)[0];

        this.ctx1 = this.c1.getContext("2d");

        this.ctx2 = this.c2.getContext("2d");

        this.cPush();

        $(cId2).mousedown(function (e) {

            self.mousePressed = true;

            self.Draw(e.pageX - $(this).offset().left, e.pageY - $(this).offset().top, false);

            console.log("anxia")

        });

        $(cId2).mousemove(function (e) {

            if (self.mousePressed) {

                self.Draw(e.pageX - $(this).offset().left, e.pageY - $(this).offset().top, true);

            }

        });

        $(cId2).mouseup(function (e) {

            if (self.mousePressed) {

                self.mousePressed = false;

                self.cPush();

            }

        });

        $(cId2).mouseleave(function (e) {

            if (self.mousePressed) {

                self.mousePressed = false;

                self.cPush();

            }

        });

    }

}

$(function (){

    var aDoodle = new Doodle();

    aDoodle.initFn("#myCanvas1","#myCanvas2");

    $("#img1").click(function (){

        aDoodle.importMuban("img/1.jpg");

    });

    $("#img2").click(function (){

        aDoodle.importImg("img/2.jpg");

    });

    $("#img3").click(function (){

        aDoodle.importImg("img/3.jpg");

    });

    $("#img4").click(function (){

        aDoodle.importImg("img/4.jpg");

    });

    $("#img5").click(function (){

        aDoodle.importImg("img/5.jpg");

    });

    $("#undo").click(function (){

        aDoodle.cUndo();

    });

    $("#redo").click(function (){

        aDoodle.cRedo();

    });

    $("#clearDraw").click(function (){

        aDoodle.clearCanvas();

    });

    $("#saveImg").click(function (){

        aDoodle.saveImg();

    });

})
html代码:
<!doctype html>
<html lang="zh">
<head>
<meta charset="UTF-8">
<meta http-equiv="X-UA-Compatible" content="IE=edge,chrome=1">
<meta name="viewport" content="width=device-width, initial-scale=1.0">
<title>demo</title>
<script src="js/jquery-1.7.2.min.js" type="text/javascript"></script>
<script type="text/javascript" src="js/doodle.js"></script>
<style type="text/css">
select{color: #333;}
.htmleaf-icon{color: #fff;}
.canvas-box{
width: 500px;
height: 400px;
margin: 0 auto;
background-size: cover;
background-repeat: no-repeat;
border: 1px solid #ccc;
position: relative;
}
#myCanvas1{
position: absolute;
top: 0px;
left: 0px;
}
#myCanvas2{
position: absolute;
top: 0px;
left: 0px;
z-index: 3;
}
.htmleaf-content{
text-align: center;
}
</style>
</head>
<body>
<div class="htmleaf-container">
<div class="htmleaf-content bgcolor-3">
<div align="center" id="bgImg" class="canvas-box">
<canvas id="myCanvas1" width="300"></canvas>
<canvas id="myCanvas2" width="300"></canvas>
</div>
<button class="btn btn-primary" id="clearDraw">清空画布</button>
线条宽度 : <select id="selWidth">
<option value="1">1</option>
<option value="3">3</option>
<option value="5">5</option>
<option value="7">7</option>
<option value="9" selected="selected">9</option>
<option value="11">11</option>
</select>
线条颜色 : <select id="selColor">
<option value="black">黑色</option>
<option value="blue" selected="selected">蓝色</option>
<option value="red">红色</option>
<option value="green">绿色</option>
<option value="yellow">黄色</option>
<option value="gray">灰色</option>
</select>
<button class="btn btn-primary" id="undo">上一步</button>
<button class="btn btn-danger" id="redo">下一步</button>
<button id="saveImg" id="saveImg">保存图片</button>
</div>
<div style="text-align:center;">
<button id="img1">载入模板图</button>
<button id="img2">图片1</button>
<button id="img3">图片2</button>
<button id="img4">图片3</button>
<button id="img5">图片4</button>
</div>
</div>
</body>
</html>
我在此方法的基础上又添加了改变线的像素和颜色的功能.
使用canvas实现对图片的批量打码的更多相关文章
- 基于HTML5 Canvas实现的图片马赛克模糊特效
效果请点击下面网址: http://hovertree.com/texiao/html5/1.htm 一.开门见山受美国肖像画家Chuck Close的启发,此脚本通过使用HTML5 canvas元素 ...
- canvas生成遮罩图片
首先我们知道css3中增加了不少好用.好玩的css3样式可以使用.今天我们要说到是遮罩. 它的使用方式也不复杂,和background使用方式差不多.使用mask-image就 ...
- HTML5 Canvas前台压缩图片并上传到服务器
1.前台代码: <input id="fileOne" type="file" /> <input id="btnOne" ...
- [js高手之路] html5 canvas系列教程 - 图片操作(drawImage,clip,createPattern)
接着上文[js高手之路] html5 canvas系列教程 - 文本样式(strokeText,fillText,measureText,textAlign,textBaseline)继续,本文介绍的 ...
- 用canvas给视频图片添加特效
Canvas制作视频图片特效 1. Canvas介绍 1.1Canvas是html5上的一个画布标签,功能有点类似java的swing.可以在canvas上画线条 弧线, 文字 就是画布的功能. 具体 ...
- Python3.7 练习题(三) 将指定目录下的图片进行批量尺寸大小处理
# 将指定目录下的图片进行批量尺寸大小处理 #修改图片尺寸 导入Image os 快捷键 alt+enter import os from PIL import Image def process_i ...
- 微信小程序--canvas画布实现图片的编辑
技术:微信小程序 概述 上传图片,编辑图片大小,添加文字,改变文字颜色等 详细 代码下载:http://www.demodashi.com/demo/14789.html 概述 微信小程序--ca ...
- canvas 2.0 图片绘制
绘制图片drawImage 2013.02.21 by 十年灯·一条评论 本文属于<html5 Canvas画图系列教程> 这里的绘制图片是指把一张现成的图片,绘制到Canvas上面. 有 ...
- C++ 根据图片url 批量 下载图片
最近需要用到根据图片URL批量下载到本地的操作.查找了相关资料,记录在这儿. 1.首先在CSV文件中提取出url ifstream fin("C:\\Users\\lenovo\\Deskt ...
随机推荐
- spring注解 @profile 以及 注解@Slf4j
@Slf4j 如果不想每次都写private final Logger logger = LoggerFactory.getLogger(XXX.class); 可以用注解@Slf4j 一.在pom ...
- Protobuffer教程
目录 什么是protobuffer? protobuffer是如何工作的? 为什么不用xml? 1.什么是protobuffer? protobuffer是一种灵活,高效,自动化的机制,用于序列化结构 ...
- 我说CMMI之七:需求管理过程域--转载
版权声明:本文为博主原创文章,遵循 CC 4.0 BY-SA 版权协议,转载请附上原文出处链接和本声明.本文链接:https://blog.csdn.net/dylanren/article/deta ...
- JavaWEB开发02——CSS&JS
今日目标 使用CSS完成网站首页的优化 使用CSS完成网站注册页面的优化 使用JS完成简单的数据校验 使用JS完成图片轮播效果 教学目标: 了解CSS的概念 了解CSS的引入方式 了解CSS的基本用法 ...
- chattr&lsattr
chattr 和 lsattr 用来查看和改变文件属性,chmod 只是用来改变文件的读写与可执行权限,而文件的属性控制是由 chattr 来完成 常用用法: chattr +i /home/test ...
- windows笔记本命令行方式建立wifi热点
建立热点: @echo off netsh wlan set hostednetwork mode=allow netsh wlan set hostednetwork ssid=热点名 key=密码 ...
- Idea 设置maven配置文件settings.xml的位置
1.[File] > [Other Settings] > [Default Settings] 2.设置 settings.xml 配置 本博文来源于:https://blog.csd ...
- (转)window.parent和window.opener区别
下面一段代码是关于window.parent和window.opener区别 来讲的,我们如果要用到iframe的值传到另一框架就要用到window.opener.document.getElemen ...
- [CF1204E]Natasha,Sasha and the Prefix Sums 题解
前言 本文中的排列指由n个1, m个-1构成的序列中的一种. 题目这么长不吐槽了,但是这确实是一道好题. 题解 DP题话不多说,直接状态/变量/转移. 状态 我们定义f表示"最大prefix ...
- phpfor函数和foreach函数
PHP for 循环 PHP While 循环 PHP 函数 PHP for 循环执行代码块指定的次数. PHP for 循环 如果您已经提前确定脚本运行的次数,可以使用 for 循环. 语法 for ...
