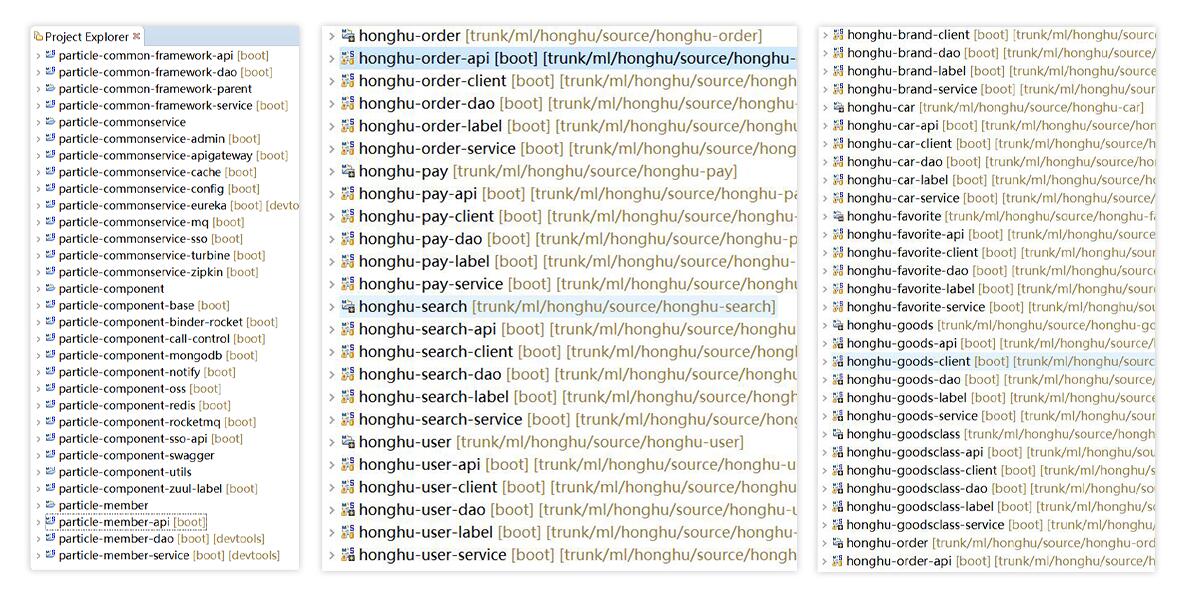
Spring Cloud云架构 - commonservice-sso服务搭建(一)
前面几篇我们已经介绍了Spring Cloud和oauth2的知识点,今天我们要利用Spring Cloud和oauth2进行commonservice-sso服务搭建,本节我们只是搭建commonservice-sso的基础平台,闲话少说,直接将步骤记录下来:
1. 创建maven项目commonservice-sso,其中pom.xml文件配置如下:
- <?xml version="1.0" encoding="UTF-8"?>
- <project xmlns="http://maven.apache.org/POM/4.0.0" xmlns:xsi="http://www.w3.org/2001/XMLSchema-instance"
- xsi:schemaLocation="http://maven.apache.org/POM/4.0.0 http://maven.apache.org/xsd/maven-4.0.0.xsd">
- <modelVersion>4.0.0</modelVersion>
- <parent>
- <groupId>com.ml.honghu</groupId>
- <artifactId>commonservice</artifactId>
- <version>0.0.1-SNAPSHOT</version>
- </parent>
- <artifactId>commonservice-sso</artifactId>
- <packaging>jar</packaging>
- <dependencies>
- <dependency>
- <groupId>org.springframework.cloud</groupId>
- <artifactId>spring-cloud-starter-eureka</artifactId>
- </dependency>
- <dependency>
- <groupId>org.springframework.cloud</groupId>
- <artifactId>spring-cloud-starter-config</artifactId>
- </dependency>
- <dependency>
- <groupId>org.springframework.boot</groupId>
- <artifactId>spring-boot-starter-actuator</artifactId>
- </dependency>
- <dependency>
- <groupId>org.springframework.boot</groupId>
- <artifactId>spring-boot-starter-data-rest</artifactId>
- </dependency>
- <dependency>
- <groupId>org.springframework.boot</groupId>
- <artifactId>spring-boot-starter-web</artifactId>
- </dependency>
- <dependency>
- <groupId>org.springframework.boot</groupId>
- <artifactId>spring-boot-starter-security</artifactId>
- </dependency>
- <dependency>
- <groupId>org.springframework.security.oauth</groupId>
- <artifactId>spring-security-oauth2</artifactId>
- </dependency>
- <dependency>
- <groupId>org.springframework.boot</groupId>
- <artifactId>spring-boot-starter-test</artifactId>
- </dependency>
- <dependency>
- <groupId>org.springframework.hateoas</groupId>
- <artifactId>spring-hateoas</artifactId>
- </dependency>
- <dependency>
- <groupId>org.springframework.boot</groupId>
- <artifactId>spring-boot-starter-data-rest</artifactId>
- </dependency>
- <dependency>
- <groupId>com.ml.honghu.common.framework</groupId>
- <artifactId>common-framework-dao</artifactId>
- <version>1.0.0-SNAPSHOT</version>
- </dependency>
- <dependency>
- <groupId>org.springframework.boot</groupId>
- <artifactId>spring-boot-starter-web</artifactId>
- </dependency>
- <dependency>
- <groupId>org.springframework.boot</groupId>
- <artifactId>spring-boot-starter-freemarker</artifactId>
- </dependency>
- <dependency>
- <groupId>com.ml.honghu</groupId>
- <artifactId>component-base</artifactId>
- </dependency>
- </dependency>
- </dependencies>
- <!-- 打包插件,其中repackage、true是专门打spring boot专用包 -->
- <build>
- <plugins>
- <plugin>
- <groupId>org.springframework.boot</groupId>
- <artifactId>spring-boot-maven-plugin</artifactId>
- <executions>
- <execution>
- <id>1</id>
- <goals>
- <goal>repackage</goal>
- </goals>
- </execution>
- <execution>
- <id>2</id>
- <goals>
- <goal>build-info</goal>
- </goals>
- </execution>
- </executions>
- </plugin>
- </plugins>
- </build>
- </project>
2. 配置bootstrap.yml文件
- spring:
- application:
- name: commonservice-sso
- profiles:
- active: dev,discoveryClient
- cloud:
- config:
- discovery:
- enabled: true
- service-id: commonservice-config-server
- eureka:
- client:
- service-url:
- defaultZone: http://honghu:123456@localhost:8761/eureka
- instance:
- prefer-ip-address: true
3. 配置项目启动文件
- package com.ml.honghu;
- import org.springframework.boot.SpringApplication;
- import org.springframework.boot.autoconfigure.SpringBootApplication;
- import org.springframework.cloud.netflix.eureka.EnableEurekaClient;
- @SpringBootApplication
- @EnableEurekaClient
- public class SSOApplication {
- public static void main(String[] args) {
- SpringApplication.run(SSOApplication.class, args);
- }
- }
4. 创建sso相关表:
oauth_access_token、oauth_approvals、
oauth_client_details、oauth_client_token、
oauth_code、oauth_refresh_token
- /*
- Navicat MySQL Data Transfer
- Source Server : localhost
- Source Server Version : 50621
- Source Host : localhost:3306
- Source Database : honghu
- Target Server Type : MYSQL
- Target Server Version : 50621
- File Encoding : 65001
- Date: 2017-10-26 20:12:56
- */
- SET FOREIGN_KEY_CHECKS=0;
- -- ----------------------------
- -- Table structure for `oauth_access_token`
- -- ----------------------------
- DROP TABLE IF EXISTS `oauth_access_token`;
- CREATE TABLE `oauth_access_token` (
- `token_id` varchar(256) DEFAULT NULL,
- `token` blob,
- `authentication_id` varchar(128) NOT NULL,
- `user_name` varchar(256) DEFAULT NULL,
- `client_id` varchar(256) DEFAULT NULL,
- `authentication` blob,
- `refresh_token` varchar(256) DEFAULT NULL,
- PRIMARY KEY (`authentication_id`)
- ) ENGINE=InnoDB DEFAULT CHARSET=utf8;
- -- ----------------------------
- -- Table structure for `oauth_approvals`
- -- ----------------------------
- DROP TABLE IF EXISTS `oauth_approvals`;
- CREATE TABLE `oauth_approvals` (
- `userId` varchar(256) DEFAULT NULL,
- `clientId` varchar(256) DEFAULT NULL,
- `scope` varchar(256) DEFAULT NULL,
- `status` varchar(10) DEFAULT NULL,
- `expiresAt` datetime DEFAULT NULL,
- `lastModifiedAt` datetime DEFAULT NULL
- ) ENGINE=InnoDB DEFAULT CHARSET=utf8;
- -- ----------------------------
- -- Records of oauth_approvals
- -- ----------------------------
- -- ----------------------------
- -- Table structure for `oauth_client_details`
- -- ----------------------------
- DROP TABLE IF EXISTS `oauth_client_details`;
- CREATE TABLE `oauth_client_details` (
- `client_id` varchar(128) NOT NULL,
- `resource_ids` varchar(256) DEFAULT NULL,
- `client_secret` varchar(256) DEFAULT NULL,
- `scope` varchar(256) DEFAULT NULL,
- `authorized_grant_types` varchar(256) DEFAULT NULL,
- `web_server_redirect_uri` varchar(256) DEFAULT NULL,
- `authorities` varchar(256) DEFAULT NULL,
- `access_token_validity` int(11) DEFAULT NULL,
- `refresh_token_validity` int(11) DEFAULT NULL,
- `additional_information` varchar(4096) DEFAULT NULL,
- `autoapprove` varchar(256) DEFAULT NULL,
- PRIMARY KEY (`client_id`)
- ) ENGINE=InnoDB DEFAULT CHARSET=utf8;
- -- ----------------------------
- -- Table structure for `oauth_client_token`
- -- ----------------------------
- DROP TABLE IF EXISTS `oauth_client_token`;
- CREATE TABLE `oauth_client_token` (
- `token_id` varchar(256) DEFAULT NULL,
- `token` blob,
- `authentication_id` varchar(128) NOT NULL,
- `user_name` varchar(256) DEFAULT NULL,
- `client_id` varchar(256) DEFAULT NULL,
- PRIMARY KEY (`authentication_id`)
- ) ENGINE=InnoDB DEFAULT CHARSET=utf8;
- -- ----------------------------
- -- Records of oauth_client_token
- -- ----------------------------
- -- ----------------------------
- -- Table structure for `oauth_code`
- -- ----------------------------
- DROP TABLE IF EXISTS `oauth_code`;
- CREATE TABLE `oauth_code` (
- `code` varchar(256) DEFAULT NULL,
- `authentication` blob
- ) ENGINE=InnoDB DEFAULT CHARSET=utf8;
- -- ----------------------------
- -- Records of oauth_code
- -- ----------------------------
- -- ----------------------------
- -- Table structure for `oauth_refresh_token`
- -- ----------------------------
- DROP TABLE IF EXISTS `oauth_refresh_token`;
- CREATE TABLE `oauth_refresh_token` (
- `token_id` varchar(256) DEFAULT NULL,
- `token` blob,
- `authentication` blob
- ) ENGINE=InnoDB DEFAULT CHARSET=utf8;
备注: oauth的相关表是用来存储用户的token信息和认证信息的。
本节搭建先搭建那么多,后面的业务代码太多,我们会在后面的章节中放出来。

从现在开始,我这边会将近期研发的spring cloud微服务云架构的搭建过程和精髓记录下来,帮助更多有兴趣研发spring cloud框架的朋友,大家来一起探讨spring cloud架构的搭建过程及如何运用于企业项目。源码来源
Spring Cloud云架构 - commonservice-sso服务搭建(一)的更多相关文章
- (十一) 整合spring cloud云架构 - SSO单点登录之OAuth2.0登录流程(2)
上一篇是站在巨人的肩膀上去研究OAuth2.0,也是为了快速帮助大家认识OAuth2.0,闲话少说,我根据框架中OAuth2.0的使用总结,画了一个简单的流程图(根据用户名+密码实现OAuth2.0的 ...
- Spring Cloud云架构 - SSO单点登录之OAuth2.0 根据token获取用户信息(4)
上一篇我根据框架中OAuth2.0的使用总结,画了SSO单点登录之OAuth2.0 登出流程,今天我们看一下根据用户token获取yoghurt信息的流程: /** * 根据token获取用户信息 * ...
- Spring Cloud云架构 - SSO单点登录之OAuth2.0登录流程(2)
上一篇是站在巨人的肩膀上去研究OAuth2.0,也是为了快速帮助大家认识OAuth2.0,闲话少说,我根据框架中OAuth2.0的使用总结,画了一个简单的流程图(根据用户名+密码实现OAuth2.0的 ...
- 整合spring cloud云架构 - SSO单点登录之OAuth2.0登录认证(1)
之前写了很多关于spring cloud的文章,今天我们对OAuth2.0的整合方式做一下笔记,首先我从网上找了一些关于OAuth2.0的一些基础知识点,帮助大家回顾一下知识点: 一.oauth中的角 ...
- Spring Cloud云架构 - SSO单点登录之OAuth2.0 登出流程(3)
上一篇我根据框架中OAuth2.0的使用总结,画了一个根据用户名+密码实现OAuth2.0的登录认证的流程图,今天我们看一下logout的流程: /** * 用户注销 * @param accessT ...
- Spring Cloud云架构 - SSO单点登录之OAuth2.0登录认证(1)
今天我们对OAuth2.0的整合方式做一下笔记,首先我从网上找了一些关于OAuth2.0的一些基础知识点,帮助大家回顾一下知识点: 一.oauth中的角色 client:调用资源服务器API的应用 O ...
- 整合spring cloud云架构 - 根据token获取用户信息
根据用户token获取yoghurt信息的流程: /** * 根据token获取用户信息 * @param accessToken * @return * @throws Exception */ @ ...
- 整合SPRING CLOUD云服务架构 - 企业分布式微服务云架构构建
整合SPRING CLOUD云服务架构 - 企业分布式微服务云架构构建 1. 介绍 Commonservice-system是一个大型分布式.微服务.面向企业的JavaEE体系快速研发平台,基于模 ...
- 从 Spring Cloud 开始,聊聊微服务架构实践之路
[编者的话]随着公司业务量的飞速发展,平台面临的挑战已经远远大于业务,需求量不断增加,技术人员数量增加,面临的复杂度也大大增加.在这个背景下,平台的技术架构也完成了从传统的单体应用到微服务化的演进. ...
随机推荐
- Linux 下面根据端口号 查询 可执行程序的路劲的方法
1. 安装上lsof 的包 2. 使用 lsof 命令查看相关进程 lsof -i: 效果为: 3. 根据/proc 的目录查看可执行目录的文件位置 ll /proc/procid # procid ...
- TableLayoutPanel
1.简单属性 百度经验:https://jingyan.baidu.com/article/9113f81b7966df2b3314c775.html Name属性:tableLayoutPanel经 ...
- python——列表方法
L.append():追加一个元素到列表末尾 L = [] L.append('boy') L.insert() :将一个元素插入到指定位置 L.insert(1, 'girl') L.extend( ...
- Mac中如何高亮显示当前git分支以及相关切换系统默认shell操作
前言 在开发中对于使用git的同学,肯定会需要高亮显示当前分支,我们今天就来说一种最简单的办法,先来看一下效果图 实现 1.安装item2 https://www.iterm2.com 2.安装oh- ...
- qt嵌入式html和本地c++通信方式
前沿:我们在做qt项目的时候,通常会把某个html网页直接显示到应用程序中.比如绘图.直接把html形式的图标嵌入到应用程序中 但是我们需要把数据从后台c++端传到html端,实现显示.qt实现了相关 ...
- 使用python 实现 微信好友 个性签名 并 制作 词云图
环境搭建: pip install itchat numpy wordcloud matplotlib jieba 先把上面的几个包安装完成,直接上代码 import itchat from itch ...
- Centos下安装nc命令工具安装以及使用
1)netcat(nc)是一个简单而有用的工具,被誉为网络安全界的“瑞士军刀”,不仅可以通过使用TCP或UDP协议的网络连接读写数据,同时还是一个功能强大的网络调试和探测工具,能够建立你需要的几乎所有 ...
- Python3零基础入门学习视频+源码+课件+习题-小甲鱼
目录 1. 介绍 2. 目录 3. 下载地址 1. 介绍 适用人群 完全零基础入门,不需要任何前置知识. 课程概述 本系列教程面向零基础的同学,是一个深入浅出,通俗易懂的Python3视频教程. 前半 ...
- matlab 中figure的图像 抗锯齿
linehandle = plot(xxxxxx); set( linehandle, 'linesmoothing', 'on' );
- Anaconda3安装及使用
一.安装及环境变量配置 1.从这里下载Anaconda 2.根据提示安装即可 3.配置环境变量:%Anaconda%\Script 打开命令行,输入:conda --version,回显版本即完成安装 ...
