基于spring的web项目启动时预加载数据到ServletContext
1、要在web启动时预加载数据到ServletContext,实现方法有很多,一种比较简单的方案就是:
1)新建一个bean,定义其初始化方法:
<bean id="beanId" class="beanClassName" init-method="初始化方法" />或者使用@PostConstruct注解到初始化方法上面
2)获取ServletContext实例对象,如何获取呢?
方法1:
@Autowired
private ServletContext application;
方法2:
实现 ServletContextAware接口,重写setServletContext(ServletContext)方法
3)在初始化方法里面写代码,调用service层或dao层方法,查询数据库得到数据;将数据设置给ServletContext实例对象;
2、案例
jdk: 1.8.0_111;
tomcat: apache-tomcat-9.0.13;
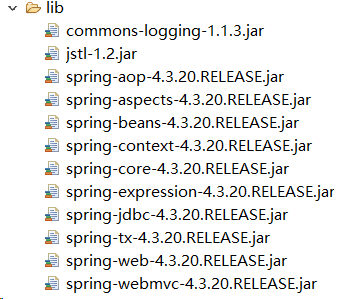
依赖jar包:
项目结构:

在service层定义一个类InitComponent,定义初始化方法init()。在spring容器加载这个bean时,会调用init()方法。
package com.oy.service.impl;

import javax.annotation.PostConstruct;

import javax.servlet.ServletContext;

import org.springframework.beans.factory.annotation.Autowired;

import org.springframework.stereotype.Component;

import org.springframework.web.bind.annotation.RequestMapping;

import org.springframework.web.bind.annotation.ResponseBody;

import com.oy.service.BookService;

@Component

public class InitComponent {

    @Autowired

    private BookService bookService;

    @Autowired

    private ServletContext application;

    @PostConstruct

    public void init() {

        System.out.println("向application域中添加数据。。。");

        application.setAttribute("bookList", bookService.findAll());

        System.out.println(application.getAttribute("bookList"));

    }

}
为了测试方便,dao层不查询数据库,而是使用模拟数据:
@Service

public class BookServiceImpl implements BookService {

    @Autowired

    private BookDao bookDao;

    @Override

    public List<Book> findAll() {

        return bookDao.findAll();

    }

}

@Repository

public class BookDaoImpl implements BookDao {

    private List<Book> bookList = new ArrayList<>();

    @Override

    public List<Book> findAll() {

        Book book1 = new Book();

        book1.setId(1);

        book1.setName("java编程思想");

        bookList.add(book1);

        Book book2 = new Book();

        book2.setId(2);

        book2.setName("java从入门到精通");

        bookList.add(book2);

        return bookList;

    }

}
以后数据改变了,想要更新缓存怎么办?写一个controller,调用InitComponent#init()。在页面上定义一个按钮,点击访问 initController#refreshCache(),即可更新缓存。记得更新前先删除缓存。
package com.oy.controller;

import org.springframework.beans.factory.annotation.Autowired;

import org.springframework.context.annotation.Lazy;

import org.springframework.stereotype.Controller;

import org.springframework.web.bind.annotation.RequestMapping;

import org.springframework.web.bind.annotation.ResponseBody;

import com.oy.service.impl.InitComponent;

@Controller

public class InitController {

    @Autowired

    private InitComponent initComponent;

    @RequestMapping("/refreshCache")

    @ResponseBody

    public String refreshCache() {

        initComponent.init();

        return "controller刷新缓存成功!";

    }

}
配置文件web.xml
<?xml version="1.0" encoding="UTF-8"?>

<web-app xmlns:xsi="http://www.w3.org/2001/XMLSchema-instance"

    xmlns="http://java.sun.com/xml/ns/javaee"

    xsi:schemaLocation="http://java.sun.com/xml/ns/javaee http://java.sun.com/xml/ns/javaee/web-app_2_5.xsd"

    id="WebApp_ID" version="2.5">

    <welcome-file-list>

        <welcome-file>index.jsp</welcome-file>

    </welcome-file-list>

    <!-- spring配置文件 -->

    <context-param>

        <param-name>contextConfigLocation</param-name>

        <param-value>classpath:applicationContext.xml</param-value>

    </context-param>

    <!-- spring监听器,初始化spring IoC容器 -->

    <listener>

        <listener-class>org.springframework.web.context.ContextLoaderListener</listener-class>

    </listener>

    <!-- springmvc前端控制器 -->

    <servlet>

        <servlet-name>springmvc</servlet-name>

        <servlet-class>org.springframework.web.servlet.DispatcherServlet</servlet-class>

        <!-- 如果不配置springmvc配置文件路径,默认在/WEB-INF/[servlet-name]-servlet.xml -->

        <init-param>

            <param-name>contextConfigLocation</param-name>

            <param-value>classpath:springmvc.xml</param-value>

        </init-param>

    </servlet>

    <servlet-mapping>

        <servlet-name>springmvc</servlet-name>

        <url-pattern>*.do</url-pattern>

        <url-pattern>/</url-pattern>

    </servlet-mapping>

    <!-- post请求的编码过滤器 -->

    <filter>

        <filter-name>characterEncodingFilter</filter-name>

        <filter-class>org.springframework.web.filter.CharacterEncodingFilter</filter-class>

        <init-param>

            <param-name>encoding</param-name>

            <param-value>utf-8</param-value>

        </init-param>

    </filter>

    <filter-mapping>

        <filter-name>characterEncodingFilter</filter-name>

        <url-pattern>*.do</url-pattern>

        <url-pattern>/</url-pattern>

    </filter-mapping>

</web-app>
配置文件applicationContext.xml
<?xml version="1.0" encoding="UTF-8"?>

<beans xmlns="http://www.springframework.org/schema/beans"

    xmlns:xsi="http://www.w3.org/2001/XMLSchema-instance"

    xmlns:p="http://www.springframework.org/schema/p"

    xmlns:aop="http://www.springframework.org/schema/aop"

    xmlns:context="http://www.springframework.org/schema/context"

    xmlns:jee="http://www.springframework.org/schema/jee"

    xmlns:tx="http://www.springframework.org/schema/tx"

    xsi:schemaLocation="

    http://www.springframework.org/schema/aop
    http://www.springframework.org/schema/aop/spring-aop-4.0.xsd

    http://www.springframework.org/schema/beans
    http://www.springframework.org/schema/beans/spring-beans-4.0.xsd

    http://www.springframework.org/schema/context
    http://www.springframework.org/schema/context/spring-context-4.0.xsd

    http://www.springframework.org/schema/jee
    http://www.springframework.org/schema/jee/spring-jee-4.0.xsd

    http://www.springframework.org/schema/tx
    http://www.springframework.org/schema/tx/spring-tx-4.0.xsd">

    <bean class="com.oy.controller.BeanPostProcessorImpl"/>

    <!-- 自动扫描 -->

    <context:component-scan base-package="com.oy.service,com.oy.dao" />

</beans>
配置文件springmvc.xml
<?xml version="1.0" encoding="UTF-8"?>

<beans xmlns="http://www.springframework.org/schema/beans"

    xmlns:xsi="http://www.w3.org/2001/XMLSchema-instance"

    xmlns:p="http://www.springframework.org/schema/p"

    xmlns:aop="http://www.springframework.org/schema/aop"

    xmlns:context="http://www.springframework.org/schema/context"

    xmlns:jee="http://www.springframework.org/schema/jee"

    xmlns:tx="http://www.springframework.org/schema/tx"

    xmlns:mvc="http://www.springframework.org/schema/mvc"

    xsi:schemaLocation="

    http://www.springframework.org/schema/aop
    http://www.springframework.org/schema/aop/spring-aop-4.0.xsd

    http://www.springframework.org/schema/beans
    http://www.springframework.org/schema/beans/spring-beans-4.0.xsd

    http://www.springframework.org/schema/mvc
    http://www.springframework.org/schema/mvc/spring-mvc-4.0.xsd

    http://www.springframework.org/schema/context
    http://www.springframework.org/schema/context/spring-context-4.0.xsd

    http://www.springframework.org/schema/jee
    http://www.springframework.org/schema/jee/spring-jee-4.0.xsd

    http://www.springframework.org/schema/tx
    http://www.springframework.org/schema/tx/spring-tx-4.0.xsd">

    <!-- 加载properties文件 -->

    <!-- <context:property-placeholder location="classpath:params.properties"/>   -->

    <!-- 使用注解的包,包括子集 -->

    <context:component-scan base-package="com.oy.controller" />

    <!-- 处理器映射器,处理器适配器 -->

    <!-- <mvc:annotation-driven conversion-service="conversionService"/> -->

    <mvc:annotation-driven />

    <!-- Converter转换器工厂  注: 需要在 适配器 中进行配置 -->

    <!-- <bean id="conversionService" class="org.springframework.format.support.FormattingConversionServiceFactoryBean">

        日期

        去掉前后空格

        <property name="converters">

            <set>

                <bean class="com.oy.converter.CustomConverter"></bean>

            </set>

        </property>

    </bean> -->

    <!-- 静态资源映射

    <mvc:resources mapping="/static/**" location="/static/"/> -->

     <!-- 如果使用了RESTful形式的拦截,那么对于静态资源的处理上,就需要加上此句,静态资源(没有映射的)
       就会交给默认的web容器中的servlet进行处理 -->

    <mvc:default-servlet-handler />

    <!-- 视图解析器 -->

    <bean id="viewResolver" class="org.springframework.web.servlet.view.InternalResourceViewResolver">

        <property name="prefix" value="/" />

        <property name="suffix" value=".jsp"></property>

    </bean>

</beans>
另外,贴一个BeanPostProcessor的实现类,这个类可以帮助我们查看spring容器中加载了哪些bean。利用这个类还可以实现bean的代理,这里就不详细讲了。如果不想使用这个类,为了避免报错,需要将applicationContext.xml中<bean class="com.oy.controller.BeanPostProcessorImpl"/>这一句删掉。
package com.oy.controller;

import java.lang.reflect.InvocationHandler;

import java.lang.reflect.Method;

import java.lang.reflect.Proxy;

import org.springframework.beans.BeansException;

import org.springframework.beans.factory.config.BeanPostProcessor;

/**

 * @author oy

 * @version 1.0

 * @date 2018年12月29日

 * @time 下午9:30:53

 */

public class BeanPostProcessorImpl implements BeanPostProcessor {

    public BeanPostProcessorImpl() {

        System.out.println();

        System.out.println("==========调用BeanPostProcessorImpl无参构造==========");

    }

    @Override

    public Object postProcessBeforeInitialization(Object bean, String beanName) throws BeansException {

        System.out.println("前处理方法,beanName为:" + beanName);

        return bean;

    }

    /**

     * 参数bean:目标对象,即被代理的bean对象 参数beanName:被代理对象的名字,即bean的id属性值

     */

    @Override

    public Object postProcessAfterInitialization(Object bean, String beanName) throws BeansException {

        System.out.println("后处理方法,bean的类型为:" + bean.getClass().getName());

        // 通过beanName过滤,对不同的bean进行处理

        if ("userService".equals(beanName)) {

            // 生成jdk代理

            return Proxy.newProxyInstance(BeanPostProcessorImpl.class.getClassLoader(), bean.getClass().getInterfaces(),

                    new InvocationHandler() {

                        @Override

                        public Object invoke(Object proxy, Method method, Object[] args) throws Throwable {

                            System.out.println("===开启事务===");

                            Object obj = method.invoke(bean, args);

                            System.out.println("===提交事务===");

                            return obj;

                        }

                    });

        } else if ("people".equals(beanName)) {

            // 生成jdk代理

            return Proxy.newProxyInstance(BeanPostProcessorImpl.class.getClassLoader(), bean.getClass().getInterfaces(),

                    new InvocationHandler() {

                        @Override

                        public Object invoke(Object proxy, Method method, Object[] args) throws Throwable {

                            // System.out.println(proxy.getClass().getName()); // com.sun.proxy.$Proxy6

                            long start = System.currentTimeMillis();

                            Object obj = method.invoke(bean, args);

                            long time = System.currentTimeMillis() - start;

                            System.out.println("方法" + method.getName() + "()共耗时:" + time + "毫秒");

                            return obj;

                        }

                    });

        } else {

            // 直接返回bean,不生成代理对象

            return bean;

        }

    }

}
在项目根路径下新建一个index.jsp:
<%@ page language="java" contentType="text/html; charset=UTF-8" pageEncoding="UTF-8"%>

<%@ taglib prefix="c" uri="http://java.sun.com/jsp/jstl/core"%>

<!DOCTYPE html>

<html>

<head>

<meta charset="UTF-8">

<title>Insert title here</title>

</head>

<body>

    <h1>index页面</h1>

    <c:forEach items="${bookList}" var="book">

        ${book.id} -- ${book.name}

    </c:forEach>

</body>

</html>
3、测试
3.1、项目启动,控制台打印结果:
==========调用BeanPostProcessorImpl无参构造==========
前处理方法,beanName为:bookDaoImpl
后处理方法,bean的类型为:com.oy.dao.impl.BookDaoImpl
前处理方法,beanName为:bookServiceImpl
后处理方法,bean的类型为:com.oy.service.impl.BookServiceImpl
前处理方法,beanName为:initComponent
向application域中添加数据。。。
[Book [id=1, name=java编程思想], Book [id=2, name=java从入门到精通]]
后处理方法,bean的类型为:com.oy.service.impl.InitComponent
前处理方法,beanName为:initController
后处理方法,bean的类型为:com.oy.controller.InitController
前处理方法,beanName为:org.springframework.context.event.internalEventListenerProcessor
后处理方法,bean的类型为:org.springframework.context.event.EventListenerMethodProcessor
前处理方法,beanName为:org.springframework.context.event.internalEventListenerFactory
后处理方法,bean的类型为:org.springframework.context.event.DefaultEventListenerFactory
3.2、浏览器访问:http://localhost:8080/04_Demo001/refreshCache, 控制台打印结果:
向application域中添加数据。。。
[Book [id=1, name=java编程思想], Book [id=2, name=java从入门到精通], Book [id=1, name=java编程思想], Book [id=2, name=java从入门到精通]]
4、在上面案例中将启动初始数据和更新数据写在两个类中,其实没有必要。
4.1、首先要知道spring可以有多个容器,spring主容器加载applicationContext.xml中配置或扫描的bean,springmvc子容器加载springmvc.xml中配置或扫描的bean;父子容器的关系这里不详细讲。可以参考:
spring与springMVC的细节问题:父子容器关系,加载controller,404错误
4.2、第一次惩罚:默认情况下,服务器是在第一次收到对controller#handler的请求时,会初始化DispatcherServlet,创建springmvc子容器,加载springmvc.xml中配置或扫描的bean;我上面的案例就是这种情况。
4.3、如果在web.xml配置DispatcherServlet时添加了<load-on-startup>1</load-on-startup>,则服务器启动时就会初始化DispatcherServlet,创建springmvc子容器,加载springmvc.xml中配置或扫描的bean;
4.4、所以在web.xml配置DispatcherServlet时添加了<load-on-startup>1</load-on-startup>后,可以将案例中initComponent类和initController类合并成一个类:
package com.oy.controller;

import javax.annotation.PostConstruct;

import javax.servlet.ServletContext;

import org.springframework.beans.factory.annotation.Autowired;

import org.springframework.stereotype.Controller;

import org.springframework.web.bind.annotation.RequestMapping;

import org.springframework.web.bind.annotation.ResponseBody;

import com.oy.service.BookService;

@Controller

public class InitController {

    @Autowired

    private BookService bookService;

    @Autowired

    private ServletContext application;

    @PostConstruct

    public void init() {

        System.out.println("向application域中添加数据。。。");

        application.setAttribute("bookList", bookService.findAll());

        System.out.println(application.getAttribute("bookList"));

    }

    @RequestMapping("/refreshCache")

    @ResponseBody

    public String refreshCache() {

        init();

        return "controller refreshCache ok!";

    }

}
基于spring的web项目启动时预加载数据到ServletContext的更多相关文章
- java web项目启动时自动加载自定义properties文件
首先创建一个类 public class ContextInitListener implements ServletContextListener 使得该类成为一个监听器.用于监听整个容器生命周期的 ...
- Spring Web项目spring配置文件随服务器启动时自动加载
前言:其实配置文件不随服务器启动时加载也是可以的,但是这样操作的话,每次获取相应对象,就会去读取一次配置文件,从而降低程序的效率,而Spring中已经为我们提供了监听器,可监听服务器是否启动,然后在启 ...
- 1.Spring项目启动时,加载相关初始化配置
Spring项目启动时,会加载一些常用的配置: 1.加载spring上下文 SpringApplicationContextUtils.initApplicationContext(event.get ...
- SpringMVC——项目启动时从数据库查询数据
SpringMVC项目中遇到这样的问题: 1.很多数据字典需要从数据库中查询: 2.懒得修改SQL语句: 3.想在项目中声明静态变量存储数据字典,但是希望这个字典可以在项目启动时进行加载. 当遇到这样 ...
- 转载:如何让spring mvc web应用启动时就执行
转载:如何让spring mvc web应用启动时就执行特定处理 http://www.cnblogs.com/yjmyzz/p/4747251.html# Spring-MVC的应用中 一.Appl ...
- 在web项目启动时,执行某个方法
在web项目中有很多时候需要在项目启动时就执行一些方法,而且只需要执行一次,比如:加载解析自定义的配置文件.初始化数据库信息等等,在项目启动时就直接执行一些方法,可以减少很多繁琐的操作. 在工作中遇到 ...
- 在web项目启动时执行某个方法
在web项目中有很多时候需要在项目启动时就执行一些方法,而且只需要执行一次,比如:加载解析自定义的配置文件.初始化数据库信息等等,在项目启动时就直接执行一些方法,可以减少很多繁琐的操作. 在工作中遇到 ...
- spring mvc web应用启动时就执行特定处理(线程启动)
package com.sdt.platform.index.controller; import java.net.URL; import java.util.List; import java.u ...
- Tomcat启动时自动加载Servlet
1.想做一个服务启动时自动启动一不停止的获取订阅功能 2.之前是做一个Jsp页面请求servlet来触发方法 3.现在实现Tomcat启动时自动加载Servlet 1.Tomcat中启动Servlet ...
随机推荐
- C# 各种控件实现可拖动和调整大小
http://www.360doc.com/content/18/0516/12/55659281_754382494.shtml using System; using System.Collect ...
- 论文笔记: Dual Deep Network for Visual Tracking
论文笔记: Dual Deep Network for Visual Tracking 2017-10-17 21:57:08 先来看文章的流程吧 ... 可以看到,作者所总结的三个点在于: 1. ...
- 剥开比原看代码16:比原是如何通过/list-transactions显示交易信息的
作者:freewind 比原项目仓库: Github地址:https://github.com/Bytom/bytom Gitee地址:https://gitee.com/BytomBlockchai ...
- Git误操作 git reset强制回滚 恢复commit方法
参考: 找回Git中丢失的Commit Git误操作 git reset强制回滚 恢复commit方法 使用Git时,常有误操作,在Commit之后又执行了git reset --hard HEAD强 ...
- Selenium Webdriver 自动化测试开发常见问题(C#版)
转一篇文章,有修改,出处http://www.7dtest.com/site/blog-2880-203.html 1:Selenium中对浏览器的操作 首先生成一个Web对象 IWebDriver ...
- 【BZOJ】1187: [HNOI2007]神奇游乐园
题目链接:http://www.lydsy.com/JudgeOnline/problem.php?id=1187 每个格子都具有权值,求任意一个回路使得路径上的权值和最大. 裸的插头DP,注意一下几 ...
- CPU核数和load average的关系
在前面的文章<Linux系统监控——top命令>中我简单提到了,判断load average的数值到底大不大的判断依据,就是数值除以CPU核数,大于5,就说明超负荷运转了.——这里其实不太 ...
- jdbcTemplate 后台接口中的分页
Springboot+jdbcTemplate 对查询结果列表做分页, 之前开发的小项目,数据逐渐增多,每次返回所有的查询结果,耗费性能和时间 想到做分页. 于是从简单的分页做起. jdbcTemp ...
- Mac Anaconda 安装
下载地址 https://www.anaconda.com/download/#macos 选择对应的python 版本 安装 一路下一步 安装后打开如下 呵呵,此处装完,我的python 环境又从3 ...
- js判断安卓客户端或者是ios客户端,是否是微信浏览器
代码: function xaizai() { var u = navigator.userAgent, app = navigator.appVersion; var isAndroid = ...