Bootstrap_CSS全局样式
PS:因为所有的设计模式都是基于面向对象来完成的,所以在讲解设计模式之前先来过一下面向对象都有哪些知识点
搭建开发环境
初始化npm环境
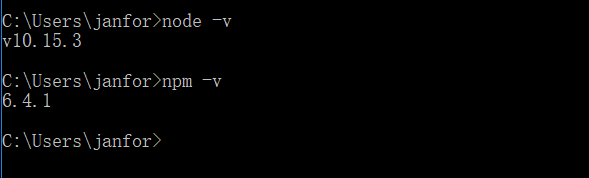
下载安装nodejs安装即可,nodejs自带npm管理包,然后使用下面命令检查node和npm的版本
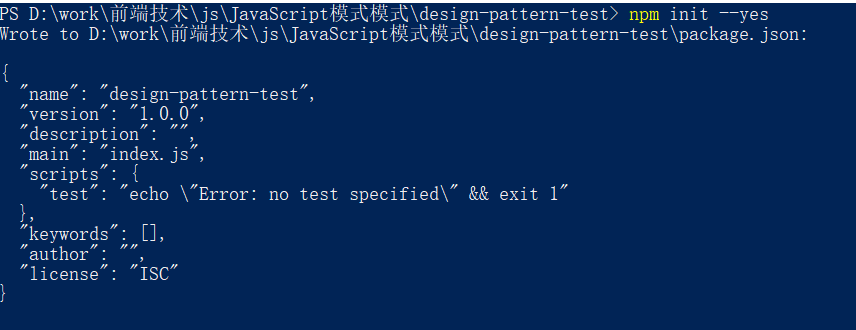
创建项目的文件夹,然后再项目目录下使用npm init --yes生成package.json文件
安装webpack和配置webpack
在项目目录下,使用如下命令进行安装
npm install --save-dev webpack
npm install --save-dev webpack-cli
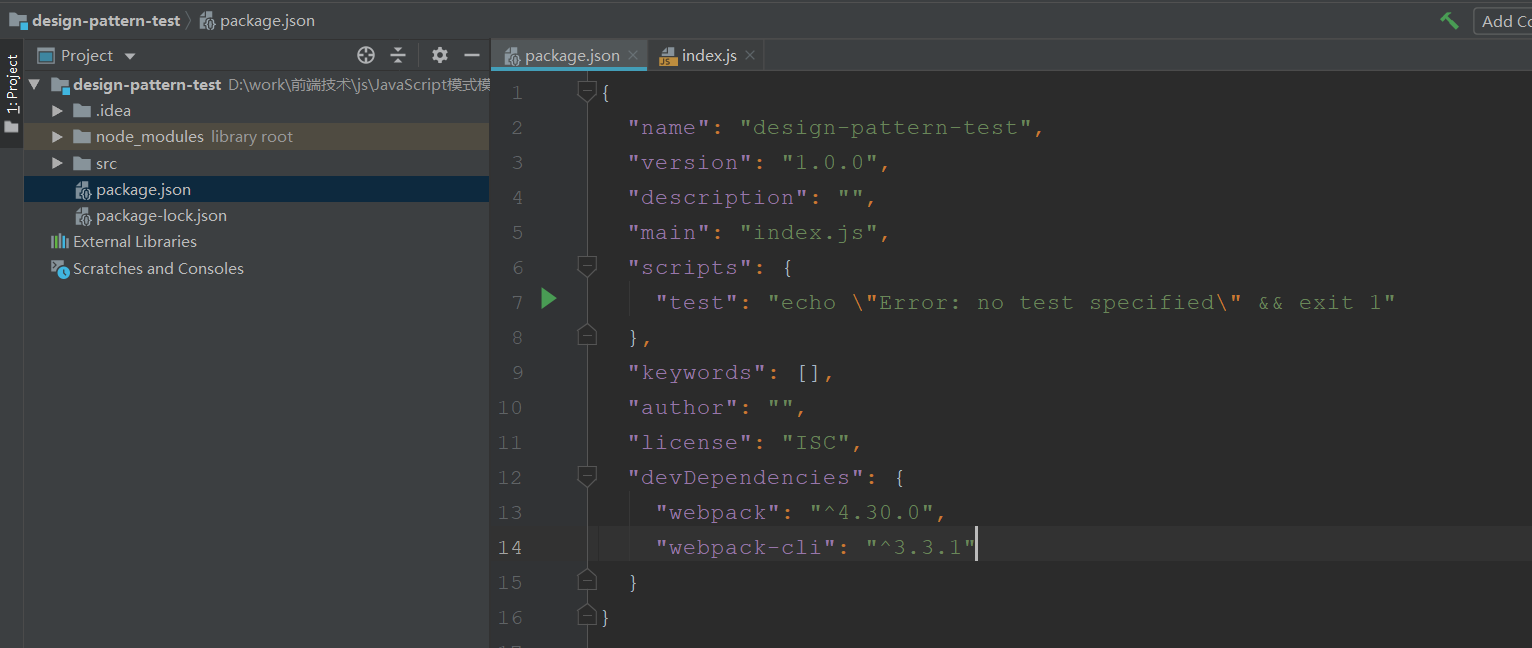
安装完成后项目中的package.json文件就有相关的配置
在项目根目录创建webpack.dev.config.js文件
module.exports = {

  entry: './src/index.js', //项目入口文件

  output: {

    path: __dirname, // 当前目录

    filename: "./release/bundle.js" // 运行的时候自己会创建出来

  }

}
配置package.json的scripts对象,新增一个dev
"scripts": {

  "test": "echo \"Error: no test specified\" && exit 1",

  "dev": "webpack --config ./webpack.dev.config.js --mode development"

},
mode development表示设置成开发者模式
然后执行那npm run dev

这样我们webpack就配置好了
安装webpack-dev-server和html-webpack-plugin
npm install webpack-dev-server html-webpack-plugin --save-dev

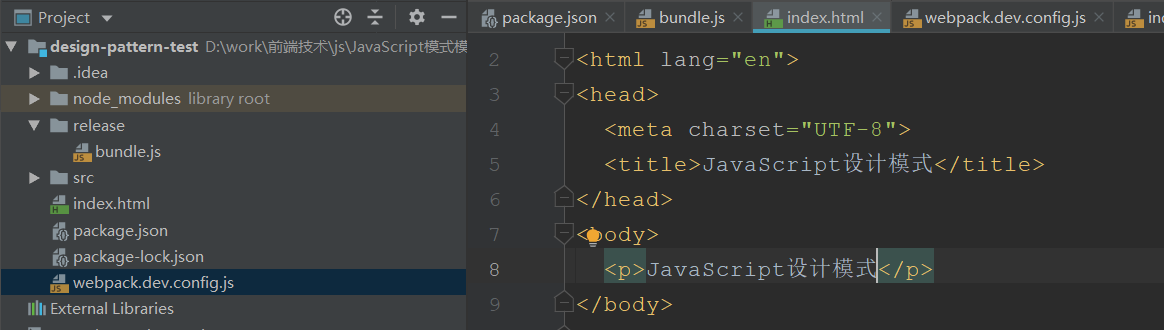
在根目录创建一个index.html
然后在webpack.dev.config.js文件配置html模板和启动服务的配置
const path = require('path')

const HtmlWebpackPlugin = require('html-webpack-plugin')

module.exports = {

  entry: './src/index.js', //项目入口文件

  output: {

    path: __dirname, // 当前目录

    filename: "./release/bundle.js" // 运行的时候自己会创建出来

  },

  plugins: [

    new HtmlWebpackPlugin({

      template: "./index.html"

    })

  ],

  devServer: {

    contentBase: path.join(__dirname, './release'), // 配置本地执行环境的根目录

    open: true, //执行命令浏览器自动打开

    port: 9000

  }

}
修改package.json的script下的dev
"scripts": {

  "test": "echo \"Error: no test specified\" && exit 1",

  "dev": "webpack-dev-server --config ./webpack.dev.config.js --mode development"

},
然后再执行npm run dev
安装babel,解析ES6
npm install babel-core babel-loader babel-polyfill babel-preset-es2015 babel-preset-latest --save-dev
在项目根目录创建.babelrc文件
{

  "presets": ["es2015", "latest"],

  "plugins": []

}
在dev.webpack.config.js文件中配置module
module: {

  rules: [{

    test: /\.js?$/,

    exclude: /(node_modules)/, // 略过

    loader: 'babel-loader'

  }]

},
然后我们使用ES6语法测试babel是否配置成功
class Person {

  constructor (name) {

    this.name = name

  }

  getName () {

    return this.name

  }

}

let p  = new Person('jack')

alert(p.getName())
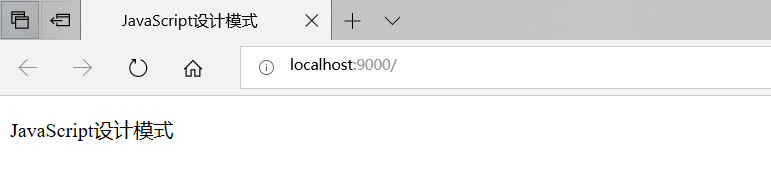
运行显示,已经正确执行index.js中的代码了

什么是面向对象
面向对象类的概念
class Person {

  constructor (name, age) {

    this.name = name

    this.age = age

  }

  getName () {

    return this.name

  }

  speak () {

    return `My name is ${this.name}, age${this.age}`

  }

}
面向对象实例化对象
let p1  = new Person('jack', 23)

let p2  = new Person('jack',32)

alert(p1.getName())

alert(p2.speak())
面向对象之继承
定义一个人的父类Person
// 父类Person

class Person {

  constructor (name, age) {

    this.name = name

    this.age = age

  }

  getName () {

    return this.name

  }

  speak () {

    return `My name is ${this.name}, age${this.age}`

  }

}
定义一个Student子类继承父类Person
// 子类,学生

class Student extends Person{

  constructor (name, age, number) {

    super(name, age)

    this.number = number

  }

  // 子类特有的方法

  study () {

    return '我正在学习'

  }

  // 覆盖父类的方法

  speak() {

    return `My name is ${this.name}, age${this.age}, number${this.number}`

  }

}
实例化子类Student
let s1 = new Student('小明', 11, '1234567890')

let s2 = new Student('小光', 12, '0987654321')

alert(s1.study())

alert(s2.speak())
Person类是公共的不仅仅服务于Student,继承可以将公共方法和属性抽离出来,提高复用性,减少冗余
面向对象之封装
面向对象的封装特性中有三个关键字需要理解的:public 完全开发,protected 对子类开发,private只对自己开发(可惜ES6中还不支持,可以使用typescript来演示)
ES6还不支持,一般认为_开头的属性是私有属性(private)
// 父类Person

class Person {

  name

  age

  protected weight // 定一个体重的属性,子类可以访问

  constructor (name, age, weight) {

    this.name = name

    this.age = age

    this.weight = weight

  }

  getName () {

    return this.name

  }

  speak () {

    return `My name is ${this.name}, age${this.age}, weight${this.weight}`

  }

}

// 子类,学生

class Student extends Person{

  number

  private girlfriend // 私有属性,只有Students可以访问

  constructor (name, age, number, weight, girlfriend) {

    super(name, age, weight)

    this.number = number

    this.girlfriend = girlfriend

  }

  study () {

    return '我正在学习'

  }

  getWeight () {

    return `My weight is ${this.weight}`

  }

  getGirlfriend () {

    return `My girlfriend is ${this.girlfriend}` // girlfriend属性是私有的,外面不能访问,只能提供一个方法

  }

  speak() {

    return `My name is ${this.name}, age${this.age}, number${this.number}`

  }

}

let s1 = new Student('小明', 11, '1234567890', 123, 'xialli')

let s2 = new Student('小光', 12, '0987654321',123, 'xiaohong')

alert(s1.getWeight())

alert(s2.getGirlfriend())
数据的权限和保密,不让外部程序看见,只暴露一些方法供外部程序调用
面向对象之多态
同一接口不同实现
// 父类Person

class Person {

  constructor (name, age) {

    this.name = name

    this.age = age

  }

  speak () { // 父类中的speak方法不写具体的实现,由子类来覆盖实现

  }

}

// 子类,学生

class Student extends Person{

  constructor (name, age, number) {

    super(name, age)

    this.number = number

  }

  // 覆盖父类的方法

  speak() {

    return `My name is ${this.name}, age${this.age}, number${this.number}`

  }

}

// 子类,学生

class Teacher extends Person{

  constructor (name, age) {

    super(name, age)

  }

  // 覆盖父类的方法

  speak() {

    return `My name is ${this.name}, age${this.age}, I m Teacher`

  }

}

let s1 = new Student('小明', 11, '1234567890')

alert(s1.speak())

let t1 = new Teacher('大明', 30)

alert(t1.speak())
面向对象的应用案例
模拟Jquery的写法,理解Jquery是如何用面向对象实现的
class jQuery {

  constructor(seletor) {

    let slice = Array.prototype.slice

    let dom = slice.call(document.querySelectorAll(seletor))

    let len = dom ? dom.length : 0

    for(let i = 0; i < len; i++){

      this[i] = dom[i]

    }

    this.length = len

    this.seletor = seletor || ''

  }

  append(node){

  }

  addClass(name){

  }

  html(data){

  }

}

window.$ = function (selector) {

  // 工厂模式

  return new jQuery(selector)

}

// 测试代码

var $p = $('p')

console.log($p)

console.log($p.addClass)
在index.html中添加几个p标签测试
<!DOCTYPE html>

<html lang="en">

<head>

  <meta charset="UTF-8">

  <title>JavaScript设计模式</title>

</head>

<body>

  <p>JavaScript设计模式1</p>

  <p>JavaScript设计模式2</p>

  <p>JavaScript设计模式3</p>

</body>

</html>
面向对象的总结
基本上我们程序员写的业务代码都是这样的一个情况:程序执行—顺序,判断,循环——结构化
为何使用面向对象,其实面向对象就是数据结构化,将世界万物集合到对象中利于管理和封装,复用
UML类图
什么是UML类图:Unified Modeling Language 统一建模语言,UML可以包含很多种图,本系列种使用的是类图
画图工具:MS Office visio(比较复杂的类图) 和processon(本系列种使用这种)
创建类图的格式如下:

接下来我们使用processon来画一个People的类图
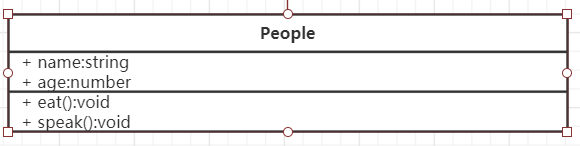
根据这个UML类图编写代码
class People {

  constructor (name ,age) {

    this.name = name

    this.age = age

  }

  eat () {

    alert(`${this.name} eat something`)

  }

  speak () {

    alert(`My name is ${this.name}, age:${this.age}`)

  }

}
接下来来设计一个比较复杂一点的类,类之间有各种关系的
泛化:表示继承,关联:表示引用
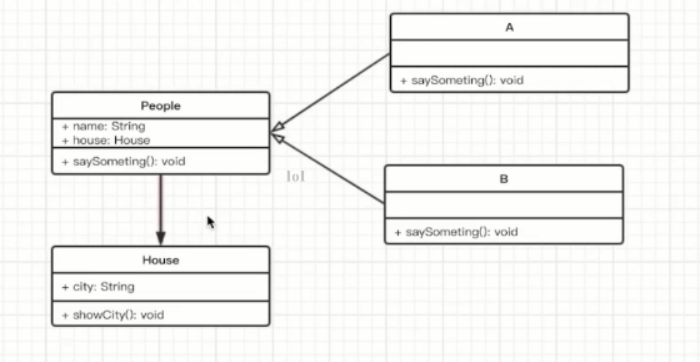
class People {

  constructor (name ,house) {

    this.name = name

    this.age = house

  }

  saySomething () {}

}

class A extends People {

  constructor(name, house){

    super(name, house)

  }

  saySomething () {

    alert('I am A')

  }

}

class B extends People{

  constructor(name, house){

    super(name, house)

  }

  saySomething () {

    alert('I am B')

  }

}

class House {

  constructor(city) {

    this.city = city

  }

  showCity () {

    alert(`house in ${this.city}`)

  }

}


// 测试代码

let aHouse = new House('深圳')

let a = new A('a', aHouse)

console.log(a) // a有房子

let b = new B('b')

console.log(b) // b没有房子
Bootstrap_CSS全局样式的更多相关文章
- BootStrap入门教程 (一) :手脚架Scaffolding(全局样式(Global Style),格网系统(Grid System),流式格网(Fluid grid System),自定义(Customing),布局(Layouts))
2011年,twitter的“一小撮”工程师为了提高他们内部的分析和管理能力,用业余时间为他们的产品构建了一套易用.优雅.灵活.可扩展的前端工具集--BootStrap.Bootstrap由MARK ...
- bootstrap复习:全局样式
一.概览 1.Bootstrap 是移动设备优先的. 2.在移动设备浏览器上,通过为视口(viewport)设置 meta 属性为 user-scalable=no 可以禁用其缩放(zooming)功 ...
- styled-components解决全局样式'injectGlobal' 废除的问题
最新版的 styled-components v4 已经将原有的 injectGlobal() 方法替换成了 createGlobalStyle() ,而且用法也和之前的 injectGlobal 方 ...
- bootstrap 全局样式设置
HTML <!DOCTYPE HTML> <html> <head> <meta http-equiv="Content-Type" co ...
- 全局css , 样式设置, css 初始化. css ,style ,全局样式, 初始化样式
全局CSS设置总结 1.清除所有标记的内外边距 html, body, ul, li, ol, dl, dd, dt, p, h1, h2, h3, h4, h5, h6, form, fieldse ...
- taro 组件的外部样式和全局样式
自定义组件对应的样式文件,只对该组件内的节点生效. 编写组件样式时,需要注意以下几点: 组件和引用组件的页面不能使用 id 选择器(#a).属性选择器([a])和标签名选择器,请改用 class 选择 ...
- 关于微信小程序中组件和页面对全局样式的继承性
1.组件只能继承全局样式中的font和color(backgroundcolor不继承) 2.页面可以继承全局样式中所有样式
- bootstrap基础学习小记(一)简介模板、全局样式
2011年,twitter的“一小撮”工程师为了提高他们内部的分析和管理能力,用业余时间为他们的产品构建了一套易用.优雅.灵活.可扩展的前端工具集--BootStrap.Bootstrap由MARK ...
- 02 uni-app框架学习:设置全局样式统一每个页面的背景颜色
1.设置全局样式可以在App.vue里面 2.在每个页面的根view 里添加一个class名叫page
随机推荐
- Codeforces Round #266 (Div. 2) D
D. Increase Sequence time limit per test 1 second memory limit per test 256 megabytes input standard ...
- Coder-Strike 2014 - Finals (online edition, Div. 2) C题
C. Online Meeting time limit per test 1 second memory limit per test 256 megabytes input standard in ...
- [开发]Win7环境下Eclipse连接Hadoop2.2.0
准备: 确保hadoop2.2.0集群正常运行 1.eclipse中建立mven工程,并编辑pom文件如下 <dependencies> <dependency> <gr ...
- 【转】Sublime text 3 中文文件名显示方框怎么解决
引用自:http://www.zhihu.com/question/24029280 如图,中文文件名打开全是乱码,内容倒是装了converttoutf8没什么太大的问题. 这个是sublime te ...
- Unity3D战争迷雾效果
原地址:http://liweizhaolili.blog.163.com/blog/static/16230744201431835652233/ 最近一直都在做Flash相关的东西,很久没有空搞U ...
- Sqli-labs less 47
Less-47 本关的sql语句为 $sql = "SELECT * FROM users ORDER BY '$id'"; 将id变为字符型,因此根据我们上述提到的知识,我 ...
- C#&java重学笔记(面向对象)
C#部分 1.C#有一个internal关键字,指字段可以同一个程序集中访问,出了程序集不行.还有一个protected internal(没有先后之分)修饰词,指只能在同一个程序集中的子类访问 2. ...
- java基础知识回顾之javaIO类---BufferedReader和BufferedWriter
使用了装饰设计模式:此类的设计是为了提高流操作数据的效率.思想就是定义容器将数据进行临时存储,对于缓冲区对象,其实就是将这个容器进行了分装,并提供了更高效的操作方法. BufferReader: pa ...
- MongoDB (九) MongoDB 投影
mongodb 投影意思是只选择必要的数据而不是选择一个文件的数据的整个.如果一个文档有5个字段,需要显示只有3个,然后选择其中只有3个字段. find() 方法 MongoDB 的find()方法, ...
- lintcode :单词搜索
题目 单词搜索 给出一个二维的字母板和一个单词,寻找字母板网格中是否存在这个单词. 单词可以由按顺序的相邻单元的字母组成,其中相邻单元指的是水平或者垂直方向相邻.每个单元中的字母最多只能使用一次. 样 ...