springmvc之前后台传值
一、向后台传值
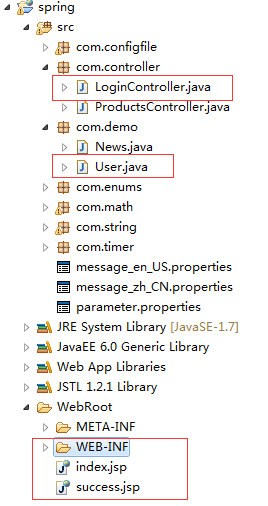
1、项目结构
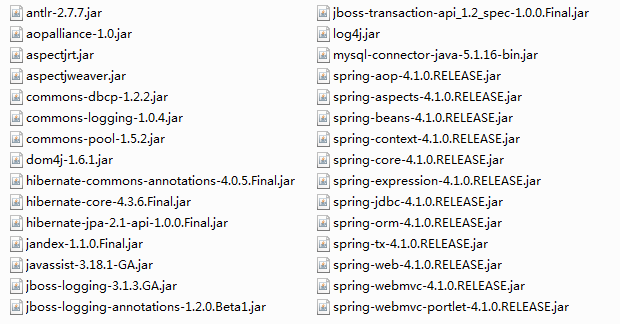
2、jar包
3、spring-config.xml
- <?xml version="1.0" encoding="UTF-8"?>
- <beans xmlns="http://www.springframework.org/schema/beans"
- xmlns:xsi="http://www.w3.org/2001/XMLSchema-instance"
- xmlns:oxm="http://www.springframework.org/schema/oxm"
- xmlns:context="http://www.springframework.org/schema/context"
- xmlns:aop="http://www.springframework.org/schema/aop"
- xmlns:tx="http://www.springframework.org/schema/tx"
- xmlns:task="http://www.springframework.org/schema/task"
- xsi:schemaLocation="http://www.springframework.org/schema/beans
- http://www.springframework.org/schema/beans/spring-beans-3.0.xsd
- http://www.springframework.org/schema/oxm
- http://www.springframework.org/schema/oxm/spring-oxm-3.0.xsd
- http://www.springframework.org/schema/context
- http://www.springframework.org/schema/context/spring-context-3.0.xsd
- http://www.springframework.org/schema/tx
- http://www.springframework.org/schema/tx/spring-tx-3.0.xsd
- http://www.springframework.org/schema/aop
- http://www.springframework.org/schema/aop/spring-aop-3.0.xsd
- http://www.springframework.org/schema/task
- http://www.springframework.org/schema/task/spring-task-3.2.xsd">
- <!-- 通知spring容器通过注解的方式装配bean -->
- <context:annotation-config />
- <!-- 通知spring容器采用自动扫描机制查找注解的bean -->
- <context:component-scan base-package="com.*" />
- <task:annotation-driven /> <!-- 定时器开关-->
- <bean id="agentExcelTask" class="com.timer.TimerController1"/>
- <task:scheduled-tasks>
- <task:scheduled ref="agentExcelTask" method="printstr" cron="* * 0/1000 * * ?"/>
- </task:scheduled-tasks>
- <!-- 配置返回页面过滤 -->
- <bean id="viewResolver" class="org.springframework.web.servlet.view.UrlBasedViewResolver">
- <property name="viewClass"
- value="org.springframework.web.servlet.view.JstlView" />
- <property name="prefix" value="/" />
- <property name="suffix" value=".jsp" />
- </bean>
- </beans>
4、LoginController.java,下面是spring向后台传值的三种方式。
- package com.controller;
- import javax.servlet.http.HttpServletRequest;
- import org.springframework.stereotype.Controller;
- import org.springframework.ui.Model;
- import org.springframework.web.bind.annotation.RequestMapping;
- import org.springframework.web.bind.annotation.RequestParam;
- import com.demo.User;
- @Controller
- public class LoginController {
- /**
- * 使用HttpServletRequest获取
- */
- @RequestMapping("/login1")
- public String login1(HttpServletRequest request,Model model){
- model.addAttribute("name", request.getParameter("name"));
- model.addAttribute("password", request.getParameter("password"));
- return "success";
- }
- /**
- * spring自动将表单参数注入到方法参数,参数值和页面name属性一致时可以省去@RequestParam注解
- */
- @RequestMapping("/login2")
- public String login2(@RequestParam("name") String name, String password,Model model){
- model.addAttribute("name", name);
- model.addAttribute("password", password);
- return "success";
- }
- /**
- * 自动注入bean属性
- */
- @RequestMapping("/login3")
- public String login3(User user,Model model){
- model.addAttribute("name", user.getName());
- model.addAttribute("password", user.getPassword());
- return "success";
- }
- }
注:第三种方式自动注入bean属性需要定义实体类,本例中定义User.java
5、User.java
- package com.demo;
- import javax.persistence.Entity;
- import javax.persistence.GeneratedValue;
- import javax.persistence.Id;
- @Entity
- public class User {
- @Id
- @GeneratedValue
- private long id;
- private String name;
- private String password;
- public long getId() {
- return id;
- }
- public void setId(long id) {
- this.id = id;
- }
- public String getName() {
- return name;
- }
- public void setName(String name) {
- this.name = name;
- }
- public String getPassword() {
- return password;
- }
- public void setPassword(String password) {
- this.password = password;
- }
- }
6、index.jsp
- <%@ page language="java" import="java.util.*" pageEncoding="UTF-8"%>
- <%@ taglib prefix="spring" uri="http://www.springframework.org/tags" %>
- <%
- String path = request.getContextPath();
- String basePath = request.getScheme()+"://"+request.getServerName()+":"+request.getServerPort()+path+"/";
- %>
- <!DOCTYPE HTML PUBLIC "-//W3C//DTD HTML 4.01 Transitional//EN">
- <html>
- <head>
- <base href="<%=basePath%>">
- <title>index</title>
- </head>
- <body>
- <form action="login2" method="post">
- 用户:<input type="text" name="name"><br><br>
- 密码:<input type="text" name="password"><br><br>
- <input type="submit" value="确定">
- </form>
- <!-- 使用message 标签配置需要显示的国际化文本,
- code 对应国际化文件中对应的键的名称 -->
- <span style="color: #2D2D2D;">
- <spring:message code="main.title"/>
- </span>
- <br>
- <input type="text" value="<spring:message code="main.target"/>">
- </body>
- </html>
7、success.jsp
- <%@ page language="java" import="java.util.*" pageEncoding="UTF-8"%>
- <%
- String path = request.getContextPath();
- String basePath = request.getScheme()+"://"+request.getServerName()+":"+request.getServerPort()+path+"/";
- %>
- <!DOCTYPE HTML PUBLIC "-//W3C//DTD HTML 4.01 Transitional//EN">
- <html>
- <head>
- <base href="<%=basePath%>">
- <title>success</title>
- </head>
- <body>
- ${name},success. <br>
- 用户名:${name},密码:${password}
- </body>
- </html>
二、向前台传值的两种方式
- package com.controller;
- import java.util.Map;
- import javax.servlet.http.HttpServletRequest;
- import org.springframework.stereotype.Controller;
- import org.springframework.ui.Model;
- import org.springframework.web.bind.annotation.RequestMapping;
- import org.springframework.web.bind.annotation.RequestParam;
- import com.demo.User;
- @Controller
- public class LoginController {
- @RequestMapping("/login2")
- public String login2(@RequestParam("name") String name, String password,Model model){
- model.addAttribute("name", name);
- model.addAttribute("password", password);
- return "success";
- }
- return "success";
- }
- @RequestMapping("/login4")
- public String login4(User user, Map<String, Object> map){
- map.put("name", user.getName());
- map.put("password", user.getPassword());
- return "success";
- }
- }
三、springmvc重定向
参考spring mvc controller间跳转 重定向 传参 (转)
springmvc之前后台传值的更多相关文章
- SpringMVC:前台jsp页面和后台传值
前台jsp页面和后台传值的几种方式: 不用SpringMVC自带的标签 前台---->后台,通过表单传递数据(): 1.jsp页面代码如下, modelattribute 有没有都行 < ...
- PHP后台传值
前台数据往后台传值,往往是新手最头痛的,最近在学习thinkPHP的时候,也遇到了这种问题,总结一下,往不足之处请大家指教. 一.前台界面代码,往后台传值有两种方式,一种是get,另一种是post,新 ...
- Spring mvc前台后台传值
前台向后台传值: ①同名参数传递:form表单中提交input,Controller方法入参中,直接以同名参数获取 ②不同名参数传递:from表单提交input,Controller方法入参中需要使用 ...
- springmvc用model传值到jsp页面,el表达式引用接收不到传递过来的值
springmvc用model传值到jsp页面,el表达式引用接收不到传递过来的值 查看下controller层代码可以发现,写的是没有错误的. @RequestMapping("list. ...
- ASP.NET MVC 富文本Ueditor编辑 后台传值前端乱码解决方案
只是将当前内容String当成Html插入,我想是跟数据类型转换差不多 //把内容赋值给ueditor var ue = UE.getEditor('editor');//实例化 ue.ready(f ...
- 元素设置disabled属性后便无法向后台传值
元素设置disabled属性后便无法向后台传值
- springMvc 通过url传值,实现访问
springMvc 通过url传值,实现访问 1.创建web项目,引入相关jar包,并完成相应配置,在上一篇博客已经实现 2.在WEB-INF下创建jsp文件夹,并创建hello.jsp文件 < ...
- SpringMVC:后台将List转为Json,传值到页面
一.JSP页面 <body> <form name="test" action="getAllStudent" method="po ...
- 菜鸟学习Spring——SpringMVC注解版前台向后台传值的两种方式
一.概述. 在很多企业的开法中常常用到SpringMVC+Spring+Hibernate(mybatis)这样的架构,SpringMVC相当于Struts是页面到Contorller直接的交互的框架 ...
随机推荐
- ng-controller event data
$emit只能向parent controller传递event与data $broadcast只能向child controller传递event与data $on用于接收event与data 例子 ...
- log4net 记录到数据库和本地文件
1)配置代码 <?xml version="1.0" encoding="utf-8" ?> <configuration> <c ...
- RestSharp使用
class Program { private readonly static string investRankingForAllUrl = "http://192.168.1.98:90 ...
- wifi-mac
//18:a6:f7:12:0b:8b //18:a6:f7:1e:a9:57 //18:a6:f7:1f:8e:69 //18:a6:f7:12:0b:9c //18:a6:f7:1f:cd:d4 ...
- case when then else end
1.根据数据库表中特定的值进行排序显示 select * from tablename where order by case when columname='' then 1 wnen column ...
- Jquery 实现密码框的显示与隐藏【转载自http://blog.csdn.net/fengzhishangsky/article/details/11809069】
<html> <head> <script type="text/JavaScript" src="jQuery-1.5.1.min.j ...
- JavaWeb学习笔记——jsp内置对象
- centos6.5编译安装git
1.下载高版本的git,地址:https://github.com/git/git/release,选择git-2.9.3.tar.gz 2.安装依赖包.解压.编译安装 yum install cur ...
- ecshop网站搬家缓存无法更新
问题描述: 1.后台产品列表能改,数据也能看到,前端就是不显示 2.缓存无法删除 3.网上其他方法都试过,还是不行 症状:是因为缓存无法删除,无法更新,只需要能重新更新缓存文件即可.网站搬家丢失tem ...
- Python之路【第六篇】:面向对象编程相关
判断类与对象关系 isinstance(obj, cls) 判断对象obj是否是由cls类创建的 #!/usr/bin/env python #-*- coding:utf-8 -*- class ...