Spring Boot实战笔记(二)-- Spring常用配置(Scope、Spring EL和资源调用)
一、Bean的Scope
Scope描述的是Spring容器如何新建Bean实例的。Spring的Scope有以下几种,通过@Scope注解来实现。
(1)Singleton:一个Spring容器中只有一个Bean的实例,此为Spring的默认配置,全容器共享一个实例。
(2)Prototype:每次调用新建一个Bean实例。
(3)Request:Web项目中,给每一个 http request 新建一个Bean实例。
(4)Session:Web项目中,给每一个 http session 新建一个Bean实例。
(5)GlobalSession:这个只在portal应用中有用,给每一个 global http session 新建一个Bean实例。
另外,在Spring Batch中还有一个Scope是使用@StepScope,我们将在批处理介绍这个Scope。
接下来简单演示默认的 Singleton 和 Prototype,分别从Spring容器中获取两次Bean,判断Bean的实例是否相等。
1.编写Singleton的Bean。
package com.ecworking.scope;

import org.springframework.stereotype.Service;

@Service //默认为Singleton,相当于@Scope("singleton")。

public class DemoSingletonService {

}
2.编写Prototype的Bean。
package com.ecworking.scope;

import org.springframework.context.annotation.Scope;

import org.springframework.stereotype.Service;

@Service

@Scope("prototype") //声明Scopew为Prototype。

public class DemoPrototypeService {

}
3.配置类。
package com.ecworking.scope;

import org.springframework.context.annotation.ComponentScan;

import org.springframework.context.annotation.Configuration;

@Configuration

@ComponentScan("com.ecworking.scope")

public class ScopeConfig {

}
4.运行。
package com.ecworking.scope;

import org.springframework.context.annotation.AnnotationConfigApplicationContext;

public class Main {

    public static void main(String[] args) {

        AnnotationConfigApplicationContext context = new AnnotationConfigApplicationContext(ScopeConfig.class);

        DemoSingletonService s1 = context.getBean(DemoSingletonService.class);

        DemoSingletonService s2 = context.getBean(DemoSingletonService.class);

        DemoPrototypeService p1 = context.getBean(DemoPrototypeService.class);

        DemoPrototypeService p2 = context.getBean(DemoPrototypeService.class);

        System.out.println("s1与s2是否相等:" + s1.equals(s2));

        System.out.println("p1与p2是否相等:" + p1.equals(p2));

        context.close();

    }

}
运行结果:

二、Spring EL和资源调用
Spring EL-Spring表达式语言,支持在xml和注解中使用表达式,类似于JSP的EL表达式语言。
Spring 开发中经常涉及调用各种资源的情况,包含普通文件、网址、配置文件、系统环境变量等,我们可以使用Spring表达式语言实现资源的注入。
Spring 主要在注解@Value的参数中使用表达式。
本节演示实现以下几种情况:
(1)注入普通字符;
(2)注入操作系统属性;
(3)注入表达式运算结果;
(4)注入其他Bean的属性;
(5)注入文件内容;
(6)注入网址内容;
(7)注入属性文件;
1. 准备,增加commons-io可简化文件相关操作。
本例中使用commons-io将file转换成字符串:
<dependency>

      <groupId>commons-io</groupId>

      <artifactId>commons-io</artifactId>

      <version>2.3</version>

</dependency>
在com.ecworking.el.source包下新建test.txt,内容随意。
在com.ecworking.el.source包下新建test.propertise,内容如下:
book.author = dongyp

book.name = spring boot
2. 需要被注入的Bean。
package com.ecworking.el;

import org.springframework.beans.factory.annotation.Value;

import org.springframework.stereotype.Service;

@Service

public class DemoService {

    @Value("其他类的属性") //此处为注入普通字符串

    private String another;

    public String getAnother() {

        return another;

    }

    public void setAnother(String another) {

        this.another = another;

    }

}
3. 演示类Bean。
package com.ecworking.el;

import org.apache.commons.io.IOUtils;

import org.springframework.beans.factory.annotation.Autowired;

import org.springframework.beans.factory.annotation.Value;

import org.springframework.context.annotation.Bean;

import org.springframework.context.annotation.PropertySource;

import org.springframework.context.support.PropertySourcesPlaceholderConfigurer;

import org.springframework.core.env.Environment;

import org.springframework.core.io.Resource;

import org.springframework.stereotype.Service;

import java.io.IOException;

@Service

@PropertySource("classpath:test.properties")

//注入配置文件需使用@PropertySource指定文件地址,若使用@Value注入,则要配置一个PropertySourcesPlaceholderConfigurer的Bean。注意@Value("${book.name}"),使用的是$而不是#。

//注入 Properties 还可以从 Environment 中获得。

public class DemoElService {

    @Value("I LOVE YOU!") //注入普通字符串

    private String normal;

    @Value("#{systemProperties['os.name']}") //注入操作系统属性

    private String osName;

    @Value("#{T(java.lang.Math).random() * 100.0}") //注入表达式结果

    private String randomNumber;

    @Value("#{demoService.another}") //注入其他Bean属性

    private String fromAnother;

    @Value("classpath:/test.txt") //注入文件资源

    private Resource testFile;

    @Value("http://www.baidu.com") //注入网址资源

    private Resource testUrl;

    @Value("${book.name}") // 注入配置文件

    private String bookName;

    @Autowired // 注入配置文件

    private Environment environment;

    @Bean // 注入配置文件

    public static PropertySourcesPlaceholderConfigurer propertyConfigurer(){

        return new PropertySourcesPlaceholderConfigurer();

    }

    public void outputResource(){

        try {

            System.out.println(normal);

            System.out.println(osName);

            System.out.println(randomNumber);

            System.out.println(fromAnother);

            System.out.println(IOUtils.toString(testFile.getInputStream()));

            System.out.println(IOUtils.toString(testUrl.getInputStream()));

            System.out.println(bookName);

            System.out.println(environment.getProperty("book.author"));

        } catch (IOException e) {

            e.printStackTrace();

        }

    }

}
4.配置类。
package com.ecworking.el;

import org.springframework.context.annotation.ComponentScan;

import org.springframework.context.annotation.Configuration;

@Configuration

@ComponentScan("com.ecworking.el")

public class ElConfig {

}
5.运行。
package com.ecworking.el;

import org.springframework.context.annotation.AnnotationConfigApplicationContext;

public class Main {

    public static void main(String[] args) {

        AnnotationConfigApplicationContext context = new AnnotationConfigApplicationContext(ElConfig.class);

        DemoElService demoElService = context.getBean(DemoElService.class);

        demoElService.outputResource();

        context.close();

    }

}
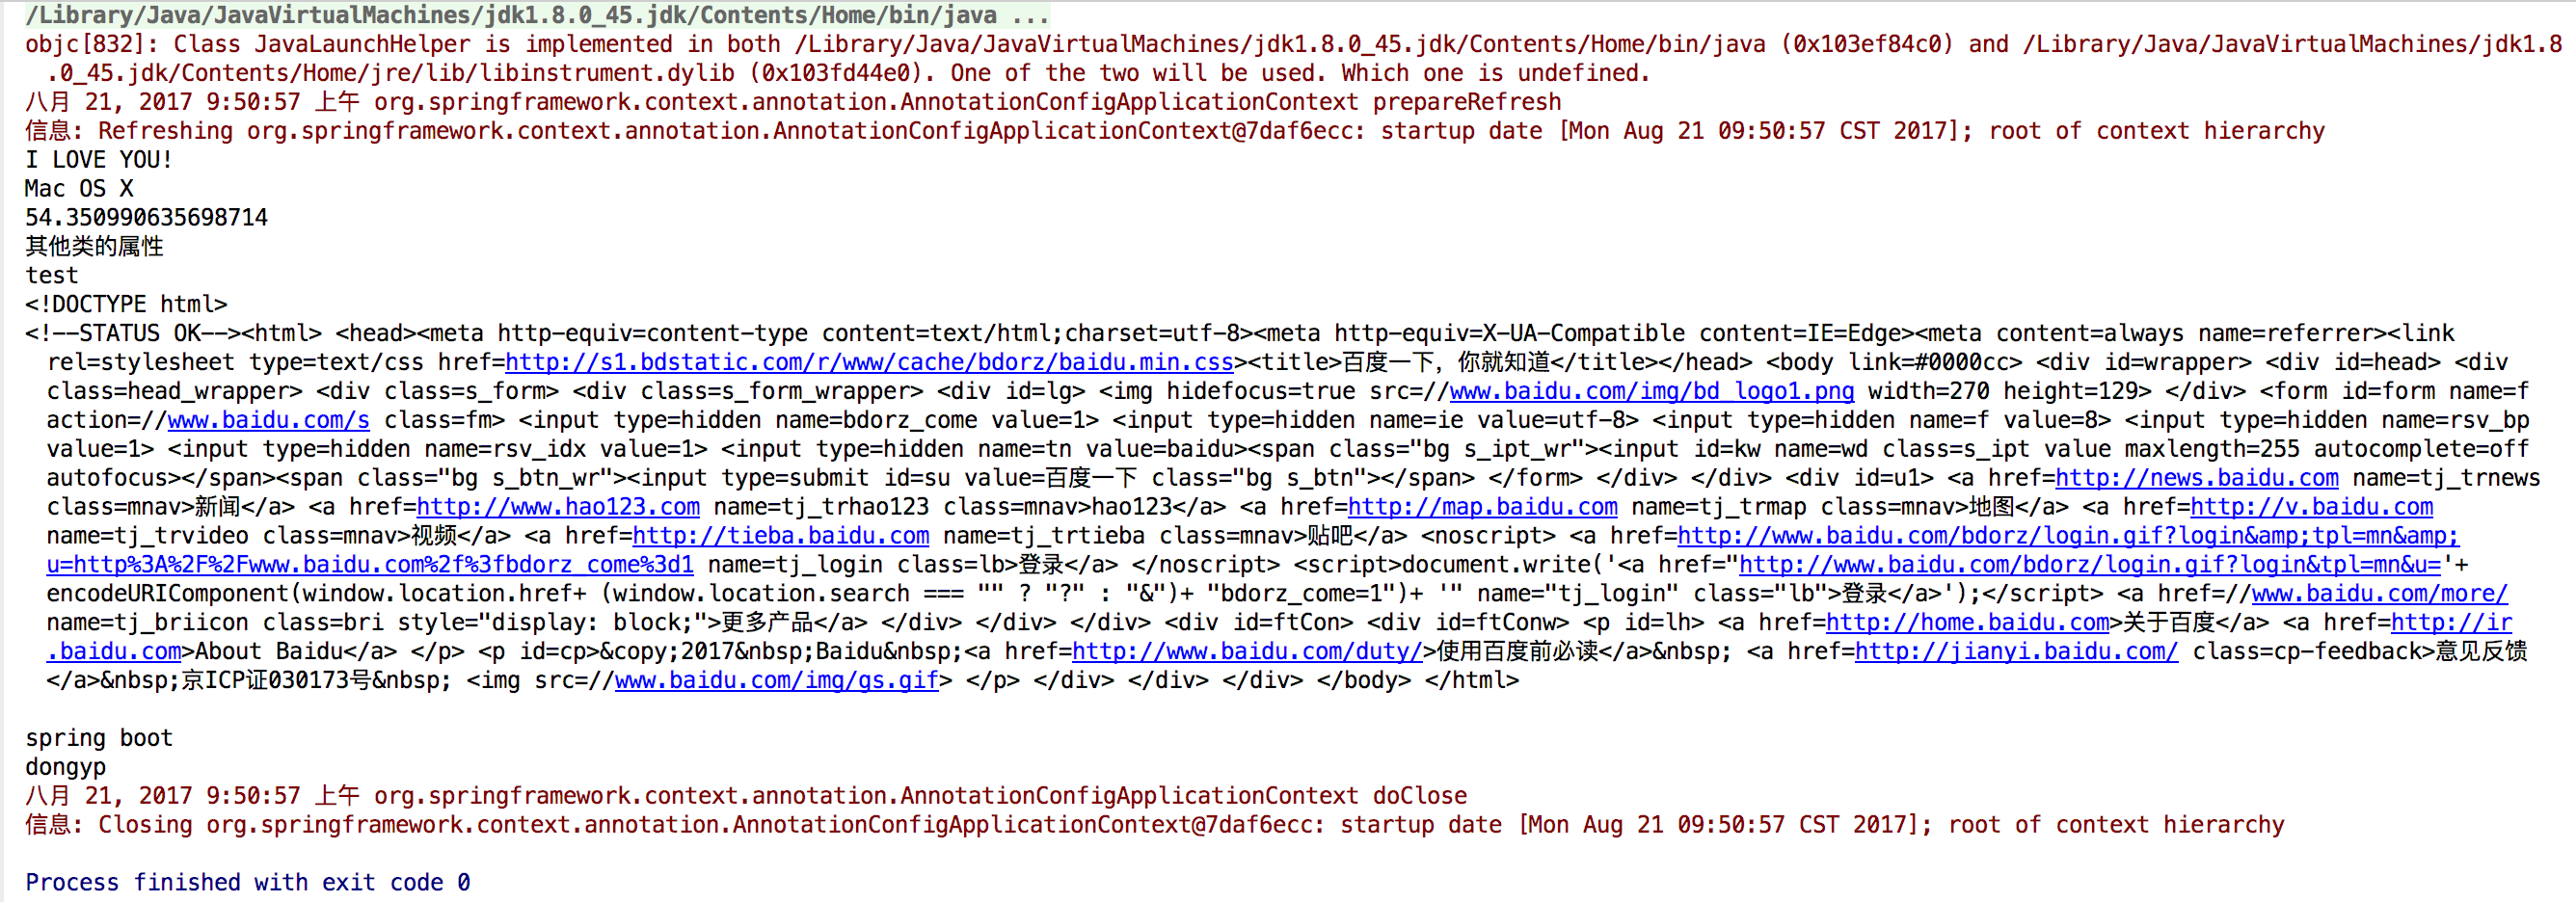
运行结果:
Spring Boot实战笔记(二)-- Spring常用配置(Scope、Spring EL和资源调用)的更多相关文章
- spring boot实战(第十三篇)自动配置原理分析
前言 spring Boot中引入了自动配置,让开发者利用起来更加的简便.快捷,本篇讲利用RabbitMQ的自动配置为例讲分析下Spring Boot中的自动配置原理. 在上一篇末尾讲述了Spring ...
- Spring Boot学习笔记二
Spring Boot入门第二篇 第一天的详见:https://www.cnblogs.com/LBJLAKERS/p/12001253.html 同样是新建一个pring Initializer快速 ...
- Spring Boot实战系列(7)集成Consul配置中心
本篇主要介绍了 Spring Boot 如何与 Consul 进行集成,Consul 只是服务注册的一种实现,还有其它的例如 Zookeeper.Etcd 等,服务注册发现在微服务架构中扮演这一个重要 ...
- Spring Boot实战笔记(一)-- Spring简介
一.Spring 概述 Spring框架是一个轻量级的企业级开发的一站式解决方案.所谓的解决方案就是可以基于Spring解决所有的Java EE开发的所有问题. Spring框架主要提供了Ioc(In ...
- JavaEE开发的颠覆者 Spring Boot实战--笔记
1.Spring boot的三种启动模式 Spring 的问题 Spring boot的特点,没有特别的地方 1.Spring 基础 PS:关于spring配置 PS: 现在都已经使用 java配置, ...
- Spring Boot学习笔记(二二) - 与Mybatis集成
Mybatis集成 Spring Boot中的JPA部分默认是使用的hibernate,而如果想使用Mybatis的话就需要自己做一些配置.使用方式有两种,第一种是Mybatis官方提供的 mybat ...
- spring boot 实战笔记(一)
spring 概述: Bean :每一个被 Spring 管理的 JAVA对象,都称之为 Bean.Spring提供一个IoC容器来初始化对象,负责创建Bean, 解决对象之间的依赖管理和对象的使用. ...
- Spring Boot实战笔记(九)-- Spring高级话题(组合注解与元注解)
一.组合注解与元注解 从Spring 2开始,为了响应JDK 1.5推出的注解功能,Spring开始大量加入注解来替代xml配置.Spring的注解主要用来配置注入Bean,切面相关配置(@Trans ...
- Spring Boot实战笔记(五)-- Spring高级话题(Spring Aware)
一.Spring Aware Spring 依赖注入的最大亮点就是你所有的 Bean 对 Spring容器的存在是没有意识的.即你可以将你的容器替换成其他的容器,如Google Guice,这时 Be ...
随机推荐
- Python学习笔记 - 列表生成式listComprehensions
#!/usr/bin/env python3 # -*- coding: utf-8 -*- list(range(1, 11)) # 生成1乘1,2乘2...10乘10 L = [] for x i ...
- Material Design之RecyclerView的使用(一)
Android 5.0开始就推荐使用Material Design这个设计语言,本文开始就逐一讲解Material Design中控件的使用.本章主要讲解RecyclerView,期中会带有ToolB ...
- ORM对象关系映射之GreenDAO自定义属性转换器PropertyConverter
在使用GreenDAO定义实体的属性时候,通常来说定义的实体属性名就是对应的表的字段名.实体中属性的类型(如Long.String等)就是表的字段名类型,但是我们难免会有不一样的需求,比如实体中我定义 ...
- cat .git/config查看远端服务器信息(git的配置信息:远端服务器连接信息)
本地git库中,查找其连接的远端服务器信息: 每个git库都会有一个配置信息文件.git/config. cat .git/config,可以看到信息如下: [core] reposi ...
- 【cocos 2d-x】VS2012+win7+cocos2d-x3.0beta2开发环境配置
本系列文章由@二货梦想家张程 所写,转载请注明出处. 作者:ZeeCoder 微博链接:http://weibo.com/zc463717263 我的邮箱:michealfloyd@126.com ...
- 中文注释 MariaDB my.cnf 大型服务器配置模板
文件如下所示,请根据需要进行修改: 翻译日期: 2014年5月22日 翻译人员: 铁锚 # /usr/share/mysql/my-huge.cnf # MariaDB 配置文件 示例模板(huge, ...
- objc写一个NSMutableArray不连续索引替换对象的方法
NSMutableArray内置的方法-(void)replaceObjectsAtIndexes:(NSIndexSet*)set withObjects:(NSArray*)objs 只能替换一段 ...
- mybatis源码之SimpleStatementHandler
/** * @author Clinton Begin */ public class SimpleStatementHandler extends BaseStatementHandler { pu ...
- Nginx + IIS实现负载均衡 Session多站点共享
日子过得太索然无味了,研究了一下,所谓的负载均衡(主要是windows服务器IIS下的).先看看分析图:环境:linux服务器: centos 6.3windows服务器: windows serve ...
- JMM规范
JMM规范: The rules for happens-before are: Program order rule. Each action in a thread happens-before ...