Springboot 连接 使用 Redis Example
通过一个简单的例子使用Springboot 连接并使用Redis。 本文假设已经安装好Redis。
1.首先将URL转换为一个ID ,并使用 StringRedisTemplate 将ID 和 URL 保存到Redis
2. 根据ID 从Redis中获取对应的URL
项目结构如下

POM文件
<?xml version="1.0" encoding="UTF-8"?>

<project xmlns="http://maven.apache.org/POM/4.0.0" xmlns:xsi="http://www.w3.org/2001/XMLSchema-instance"

    xsi:schemaLocation="http://maven.apache.org/POM/4.0.0 http://maven.apache.org/xsd/maven-4.0.0.xsd">

    <modelVersion>4.0.</modelVersion>

    <parent>

        <groupId>org.springframework.boot</groupId>

        <artifactId>spring-boot-starter-parent</artifactId>

        <version>2.0..RELEASE</version>

        <relativePath /> <!-- lookup parent from repository -->

    </parent>

    <groupId>com.example</groupId>

    <artifactId>redis-shorterurl</artifactId>

    <version>0.0.-SNAPSHOT</version>

    <name>redis-shorterurl</name>

    <description>Demo project for Spring Boot</description>

    <properties>

        <java.version>1.8</java.version>

    </properties>

    <dependencies>

        <dependency>

            <groupId>org.springframework.boot</groupId>

            <artifactId>spring-boot-starter-data-redis</artifactId>

        </dependency>

        <dependency>

            <groupId>org.springframework.boot</groupId>

            <artifactId>spring-boot-starter-web</artifactId>

        </dependency>

        <!-- https://mvnrepository.com/artifact/commons-validator/commons-validator -->

        <dependency>

            <groupId>commons-validator</groupId>

            <artifactId>commons-validator</artifactId>

            <version>1.6</version>

        </dependency>

        <dependency>

            <groupId>com.google.guava</groupId>

            <artifactId>guava</artifactId>

            <version>18.0</version>

        </dependency>

        <dependency>

            <groupId>org.springframework.boot</groupId>

            <artifactId>spring-boot-starter-test</artifactId>

            <scope>test</scope>

        </dependency>

    </dependencies>

    <build>

        <plugins>

            <plugin>

                <groupId>org.springframework.boot</groupId>

                <artifactId>spring-boot-maven-plugin</artifactId>

            </plugin>

        </plugins>

    </build>

</project>
以及Java文件
package com.example.redisshorterurl;

import org.springframework.boot.SpringApplication;

import org.springframework.boot.autoconfigure.SpringBootApplication;

@SpringBootApplication

public class RedisShorterurlApplication {

    public static void main(String[] args) {

        SpringApplication.run(RedisShorterurlApplication.class, args);

    }

}
package com.example.redisshorterurl;

import java.nio.charset.StandardCharsets;

import org.apache.commons.validator.routines.UrlValidator;

import org.springframework.beans.factory.annotation.Autowired;

import org.springframework.data.redis.core.StringRedisTemplate;

import org.springframework.web.bind.annotation.GetMapping;

import org.springframework.web.bind.annotation.PathVariable;

import org.springframework.web.bind.annotation.PostMapping;

import org.springframework.web.bind.annotation.RequestBody;

import org.springframework.web.bind.annotation.RestController;

import com.google.common.hash.Hashing;

@RestController

public class URLShorterResource {

    @Autowired

    StringRedisTemplate redisTemplate;

    @GetMapping("URL/{id}")

    public String getUrl(@PathVariable String id) {

    String url =  redisTemplate.opsForValue().get(id);

    System.out.println("URL Retrieved: " + url);

        if (url == null) {

            throw new RuntimeException("There is no shorter URL for : " + id);

        }

        return url;

    }

    @PostMapping("/create")

    public String create(@RequestBody String url) {

    UrlValidator urlValidator = new UrlValidator(new String[] { "http", "https" });

    if (urlValidator.isValid(url)) {

        String id = Hashing.murmur3_32().hashString(url, StandardCharsets.UTF_8).toString();

        System.out.println("URL ID generated:" + id);

        redisTemplate.opsForValue().set(id, url);

        return id;

    }

     throw new RuntimeException("URL Invalid: " + url);

    }

}
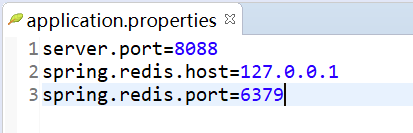
application.properties
之后启动Redis server

启动Springboot Application.
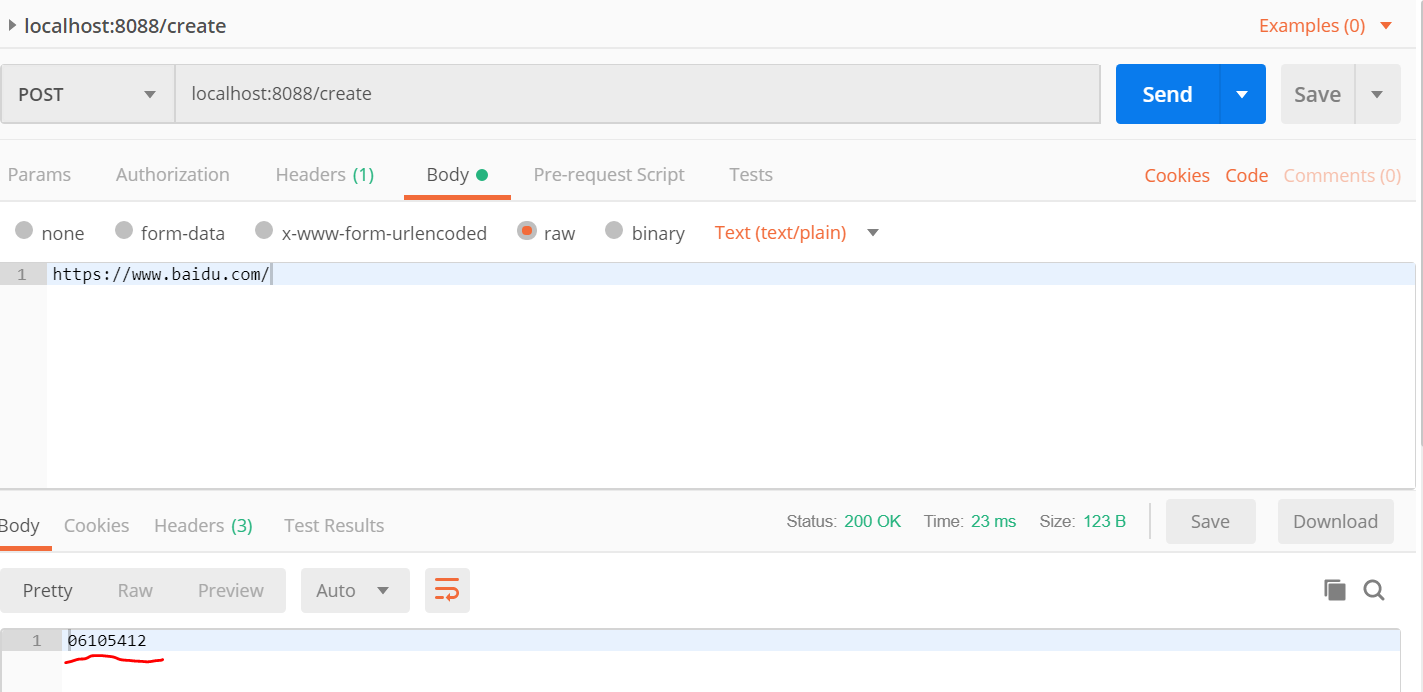
此时,可以用Postman测试效果。
首先, 使用 HTTP POST method 根据URL 生成一个 ID
之后,使用 ID 获取对应的 URL

Springboot 连接 使用 Redis Example的更多相关文章
- springboot连接redis进行CRUD
springboot连接redis进行CRUD: 1.添加以下依赖: <dependency> <groupId>org.springframework.boot</gr ...
- springboot连接redis错误 io.lettuce.core.RedisCommandTimeoutException:
springboot连接redis报错 超时连接不上 可以从以下方面排查 1查看自己的配置文件信息,把超时时间不要设置0毫秒 设置5000毫秒 2redis服务长时间不连接就会休眠,也会连接不上 重 ...
- 不会用SpringBoot连接Redis,那就赶紧看这篇
摘要:如何通过springboot来集成操作Redis. 本文分享自华为云社区<SpringBoot连接Redis操作教程>,作者: 灰小猿. 今天来和大家分享一个如何通过springbo ...
- springboot+redis+虚拟机 springboot连接linux虚拟机中的redis服务
文章目录 1.前提条件:确保虚拟机开启.并且连接到redis 2.新建立一个springboot项目,创建项目时勾选web选项 3.在pom中引入redis依赖 4.在application.prop ...
- springboot 连接redis
引入依赖: <dependency> <groupId>org.springframework.boot</groupId> <artifactId>s ...
- 由浅入深学习springboot中使用redis
很多时候,我们会在springboot中配置redis,但是就那么几个配置就配好了,没办法知道为什么,这里就详细的讲解一下 这里假设已经成功创建了一个springboot项目. redis连接工厂类 ...
- 基于springboot+bootstrap+mysql+redis搭建一套完整的权限架构【六】【引入bootstrap前端框架】
https://blog.csdn.net/linzhefeng89/article/details/78752658 基于springboot+bootstrap+mysql+redis搭建一套完整 ...
- SpringBoot中集成redis
转载:https://www.cnblogs.com/zeng1994/p/03303c805731afc9aa9c60dbbd32a323.html 不是使用注解而是代码调用 需要在springbo ...
- SpringBoot入门 (七) Redis访问操作
本文记录学习在SpringBoot中使用Redis. 一 什么是Redis Redis 是一个速度非常快的非关系数据库(Non-Relational Database),它可以存储键(Key)与 多种 ...
随机推荐
- WPF 走马灯 文字滚动 自定义控件
原文:WPF 走马灯 文字滚动 自定义控件 /// <summary> /// Label走马灯自定义控件 /// </summary> [ToolboxBitmap(type ...
- windows下编译qt的mysql驱动
windows下编译qt的mysql驱动cd %QTDIR%\src\plugins\sqldrivers\mysqlqmake –o Makefile INCLUDEPATH+="C:\M ...
- jquery layer插件弹出弹层 结构紧凑,功能强大
/* 去官方网站下载最新的js http://sentsin.com/jquery/layer/ ①引用jquery ②引用layer.min.js */ 事件触发炸弹层可以自由绑定,例如: $('# ...
- delphi2009(10,xe)下indy10发送utf8字符串
最近实现一个功能,使用delphi2009以TCP调用Java端的接口,接口要求先发送字符串的长度,然后再发送字符串内容,并且字符串要求是utf8格式的 调试了好长时间,才终于发现解决办法,或者说发现 ...
- c# Ajax后台动态分页
创建WebPager类 public static class WebPager { public static string WebPagerAjax(string Idn, bool IsShor ...
- liunx 桥接 上网 ip配置 外部网络访问
一.设置VMware 在vmware的[编辑]-->[虚拟网络编辑器]设置:将VMnet0设置为“桥接”,并桥接到宿主机器的网卡(可以是有线或者无线网络). 二.设置虚拟机系统(以cento ...
- html send mail
<html> <body> <script> var formattedBody = "FirstLine \n Second Line \n Third ...
- C# 开机自动启动
if (ConfigurationManager.AppSettings["IsBoot"].ToString().Trim().ToUpper() == "TRUE&q ...
- ArcGIS 10.3 for Server 在windows下的安装教程
原文:ArcGIS 10.3 for Server 在windows下的安装教程 以下是10.2的教程,10.3同样适用. 许可文件: ArcGIS For Server10.3许可文件 - 下载频道 ...
- win10 uwp 获得Slider拖动结束的值
原文:win10 uwp 获得Slider拖动结束的值 本文讲的是如何获得Slider移动结束的值,也就是触发移动后的值.如果我们监听ValueChanged,在我们鼠标放开之前,只要拖动不放,那么就 ...