Spring学习记录(十一)---使用注解和自动装配
Spring支持用注解配置Bean,更简便。
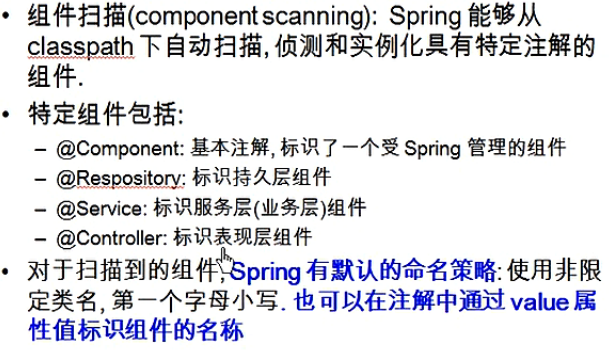
上面的组件,是根据实际情况配的。比如写的一个类,是做业务处理的,那就用注解@Service表示服务层组件,以此类推。将整体分成不同部分。
要在xml加入context命名空间
- <!-- 指定Spring IOC容器扫描的包 -->
- <context:component-scan base-package="package com.guigu.spring.beans.annotation"></context:component-scan>
这样,就表示要自动扫描 基类包的类以及子包中的类。类中有注解,就会被管理
例子:
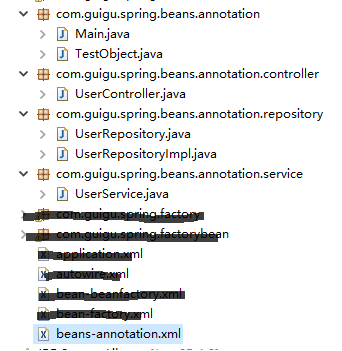
目录结构如下,第一个annotation包为要扫描的包,有下面三个子包:controller、repository、service
类里面都是一个简单的注解和一个方法:
- //TestObject.java
- package com.guigu.spring.beans.annotation;
- import org.springframework.stereotype.Component;
- @Component
- public class TestObject {
- }
- //UserController.java
- package com.guigu.spring.beans.annotation.controller;
- import org.springframework.stereotype.Controller;
- @Controller
- public class UserController {
- public void execute(){
- System.out.println("UserController execute...");
- }
- }
- //UserRepository.java
- package com.guigu.spring.beans.annotation.repository;
- public interface UserRepository {
- void save();
- }
- //UserRepositoryImpl.java 继承 UserRepository
- package com.guigu.spring.beans.annotation.repository;
- import org.springframework.stereotype.Repository;
- @Repository("userRepository");
- public class UserRepositoryImpl implements UserRepository {
- @Override
- public void save() {
- System.out.println("UserRepositoryImpl Save...");
- }
- }
写一个继承,为了说明注解命名可以更改,这里改成了userRepository,否则是默认的userRepositoryImpl,下面讲。
- //UserService.java
- package com.guigu.spring.beans.annotation.service;
- import org.springframework.stereotype.Service;
- @Service
- public class UserService {
- public void add(){
- System.out.println("UserService add...");
- }
- }
xml最上面已经配置,最后main函数:
- package com.guigu.spring.beans.annotation;
- import org.springframework.context.ApplicationContext;
- import org.springframework.context.support.ClassPathXmlApplicationContext;
- import com.guigu.spring.beans.annotation.controller.UserController;
- import com.guigu.spring.beans.annotation.repository.UserRepository;
- import com.guigu.spring.beans.annotation.service.UserService;
- public class Main {
- public static void main(String[] args) {
- ApplicationContext ctx =new ClassPathXmlApplicationContext("beans-annotation.xml");
- TestObject to = (TestObject) ctx.getBean("testObject");
- System.out.println(to);
- UserController userController=(UserController) ctx.getBean("userController");
- System.out.println(userController);
- UserService userservice=(UserService) ctx.getBean("userservice");
- System.out.println(userservice);
- UserRepository userRepository=(UserRepository) ctx.getBean("userRepository");
- System.out.println(userRepository);
- }
- }
输出如下:说明对象被创建了

xml里面没有bean,那main函数怎么获取Bean呢?
就是用最上面图中蓝色字体。Spring默认命名,名字是它的类名第一个字符小写。如:
UserService.java类中类名是UserService ,获取bean默认名字就是userService
也可以更改,如上面的UserRepositoryImpl类,用了@Repository("userRepository"),表示bean名字为userRepository
在xml中,有一些属性和节点:
resource-pattern:只扫描特定文件
context:include-filter: 子节点表示要包含的组件
context:exclude-filter: 子节点表示要排除在外的组件
- <!-- 可以通过resource-pattern指定扫描的资源 -->
- <context:component-scan base-package="package com.guigu.spring.beans.annotation"
- resource-pattern="repository/*.class">
- </context:component-scan>
这样,只会扫描repository包下的类,如果main函数中,还要调用其他类,报错。只能调用repository包下的类。
- <!-- context:exclude-filter 子节点指定排除哪些指定表达式的组件 -->
- <context:component-scan base-package="package com.guigu.spring.beans.annotation">
- <context:exclude-filter type="annotation" expression="package com.guigu.spring.beans.annotation.repository"/> //type类型后面看
- </context:component-scan>
这表示不扫描repository子包的文件,若main函数中调用它们,会抛异常
- <!-- context:include-filter 子节点指定包含哪些指定表达式的组件, 该子节点需要use-default-filters配合使用 -->
- <context:component-scan base-package="package com.guigu.spring.beans.annotation"
- use-default-filters="false">
- <context:include-filter type="annotation"
- expression="package com.guigu.spring.beans.annotation"/>
- </context:component-scan>
注意,use-default-filters默认自动扫描全部,要设置成false不自动扫描,才能实现只扫描部分的功能。
<context:include-filter>和<context:exclude-filter>子节点支持多种类型的过滤表达式:
| 类别 | 示例 | 说明 |
| annotation | com.yl.XxxAnnotation | 所有标注了XxxAnnotation的类,该类型采用目标类是否标注了某个注解进行过滤 |
| assinable | com.yl.XxxService | 所有继承或扩展XxxService的类,该类型采用了目标类是否继承或扩展某个特定类进行过滤 |
| aspectj | com.yl.*Service | 所有类名义Service结束的类及继承或扩展它们的类,该类型采用AspectJ表达式进行过滤 |
| regex | com.yl.anno.* | 所有com.yl.anno包下的类。该类型采用正则表达式,根据类的类名进行过滤 |
| custom | com.yl.XxxTypeFilter | 采用XxxTypeFilter通过代码的方式定义过滤原则。该类必须实现org.springframewor |
@Autowired:自动装配具有兼容类型的单个bean属性。可以对类成员变量、方法及构造函数进行标注,完成自动装配的工作。 通过 @Autowired的使用来代替set方法。(property 属性通过调用setter方法进行赋值)
意思就是用它,可以代替xml中的<property name="car" ref="car"> 这样的引用赋值。自动创建bean。
例子:Person类有Car对象,不用 自动装配
- //Person类
- public class Person {
- private Car car;
- public Car getCar() {
- return car;
- }
- public void setCar(Car car) {
- this.car = car;
- }
- }
- //Car类
- public class Car {
- private String brand;
- private double price;
- public void setBrand(String brand) {
- this.brand = brand;
- }
- public void setPrice(double price) {
- this.price = price;
- }
- }
xml
- <bean id="person" class="com.guigu.spring.bean.Person">
- <property name="car" ref="car"/>
- </bean>
- <bean id="car" class="com.guigu.spring.bean.Car">
- <property name="brand" value=" aodi"/>
- <property name="price" value="200000"/>
- </bean>
main
- ApplicationContext context = new ClassPathXmlApplicationContext("autowired.xml");
- Person person=(Person)ctx.getBean("person");
- System.out.println(person);
这是之前的做法。
@Autowired自动装配的方法
查了一下,在之前版本的Spring中,要使用@Autowired,要在xml写上这一行代码才行
- 1 <!-- 该 BeanPostProcessor 将自动对标注 @Autowired 的 Bean 进行注入 -->
- 2 <bean class="org.springframework.beans.factory.annotation.AutowiredAnnotationBeanPostProcessor"/>
但现在spring4,<context:component-scan>自动注册AutowiredAnnotationBeanPostProcessor实例,可以使用@Autowired和@Resource、和@Inject注解(一般用@Autowired)
所以,如果使用了<context:component-scan>,就不用额外注册,不然还是要
- //Person类
- public class Person {
- //@Aotuwired //自动根据xml配置实例car对象
- private Car car;
- }
- <bean id="person" class="com.guigu.spring.bean.Person">
- //这里就不需要再写ref="car"
- </bean>
- <bean id="car" class="com.guigu.spring.bean.Car">
- <property name="brand" value=" aodi"/>
- <property name="price" value="200000"/>
- </bean>
结果和不用 @Aotuwired一样,都可以
还可以写在setter上
- //Person类
- public class Person {
- private Car car;
- //@Aotuwired
- public Car setCar(Car car){
- this.car=car;
- }
- }
回到注解上面的例子:
- //UserController.java
- package com.guigu.spring.beans.annotation.controller;
- import org.springframework.stereotype.Controller;
- @Controller
- public class UserController {
- public void execute(){
- System.out.println("UserController execute...");
- }
- }
- // main函数
- public class Main {
- public static void main(String[] args) {
- private UserController userController;
- ApplicationContext ctx =new ClassPathXmlApplicationContext("beans-annotation.xml");
- userController.execute(); // 报错
- }
9 }
在main函数声明userController然后直接调用它的方法,这样显然不行,因为userController都还没有创建,这时用@Autowired就很简单
- // main函数
- public class Main {
- public static void main(String[] args) {
- //@Autowired
- private UserController userController;
- ApplicationContext ctx =new ClassPathXmlApplicationContext("beans-annotation.xml");
- userController.execute();//不报错
- }
- }
这样,就自动配置创建了userController对象,可以直接使用
注意①:@Autowired要想成功配置,得先扫描得到,就是UserController类一定要能被扫描到。
注意②:@Autowired遇到相同两个类
- //UserRepository
- package com.guigu.spring.beans.annotation.repository;
- public interface UserRepository {
- void save();
- }
- //UserRepositoryImpl 继承 UserRepository
- package com.guigu.spring.beans.annotation.repository;
- import org.springframework.stereotype.Repository;
- @Repository("userRepository"); //这里
- public class UserRepositoryImpl implements UserRepository {
- @Override
- public void save() {
- System.out.println("UserRepositoryImpl Save...");
- }
- //UserRepositoryImpl2 继承 UserRepository
- @Repository
- public class UserRepositoryImpl2 implements UserRepository {
- @Override
- public void save() {
- System.out.println("UserRepositoryImpl2 Save...");
- }
- }
- // main函数
- public class Main {
- public static void main(String[] args) {
- //@Autowired
- private UserRepository userRepository ;
- ApplicationContext ctx =new ClassPathXmlApplicationContext("beans-annotation.xml");
- userRepository .save();
- }
- }
main函数中有@Autowired,自动创建对象,但UserRepository 类却有两个接口,它要去创建哪一个呢?
:默认情况下,若有两个,去找名字相同的,就是还没实例的这个userRepository ,若找到和它名字一样的,上面 @Repository("userRepository"); 写了名字,那就找它了。
若不是这样写@Repository("userRepository");而是 @Repository(),那就报错了。
注意③:解决②的另一个方法
若@Repository("userRepository");改成@Repository(),main函数会报错。
改一下main函数
- // main函数
- public class Main {
- public static void main(String[] args) {
- //@Autowired
- //Qualifier("userRepositoryImpl ")
- private UserRepository userRepository ;
- ApplicationContext ctx =new ClassPathXmlApplicationContext("beans-annotation.xml");
- userRepository .save();
- }
- }
用Qualifier("userRepositoryImpl ");表示去找userRepositoryImpl 实例,这样也解决了。
Spring学习记录(十一)---使用注解和自动装配的更多相关文章
- 使用Spring的JavaConfig 和 @Autowired注解与自动装配
1 JavaConfig 配置方法 之前我们都是在xml文件中定义bean的,比如: 1 2 3 4 5 6 7 8 <beans xmlns="http://www.springf ...
- Spring学习七----------Bean的配置之自动装配
© 版权声明:本文为博主原创文章,转载请注明出处 Bean的自动装配(Autowiring) no:不启用自动装配,此时需要手动注入.参考:Spring学习三----------注入方式 defaul ...
- 我的Spring学习记录(四)
虽然Spring管理这我们的Bean很方便,但是,我们需要使用xml配置大量的Bean信息,告诉Spring我们要干嘛,这还是挺烦的,毕竟当我们的Bean随之增多的话,xml的各种配置会让人很头疼. ...
- 我的Spring学习记录(五)
在我的Spring学习记录(四)中使用了注解的方式对前面三篇做了总结.而这次,使用了用户登录及注册来对于本人前面四篇做一个应用案例,希望通过这个来对于我们的Spring的使用有一定的了解. 1. 程序 ...
- 我的Spring学习记录(二)
本篇就简单的说一下Bean的装配和AOP 本篇的项目是在上一篇我的Spring学习记录(一) 中项目的基础上进行开发的 1. 使用setter方法和构造方法装配Bean 1.1 前期准备 使用sett ...
- Spring 学习记录3 ConversionService
ConversionService与Environment的关系 通过之前的学习(Spring 学习记录2 Environment),我已经Environment主要是负责解析properties和p ...
- Spring 学习记录8 初识XmlWebApplicationContext(2)
主题 接上文Spring 学习记录7 初识XmlWebApplicationContext refresh方法 refresh方法是定义在父类AbstractApplicationContext中的. ...
- Spring 学习记录6 BeanFactory(2)
主题 除了Spring 学习记录5 BeanFactory 里写的几个接口外,BeanFactory的实现类还实现了一些其他接口,这篇文章主要介绍这些接口和实现类. 结构 DefaultListabl ...
- Spring学习七:ComponentScan注解
今天主要从以下几个方面来介绍一下@ComponentScan注解: @ComponentScan注解是什么 @ComponentScan注解的详细使用 1.ComponentScan注解是什么 其实很 ...
随机推荐
- Maven 配置远程仓库
最近要用到一个包:spark-1.6.0-cdh5.8.2,在https://mvnrepository.com网站上搜到该包的pom.xml语句.但是看到下面有这样一句话: 该包在图中所述repos ...
- div高度根据内容自动增大
1.很多时候我们希望容器高度能够自适应内部元素的变化,需要用到min-height属性. 2.有时候用了min-height还是不会随着内容自适应高度,您需要检查下容器的子元素是不是有浮动属性,当子元 ...
- CentOS6.5的vsftp搭建流程(一)
前几次搭建FTP都失败了,不是登陆不了,就是目录没有权限.现在终于摸索出了靠谱的操作流程,分享之~ 1. 查看是否安装了vsftpd,未安装则安装 [root@iZ283tian2dZ /]# rpm ...
- [BZOJ1562][ZJOI2007] 最大半连通子图
Description Input 第一行包含两个整数N,M,X.N,M分别表示图G的点数与边数,X的意义如上文所述.接下来M行,每行两个正整数a, b,表示一条有向边(a, b).图中的每个点将编号 ...
- bzoj1503郁闷的出(cheng)纳(xu)员
好痛苦,,,WA了不知道多少遍 错的服了,,, 如果某员工的初始工资低于工资下界,他将立刻离开公司 我也不知道是我语文有问题还是题目有毒,反正这个东西好像不应该算在离开公司的总人数的答案里... 让我 ...
- 压缩png质量不改变像素
private static byte[] CompressionImage(Bitmap bitmap, Stream fileStream, long quality) { using (Syst ...
- Cannot run gnome extension in browser
Error Message: We cannot detect a running copy of GNOME on this system, so some parts of the interfa ...
- POJ 1163 The Triangle(简单动态规划)
http://poj.org/problem?id=1163 The Triangle Time Limit: 1000MS Memory Limit: 10000K Total Submissi ...
- 关于兼容IE的一些策略
--css 盒子模型下的 box-sizing 属性,只兼容到ie8: -moz-box-sizing: border-box; -webkit-box-sizing: border-box; -o- ...
- win10调用局域网内xp系统上的打印机
首先在xp系统上配置允许远程连接,然后设置账户密码,最后配置打印机,允许共享. 打开自己win10 ,win+R ,输入\\目标电脑ip\打印机名,确定,输入账户,密码. win+X - P-进入控制 ...