springboot2 + grpc + k8s + istio
项目情况说明:
ubuntu - 16.04
java - openjdk:8
springboot - 2.2.2.RELEASE
mysql - 5.7
mongodb - 4.0.14
redis - 3.0.6
grpc - grpc-spring-boot-starter - 2.6.1.RELEASE
项目目录:
mypro -
device - 调用数据库,grpc客户端
lib - 公共库
person - 调用数据库,grpc服务端

项目启动:
步骤一:项目建立
之所以从这里开始,因为我之前纠结过多模块项目的建立...
IDE我使用的是IDEA
1.1、建立主目录mypro
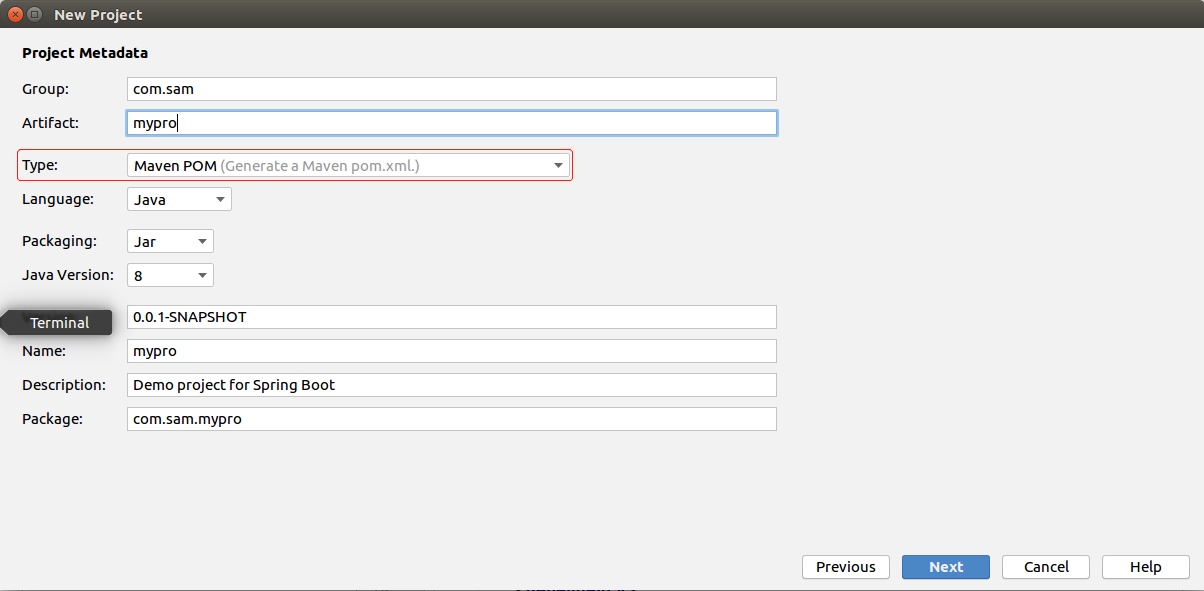
新建文件夹mypro,在IDEA中依次选择:file -- New -- Project,弹出框选择Spring Initializr,点击Next。

注意红框区域,选择Maven POM,其它可以自己填
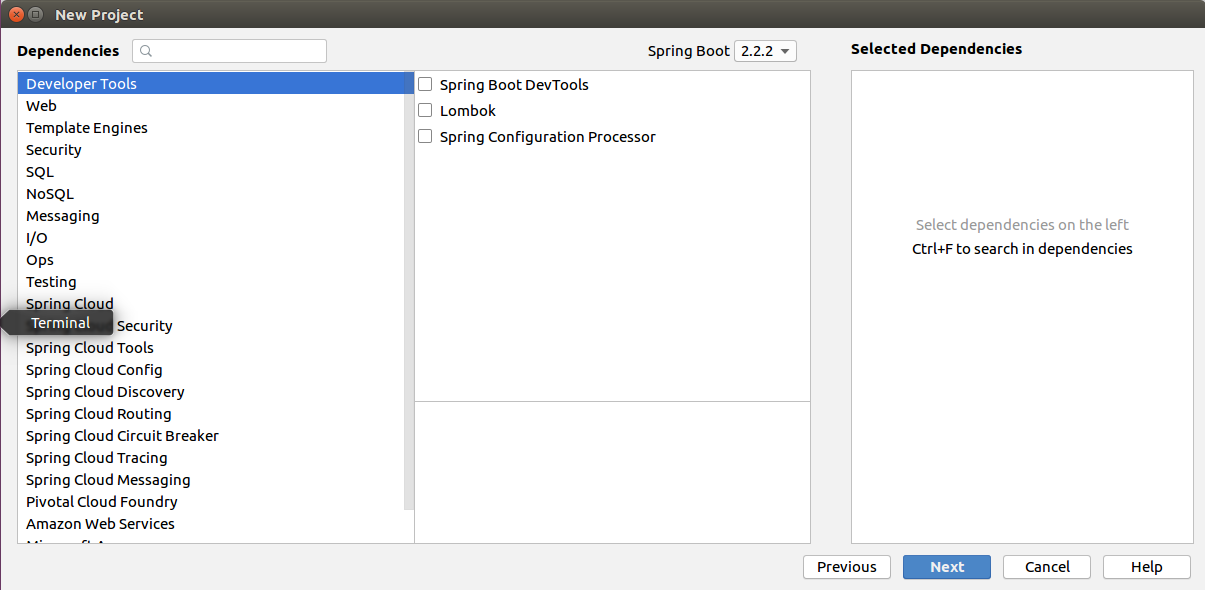
又弹出一个框来,什么也不选,直接Next
选择地址(刚才新建的mypro文件夹)
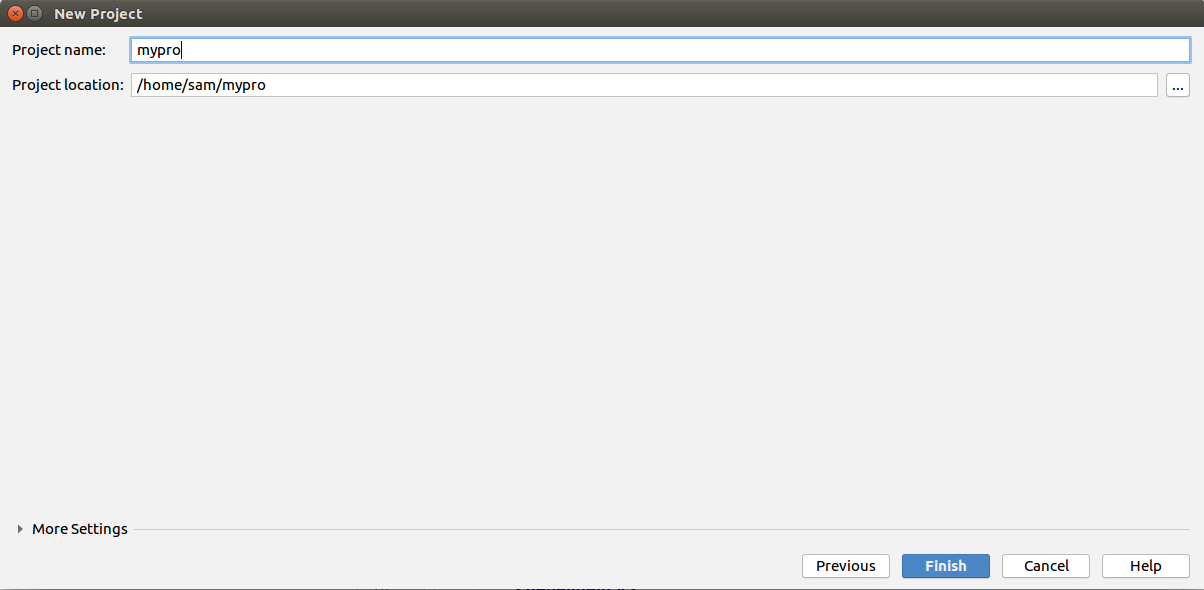
至此,新建主目录结束
1.2、建立子目录
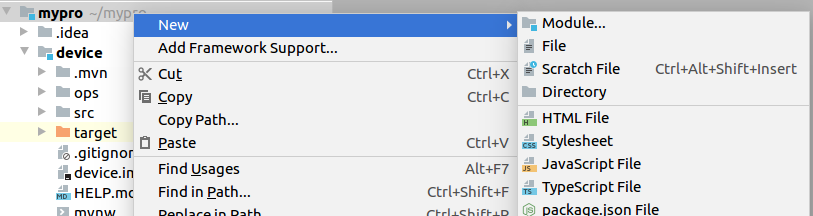
右键单击主目录mypro,选择New,选择Module
选择Spring Initializr,直接Next

注意这里红框选择了Maven Project,其他可以自己填,填完Next
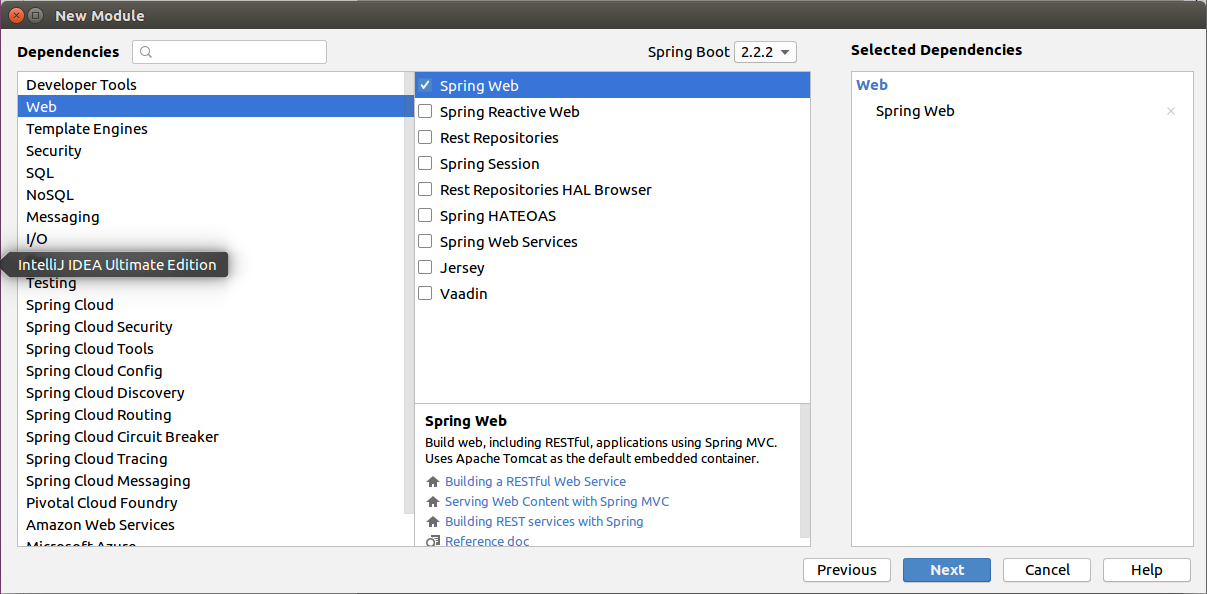
便于测试,这里选择了Spring Web,点击Next,弹出框直接Next就创建成功了
至此,第一个子模块建立成功,按照上面的步骤依次建立其它子模块,我这里建立了lib和person。
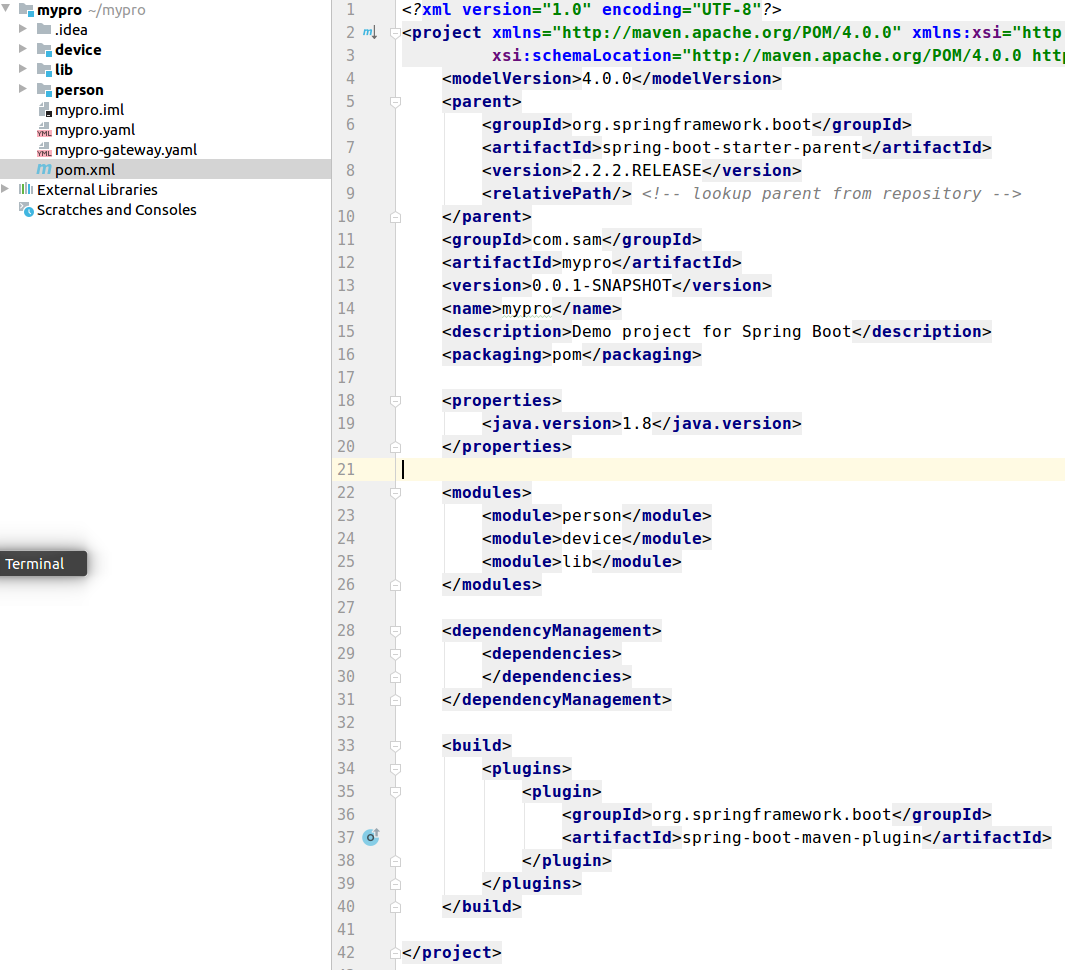
1.3、调整pom配置
主模块:去掉依赖,引入子模块,注意<packaging>pom</packaging>打包时会用到
简单处理,把所有的依赖都由lib公共库引入,device和person模块引入lib公共库
首先修改lib模块:<parent>使用了主模块的内容,直接复制过来即可,注意<packaging>jar</packaging>

修改device模块:<parent>使用了主模块的内容,直接复制过来即可,注意<packaging>war</packaging>

引入lib

peron模块同上。
至此,项目建立完成。
步骤二:项目相关依赖
1.1、mysql
CREATE TABLE `user` (

  `name` char(16) NOT NULL,

  `age` int(11) DEFAULT NULL,

  `password` char(64) NOT NULL,

  `id` char(64) NOT NULL,

  PRIMARY KEY (`id`)

) ENGINE=InnoDB DEFAULT CHARSET=utf8
device | CREATE TABLE `device` (

  `id` char() NOT NULL,

  `name` char() NOT NULL,

  `code` char() DEFAULT NULL,

  PRIMARY KEY (`id`)

) ENGINE=InnoDB DEFAULT CHARSET=utf8
使用的是mybatis-plus和代码生成器
     <dependency>

           <groupId>mysql</groupId>

            <artifactId>mysql-connector-java</artifactId>

            <scope>runtime</scope>

        </dependency>

        <dependency>

            <groupId>com.baomidou</groupId>

            <artifactId>mybatis-plus-boot-starter</artifactId>

            <version>3.3.</version>

        </dependency>


        <dependency>

            <groupId>com.baomidou</groupId>

            <artifactId>mybatis-plus-generator</artifactId>

            <version>3.3.</version>

        </dependency>

        <dependency>

            <groupId>org.apache.velocity</groupId>

            <artifactId>velocity-engine-core</artifactId>

            <version>2.1</version>

        </dependency>
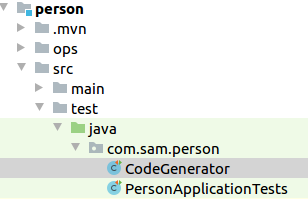
代码生成器:(我放在test中,加注释的改成自己的就可以)
import org.springframework.boot.test.context.SpringBootTest;

import com.baomidou.mybatisplus.annotation.DbType;

import com.baomidou.mybatisplus.generator.AutoGenerator;

import com.baomidou.mybatisplus.generator.config.DataSourceConfig;

import com.baomidou.mybatisplus.generator.config.GlobalConfig;

import com.baomidou.mybatisplus.generator.config.PackageConfig;

import com.baomidou.mybatisplus.generator.config.StrategyConfig;

import com.baomidou.mybatisplus.generator.config.rules.NamingStrategy;

import org.junit.jupiter.api.Test;

@SpringBootTest

public class CodeGenerator {

    @Test

    public void generateCode() {

        String packageName = "com.sam.person";  // 当前的包

        boolean serviceNameStartWithI = true;

        generateByTables(serviceNameStartWithI, packageName);

    }

    private void generateByTables(boolean serviceNameStartWithI, String packageName) {

        GlobalConfig config = new GlobalConfig();
        // 改成自己的

        String dbUrl = "jdbc:mysql://127.0.0.1:3306/test?useUnicode=true&characterEncoding=utf-8&useLegacyDatetimeCode=false&serverTimezone=UTC";

        DataSourceConfig dataSourceConfig = new DataSourceConfig();
        // 用户名和密码

        dataSourceConfig.setDbType(DbType.MYSQL).setUrl(dbUrl).setUsername("root").setPassword("123456").setDriverName("com.mysql.cj.jdbc.Driver");

        StrategyConfig strategyConfig = new StrategyConfig();

        strategyConfig.setCapitalMode(true).setEntityLombokModel(false)

                .setNaming(NamingStrategy.underline_to_camel)
             .setInclude("user");  // 对应数据库表名,表要先创建

        config.setActiveRecord(false).setAuthor("sam")  // 作者

                .setOutputDir("/home/sam/mypro/person/src/main/java")  // 路径,到/java就可以

                .setFileOverride(true)

                .setEnableCache(false);

        if (!serviceNameStartWithI) {

            config.setServiceName("%sService");

        }

        new AutoGenerator()

                .setGlobalConfig(config)

                .setDataSource(dataSourceConfig)

                .setStrategy(strategyConfig)

                .setPackageInfo(new PackageConfig()

                        .setParent(packageName)

                        .setController("controller")

                        .setEntity("entity.Do"))

                .execute();

    }

}
不熟悉test的,可以放在如图这里,注意person有一个,device也要有一个,包和路径内容要调整下。

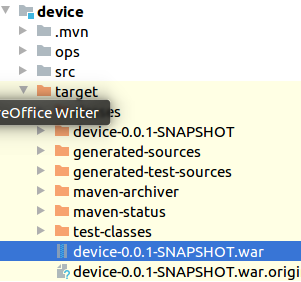
生成的结构与下图类似:

注意给启动类上加MapperScan: @MapperScan("com.sam.device.mapper"),person同理。
没有config,是后加的,application.yml见后。
开放远程连接:(重要)
https://www.cnblogs.com/zhangkaiqiang/p/6646488.html
1.2、mongodb
可参考我另一篇随笔
https://www.cnblogs.com/SamNicole1809/p/12097182.html
开放远程连接:(重要)(参考,主要是需要设置bind-ip: 0.0.0.0,并重启服务)
https://www.cnblogs.com/jinxiao-pu/p/7121307.html
1.3、redis
可参考我另一篇随笔
https://www.cnblogs.com/SamNicole1809/p/12097440.html
开放远程连接:(重要)
https://blog.csdn.net/mr_oldcold/article/details/81026928
1.4、yml配置
黄色标注的根据自己情况填,没有可以不填,host填主机的Ip,不是localhost或127.0.0.1,部署时要用,这也是为什么要把所有数据库的远程连接都打开的原因。
spring:

  datasource:

    username: root

    password: 123456

    url: jdbc:mysql://host:3306/test?useUnicode=true&characterEncoding=utf-8&useLegacyDatetimeCode=false&serverTimezone=UTC

  redis:

    host: host

    password: 123456

    jedis:

      pool:

        max-active: 8

        max-idle: 8

        max-wait: -1ms

        min-idle: 0

  data:

    mongodb:

      uri: mongodb://sam:123456@host:27017/test
至此,数据库部分结束。
1.5、grpc
请参考我另一篇随笔:(需要注意的是,device的yml在部署时需要修改address中的内容)
https://www.cnblogs.com/SamNicole1809/p/12201227.html
1.6、测试controller
device的:
import com.sam.device.entity.Do.Device;

import com.sam.device.service.grpc.DeviceGrpcService;

import com.sam.device.service.impl.DeviceServiceImpl;

import com.sam.lib.utils.MongoUtils;

import com.sam.lib.utils.RedisUtils;

import com.sam.lib.utils.StringUtils;

import com.sam.lib.utils.TestUtils;

import org.bson.Document;

import org.springframework.web.bind.annotation.GetMapping;

import org.springframework.web.bind.annotation.RequestMapping;

import org.springframework.web.bind.annotation.RestController;

import java.util.UUID;

/**

 * <p>

 * 前端控制器

 * </p>

 *

 * @author sam

 * @since 2020-01-13

 */

@RestController

@RequestMapping("/device")

public class DeviceController {

    private final TestUtils testUtils;

    private final DeviceServiceImpl deviceService;

    private final RedisUtils redisUtils;

    private final MongoUtils mongoUtils;

    private final DeviceGrpcService deviceGrpcService;

    public DeviceController(TestUtils testUtils, DeviceServiceImpl deviceService, RedisUtils redisUtils, MongoUtils mongoUtils, DeviceGrpcService deviceGrpcService) {

        this.testUtils = testUtils;

        this.deviceService = deviceService;

        this.redisUtils = redisUtils;

        this.mongoUtils = mongoUtils;

        this.deviceGrpcService = deviceGrpcService;

    }

    @GetMapping("/get")

    public String getDevice() {

        return StringUtils.getResult(testUtils.setLabel("Device"));

    }

    @GetMapping("/mysql")

    public String setMysql() {

        Device device = new Device();

        device.setId(UUID.randomUUID().toString());

        device.setCode("123456");

        device.setName("device-dev");

        boolean flag = deviceService.save(device);

        if (flag) {

            return device.toString();

        }

        return "Save device error";

    }

    @GetMapping("/redis")

    public String setRedis() {

        redisUtils.vSet("name", "device");

        String name = redisUtils.vGet("name").toString();

        return "Redis write success, name is " + name;

    }

    @GetMapping("/mongo")

    public String setMongo() {

        Document doc = new Document();

        String mid = UUID.randomUUID().toString();

        doc.put("mid", mid);

        doc.put("name", "device");

        mongoUtils.insertOne("device", doc);

        Document query = new Document();

        query.put("mid", mid);

        Document result = mongoUtils.findOne("device", query);

        return "Mongo write success, result is " + result.toString();

    }

    @GetMapping("/grpc")

    public String setGrpc() {

        String result = deviceGrpcService.getUser("device");

        if ("".equals(result)) {

            return "Result is blank";

        }

        return result;

    }

}
person的:
import com.sam.lib.utils.MongoUtils;

import com.sam.lib.utils.RedisUtils;

import com.sam.lib.utils.StringUtils;

import com.sam.lib.utils.TestUtils;

import com.sam.person.entity.Do.User;

import com.sam.person.service.impl.UserServiceImpl;

import org.bson.Document;

import org.springframework.beans.factory.annotation.Autowired;

import org.springframework.web.bind.annotation.GetMapping;

import org.springframework.web.bind.annotation.RequestMapping;

import org.springframework.web.bind.annotation.RestController;

import java.util.UUID;

/**

 * <p>

 * 前端控制器

 * </p>

 *

 * @author sam

 * @since 2020-01-13

 */

@RestController

@RequestMapping("/user")

public class UserController {

    private final TestUtils testUtils;

    private final UserServiceImpl userService;

    private final RedisUtils redisUtils;

    private final MongoUtils mongoUtils;

    public UserController(TestUtils testUtils, UserServiceImpl userService, RedisUtils redisUtils, MongoUtils mongoUtils) {

        this.testUtils = testUtils;

        this.userService = userService;

        this.redisUtils = redisUtils;

        this.mongoUtils = mongoUtils;

    }

    @GetMapping("/get")

    public String getUser() {

        return StringUtils.getResult(testUtils.setLabel("User"));

    }

    @GetMapping("/mysql")

    public String setMysql() {

        User user = new User();

        user.setId(UUID.randomUUID().toString());

        user.setName("sam");

        user.setAge(31);

        user.setPassword("123456");

        boolean flag = userService.save(user);

        if (flag) {

            return user.toString();

        }

        return "Save user error";

    }

    @GetMapping("/redis")

    public String setRedis() {

        redisUtils.vSet("name", "person");

        String name = redisUtils.vGet("name").toString();

        return "Redis write success, name is " + name;

    }

    @GetMapping("/mongo")

    public String setMongo() {

        Document doc = new Document();

        String mid = UUID.randomUUID().toString();

        doc.put("mid", mid);

        doc.put("name", "device");

        mongoUtils.insertOne("device", doc);

        Document query = new Document();

        query.put("mid", mid);

        Document result = mongoUtils.findOne("device", query);

        return "Mongo write success, result is " + result.toString();

    }

}
至此,依赖部分结束。
步骤三:搭建k8s和istio环境
请参考我另一篇随笔:
https://www.cnblogs.com/SamNicole1809/p/12172887.html
步骤四:项目打包
1.1、跳过测试
在所有子模块的pom文件中增加:<skipTests>true</skipTests>
    <properties>

        <java.version>1.8</java.version>

        <skipTests>true</skipTests>

    </properties>
1.2、修改lib的pom
注释掉原有的用于build,使用下面的build
    <build>

        <plugins>

            <plugin>

                <groupId>org.springframework.boot</groupId>

                <artifactId>spring-boot-maven-plugin</artifactId>

                <configuration>

                    <classifier>exec</classifier>

                </configuration>

            </plugin>

        </plugins>

    </build>
1.3、打包
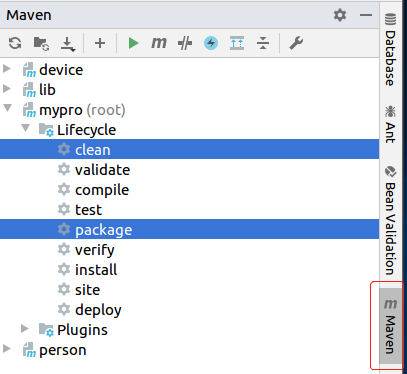
使用maven,一次执行mypro下的Lifecycle中的clean和package,会在person和device的target目录下生成war包,并自动处理关于lib的依赖问题。
至此,项目打包完毕。
步骤五:部署
请确保已经参照了k8s和Istio的随笔,环境搭建成功,并能够正常运行,namespace: default开启了istio自动注入功能。
可参考官方文档:
https://preliminary.istio.io/zh/docs/examples/bookinfo/
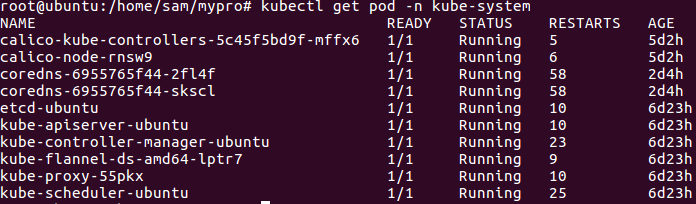
namespace: kube-system
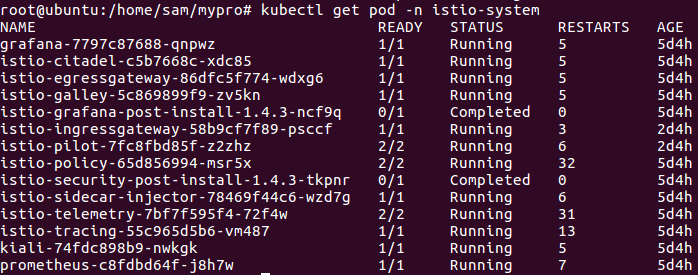
namespace: istio-system
1.1、生成docker镜像
创建文件夹doc,将生成的war包复制到doc文件夹下,并创建文件Dockerfile,没有后缀,注意文件名必须这样
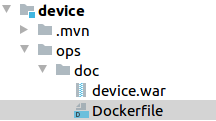
Dockerfile文件内容:
FROM openjdk:8-jdk-alpine

VOLUME /tmp

ARG device

COPY device.war app.war

ENTRYPOINT ["java","-Djava.security.egdod=file:/dev/./urandom","-jar","/app.war"]
这里我把war包改名为device.war了,注意一下。
person同理,将里面的device改为person就好。
生成镜像命令:
名称(黄色标记)建议不要更改,因为yaml文件会用到,以后可以自己改。
docker build -t device-service .
docker build -t person-service .
1.2、添加yaml文件
网关:mypro-gateway.yaml
apiVersion: networking.istio.io/v1alpha3

kind: Gateway

metadata:

  name: mypro-gateway

spec:

  selector:

    istio: ingressgateway # use istio default controller

  servers:

    - port:

        number: 80

        name: http

        protocol: HTTP

      hosts:

        - "*"

---

apiVersion: networking.istio.io/v1alpha3

kind: VirtualService

metadata:

  name: mypro

spec:

  hosts:

    - "*"

  gateways:

    - mypro-gateway

  http:

    - match:

        - uri:

            prefix: /user

      route:

        - destination:

            host: person

            port:

              number: 8080

    - match:

        - uri:

            prefix: /device

      route:

        - destination:

            host: device

            port:

              number: 8080
deployment和service:mypro.yaml
##################################################################################################

# person service

##################################################################################################

apiVersion: v1

kind: Service

metadata:

  name: person

  labels:

    app: person

    service: person

spec:

  ports:

    - name: http

      port: 8080

    - name: grpc

      port: 9898

      protocol: TCP

  selector:

    app: person

---

apiVersion: v1

kind: ServiceAccount

metadata:

  name: mypro-person

  labels:

    account: person

---

apiVersion: apps/v1

kind: Deployment

metadata:

  name: person-v1

  labels:

    app: person

    version: v1

spec:

  replicas: 1

  selector:

    matchLabels:

      app: person

      version: v1

  template:

    metadata:

      labels:

        app: person

        version: v1

    spec:

      serviceAccountName: mypro-person

      containers:

        - name: person

          image: person-service:latest

          imagePullPolicy: IfNotPresent

          ports:

            - containerPort: 8080

              name: http

            - containerPort: 9898

              name: grpc

              protocol: TCP

---

##################################################################################################

# device service

##################################################################################################

apiVersion: v1

kind: Service

metadata:

  name: device

  labels:

    app: device

    service: device

spec:

  ports:

    - name: http

      port: 8080

    - name: grpc

      port: 9898

      protocol: TCP

  selector:

    app: device

---

apiVersion: v1

kind: ServiceAccount

metadata:

  name: mypro-device

  labels:

    account: device

---

apiVersion: apps/v1

kind: Deployment

metadata:

  name: device-v1

  labels:

    app: device

    version: v1

spec:

  replicas: 1

  selector:

    matchLabels:

      app: device

      version: v1

  template:

    metadata:

      labels:

        app: device

        version: v1

    spec:

      serviceAccountName: mypro-device

      containers:

        - name: device

          image: device-service:latest

          imagePullPolicy: IfNotPresent

          ports:

            - containerPort: 8080

              name: http

            - containerPort: 9898

              name: grpc

              protocol: TCP

---
说明一下:
1、9898是grpc端口,8080是person和device的默认端口
2、device中的yml文件需要把address修改如下:(对应的服务名)
address: 'static://person:9898'
1.3、部署
到yaml相关文件目录下执行如下命令:
安装网关:
kubectl apply -f mypro-gateway.yaml
查看:

设置url:(参考官方文档)
echo GATEWAY_URL=$INGRESS_HOST:$INGRESS_PORT
显示你能够访问的url地址,通过这个地址可以访问项目,正常是host:port都有。
部署服务:
kubectl apply -f mypro.yaml
查看:
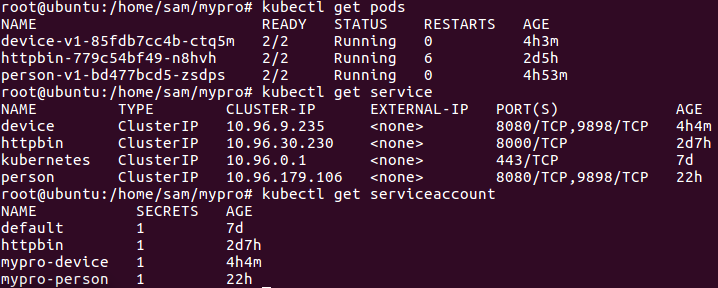
至此项目部署成功。
步骤五:测试
http://host:port/device/get

http://host:port/device/mysql

http://host:port/device/mongo

http://host:port/device/redis

http://host:port/device/grpc

person相同
至此,测试成功。
结语:
我想说的是:
网络的目的在于分享,这个项目是在别人的经验上搭建起来的,我只是做了一个整合。
本文的目的在于帮助刚接触k8s和istio的新人,少采坑。
希望用微服务的人越来越多,把越来越多的资料经验分享出来。
我是一个新手,希望文中有错误的大家请批评指正,以免影响更多的人。
欢迎多多交流。
Git地址:
https://github.com/SamNicole1809/mypro
springboot2 + grpc + k8s + istio的更多相关文章
- k8s+istio:流量控制之灰度发布
通过Kubernetes+Istio的流量控制实现灰度发布,主要演示通过流量权重实现蓝绿,通过http自定义头实现金丝雀 准备环境 k8s和istio不想自己装的话可以在云上买个按量付费集群,用完即删 ...
- ubuntu16.04 docker kubernetes(k8s) istio 安装
版本: docker: 19.03.5 kubernetes: 1.17.0 istio: 1.4.3 步骤一:给ubuntu换源 https://www.cnblogs.com/lfri/p/106 ...
- k8s istio 配置请求的路由规则
使用istio我们可以根据权重和HTTP headers来动态配置请求路由. 基于内容的路由 因为BookInfo示例部署了3个版本的评论微服务,我们需要设置一个默认路由. 否则,当你多次访问应用程序 ...
- springboot2 + grpc
项目情况: springboot: 2.2.2 grpc-spring-boot-starter: 2.6.1.RELEASE 项目目录: mypro: - person - grpc服务端 - l ...
- helm istio k8s docker
helm https://hub.helm.sh/ k8s https://www.kubernetes.org.cn/k8s istio 微服务 https://istio.io/
- Service Mesh服务网格新生代--Istio(转)
万字解读:Service Mesh服务网格新生代--Istio 官网地址:https://preliminary.istio.io/zh/docs/concepts/security/ Servic ...
- 朱晔的互联网架构实践心得S2E4:小议微服务的各种玩法(古典、SOA、传统、K8S、ServiceMesh)
十几年前就有一些公司开始践行服务拆分以及SOA,六年前有了微服务的概念,于是大家开始思考SOA和微服务的关系和区别.最近三年Spring Cloud的大火把微服务的实践推到了高潮,而近两年K8S在容器 ...
- 古典、SOA、传统、K8S、ServiceMesh
古典.SOA.传统.K8S.ServiceMesh 十几年前就有一些公司开始践行服务拆分以及SOA,六年前有了微服务的概念,于是大家开始思考SOA和微服务的关系和区别.最近三年Spring Cloud ...
- 云原生生态周报 Vol. 15 | K8s 安全审计报告发布
业界要闻 CNCF 公布 Kubernetes 的安全审计报告 报告收集了社区对 Kubernetes.CoreDNS.Envoy.Prometheus 等项目的安全问题反馈,包含从一般弱点到关键漏洞 ...
随机推荐
- RBF神经网络的matlab简单实现
径向基神经网络 1.径向基函数 (Radial Basis Function,RBF) 神经网络是一种性能良好的前向网络,具有最佳逼近.训练简洁.学习收敛速度快以及克服局部最小值问题的性能,目前已经证 ...
- tf.shape()
tf.shapetf.shape( input, name=None, out_type=tf.int32)12345例如:将矩阵的维度输出为一个维度矩阵import tensorflow as tf ...
- Javassist指引(二)--ClassPool
原文链接 上一章: Javassist指引(一) 2.ClassPool ClassPool是一个CtClass的容器.因为编译器随时可能访问一个CtClass类,所以一旦一个CtClass创建,它将 ...
- P1095 水仙花数
题目描述 春天是鲜花的季节,水仙花就是其中最迷人的代表,数学上有个水仙花数,他是这样定义的:"水仙花数"是指一个三位数,它的各位数字的立方和等于其本身,比如:153=1^3+5^3 ...
- 【js】 vue 2.5.1 源码学习(一) 大体结构 (自写版本,非源码)
一.整体思路 1. 首先我们需要解析data,并且data里面的属性添加为vue的属性,并且拿到属性值 . 通过 原型方法 _peoxy实现 Obsever(代理函数) ==> walk ...
- 9月29更新美版T-mobile版本iPhone7代和7P有锁机卡贴解锁方法
T版是块难解的砖头,之前一直没有找到稳定解锁办法,经过多次不写努力和实验,终于解决 不管是用超雪卡贴还是GPP卡贴,第一次先用连接WIFI激活手机! 注意:一定不要用ICCID通用激活,或者是TM ...
- linux 让出处理器
如我们已见到的, 忙等待强加了一个重负载给系统总体; 我们乐意找出一个更好的技术. 想到的第一个改变是明确地释放 CPU 当我们对其不感兴趣时. 这是通过调用调度函数而 实现地, 在 <linu ...
- mysql(8.0.16)安装及使用注意事项
1.安装地址:https://dev.mysql.com/downloads/mysql/ 2.在安装路径:D:\mysql\mysql-8.0.16-winx64(安装时的路径,可自己选择)下面新建 ...
- 在eclipse动态网页项目中,编写web.xml时,servlet标签报错.
cvc-complex-type.2.4.b: The content of element 'servlet' is not complete. One of '{"http:// jav ...
- WPF 设置纯软件渲染
最近看到有小伙伴说 WPF 使用硬件渲染,如何让 WPF 不使用硬件渲染,因为他觉得性能太好了.万一这个版本发布了,产品经理说下个版本要提升性能就不好了.于是就找到一个快速的方法,让程序不使用硬件渲染 ...