主备(keepalived+haproxy)
系统:centos6.9 mini
主机名 ip 虚拟ip
kh1 192.168.126.210
kh2 192.168.126.220 192.168.126.100
web11 192.168.126.230
web22 192.168.126.240
1、在kh1和kh2安装keepalived和haproxy
[root@kh1 ~]# yum install -y keepavlivd haproxy
[root@kh2 ~]# yum install -y keepavlivd haproxy
2、在web1和web2上部署web服务
[root@web11 ~]# yum install -y httpd
[root@web11 ~]# echo "web1">/var/www/html/index.html
[root@web11 ~]# service httpd restart
[root@web11 ~]# chkconfig httpd on
[root@web22 ~]# yum install -y httpd
[root@web22 ~]# echo "web2">/var/www/html/index.html
[root@web22 ~]# service httpd restart
[root@web22 ~]# chkconfig httpd on
3、在kh1和kh2 配置keepalived,在kh1上查看虚拟ip
[root@kh1 ~]# cat /etc/keepalived/keepalived.conf
! Configuration File for keepalived
global_defs {
router_id kh1
}
vrrp_instance VI_1 {
state MASTER
interface eth0
virtual_router_id 51
priority 100
advert_int 1
authentication {
auth_type PASS
auth_pass 1111
}
virtual_ipaddress {
192.168.126.100
}
}
[root@kh1 ~]# /etc/init.d/keepalived restart
[root@kh1 ~]# ip addr list
link/ether 00:0c:29:da:01:36 brd ff:ff:ff:ff:ff:ff
inet 192.168.126.210/24 brd 192.168.126.255 scope global eth0
inet 192.168.126.100/32 scope global eth0
[root@kh2 ~]# cat /etc/keepalived/keepalived.conf
! Configuration File for keepalived
global_defs {
router_id kn2
}
vrrp_instance VI_1 {
state BACKUP
interface eth0
virtual_router_id 51
priority 90
advert_int 1
authentication {
auth_type PASS
auth_pass 1111
}
virtual_ipaddress {
192.168.126.100
}
}
[root@kh2 ~]# /etc/init.d/keepalived restart
4、在kh1和kh2上配置haproxy(两个节点的配置一样的,红色部分为添加部分)
[root@kh1 ~]# cat /etc/haproxy/haproxy.cfg
#---------------------------------------------------------------------
# Example configuration for a possible web application. See the
# full configuration options online.
#
# http://haproxy.1wt.eu/download/1.4/doc/configuration.txt
#
#---------------------------------------------------------------------
#---------------------------------------------------------------------
# Global settings
#---------------------------------------------------------------------
global
# to have these messages end up in /var/log/haproxy.log you will
# need to:
#
# 1) configure syslog to accept network log events. This is done
# by adding the '-r' option to the SYSLOGD_OPTIONS in
# /etc/sysconfig/syslog
#
# 2) configure local2 events to go to the /var/log/haproxy.log
# file. A line like the following can be added to
# /etc/sysconfig/syslog
#
# local2.* /var/log/haproxy.log
#
log 127.0.0.1 local2
chroot /var/lib/haproxy
pidfile /var/run/haproxy.pid
maxconn 4000
user haproxy
group haproxy
daemon
# turn on stats unix socket
stats socket /var/lib/haproxy/stats
#---------------------------------------------------------------------
# common defaults that all the 'listen' and 'backend' sections will
# use if not designated in their block
#---------------------------------------------------------------------
defaults
mode http
log global
option httplog
option dontlognull
option http-server-close
option forwardfor except 127.0.0.0/8
option redispatch
retries 3
timeout http-request 10s
timeout queue 1m
timeout connect 10s
timeout client 1m
timeout server 1m
timeout http-keep-alive 10s
timeout check 10s
maxconn 3000
stats uri /haproxy-stats #监控页面的url
stats refresh 30s #更新页面时间
stats auth admin:admin #监控页面的提示信息
stats hide-version #隐藏统计页面上的HAproxy版本信息
#---------------------------------------------------------------------
# main frontend which proxys to the backends
#---------------------------------------------------------------------
frontend http_80_in
bind *:80 #监听端口,即haproxy提供web服务的端口,和lvs的vip端口类似
mode http #http的7层模式
log global
default_backend test1
#---------------------------------------------------------------------
# static backend for serving up images, stylesheets and such
#---------------------------------------------------------------------
#backend static
# balance roundrobin
#---------------------------------------------------------------------
# round robin balancing between the various backends
#---------------------------------------------------------------------
backend test1
balance roundrobin
server web11 192.168.126.230:80 weight 1 check inter 15000 rise 2 fall 4
server web22 192.168.126.240:80 weight 2 check inter 15000 rise 2 fall 4
#web集群配置,服务器定义web11,webv22 ,check inter 1500是检测心跳频率rise 2是2次正确认为服务器可用,
fall 4是4次失败认为服务器不可用,weight代表权重
[root@kh1 ~]# scp /etc/haproxy/haproxy.cfg root@192.168.126.220:/etc/haproxy/haproxy.cfg
#复制配置文件到kh2上
[root@kh1 ~]# /etc/init.d/haproxy restart
[root@kh2 ~]# /etc/init.d/haproxy restart
5、验证
5.1 在kh1上关掉keepalived和haproxy 服务,vip 转移到kh2上,后端服务正常
[root@kh1 ~]# /etc/init.d/keepalived stop
Stopping keepalived: [ OK ]
[root@kh1 ~]# /etc/init.d/haproxy stop
Stopping haproxy:
[root@kh2 ~]# ip addr list
2: eth0: <BROADCAST,MULTICAST,UP,LOWER_UP> mtu 1500 qdisc pfifo_fast state UP qlen 1000
link/ether 00:0c:29:80:2e:09 brd ff:ff:ff:ff:ff:ff
inet 192.168.126.220/24 brd 192.168.126.255 scope global eth0
inet 192.168.126.100/32 scope global eth0
inet6 fe80::20c:29ff:fe80:2e09/64 scope link
valid_lft forever preferred_lft forever
[root@kh2 ~]# curl http://192.168.126.100
web2
[root@kh2 ~]# curl http://192.168.126.100
web2
[root@kh2 ~]# curl http://192.168.126.100
web1
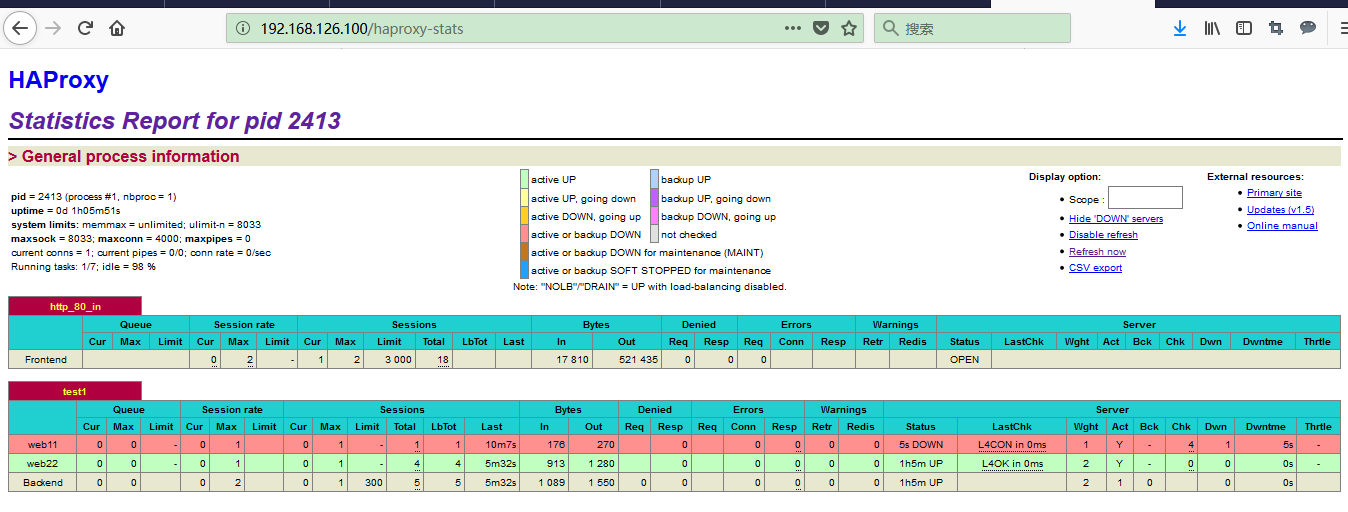
5.2 访问haproxy 监控页面,最浏览器输入http://192.168.126.100/haproxy-stats ,填入用户名admin和密码admin(图一),接着看到的是监控的页面(图二),可以看到web11,web2都是up的,当web11 宕机了,再次刷新,可以看到web11的状态是down 的,颜色变成了红色(图三)
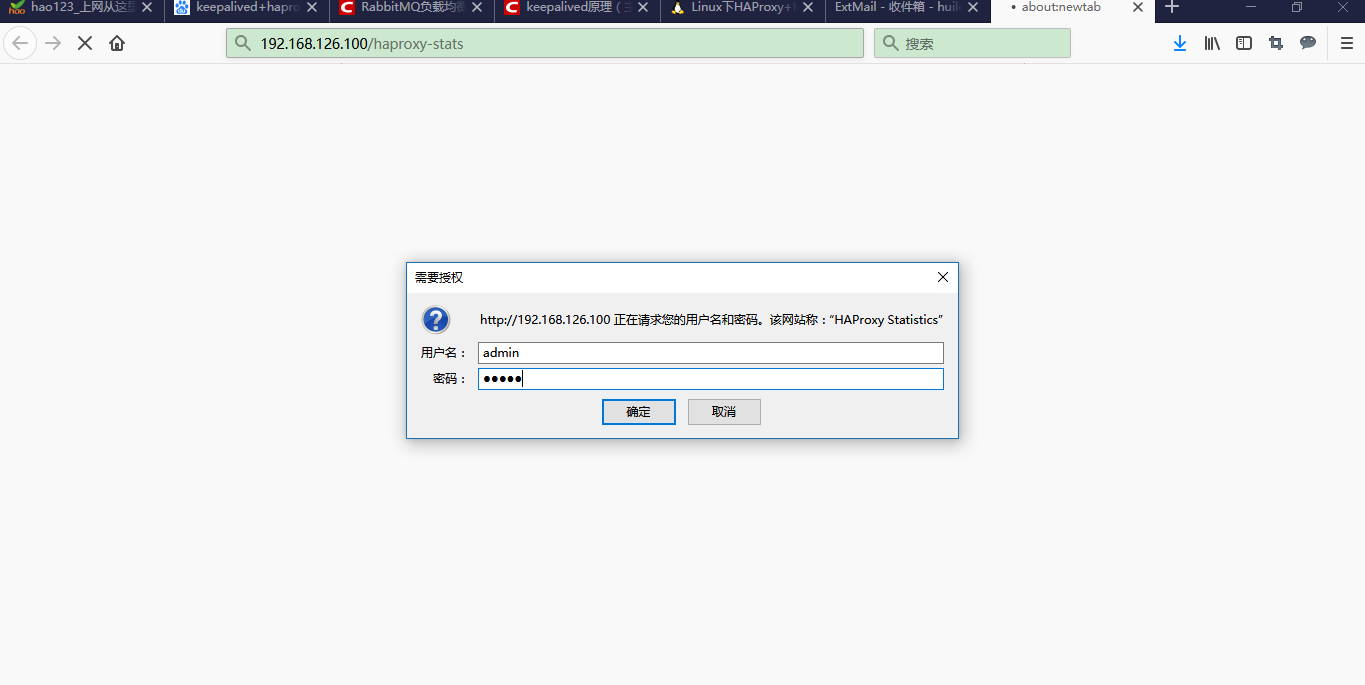
图一

图二
图三
主备(keepalived+haproxy)的更多相关文章
- Keepalived 主备配置
keepalived主备或多主多备,配置都是一样配置方法,只是搭建多少的问题. 1.keepalived安装 参考:https://www.cnblogs.com/zwcry/p/9542867.ht ...
- Centos7.6部署k8s v1.16.4高可用集群(主备模式)
一.部署环境 主机列表: 主机名 Centos版本 ip docker version flannel version Keepalived version 主机配置 备注 master01 7.6. ...
- haproxy+keepalived主备与双主模式配置
Haproxy+Keepalived主备模式 主备节点设置 主备节点上各安装配置haproxy,配置内容且要相同 global log 127.0.0.1 local2 chroot /var/lib ...
- 二十七. Keepalived热备 Keepalived+LVS 、 HAProxy服务器
1.Keepalived高可用服务器 proxy:192.168.4.5(客户端主机) web1:192.168.4.100(Web服务器,部署Keepalived高可用软件) web2:192.16 ...
- KeepAlived主备/主主模型高可用Nginx
部署准备: 两台CentOS 7主机HA1和HA2 CentOS 7 基于rpm包安装Nginx: 由于Base源中没有Nginx,所以要安装EPEL源,命令如下: wget http://dl.fe ...
- KeepAlived主备模型高可用LVS
部署前准备: 1.至少4台主机:两个Director(HA1,HA2),两个Real Server(RS1,RS2) 2.Director之间时间必须同步,且关闭各主机的防火墙和Selinux 3.出 ...
- keepalived工作原理和配置说明 腾讯云VPC内通过keepalived搭建高可用主备集群
keepalived工作原理和配置说明 腾讯云VPC内通过keepalived搭建高可用主备集群 内网路由都用mac地址 一个mac地址绑定多个ip一个网卡只能一个mac地址,而且mac地址无法改,但 ...
- Nginx+Keepalived主备切换(包含nginx服务停止)
原文地址:http://blog.sina.com.cn/s/blog_79ac6aa80101bmed.html Nginx+Keepalived主备切换(包含nginx服务停止) 环境: VM中4 ...
- 测试redis+keepalived实现简单的主备切换【转载】
转自: 测试redis+keepalived实现简单的主备切换 - Try My Best 尽力而为 - ITeye技术网站http://raising.iteye.com/blog/2311757 ...
- Nginx+Keepalived 主备高可用 安装与配置
环境说明:操作系统:CentOS6.7 x86_64Nginx版本:nginx-1.9.7Keepalived版本:keepalived-1.2.24 主nginx + Keepalived :10. ...
随机推荐
- HDU--1212大数取模
大数取模问题.题目传送门:HDU1212 #include <iostream> using namespace std; char a[1010]; int main() { int b ...
- 【Sql】mySQL在windows环境启动
SQL的不同版本在Windows环境启动配置方法不同,此处仅介绍 5.7.20的配置方法: 1.登录mysql官网下载windows环境下的工具压缩包 http://dev.mysql.com/dow ...
- Spring最核心的功能是什么?使用Spring框架的最核心的原因是什么?
quote:Spring最核心的功能是什么?使用Spring框架的最核心的原因是什么? (IT公司面试手册,可以多看看) spring 框架中核心组件有三个:Core.Context 和 Beans. ...
- Linux文件链接hard link与symbolic link
Linux中文件链接有两种方式,一种是hard link,又称为硬链接:另一种是symbolic link,又称为符号链接.要区分两者的不同要回顾Linux常用的ext2文件系统.这种文件系统使用in ...
- 基于逆波兰式的JAVA计算器
请看下方↓↓
- 腾讯云服务器php+mysq+nginx配置出现的问题及解决方法(亲测)
http://blog.csdn.net/hfdmv/article/details/50900043 删除文件命令 sudo rm -f /usr/share/nginx/html/home.php ...
- [转载]织梦CMS首页调用分类信息栏目及列表方法
原文地址:织梦CMS首页调用分类信息栏目及列表方法作者:小武哥 不懂代码,搜索学习一晚上,都是说调用特定栏目分类信息列表的,用这个代码 {dede:arclistsg row='10' titlele ...
- javascript如何自动去除所有空格?
1.jquery自带了trim方法: $.trim(" abc ") // abc 2.自己写方法: function trim(str) { return str.repl ...
- ABB中断设定
简介: 中断是程序定义事件,通过中断编号识别.中断发生在中断条件为真时.中断不同于其他错误,前者与特定消息号位置无直接关系(不同步).中断会导致正常程序执行过程暂停,跳过控制,进入软中断程序. 即使机 ...
- FORTH基础
body, table{font-family: 微软雅黑} table{border-collapse: collapse; border: solid gray; border-width: 2p ...