WCF的实现(方式二)
参考他人实现文件传输
【WCF】利用WCF实现上传下载文件服务
服务端:
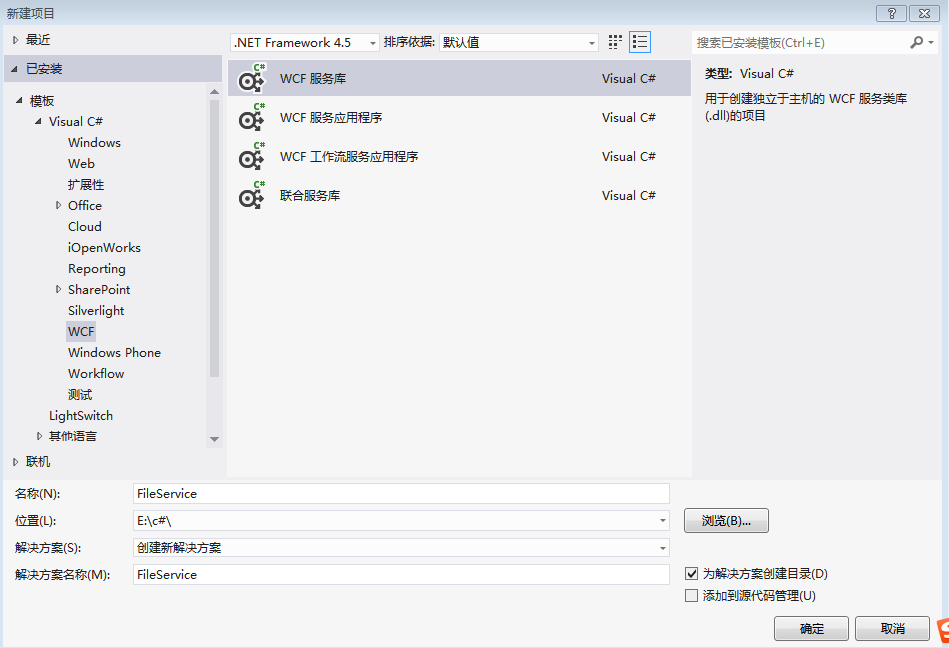
1.首先新建一个名为FileService的WCF服务库项目,如下图:
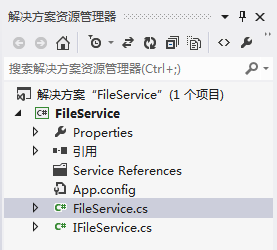
2.将Service,IService重命名为FileService,IFileService,如下图:
3.打开IFileService.cs,定义两个方法,如下:
 1 [ServiceContract]

 2     public interface IFileService

 3     {

 4

 5         //上传文件

 6         [OperationContract]

 7         bool UpLoadFile(Stream filestream);

 8

 9         //下载文件

10         [OperationContract]

11         Stream DownLoadFile(string downfile);

12

13     }
4.上面方法定义了输入参数和返回参数,但是实际项目中往往是不够的,我们需要增加其他参数,如文件名,文件大小之类。然而WCF中有限定,如下:
|
所以我们需要用Message契约特性包装一下参数,修改代码如下:
1 [ServiceContract]

 2     public interface IFileService

 3     {

 4         //上传文件

 5         [OperationContract]

 6         UpFileResult UpLoadFile(UpFile filestream);

 7

 8         //下载文件

 9         [OperationContract]

10         DownFileResult DownLoadFile(DownFile downfile);

11     }

12

13     [MessageContract]

14     public class DownFile

15     {

16         [MessageHeader]

17         public string FileName { get; set; }

18     }

19

20     [MessageContract]

21     public class UpFileResult

22     {

23         [MessageHeader]

24         public bool IsSuccess { get; set; }

25         [MessageHeader]

26         public string Message { get; set; }

27     }

28

29     [MessageContract]

30     public class UpFile

31     {

32         [MessageHeader]

33         public long FileSize { get; set; }

34         [MessageHeader]

35         public string FileName { get; set; }

36         [MessageBodyMember]

37         public Stream FileStream { get; set; }

38     }

39

40     [MessageContract]

41     public class DownFileResult

42     {

43         [MessageHeader]

44         public long   FileSize { get; set; }

45         [MessageHeader]

46         public bool IsSuccess { get; set; }

47         [MessageHeader]

48         public string Message { get; set; }

49         [MessageBodyMember]

50         public Stream FileStream { get; set; }

51     }
5.现在服务契约定义好了,接下来实现契约的接口。打开FileService.cs文件,编写代码,实现服务端的上传下载文件服务,代码如下:
 1 public class FileService : IFileService

 2     {

 3         public UpFileResult UpLoadFile(UpFile filedata)

 4         {

 5

 6             UpFileResult result = new UpFileResult();

 7

 8             string path = System.AppDomain.CurrentDomain.BaseDirectory +@"\service\";

 9

10             if (!Directory.Exists(path))

11             {

12                 Directory.CreateDirectory(path);

13             }

14

15             byte[] buffer = new byte[filedata.FileSize];

16

17             FileStream fs = new FileStream(path + filedata.FileName, FileMode.Create, FileAccess.Write);

18

19             int count = 0;

20             while ((count = filedata.FileStream.Read(buffer, 0, buffer.Length)) > 0)

21             {

22                 fs.Write(buffer, 0, count);

23             }

24             //清空缓冲区

25             fs.Flush();

26             //关闭流

27             fs.Close();

28

29             result.IsSuccess = true;

30

31             return result;

32

33         }

34

35         //下载文件

36         public DownFileResult DownLoadFile(DownFile filedata)

37         {

38

39             DownFileResult result = new DownFileResult();

40

41             string path = System.AppDomain.CurrentDomain.BaseDirectory + @"\service\" + filedata.FileName;

42

43             if (!File.Exists(path))

44             {

45                 result.IsSuccess = false;

46                 result.FileSize = 0;

47                 result.Message = "服务器不存在此文件";

48                 result.FileStream = new MemoryStream();

49                 return result;

50             }

51             Stream ms = new MemoryStream();

52             FileStream fs = new FileStream(path, FileMode.Open, FileAccess.Read);

53             fs.CopyTo(ms);

54             ms.Position = 0;  //重要,不为0的话,客户端读取有问题

55             result.IsSuccess = true;

56             result.FileSize = ms.Length;

57             result.FileStream = ms;

58

59             fs.Flush();

60             fs.Close();

61             return result;

62         }

63     }
6.至此,具体实现代码完成,但是我们还需要配置一下App.config,设置地址,契约和绑定。这里绑定采用NetTcpBinding,我们还需要为NetTcpBinding具体配置,如maxReceivedMessageSize(配置最大接收文件大小),transferMode(传输模式,这里是Streamed)等。最终代码如下:
 1 <?xml version="1.0" encoding="utf-8" ?>

 2 <configuration>

 3

 4   <appSettings>

 5     <add key="aspnet:UseTaskFriendlySynchronizationContext" value="true" />

 6   </appSettings>

 7   <system.web>

 8     <compilation debug="true" />

 9   </system.web>

10   <!-- 部署服务库项目时,必须将配置文件的内容添加到

11   主机的 app.config 文件中。System.Configuration 不支持库的配置文件。-->

12   <system.serviceModel>

13

14     <bindings>

15        <netTcpBinding>

16         <binding name="MyTcpBinding" maxBufferSize="2147483647" maxReceivedMessageSize="2147483647" sendTimeout="00:30:00" transferMode="Streamed"   >

17           <security mode="None"></security>

18         </binding>

19       </netTcpBinding>

20     </bindings>

21

22     <services>

23       <service name="WcfTest.FileService">

24         <endpoint address="" binding="netTcpBinding" bindingConfiguration="MyTcpBinding" contract="WcfTest.IFileService">

25           <identity>

26             <dns value="localhost" />

27           </identity>

28         </endpoint>

29         <endpoint address="mex" binding="mexHttpBinding" contract="IMetadataExchange" />

30         <host>

31           <baseAddresses>

32              <add baseAddress="http://localhost:8733/Design_Time_Addresses/WcfTest/Service1/" />

33             <add baseAddress="net.tcp://localhost:8734/Design_Time_Addresses/WcfTest/Service1/" />

34           </baseAddresses>

35         </host>

36       </service>

37     </services>

38     <behaviors>

39       <serviceBehaviors>

40         <behavior>

41           <!-- 为避免泄漏元数据信息,

42           请在部署前将以下值设置为 false -->

43           <serviceMetadata httpGetEnabled="True" httpsGetEnabled="True"/>

44           <!-- 要接收故障异常详细信息以进行调试,

45           请将以下值设置为 true。在部署前设置为 false

46             以避免泄漏异常信息-->

47           <serviceDebug includeExceptionDetailInFaults="False" />

48         </behavior>

49       </serviceBehaviors>

50     </behaviors>

51   </system.serviceModel>

52

53 </configuration>
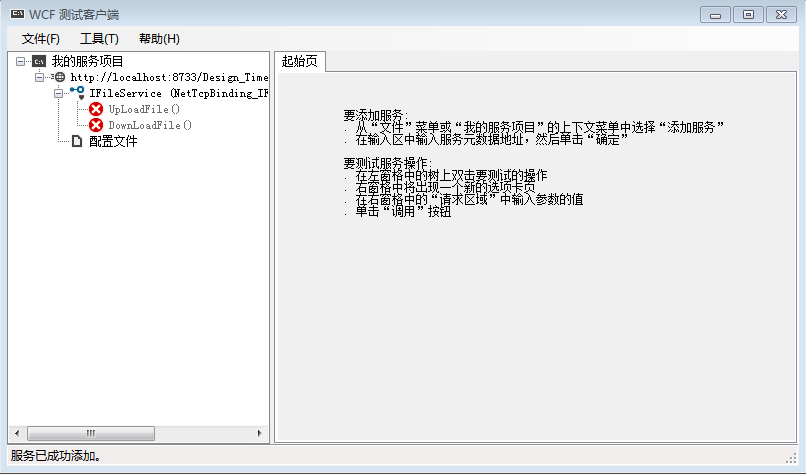
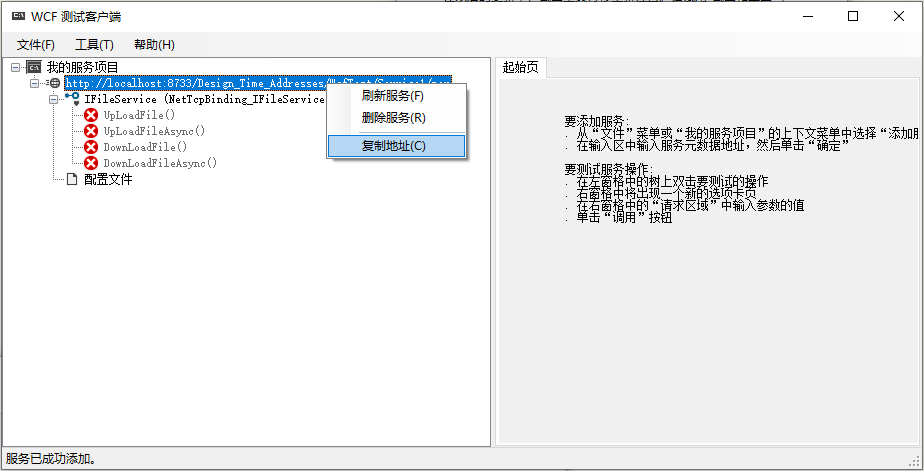
7.这时可以运行服务,如果没有问题的话,会看到如下截图。
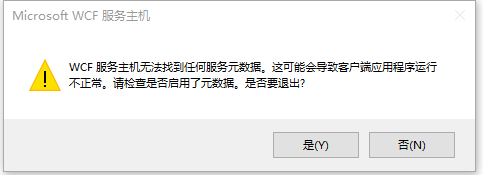
第七步出问题了:
直接复制App.config的内容,并点击运行,会以下出错(哈哈,肯定的呀)
右键App.config,选择“编辑WCF配置”,
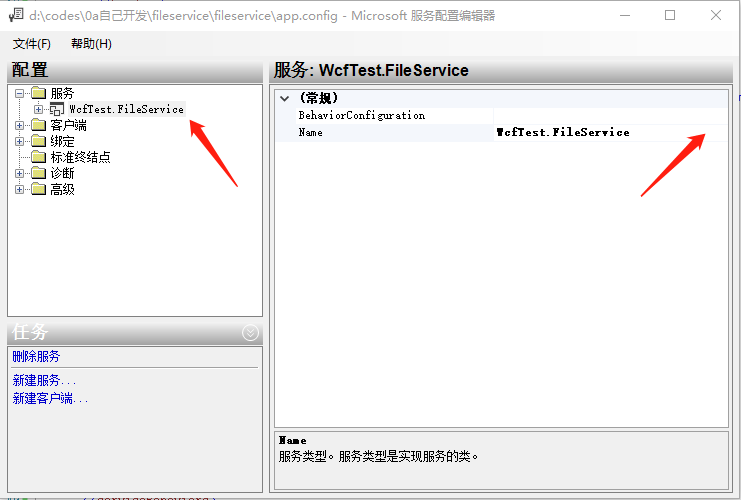
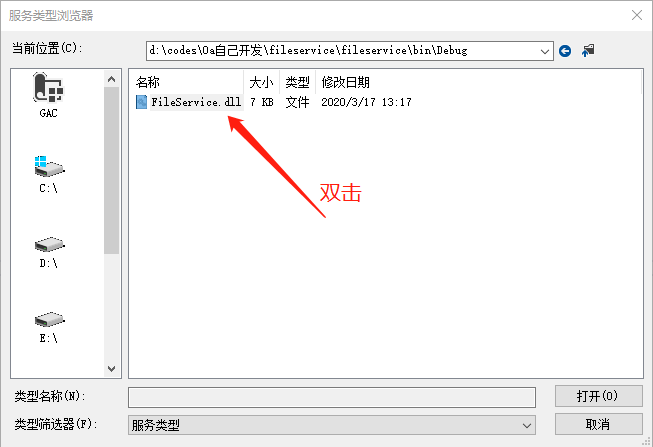
修改第一个终结点的Contract
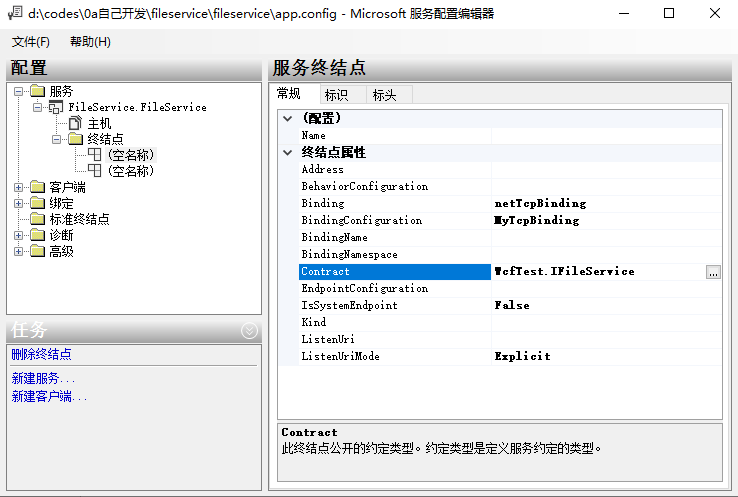

没有重复以上步骤,没有修改第二个终结点。
至此,App.config文件变成了:
 1 <?xml version="1.0" encoding="utf-8" ?>

 2 <configuration>

 3

 4   <appSettings>

 5     <add key="aspnet:UseTaskFriendlySynchronizationContext" value="true" />

 6   </appSettings>

 7   <system.web>

 8     <compilation debug="true" />

 9   </system.web>

10   <!-- 部署服务库项目时,必须将配置文件的内容添加到

11   主机的 app.config 文件中。System.Configuration 不支持库的配置文件。-->

12   <system.serviceModel>

13

14     <bindings>

15       <netTcpBinding>

16         <binding name="MyTcpBinding" maxBufferSize="2147483647" maxReceivedMessageSize="2147483647" sendTimeout="00:30:00" transferMode="Streamed"   >

17           <security mode="None"></security>

18         </binding>

19       </netTcpBinding>

20     </bindings>

21

22     <services>

23       <service name="FileService.FileService">

24         <endpoint address="" binding="netTcpBinding" bindingConfiguration="MyTcpBinding"

25           contract="FileService.IFileService">

26           <identity>

27             <dns value="localhost" />

28           </identity>

29         </endpoint>

30         <endpoint address="mex" binding="mexHttpBinding" contract="IMetadataExchange" />

31         <host>

32           <baseAddresses>

33             <add baseAddress="http://localhost:8733/Design_Time_Addresses/WcfTest/Service1/" />

34             <add baseAddress="net.tcp://localhost:8734/Design_Time_Addresses/WcfTest/Service1/" />

35           </baseAddresses>

36         </host>

37       </service>

38     </services>

39     <behaviors>

40       <serviceBehaviors>

41         <behavior>

42           <!-- 为避免泄漏元数据信息,

43           请在部署前将以下值设置为 false -->

44           <serviceMetadata httpGetEnabled="True" httpsGetEnabled="True"/>

45           <!-- 要接收故障异常详细信息以进行调试,

46           请将以下值设置为 true。在部署前设置为 false

47             以避免泄漏异常信息-->

48           <serviceDebug includeExceptionDetailInFaults="False" />

49         </behavior>

50       </serviceBehaviors>

51     </behaviors>

52   </system.serviceModel>

53

54 </configuration>
点击三角运行:

客户端:
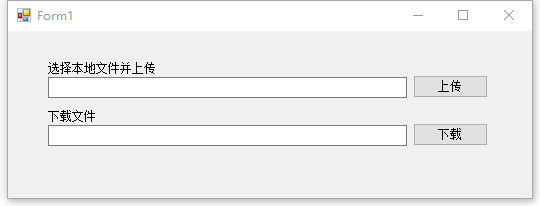
1.首先新建一个WinForm应用程序,添加控件,得到下图:
2.在引用中右击,选择添加服务引用,出现对话框,我们需要填上刚才打开的服务的地址(直接右键复制),然后按旁边的“转到”,会看到显示找到服务,接着更改命名空间为FileService,得到如下图。
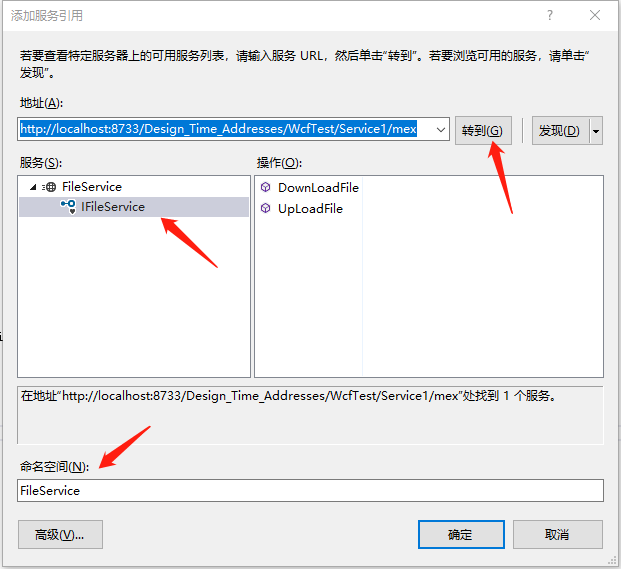
3.按确定之后,在资源管理器里的引用下面会多出一个FileService命名空间,里面包含我们的刚才写的FileServiceClient服务代理类 ,现在我们可以通过它调用服务了。编写代码如下:
 1 using System;

 2 using System.Collections.Generic;

 3 using System.ComponentModel;

 4 using System.Data;

 5 using System.Drawing;

 6 using System.IO;

 7 using System.Linq;

 8 using System.Text;

 9 using System.Windows.Forms;

10 using 客户端.FileService;

11

12 namespace 客户端

13 {

14     public partial class Form1 : Form

15     {

16         FileServiceClient client;

17         public Form1()

18         {

19             InitializeComponent();

20             client = new FileServiceClient();

21         }

22

23         private void button1_Click(object sender, EventArgs e)

24         {

25             OpenFileDialog Fdialog = new OpenFileDialog();

26

27             if (Fdialog.ShowDialog() == DialogResult.OK)

28             {

29

30                 using (Stream fs = new FileStream(Fdialog.FileName, FileMode.Open, FileAccess.Read))

31                 {

32                     string message;

33                     this.textBox1.Text = Fdialog.SafeFileName;

34                     bool result = client.UpLoadFile(Fdialog.SafeFileName, fs.Length, fs, out message);

35

36                     if (result == true)

37                     {

38                         MessageBox.Show("上传成功!");

39                     }

40                     else

41                     {

42                         MessageBox.Show(message);

43                     }

44                 }

45

46             }

47         }

48

49         private void button2_Click(object sender, EventArgs e)

50         {

51             string filename = this.textBox2.Text;

52             string path = System.AppDomain.CurrentDomain.BaseDirectory + @"\client\";

53             bool issuccess = false;

54             string message = "";

55             Stream filestream = new MemoryStream();

56             long filesize = client.DownLoadFile(filename, out issuccess, out message, out filestream);

57

58             if (issuccess)

59             {

60                 if (!Directory.Exists(path))

61                 {

62                     Directory.CreateDirectory(path);

63                 }

64

65                 byte[] buffer = new byte[filesize];

66                 FileStream fs = new FileStream(path + filename, FileMode.Create, FileAccess.Write);

67                 int count = 0;

68                 while ((count = filestream.Read(buffer, 0, buffer.Length)) > 0)

69                 {

70                     fs.Write(buffer, 0, count);

71                 }

72

73                 //清空缓冲区

74                 fs.Flush();

75                 //关闭流

76                 fs.Close();

77                 MessageBox.Show("下载成功!");

78

79             }

80             else

81             {

82                 MessageBox.Show(message);

83             }

84         }

85     }

86 }
在保证“WCF测试客户端”开启的情况下,即可实现上传下载文件。
上传保存路径:service文件夹下(wcf服务的debug目录下service文件目录)
若使用console启动wcf,则在console的debug目录下的service文件夹目录;
下载路径:“客户端”的debug目录下的client文件夹下。
附console启动wcf代码(添加App.config文件)
 1 using System;

 2 using System.Collections.Generic;

 3 using System.Linq;

 4 using System.ServiceModel;

 5 using System.Text;

 6

 7 namespace ConsoleApp1

 8 {

 9     class Program

10     {

11         static void Main(string[] args)

12         {

13             using (ServiceHost host = new ServiceHost(typeof(FileService.FileService )))

14             {

15                 host.Opened += delegate

16                 {

17                     Console.WriteLine("FileService.FileService已启动,按任意键停止服务");

18                 };

19                 host.Open();

20                 Console.Read();

21             }

22         }

23     }

24 }
参考:
感谢!
【WCF】利用WCF实现上传下载文件服务
https://www.cnblogs.com/caizl/p/4326016.html
https://www.cnblogs.com/wolf-sun/p/3277599.html
WCF的实现(方式二)的更多相关文章
- WCF技术剖析之二十九:换种不同的方式调用WCF服务[提供源代码下载]
原文:WCF技术剖析之二十九:换种不同的方式调用WCF服务[提供源代码下载] 我们有两种典型的WCF调用方式:通过SvcUtil.exe(或者添加Web引用)导入发布的服务元数据生成服务代理相关的代码 ...
- WCF技术剖析之二十七: 如何将一个服务发布成WSDL[基于HTTP-GET的实现](提供模拟程序)
原文:WCF技术剖析之二十七: 如何将一个服务发布成WSDL[基于HTTP-GET的实现](提供模拟程序) 基于HTTP-GET的元数据发布方式与基于WS-MEX原理类似,但是ServiceMetad ...
- WCF技术剖析之二十八:自己动手获取元数据[附源代码下载]
原文:WCF技术剖析之二十八:自己动手获取元数据[附源代码下载] 元数据的发布方式决定了元数据的获取行为,WCF服务元数据架构体系通过ServiceMetadataBehavior实现了基于WS-ME ...
- WCF技术剖析之二十七: 如何将一个服务发布成WSDL[基于WS-MEX的实现](提供模拟程序)
原文:WCF技术剖析之二十七: 如何将一个服务发布成WSDL[基于WS-MEX的实现](提供模拟程序) 通过<如何将一个服务发布成WSDL[编程篇]>的介绍我们知道了如何可以通过编程或者配 ...
- WCF技术剖析之二十七: 如何将一个服务发布成WSDL[编程篇]
原文:WCF技术剖析之二十七: 如何将一个服务发布成WSDL[编程篇] 对于WCF服务端元数据架构体系来说,通过MetadataExporter将服务的终结点导出成MetadataSet(参考< ...
- WCF技术剖析之二十五: 元数据(Metadata)架构体系全景展现[元数据描述篇]
原文:WCF技术剖析之二十五: 元数据(Metadata)架构体系全景展现[元数据描述篇] 在[WS标准篇]中我花了很大的篇幅介绍了WS-MEX以及与它相关的WS规范:WS-Policy.WS-Tra ...
- WCF技术剖析之二十三:服务实例(Service Instance)生命周期如何控制[下篇]
原文:WCF技术剖析之二十三:服务实例(Service Instance)生命周期如何控制[下篇] 在[第2篇]中,我们深入剖析了单调(PerCall)模式下WCF对服务实例生命周期的控制,现在我们来 ...
- WCF技术剖析之二十二: 深入剖析WCF底层异常处理框架实现原理[中篇]
原文:WCF技术剖析之二十二: 深入剖析WCF底层异常处理框架实现原理[中篇] 在[上篇]中,我们分别站在消息交换和编程的角度介绍了SOAP Fault和FaultException异常.在服务执行过 ...
- WCF技术剖析之二十一:WCF基本异常处理模式[下篇]
原文:WCF技术剖析之二十一:WCF基本异常处理模式[下篇] 从FaultContractAttribute的定义我们可以看出,该特性可以在同一个目标对象上面多次应用(AllowMultiple = ...
- WCF技术剖析之二十一:WCF基本异常处理模式[中篇]
原文:WCF技术剖析之二十一:WCF基本异常处理模式[中篇] 通过WCF基本的异常处理模式[上篇], 我们知道了:在默认的情况下,服务端在执行某个服务操作时抛出的异常(在这里指非FaultExcept ...
随机推荐
- .NET依赖注入之一个接口多个实现
前言 最近又在项目中碰到需要将原本单实现的接口改造成多个实现的场景,这里记录一下常见的几种改法. 假设已经存在如下接口ICustomService和其实现CustomService,由于只有一种实现, ...
- js实现图片选中马上显示图片名,选择后可以预览,即选即显
<!DOCTYPE html> <html> <head> <meta charset="UTF-8"> <title> ...
- 使用vscode编辑markdown
目录 markdown在vscode中的使用 标题 一级标题 二级标题 三级标题 四级标题 五级标题 六级标题 列表 图片 表格 网址 代码 文本样式 引用 目录 vscode中使用的插件推荐 截图工 ...
- Map Inference in the Face of Noise and Disparity代码环境搭建
1. 引言 地图生成算法网站Mapconstruction by pfoser里可以看到许多关于地图生成算法的介绍,Map Inference in the Face of Noise and Dis ...
- c# 游戏设计:地图移动
想实现一个小游戏,先做地图移动.步骤记录如下: 1.百度到一张大的迷宫地图,放在项目的debug目录下,备用. 2.创建一个winform项目,不添加任何界面元素. 3.添加数据成员如下: Pictu ...
- Educational Codeforces Round 138 (Rated for Div. 2) - D. Counting Arrays
数论 + 计数 Problem - D - Codeforces 题意 给定整数 \(n\;(1<=n<=3e5),\;m\;(1<=m<=1e12)\) 要求求长度为 \(n ...
- lg9018题解
#include<bits/stdc++.h> using namespace std; #define N 2000010 #define int long long #define m ...
- pwn基础
pwn常用工具 1.IDA 是一个世界顶级的交互式反汇编工具,主要用来静态分析. 使用F5即可将汇编反编译成易于阅读的伪代码:空格键:文本,图形和反汇编窗口的切换:ESC:退到上一个操作地址:F7:单 ...
- Notepad++来比较文件
使用Notepad++来比较文件_sanqima的专栏-CSDN博客_notepad比较文件https://blog.csdn.net/sanqima/article/details/50467154
- WSL2安装nvm并配置npm镜像源
1.下载安装脚本并执行 curl -o- https://raw.githubusercontent.com/nvm-sh/nvm/v0.39.1/install.sh | bash 2.关闭命令行后 ...