【Android】13.0 UI开发(四)——列表控件RecyclerView的横向布局排列实现
1.0 新建项目,由于ListView的局限性,RecyclerView是一种很好取代ListView的控件,可以灵活实现多种布局。
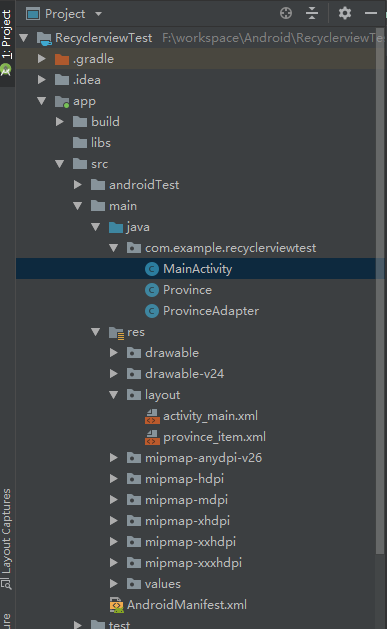
2.0 新建项目RecyclerviewTest,目录如下:
3.0 这里需要在app/build.gradle中配置,导入依赖包:
dependencies {

    implementation fileTree(dir: 'libs', include: ['*.jar'])

    implementation 'com.android.support:appcompat-v7:28.0.0'

    implementation 'com.android.support.constraint:constraint-layout:1.1.3'

    implementation 'com.android.support:recyclerview-v7:28.0.0'

    testImplementation 'junit:junit:4.12'

    androidTestImplementation 'com.android.support.test:runner:1.0.2'

    androidTestImplementation 'com.android.support.test.espresso:espresso-core:3.0.2'

}
红色标签这行加入,后面的版本号和support:appcompat一致即可。
4.0 将之前项目中的构造类复制过来,省去重复编写代码的时间。
Province.java
package com.example.recyclerviewtest;

public class Province {

    private String name;

    public Province(String name){

        this.name = name;

    }

    public String getName() {

        return name;

    }

}
ProvinceAdapter.java,这里代码进行了修改,并在代码中做以说明:
package com.example.recyclerviewtest;

import android.content.Context;

import android.support.annotation.NonNull;

import android.support.v7.widget.RecyclerView;

import android.view.LayoutInflater;

import android.view.View;

import android.view.ViewGroup;

import android.widget.ArrayAdapter;

import android.widget.ImageView;

import android.widget.TextView;

import java.util.List;

public class ProvinceAdapter extends RecyclerView.Adapter<ProvinceAdapter.ViewHolder> {

    private List<Province> mProvinceList;

    private int resourceId;

//    定义一个内部类ViewHolder,该类继承自RecyclerView.ViewHolder。

//    需要传入一个View参数,通常是RecyclerView子项最外层布局

    static class ViewHolder extends RecyclerView.ViewHolder {

        //        ImageView provinceImage;

        TextView provinceName;

        public ViewHolder(View view) {

            super(view);

            provinceName = (TextView) view.findViewById(R.id.province_name);

        }

    }

//    该构造函数作用是将数据源赋值给一个全局变量mProvinceList

    public ProvinceAdapter(List<Province> provinceList) {

        mProvinceList = provinceList;

    }

//  由于ProvinceAdapter是继承自RecyclerView.Adapter,

//  所以需要重写三个方法:

// onCreateViewHolder() :创建ViewHolder实例,将局部加载进来

//  onBindViewHolder() :对RecyclerView子项数据进行赋值

//  getItemCount()

    @Override

    public ViewHolder onCreateViewHolder(ViewGroup viewGroup, int i) {

        View view = LayoutInflater.from(viewGroup.getContext()).inflate(R.layout.province_item,

                viewGroup,

                false);

        ViewHolder holder = new ViewHolder(view);

        return holder;

    }

    @Override

    public void onBindViewHolder(ViewHolder holder, int position

    ) {

        Province province = mProvinceList.get(position);

        holder.provinceName.setText(province.getName());

    }

    @Override

    public int getItemCount() {

        return mProvinceList.size();

    }

}
5.0 在activity_main.xml布局文件中,写入RecyclerView布局,因为RecyclerView不是SDK内置布局,所以需要把全称写进去
<?xml version="1.0" encoding="utf-8"?>

<android.support.constraint.ConstraintLayout xmlns:android="http://schemas.android.com/apk/res/android"

    xmlns:app="http://schemas.android.com/apk/res-auto"

    xmlns:tools="http://schemas.android.com/tools"

    android:layout_width="match_parent"

    android:layout_height="match_parent"

    tools:context=".MainActivity">

    <android.support.v7.widget.RecyclerView

        android:id="@+id/recycler_view"

        android:layout_width="0dp"

        android:layout_height="match_parent"

        app:layout_constraintBottom_toBottomOf="parent"

        app:layout_constraintEnd_toEndOf="parent"

        app:layout_constraintStart_toStartOf="parent"

        app:layout_constraintTop_toTopOf="parent" />

</android.support.constraint.ConstraintLayout>
6.0 province_item.xml
<?xml version="1.0" encoding="utf-8"?>

<android.support.constraint.ConstraintLayout xmlns:android="http://schemas.android.com/apk/res/android"

    xmlns:app="http://schemas.android.com/apk/res-auto"

    xmlns:tools="http://schemas.android.com/tools"

    android:orientation="vertical"

    android:layout_width="100dp"

    android:layout_height="match_parent">

    <TextView

        android:id="@+id/province_name"

        android:layout_width="match_parent"

        android:layout_height="wrap_content"

        android:textSize="18dp"

        app:layout_constraintEnd_toEndOf="parent"

        app:layout_constraintHorizontal_bias="0.0"

        app:layout_constraintStart_toStartOf="parent"

        app:layout_constraintTop_toTopOf="parent"

        android:gravity="center_horizontal"

        android:layout_marginTop="10dp"/>

</android.support.constraint.ConstraintLayout>
7.0 MainActivity.java
package com.example.recyclerviewtest;

import android.support.v7.app.AppCompatActivity;

import android.os.Bundle;

import android.support.v7.widget.LinearLayoutManager;

import android.support.v7.widget.RecyclerView;

import java.util.ArrayList;

import java.util.List;

public class MainActivity extends AppCompatActivity {

    private List<Province> provincelist = new ArrayList<>();

    private String[] data = {

            "广西壮族自治区", "内蒙古自治区", "宁夏回族自治区", "西藏藏族自治区", "新疆维吾尔自治区", "香港特别行政区", "澳门特别行政区",

            "北京市", "天津市", "上海市", "重庆市", "吉林省", "辽宁省", "黑龙江省",

            "河北省", "河南省", "安徽省", "甘肃省", "山东省",

            "湖南省", "湖北省", "江苏省", "浙江省", "江西省",

            "云南省", "广西省", "贵州省", "海南省", "台湾省",};

    @Override

    protected void onCreate(Bundle savedInstanceState) {

        super.onCreate(savedInstanceState);

        setContentView(R.layout.activity_main);

        initProvince();

        RecyclerView recyclerView = (RecyclerView) findViewById(R.id.recycler_view);

        LinearLayoutManager layoutManager = new LinearLayoutManager(this);

//        调用下面这行代码可以实现布局横向排列

        layoutManager.setOrientation(LinearLayoutManager.HORIZONTAL);

//        GridLayoutManager 实现网格布局

//        StaggeredGridLayoutManager 实现瀑布流布局

//        和ListView不同的地方在于,ListView的布局排列是由自身去管理

//        而RecyclerView则将这个工作交给LayoutManager,它制定了一套可扩展的布局排列接口

//        子类只要按照接口的规范来实现,就能定制出不同排列方式的布局了

        recyclerView.setLayoutManager(layoutManager);

        ProvinceAdapter adapter = new ProvinceAdapter(provincelist);

        recyclerView.setAdapter(adapter);

    }

    public void initProvince() {

        for (String dataone : data) {

            Province province = new Province(dataone);

            provincelist.add(province);

        }

    }

}
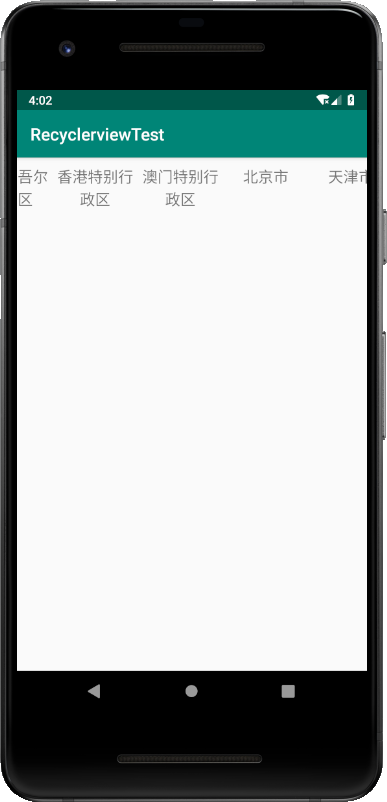
8.0 运行效果如下:
【Android】13.0 UI开发(四)——列表控件RecyclerView的横向布局排列实现的更多相关文章
- 【Android】15.0 UI开发(六)——列表控件RecyclerView的网格布局排列实现
1.0 列表控件RecyclerView的网格布局排列实现,关键词GridLayoutManager. LinearLayoutManager 实现顺序布局 GridLayoutManager 实现网 ...
- 【Android】14.0 UI开发(五)——列表控件RecyclerView的瀑布布局排列实现
1.0 列表控件RecyclerView的瀑布布局排列实现,关键词StaggeredGridLayoutManager LinearLayoutManager 实现顺序布局 GridLayoutMan ...
- 【Android】16.0 UI开发(七)——列表控件RecyclerView的点击事件实现
1.0 在各布局的基础上,修改ProvinceAdapter.java的代码: package com.example.recyclerviewtest; import android.support ...
- 【WPF开发备忘】使用MVVM模式开发中列表控件内的按钮事件无法触发解决方法
实际使用MVVM进行WPF开发的时候,可能会用到列表控件中每行一个编辑或删除按钮,这时直接去绑定,发现无法响应: <DataGridTemplateColumn Header="操作& ...
- Android UI组件----ListView列表控件详解
[声明] 欢迎转载,但请保留文章原始出处→_→ 生命壹号:http://www.cnblogs.com/smyhvae/ 文章来源:http://www.cnblogs.com/smyhvae/p/3 ...
- Android UI开发之开源控件项目整理
一.Banner 1.https://github.com/youth5201314/banner Android广告图片轮播控件,支持无限循环和多种主题,可以灵活设置轮播样式.动画.轮播和切换时间. ...
- 【Android】17.0 UI开发(八)——利用RecyclerView列表控件实现精美的聊天界面
1.0 首先新建一个项目,名叫:UIBestPractice,目录如下: 2.0 这里需要先准备两张图片,放在app\src\main\res\drawable-xhdpi目录下. 这里图片名称已经制 ...
- 列表控件ListBox关联的MFC中的类:CListBox
列表控件ListBox关联的MFC中的类:CListBox ######################################################## 1.在列表的结尾添加一项: ...
- 【Android】11.0 UI开发(二)——列表控件ListView的简单实现1
************************ 转载请注明出处:https://www.cnblogs.com/xiaofu007/p/10342462.html ***************** ...
随机推荐
- 根据浏览器判断是否为Android、ios或微信环境
写h5页面时经常有业务逻辑需要判断页面所处的环境,这时我们可以通过navigator对象来获取浏览器相关信息加以判断,方法如下: let ua = navigator.userAgent; let i ...
- C++默认构造函数的问题
C++ defaul construct :缺省构造函数(默认构造函数) 定义:第一种 构造函数没有参数,即是 A()形式的 第二种 构造函数的全部参数由缺省值提供,A(int a=0,int ...
- 命令提示符下的WQL
WQL就是英文WMI Query Language的缩写,就是说wmic这个命令支持简单的一些SQL查询,我们以实例来讲解他的部分用法,这个命令过于强大,因此以下只是该命令的冰山一角. 列出本地连接的 ...
- springcloud(二)-最简单的实战
技术储备 Spring cloud并不是面向零基础开发人员,它有一定的学习曲线. 语言基础:spring cloud是一个基于Java语言的工具套件,所以学习它需要一定的Java基础.当然,sprin ...
- Shiro入门资源整理
学习一个框架,查阅权威有效的资料能够事半功倍,本文收集笔者学习此框架中帮助很大的文档,希望对大家有所帮助. 对于文档类的,强烈建议看官方文档,而不是百度出来的经过网友加工或者搬运过来的资料!! shi ...
- Oracle DMP
通过DMP对Oracle数据库进行导入导出 打开“开始”--->输入cmd,打开cmd命令窗口,输入以下命令即可 1导出 (1)将数据库ORACLE完全导出,用户名system密码manager ...
- IOS Intro - Write file
#import <sys/xattr.h> + (NSString *)getFullFilePathInDocuments:(NSString *)subFilePath fileNam ...
- 【ExtJS】contentEl的使用
contentEl 指定一个已存在的HTML元素, 或者一个已存在HTML元素的 id , 它们将被用作当前组件的内容. 此配置选项被用来将一个已存在的HTML元素 插入到一个新组件(在组件渲染之后它 ...
- 【ExtJS】FormPanel 布局(一)
准备工作,布置一个最简单的Form,共5个组件,都为textfield. Ext.onReady(function(){ Ext.create('Ext.form.Panel', { width: 5 ...
- MySql的数据目录
数据目录的位置 MySQL数据目录的默认位置已经被编译到MySQL服务器程序里了. 在启动服务器时,通过使用一个--datadir=dir_name选项可以明确指定数据目录位置.把MySQL数据目录安 ...