转载:wepy框架入门
转载:https://www.jianshu.com/p/93d5a4b99777
安装 wepy 命令行工具。
npm install wepy-cli -g
在开发目录生成开发DEMO。
wepy new myproject
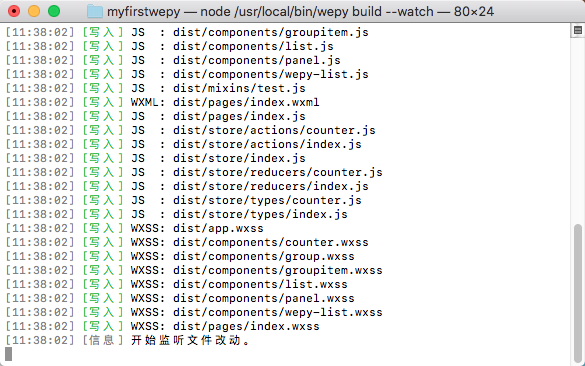
开发实时编译。
wepy build --watch
项目目录结构
    dist

    node_modules

    src

        components

            com_a.wpy

            com_b.wpy

        pages

            index.wpy

            page2.wpy

        app.wpy

    package.json
使用微信开发者工具新建项目,本地开发选择dist目录。
微信开发者工具 --> 项目 --> 关闭ES6转ES5。
本地项目根目录运行wepy build --watch,开启实时编译。
官方DEMO代码:
//index.js

//获取应用实例

var app = getApp()

Page({

  data: {

    motto: 'Hello World',

    userInfo: {}

  },

  //事件处理函数

  bindViewTap: function() {

    console.log('button clicked')

  },

  onLoad: function () {

    console.log('onLoad')

  }

})
基于wepy的实现:
import wepy from 'wepy';

export default class Index extends wepy.page {

    data = {

        motto: 'Hello World',

        userInfo: {}

    };

    methods = {

        bindViewTap () {

            console.log('button clicked');

        }

    };

    onLoad() {

        console.log('onLoad');

    };

}
wepy支持组件化开发
组件示例代码:
// index.wpy

<template>

    <view>

        <component id="pannel" path="pannel"></component>

        <component id="counter1" path="counter"></component>

        <component id="counter2" path="counter"></component>

        <component id="list" path="list"></component>

    </view>

</template>

<script>

import wepy from 'wepy';

import List from '../components/list';

import Panel from '../components/panel';

import Counter from '../components/counter';

export default class Index extends wepy.page {

    config = {

        "navigationBarTitleText": "test"

    };

    components = {

        panel: Panel,

        counter1: Counter,

        counter2: Counter,

        list: List

    };

}

</script>
官方DEMO:
project

    pages

        index

            index.json

            index.js

            index.wxml

            index.wxss

        log

            log.json

            log.wxml

            log.js

            log.wxss

    app.js

    app.json

    app.wxss
使用wepy框架后目录结构:
project

    src

        pages

            index.wpy

            log.wpy

        app.wpy
wepy默认使用babel编译,支持ES6 / 7的一些新特性
示例代码:
import wepy from 'wepy';

export default class Index extends wepy.page {

    getData() {

        return new Promise((resolve, reject) => {

            setTimeout(() => {

                resolve({data: });

            }, );

        });

    };

    async onLoad() {

        let data = await this.getData();

        console.log(data.data);

    };

}
原有代码:
onLoad = function () {

    var self = this;

    wx.login({

        success: function (data) {

            wx.getUserInfo({

                success: function (userinfo) {

                    self.setData({userInfo: userinfo});

                }

            });

        }

    });

}
基于wepy实现代码:
async onLoad() {

    await wx.login();

    this.userInfo = await wx.getUserInfo();

}
执行wepy new demo后,会生成类似配置文件。
{

  "wpyExt": ".wpy",

  "sass": {},

  "less": {},

  "babel": {}

}

<style type="less" src="page1.less"></style>

<template type="wxml" src="page1.wxml"></template>

<script>

    // some code

</script>
程序入口app.wpy
<style type="less">

/** less **/

</style>

<script>

import wepy from 'wepy';

export default class extends wepy.app {

    config = {

            "pages":[

            "pages/index/index"

        ],

        "window":{

            "backgroundTextStyle": "light",

            "navigationBarBackgroundColor": "#fff",

            "navigationBarTitleText": "WeChat",

            "navigationBarTextStyle": "black"

        }

    };

    onLaunch() {

        console.log(this);

    }

}

</script>
wepy页面index.wpy
<style type="less">

/** less **/

</style>

<template type="wxml">

    <view>

    </view>

    <component id="counter1" path="counter"></component>

</template>

<script>

import wepy form 'wepy';

import Counter from '../components/counter';

export default class Index extends wepy.page {

    config = {};

    components = {counter1: Counter};

    data = {};

    methods = {};

    events = {};

    onLoad() {};

    // Other properties

}

</script>
wepy组件com.wpy
<style type="less">

/** less **/

</style>

<template type="wxml">

    <view>  </view>

</template>

<script>

import wepy form 'wepy';

export default class Com extends wepy.component {

    components = {};

    data = {};

    methods = {};

    events = {};

    // Other properties

}

</script>
wepy 组件通信与交互
wepy.component基类提供三个方法$broadcast,$emit,$invoke

$this.$emit('some-event', , , , );

组件的事件监听需要写在events属性下,如:

import wepy form 'wepy';

export default class Com extends wepy.component {

    components = {};

    data = {};

    methods = {};

    events = {

        'some-event': ($event, ...args) {

               console.log(`${this.name} receive ${$event.name} from ${$event.source.name}`);

        }

    };

    // Other properties

}
$invoke$invoke是一个组件对另一个组件的直接调用,通过传入的组件路径找到相应组件,然后再调用其方法。

如果想在Page_Index中调用组件A的某个方法:

this.$invoke('ComA', 'someMethod', 'someArgs');

如果想在组件A中调用组件G的某个方法:

this.$invoke('./../ComB/ComG', 'someMethod', 'someArgs');
小程序通过Page提供的setData方法去绑定数据,如:
this.setData({title: 'this is title'});
wepy数据绑定方式
this.title = 'this is title';
在函数运行周期之外的函数里去修改数据需要手动调用$apply方法。如:
setTimeout(() => {

    this.title = 'this is title';

    this.$apply();

}, );
// 官方
wx.request({

    url: 'xxx',

    success: function (data) {

        console.log(data);

    }

});
// wepy 使用方式
// request 接口从只接收Object变为可接收String
wx.request('xxxx').then((d) => console.log(d));
优化事件参数传递
// 官方

<view id="tapTest" data-hi="WeChat" bindtap="tapName"> Click me! </view>

Page({

  tapName: function(event) {

    console.log(event.currentTarget.hi)// output: WeChat

  }

});

// wepy 建议传参方式

<view id="tapTest" data-wepy-params="1-wepy-something" bindtap="tapName"> Click me! </view>

events: {

    tapName (event, id, title, other) {

        console.log(id, title, other)// output: 1, wepy, something

    }

}
改变数据绑定方式
// 官方

<view> {{ message }} </view>

onLoad: function () {

    this.setData({message: 'hello world'});

}

// wepy

<view> {{ message }} </view>

onLoad () {

    this.message = 'hello world';

}
组件代替模板和模块
// 官方

<!-- item.wxml -->

<template name="item">

  <text>{{text}}</text>

</template>

<!-- index.wxml -->

<import src="item.wxml"/>

<template is="item" data="{{text: 'forbar'}}"/>

<!-- index.js -->

var item = require('item.js')

// wepy

<!-- /components/item.wpy -->

 <text>{{text}}</text>

<!-- index.wpy -->

<template>

    <component id="item"></component>

</template>

<script>

    import wepy from 'wepy';

    import Item from '../components/item';

    export default class Index extends wepy.page {

        components = { Item }

    }

</script>
WePY Demo
<style lang="less">

    @color: #4D926F;

    .userinfo {

        color: @color;

    }

</style>

<template lang="pug">

    view(class='container')

        view(class='userinfo' @tap='tap')

            mycom(:prop.sync='myprop' @fn.user='myevent')

            text {{now}}

</template>

<script>

    import wepy from 'wepy';

    import mycom from '../components/mycom';

    export default class Index extends wepy.page {

        components = { mycom };

        data = {

            myprop: {}

        };

        computed = {

            now () { return +new Date(); }

        };

        async onLoad() {

            await sleep();

            console.log('Hello World');

        }

        sleep(time) {

            return new Promise((resolve, reject) => setTimeout(() => resolve, time * ));

        }

    }

</script>
登录相关API wx.login。
获取用户信息API wx.getUserInfo。
Storage相关 wx.getStorage,wx.setStorage,wx.clearStorage。
开发
目录结构:

src

    components

        alpha.wpy --- 联系人

        chatboard.wpy --- "聊天面板" 组件

        contact.wpy --- "联系人" 组件

        discovery.wpy --- "发现" 组件

        input.wpy --- 聊天页输入框组件

        list.wpy --- 菜单列表组件

        me.wpy --- "我" 组件

        message.wpy --- message 组件

        tab.wpy --- tab 组件

    pages

        chat.wpy --- 聊天页

        index.wpy --- 首页

    app.wpy --- 小程序入口

src/pages/index.wpy:

<style type="sass">

    .body, .tab_item {

        height: %;

    }

</style>

<template>

    <view class="body">

        <view class="tab_item tab_message">

            <component id="message"></component>

        </view>

        <view class="tab_item tab_contact">

            <component id="contact"></component>

        </view>

        <view class="tab_item tab_discovery">

            <component id="discovery"></component>

        </view>

        <view class="tab_item tab_me">

            <component id="me"></component>

        </view>

        <component id="tab"></component>

    </view>

</template>

src/pages/chat.wpy:

<style type="sass">

    .body {

        height: %;

        background-color: #ededed;

    }

</style>

<template>

    <view class="body">

        <component id="chartboard"></component>

        <component id="input"></component>

    </view>

</template>


import m_contacts from '../mocks/contact';

import m_history from '../mocks/history';

export default {

    // 拉取用户信息

    getUserInfo () {},

    // 拉取与某个用户的聊天历史记录

    getHistory (id) {},

    // 拉取首页聊天列表

    getMessageList () {},

    // 发送聊天信息

    sendMsg (to, msg, type = 'text') {}

}
<template>

    <view class="message">

        <block wx:for="{{list}}" wx:for-index="index" wx:for-item="item">

            <view class="item" bindtap="select" data-wepy-params="{{item.id}}">

                <view class="header">

                    <image class="img" src="{{item.icon}}"></image>

                </view>

                <view class="content">

                    <view class="name">{{item.name}}</view>

                    <view class="lastmsg">{{item.lastmsg}}</view>

                </view>

            </view>

        </block>

    </view>

</template>

<script>

    import wepy from 'wepy';

    import api from '../common/api';

    export default class Message extends wepy.component {

        data = {

            list: []

        };

        methods = {

            select (evt, id) {

                wx.navigateTo({url: 'chat?id=' + id});

            }

        };

        async loadMessage () {

            this.list = await api.getMessageList();

            this.$apply();

        }

    }

</script>
// src/pages/index.wpy

onShow() {

    this.$invoke('message', 'loadMessage');

}
src/pages/index:

<template>

    <view class="body">

        <view class="tab_item tab_message" hidden="{{currentTab != 0}}">

            <component id="message"></component>

        </view>

        <view class="tab_item tab_contact" hidden="{{currentTab != 1}}">

            <component id="contact"></component>

        </view>

        <view class="tab_item tab_discovery" hidden="{{currentTab != 2}}">

            <component id="discovery"></component>

        </view>

        <view class="tab_item tab_me" hidden="{{currentTab != 3}}">

            <component id="me"></component>

        </view>

        <component id="tab"></component>

    </view>

</template>

<script>

    //....

    changeTab (idx) {

        this.currentTab = +idx;

        this.$apply();

    }

</script>
<script>

    import wepy from 'wepy';

    export default class Tab extends wepy.component {

        data = {

            active: ,

        };

        methods = {

            change (evt, idx) {

                this.active = +idx;

                this.$parent.changeTab(idx);

            }

        };

    }

</script>
parent.wpy

<child :item.sync="myitem" />

<repeat for="{{list}}" item="item" index="index">

   <item :item="item" />

</repeat>
转载:wepy框架入门的更多相关文章
- wepy框架入门
安装 wepy 命令行工具. npm install wepy-cli -g 在开发目录生成开发DEMO. wepy new myproject 开发实时编译. wepy build --watch ...
- 小程序框架WePY 从入门到放弃踩坑合集
小程序框架WePY 从入门到放弃踩坑合集 一点点介绍WePY 因为小程序的语法设计略迷, 所以x1 模块化起来并不方便, 所以x2 各厂就出了不少的框架用以方便小程序的开发, 腾讯看到别人家都出了框架 ...
- CodeIgniter框架入门教程——第一课 Hello World!
本文转载自:http://www.softeng.cn/?p=45 今天开始,我将在这里连载由我自己编写的<CodeIgniter框架入门教程>,首先,这篇教程的读着应该是有PHP基础的编 ...
- Newbe.Claptrap 框架入门,第二步 —— 简单业务,清空购物车
接上一篇 Newbe.Claptrap 框架入门,第一步 —— 创建项目,实现简易购物车 ,我们继续要了解一下如何使用 Newbe.Claptrap 框架开发业务.通过本篇阅读,您便可以开始尝试使用 ...
- Newbe.Claptrap 框架入门,第三步 —— 定义 Claptrap,管理商品库存
接上一篇 Newbe.Claptrap 框架入门,第二步 —— 简单业务,清空购物车 ,我们继续要了解一下如何使用 Newbe.Claptrap 框架开发业务.通过本篇阅读,您便可以开始学会添加一个全 ...
- 轻松应对并发,Newbe.Claptrap 框架入门,第四步 —— 利用 Minion,商品下单
接上一篇 Newbe.Claptrap 框架入门,第三步 —— 定义 Claptrap,管理商品库存 ,我们继续要了解一下如何使用 Newbe.Claptrap 框架开发业务.通过本篇阅读,您便可以开 ...
- Newbe.Claptrap 框架入门,第一步 —— 开发环境准备
Newbe.Claptrap 框架依托于一些关键性的基础组件和一些可选的辅助组件.本篇我们来介绍一下如何准备一个开发环境. Newbe.Claptrap 是一个用于轻松应对并发问题的分布式开发框架.如 ...
- Newbe.Claptrap 框架入门,第二步 —— 创建项目
接上一篇 Newbe.Claptrap 框架入门,第一步 -- 开发环境准备 ,我们继续了解如何创建一个 Newbe.Claptrap 项目. Newbe.Claptrap 是一个用于轻松应对并发问题 ...
- CI框架入门1
CI框架入门: 1.url的特点 2.目录结构/布局 3.MVC分别在哪里,如何依葫芦画瓢 4.安全性 ...
随机推荐
- Distributed Systems: When you should build them, and how to scale. A step-by-step guide.
原文链接 https://medium.com/free-code-camp/distributed-systems-when-you-should-build-them-and-how-to-sca ...
- SpringMVC 自定义参数解析器.
一.简述 有没有想过像 @RequestParam.@RequestBody 这些注解的工作原理呢?为什么 form 表单.application/json 的参数能够直接封装进 Bean 对象中呢? ...
- ReactNative: 使用AppReistry注册类
一.简介 每一个应用程序的运行都有一个入口文件或者入口函数,例如iOS中的使用UIApplicationMain类完成入口函数的实现,在React-Native中,AppRegistry类就肩负着这个 ...
- C# Newtonsoft.Json JsonSerializerSettings配置
JsonSerializerSettings常用配置整理 1.忽略某些属性 MemberSerialization.OptIn 默认情况下,所有的成员不会被序列化,类中的成员只有标有特性JsonPro ...
- C# sync/async 同步/异步
同步方法 Console.WriteLine($")} {DateTime.Now.ToString("yyyy-MM-dd HH:mm:ss.fff")}******* ...
- netcore 2.2 使用 Autofac 实现自动注入
Autofac自动注入是通过名称约定来实现依赖注入 ps:本demo接口层都以“I”开头,以“Service”结尾.服务层实现都以“Service”结尾. 为什么要实现自动注入 大多时候,我们都是 以 ...
- 运用arcgis sever 进行地图发布
1.对已有的文件在arcgis中进行编辑:如图 2.从file下拉的目录中找到share as 点击 3.选择自己的manage sever 填写好名称 4.继续下一步 5.重点看capabiliti ...
- SpringBoot项目里,让TKmybatis支持可以手写sql的Mapper.xml文件
SpringBoot项目通常配合TKMybatis或MyBatis-Plus来做数据的持久化. 对于单表的增删改查,TKMybatis优雅简洁,无需像传统mybatis那样在mapper.xml文件里 ...
- 一步一步创建聊天程序2-利用epoll来创建简单的聊天室
如图,这个是看视频时,最后的作业,除了客户端未使用select实现外,其它的要求都有简单实现. 服务端代码如下: #include <stdio.h> #include <strin ...
- 004.Windows Server 故障转移群集 (WSFC)简介
一 WSFC 简介 1.1 WSFC 概述 “Windows Server 故障转移群集”(WSFC) 群集是一组独立的服务器,它们共同协作以提高应用程序和服务的可用性.SQL Server 2012 ...