Spring Boot + Spring Cloud 构建微服务系统(九):配置中心(Spring Cloud Config)
技术背景
如今微服务架构盛行,在分布式系统中,项目日益庞大,子项目日益增多,每个项目都散落着各种配置文件,且随着服务的增加而不断增多。此时,往往某一个基础服务信息变更,都会导致一系列服务的更新和重启,运维也是苦不堪言,而且还很容易出错。于是,配置中心便由此应运而生了。
目前市面上开源的配置中心有很多,像Spring家族的Spring Cloud Config, Apache的Apache Commons Configuration,淘宝的diamond, 百度的disconf, 360的QConf等等,都是为了解决这类问题。当下Spring体系大行其道,我们当然也优先选择Spring Cloud Config了。
Spring Cloud Config
Spring Cloud Config 是一套为分布式系统中的基础设施和微服务应用提供集中化配置的管理方案,它分为服务端与客户端两个部分。服务端也称为分布式配置中心,它是一个独立的微服务应用,用来连接配置仓库并为客户端提供获取配置信息。客户端则是微服务架构中的各个微服务应用或基础设施,它们通过指定的配置中心来管理服务相关的配置内容,并在启动的时候从配置中心获取和加载配置信息。
Spring Cloud Config对服务端和客户端中的环境变量和属性配置 实现了抽象映射,所以它除了适用于 Spring 应用,也是可以在任何其他语言应用中使用的。Spring Cloud Config 实现的配置中心默认采用 Git 来存储配置信息,所以使用 Spring Cloud Config 构建的配置服务器,天然就支持对微服务应用配置信息的版本管理,并且可以通过 Git 客户端工具非常方便的管理和访问配置内容。当然它也提供了对其他存储方式的支持,比如:SVN 仓库、本地化文件系统等。
实现案例
准备配置文件
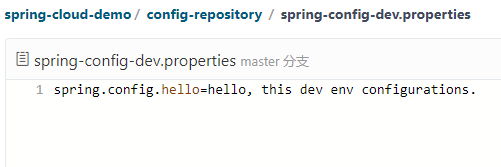
首先在GIT下,新建config-reposity目录,用来存放配置文件,如下图所示,分别模拟了三个环境的配置文件。

分别编辑三个文件的,配置 spring.config.hello 属性的值为 hello, this x env configurations.
服务端实现
新建工程
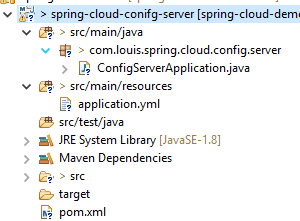
新建 spring-cloud-conifg-server 工程。
添加依赖
除了Spring Cloud依赖之外,添加配置中心依赖包。
pom.xml
    <dependencies>

        <dependency>

            <groupId>org.springframework.cloud</groupId>

            <artifactId>spring-cloud-config-server</artifactId>

        </dependency>

    </dependencies>
启动类
启动类添加注解 @EnableConfigServer,开启配置服务支持。
ConfigServerApplication.java
package com.louis.spring.cloud.config.server;

import org.springframework.boot.SpringApplication;

import org.springframework.boot.autoconfigure.SpringBootApplication;

import org.springframework.cloud.config.server.EnableConfigServer;

@EnableConfigServer

@SpringBootApplication

public class ConfigServerApplication {

    public static void main(String[] args) {

        SpringApplication.run(ConfigServerApplication.class, args);

    }

}
添加配置
修改配置文件,添加如下内容。如果是私有仓库需要填写用户名密码,如果是公开仓库,可以不配置密码。
application.yml
server:

  port:

spring:

  application:

    name: spring-cloud-config-server

  cloud:

    config:

      server:

        git:

          uri: https://gitee.com/liuge1988/spring-cloud-demo/         # 配置git仓库的地址

          search-paths: config-repository                             # git仓库地址下的相对地址,可以配置多个,用,分割。

          username: username                                          # git仓库的账号

          password: password                                          # git仓库的密码
Spring Cloud Config也提供本地存储配置的方式,只需设置属性spring.profiles.active=native,Config Server会默认从应用的src/main/resource目录下检索配置文件。另外也可以通过spring.cloud.config.server.native.searchLocations=file:D:/properties/属性来指定配置文件的位置。虽然Spring Cloud Config提供了这样的功能,但是为了更好的支持内容管理和版本控制,还是比较推荐使用GIT的方式。
测试效果
启动应用,访问 http://localhost:8551/spring-config/dev,返回结果如下。

启动应用,访问 http://localhost:8551/spring-config/pro,返回结果如下。

上述的返回的信息包含了配置文件的位置、版本、配置文件的名称以及配置文件中的具体内容,说明server端已经成功获取了git仓库的配置信息。
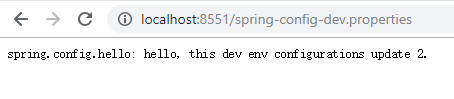
访问:http://localhost:8551/spring-config-dev.properties,返回结果如下。

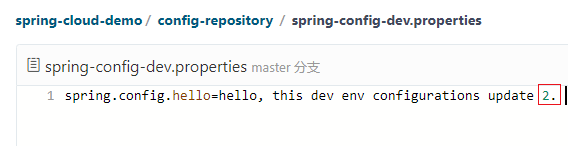
修改一下dev配置文件内容如下(末尾加了一个 update):
spring.config.hello=hello, this dev env configurations update.
再次访问:http://localhost:8551/spring-config-dev.properties,返回结果如下。

发现读取的是修改后提交的信息,说明服务端会自动读取最新提交的数据。
仓库中的配置文件会被转换成相应的WEB接口,访问可以参照以下的规则:
- /{application}/{profile}[/{label}]
- /{application}-{profile}.yml
- /{label}/{application}-{profile}.yml
- /{application}-{profile}.properties
- /{label}/{application}-{profile}.properties
以spring-config-dev.properties为例子,它的application是spring-config,profile是dev。client会根据填写的参数来选择读取对应的配置。
客户端实现
新建工程
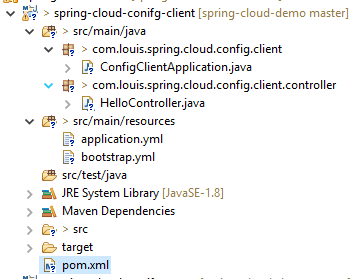
新建 spring-cloud-conifg-client 工程。
添加依赖
添加相关依赖,添加WEB是为了测试接口。
pom.xml
    <dependencies>

        <dependency>

             <groupId>org.springframework.cloud</groupId>

             <artifactId>spring-cloud-starter-config</artifactId>

        </dependency>

        <dependency>

            <groupId>org.springframework.boot</groupId>

            <artifactId>spring-boot-starter-web</artifactId>

        </dependency>

    </dependencies>
添加配置
添加两个配置文件如下。
application.yml
server:

  port:

spring:

  application:

    name: spring-cloud-config-client
bootstrap.yml
spring:

  cloud:

    config:

      uri: http://localhost:8551/ # 配置中心的具体地址

      name: spring-config  # 对应{application}部分

      profile: dev  # 对应{profile}部分

      label: master  # 对应git的分支,如果配置中心使用的是本地存储,则该参数无用
配置说明:
- spring.cloud.config.uri:配置中心的具体地址
- spring.cloud.config.name:对应{application}部分
- spring.cloud.config.profile:对应{profile}部分
- spring.cloud.config.label:对应git的分支。如果配置中心使用的是本地存储,则该参数无用
- spring.cloud.config.discovery.service-id:指定配置中心的service-id,便于扩展为高可用配置集群。
特别注意:
上面这些与spring cloud相关的属性必须配置在bootstrap.yml中,这样config部分内容才能被正确加载。
因为config的相关配置会先于application.yml,而bootstrap.yml的加载也是先于application.yml文件的。
启动类
启动类无需添加额外注解。
ConfigClientApplication.java
package com.louis.spring.cloud.config.client;

import org.springframework.boot.SpringApplication;

import org.springframework.boot.autoconfigure.SpringBootApplication;

@SpringBootApplication

public class ConfigClientApplication {

    public static void main(String[] args) {

        SpringApplication.run(ConfigClientApplication.class, args);

    }

}
控制器
添加一个 HelloController 控制器, 添加注解 @Value("${spring.config.hello}"),声明hello属性从配置文件读取。
HelloController.java
package com.louis.spring.cloud.config.client.controller;

import org.springframework.beans.factory.annotation.Value;

import org.springframework.web.bind.annotation.RequestMapping;

import org.springframework.web.bind.annotation.RestController;

@RestController

class HelloController {

    @Value("${spring.config.hello}")

    private String hello;

    @RequestMapping("/hello")

    public String from() {

        return this.hello;

    }

}
测试效果
先后启动配置中心服务端和客户端, 访问 http://localhost:8552/hello,效果如下。
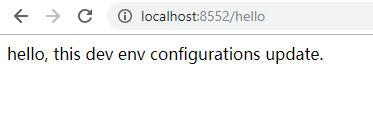
说明客户端已经成功从服务端读取了配置信息。
现在手动修改一下仓库配置文件的内容,末尾加个数字 2,修改完成并提交。
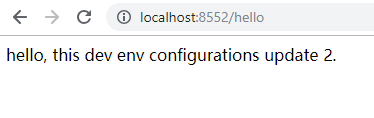
再次访问 http://localhost:8552/hello,效果如下。
我们发现返回结果并没有读取最新提交的内容,这是因为Spring Boot项目只有在启动的时候才会获取配置文件的内容,虽然GIT配置信息被修改了,但是客户端并没有重新去获取,所以导致读取的信息仍然是旧配置。那么该如何去解决这个问题呢?这就是我们下一章要讲的 Spring Cloud Bus。
配置中心服务化
到目前为止,我们的客户端都是直接调用配置中心的server端来获取配置文件信息。这样客户端和服务端的耦合性太高,如果server端要做集群,客户端只能通过原始的方式来路由,server端改变IP地址的时候,客户端也需要修改配置,不符合Spring Cloud服务治理的理念。所以我们需要将服务端也当做一个服务注册到注册中心,客户端去注册中心获取配置中心服务就可以了。
打开 spring-cloud-conifg-server,修改服务端POM,添加注册中心依赖。
pom.xml
<dependency>

    <groupId>org.springframework.cloud</groupId>

    <artifactId>spring-cloud-starter-consul-discovery</artifactId>

</dependency>
启动类添加注解 @EnableDiscoveryClient,提供服务发现支持。
ConfigServerApplication.java
package com.louis.spring.cloud.config.server;

import org.springframework.boot.SpringApplication;

import org.springframework.boot.autoconfigure.SpringBootApplication;

import org.springframework.cloud.client.discovery.EnableDiscoveryClient;

import org.springframework.cloud.config.server.EnableConfigServer;

@EnableConfigServer

@EnableDiscoveryClient

@SpringBootApplication

public class ConfigServerApplication {

    public static void main(String[] args) {

        SpringApplication.run(ConfigServerApplication.class, args);

    }

}
修改配置,添加服务注册信息。
application.yml
server:

  port:

spring:

  application:

    name: spring-cloud-config-server

  cloud:

    consul:

      host: localhost

      port:

      discovery:

        serviceName: ${spring.application.name}    # 注册到consul的服务名称

    config:

      server:

        git:

          uri: https://gitee.com/liuge1988/spring-cloud-demo/     # 配置git仓库的地址

          search-paths: config-repository                             # git仓库地址下的相对地址,可以配置多个,用,分割。

          username: username                                             # git仓库的账号

          password: password                                             # git仓库的密码
先后启动注册中心服务器,配置中心服务器, 访问 http://localhost:8500,确认注册中心注册成功。

访问 http://localhost:8551/config-server/dev,也能成功读取配置,服务端就算改造好了。
打开 spring-cloud-conifg-client,修改服务端POM,添加注册中心依赖。
pom.xml
<dependency>

    <groupId>org.springframework.cloud</groupId>

    <artifactId>spring-cloud-starter-consul-discovery</artifactId>

</dependency>
启动类添加注解 @EnableDiscoveryClient,提供服务发现支持。
ConfigClientApplication.java
package com.louis.spring.cloud.config.client;

import org.springframework.boot.SpringApplication;

import org.springframework.boot.autoconfigure.SpringBootApplication;

import org.springframework.cloud.client.discovery.EnableDiscoveryClient;

@EnableDiscoveryClient

@SpringBootApplication

public class ConfigClientApplication {

    public static void main(String[] args) {

        SpringApplication.run(ConfigClientApplication.class, args);

    }

}
修改配置文件,移除uri的直接地址配置,开启服务发现并配置serviceId为注册中心服务器的服务名称。
bootstrap.yml
spring:

  cloud:

    consul:

      host: localhost

      port:

      discovery:

        serviceName: spring-cloud-config-client    # 注册到consul的服务名称

    config:

      discovery:

        enabled: true  # 开启服务发现

        serviceId: spring-cloud-config-server # 配置中心服务名称

      name: spring-config  # 对应{application}部分

      profile: dev  # 对应{profile}部分

      label: master  # 对应git的分支,如果配置中心使用的是本地存储,则该参数无用
启动客户端,访问 http://localhost:8552/hello,成功读取配置信息,说明客户端也改造完成了。
源码下载
码云:https://gitee.com/liuge1988/spring-cloud-demo.git
作者:朝雨忆轻尘
出处:https://www.cnblogs.com/xifengxiaoma/
版权所有,欢迎转载,转载请注明原文作者及出处。
Spring Boot + Spring Cloud 构建微服务系统(九):配置中心(Spring Cloud Config)的更多相关文章
- Spring boot学习1 构建微服务:Spring boot 入门篇
Spring boot学习1 构建微服务:Spring boot 入门篇 Spring Boot是由Pivotal团队提供的全新框架,其设计目的是用来简化新Spring应用的初始搭建以及开发过程.该框 ...
- Spring Boot + Spring Cloud 构建微服务系统(七):API服务网关(Zuul)
技术背景 前面我们通过Ribbon或Feign实现了微服务之间的调用和负载均衡,那我们的各种微服务又要如何提供给外部应用调用呢. 当然,因为是REST API接口,外部客户端直接调用各个微服务是没有问 ...
- Spring Boot + Spring Cloud 构建微服务系统(十):配置中心(Spring Cloud Bus)
技术背景 我们在上一篇讲到,Spring Boot程序只在启动的时候加载配置文件信息,这样在GIT仓库配置修改之后,虽然配置中心服务器能够读取最新的提交信息,但是配置中心客户端却不会重新读取,以至于不 ...
- Spring Boot + Spring Cloud 构建微服务系统(八):分布式链路追踪(Sleuth、Zipkin)
技术背景 在微服务架构中,随着业务发展,系统拆分导致系统调用链路愈发复杂,一个看似简单的前端请求可能最终需要调用很多次后端服务才能完成,那么当整个请求出现问题时,我们很难得知到底是哪个服务出了问题导致 ...
- Spring Boot + Spring Cloud 构建微服务系统(四):容错机制和熔断(Hystrix)
雪崩效应 在微服务架构中,由于服务众多,通常会涉及多个服务层级的调用,而一旦基础服务发生故障,很可能会导致级联故障,进而造成整个系统不可用,这种现象被称为服务雪崩效应.服务雪崩效应是一种因“服务提供者 ...
- Spring Boot + Spring Cloud 构建微服务系统(六):熔断监控集群(Turbine)
Spring Cloud Turbine 上一章我们集成了Hystrix Dashboard,使用Hystrix Dashboard可以看到单个应用内的服务信息,显然这是不够的,我们还需要一个工具能让 ...
- Spring Boot + Spring Cloud 构建微服务系统(五):熔断监控面板(Hystrix Dashboard)
Hystrix Dashboard Hystrix-dashboard是一款针对Hystrix进行实时监控的工具,通过Hystrix Dashboard我们可以在直观地看到各Hystrix Comma ...
- Spring Boot + Spring Cloud 构建微服务系统(一):服务注册和发现(Consul)
使用Consul提供注册和发现服务 什么是 Consul Consul 是 HashiCorp 公司推出的开源工具,用于实现分布式系统的服务发现与配置.与其它分布式服务注册与发现的方案,Consul ...
- Spring Boot + Spring Cloud 构建微服务系统(三):服务消费和负载(Feign)
Spring Cloud Feign Spring Cloud Feign是一套基于Netflix Feign实现的声明式服务调用客户端.它使得编写Web服务客户端变得更加简单.我们只需要通过创建接口 ...
随机推荐
- stark组件开发之列表页面应用示例
已经解决的,自定义的扩展函数,功能.但是 不可能返回. 一个 固定的页面把! 应该是,点击那条 记录之后的编辑, 就会跳转到相应的,编辑页面.所以 这个标签的 <a href="/ ...
- No write since last change (add ! to override)
故障现象: 使用vim修改文件报错,系统提示如下: E37: No write since last change (add ! to override) 故障原因: 文件为只读文件,无法修改. 解决 ...
- tensorflow学习之(三)Varible 变量的使用
#Varible 变量的使用 使用变量进行自加 import tensorflow as tf state = tf.Variable(0,name='counter') #定义一个变量,赋值为0,且 ...
- v$lockv和$locked_object的区别
v$lockv和$locked_object的区别 url: http://blog.sina.com.cn/s/blog_62defbef0101pgvo.html 2013-12-24 v1.0 ...
- drf7 分页组件
DRF的分页 数据库有几千万条数据,这些数据需要展示,不可能直接从数据库把数据全部读取出来, 这样会给内存造成特别大的压力,有可能还会内存溢出,所以希望一点一点的取,那展示的时候也是一样的,总是要进行 ...
- 20155326《网络攻防》Exp4 恶意代码分析
20155326<网络攻防>Exp4 恶意代码分析 基础问题回答: 1)如果在工作中怀疑一台主机上有恶意代码,但只是猜想,所有想监控下系统一天天的到底在干些什么.请设计下你想监控的操作有哪 ...
- 2.DI依赖注入
一:DI Dependency Injection ,依赖注入 is a :是一个,继承. has a:有一个,成员变量,依赖. class B { private A a; //B类依赖A类 } ...
- Batch Normalization--介绍
思考 YJango的前馈神经网络--代码LV3的数据预处理中提到过:在数据预处理阶段,数据会被标准化(减掉平均值.除以标准差),以降低不同样本间的差异性,使建模变得相对简单. 我们又知道神经网络中的每 ...
- 在Ubuntu登陆界面输入密码之后,黑屏一闪后,又跳转到登录界面
现象:在Ubuntu登陆界面输入密码之后,黑屏一闪后,又跳转到登录界面.原因:主目录下的.Xauthority文件拥有者变成了root,从而以用户登陆的时候无法都取.Xauthority文件.说明:X ...
- [UWP]使用Picker构建应用内图片公共裁剪组件
在上一篇博文<[UWP]如何实现UWP平台最佳图片裁剪控件>中我讲解了编写ImageCropper控件的过程及知识分享.在那篇文章里,我大言不惭的称其为UWP平台最佳图片裁剪控件(主要是没 ...