Web Automation with Selenium (C#)
Web Automation is a quite regular task nowadays, scripting for repeated operations and testing. Selenium is a good toolkit for this kind of tasks.
There are four subprojects in Selenium:
Selenuim IDE is a firefox addon. It can record and replay your actions in firefox, then export scripts in your desired language (Selenese, Java, C# or other bindings). Selenium WebDriver is used for driving a browser natively in your language binding, including:
- AndroidDriver
- ChromeDriver
- EventFiringWebDriver
- FirefoxDriver
- HtmlUnitDriver
- InternetExplorerDriver
- IPhoneDriver
- PhantomJSDriver
- RemoteWebDriver
- SafariDriver
We will use FirefoxDriver, ChromeDriver and InternetExplorerDriver in C# here.
Step 1: Download selenium-dotnet-2.37.0.zip
http://code.google.com/p/selenium/downloads/detail?name=selenium-dotnet-2.37.0.zip&can=2&q=
Step 2: Setup the environment
Create an directory for selenium files <selenium>. Then extract selenium-dotnet-2.37.0.zip to <selenium>/lib.

NAnt script for building:
<?xml version="1.0"?>

<project name="selenium" default="run">

    <property name="debug" value="true" />

    <property name="outdir" value="bin" />

    <property name="libdir" value="lib/net40" />

    <property name="datadir" value="data" />

    <target name="clean" description="remove all generated files">

    <!-- Files: '*.xml; *.pdb' -->

        <delete>

            <fileset>

                <include name="*.xml" />

                <include name="*.exe" />

                <include name="*.pdb" />

            </fileset>

        </delete>

        <delete dir="${outdir}" />

    </target>

    <target name="build" description="compiles the source code">

        <mkdir dir="${outdir}" />

        <foreach item="File" property="filename">

            <in>

                <items>

                    <include name="*.cs" />

                    <exclude name="*Test.cs" />

                </items>

            </in>

            <do>

                <echo message="${filename}" />

                <csc debug="${debug}" output="${path::combine(path::combine(path::get-directory-name(filename), outdir), path::get-file-name(path::change-extension(filename, 'exe')))}" target="exe">

                    <sources>

                        <include name="${filename}" />

                    </sources>

                    <references basedir="${libdir}">

                        <include name="WebDriver.dll" />

                        <include name="WebDriver.Support.dll" />

                    </references>

                </csc>

            </do>

        </foreach>

        <foreach item="File" property="filename">

            <in>

                <items>

                    <include name="*Test.cs" />

                </items>

            </in>

            <do>

                <echo message="${filename}" />

                <csc debug="${debug}" output="${path::combine(path::combine(path::get-directory-name(filename), outdir), path::get-file-name(path::change-extension(filename, 'dll')))}" target="library">

                    <sources>

                        <include name="${filename}" />

                    </sources>

                    <references basedir=".">

                        <include name="${nant::scan-probing-paths('nunit.framework.dll')}" />

                        <include name="${libdir}/WebDriver.dll" />

                        <include name="${libdir}/WebDriver.Support.dll" />

                    </references>

                </csc>

            </do>

        </foreach>

        <copy todir="${outdir}">

            <fileset basedir="${libdir}">

              <include name="WebDriver.dll" />

              <include name="WebDriver.Support.dll" />

            </fileset>

        </copy>

    </target>

    <target name="run" depends="build">

        <foreach item="File" property="filename">

            <in>

                <items>

                    <include name="${outdir}/*.exe" />

                </items>

            </in>

            <do>

                <echo message="${filename}" />

                <exec program="${path::combine(outdir,filename)}"  workingdir="${outdir}"/>

            </do>

        </foreach>

    </target>

    <target name="test" depends="build">

        <nunit2>

            <formatter type="Plain" />

            <test>

                <assemblies basedir="${outdir}">

                    <include name="*Test.dll" />

                </assemblies>

            </test>

        </nunit2>

    </target>

</project>
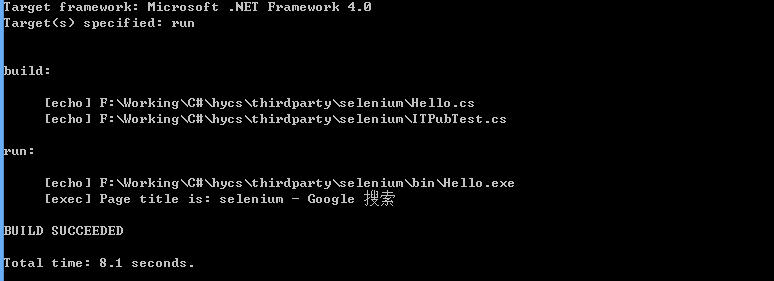
Step 3: Kick start
Just a Hello World in Selenium WebDriver C#. It opens the browser and search 'selenium' in Google, then return the page title.
using System;

using OpenQA.Selenium.IE;

using OpenQA.Selenium.Firefox;

using OpenQA.Selenium.Chrome;

using OpenQA.Selenium;

// Requires reference to WebDriver.Support.dll

using OpenQA.Selenium.Support.UI;

namespace huys

{

    class Program

    {

        static void Main(string[] args)

        {

            // For Firefox

            //var driver = new FirefoxDriver();

            // For IE

            //var driver = new InternetExplorerDriver();

            // For chrome

            var options = new ChromeOptions();

            options.BinaryLocation = "C:\\Program Files (x86)\\Google\\Chrome\\Application\\chrome.exe";

            var driver = new ChromeDriver("..\\lib", options);

            //Notice navigation is slightly different than the Java version

            //This is because 'get' is a keyword in C#

            driver.Navigate().GoToUrl("http://www.google.com/");

            // Find the text input element by its name

            IWebElement query = driver.FindElement(By.Name("q"));

            // Enter something to search for

            query.SendKeys("selenium");

            // Now submit the form. WebDriver will find the form for us from the element

            query.Submit();

            // Google's search is rendered dynamically with JavaScript.

            // Wait for the page to load, timeout after 10 seconds

            WebDriverWait wait = new WebDriverWait(driver, TimeSpan.FromSeconds());

            wait.Until((d) => { return d.Title.ToLower().StartsWith("selenium"); });

            // Should see: "Cheese - Google Search"

            System.Console.WriteLine("Page title is: " + driver.Title);

            //Close the browser

            driver.Quit();

        }

    }

}
* Problems with ChromeDriver
FireFoxDriver is perfect in selenium, but ChromeDriver isn't. You have to download chromedriver.exe for running ChromeDriver. If chrome wasn't installed under default location, the code definitely will fail.
The server expects you to have Chrome installed in the default location for each system:
| OS | Expected Location of Chrome |
| Linux | /usr/bin/google-chrome1 |
| Mac | /Applications/Google\ Chrome.app/Contents/MacOS/Google\ Chrome |
| Windows XP | %HOMEPATH%\Local Settings\Application Data\Google\Chrome\Application\chrome.exe |
| Windows Vista | C:\Users\%USERNAME%\AppData\Local\Google\Chrome\Application\chrome.exe |
Unfortunately no chrome under default location on my laptop. To overcome this issue, some extra lines for locations.
 // For chrome

 var options = new ChromeOptions();

 options.BinaryLocation = "C:\\Program Files (x86)\\Google\\Chrome\\Application\\chrome.exe"; // Explicitly define the path to chrome.exe

  var driver = new ChromeDriver("..\\lib", options); // Add the directory for chromedriver.exe
[1] http://code.google.com/p/selenium/wiki/ChromeDriver
[2] http://selenium.googlecode.com/git/docs/api/dotnet/index.html
[3] http://docs.seleniumhq.org/
Web Automation with Selenium (C#)的更多相关文章
- 《零成本实现Web自动化测试--基于Selenium》第一章 自动化测试基础
第一篇 Selenium 和WebDriver工具篇 第一章 自动化测试基础 1.1 初识自动化测试 自动化测试有两种常见方式 1.1.1 代码驱动测试,又叫测试驱动开发(TDD) 1.1.2 ...
- 《零成本实现Web自动化测试--基于Selenium》 第四章 Selenium 命令
Selenium 命令,通常被称为Selenese,由一系列运行测试案例所需要的命令构成.按顺序排列这些命令就构成了测试脚本. 一. 验证颜面元素 1.Assertion或者Verification ...
- 《零成本实现Web自动化测试--基于Selenium》第二章 Selenium简介和基础
第一部分 Selenium简介 1.Selenium 组建 1.1 Selenium-IDE Selenium-IDC是开发Selenium测试案例的集成开发环境.它像FireFox插件一样的工作,支 ...
- python自动化测试应用-第6篇(WEB测试)--Selenium元素篇
篇6 python自动化测试应用-Selenium基础篇 --lamecho 1.1概要 大家好!我是lamecho(辣么丑),上一篇我们搭建好p ...
- WEB自动化(Python+selenium)的API
在做Web自动化过程中,汇总了Python+selenium的API相关方法,给公司里的同事做了第二次培训,分享给大家 ...
- 开源Web自动化测试工具Selenium IDE
Selenium IDE(也有简写SIDE的)是一款开源的Web自动化测试工具,它实现了测试用例的录制与回放. Selenium IDE目前版本为 3.6 系列,支持跨浏览器运行,所以IDE的UI从原 ...
- python3 web测试模块selenium
selenium是一个用于web应用程序测试工具,selenium测试直接运行在浏览器中,就像真正的用户在操作一样,支持的浏览器包括IE(7,8,9,10,11),mozilla firefox,sa ...
- .NET项目web自动化测试实战——Selenium 2.0
PS:这次用公司的项目来练手,希望公司不会起诉我,因为我绝对是抱着学习的态度,没有任何恶意.仅供交流学习. 该项目是基于SharePoint平台所开发的门户网站,为了切身感受一下Selenium 2. ...
- web automation 常用技术比较
selenium2支持通过各种driver(FirfoxDriver,IternetExplorerDriver,OperaDriver,ChromeDriver)驱动真实浏览器完成测试. 除此之外, ...
随机推荐
- JavaFile类和递归
八.File类和递归 8.1 概述 java.io.File 类时文件和目录路径名的抽象表示,主要用于文件和目录的创建.查找和产出等操作. 8.2 构造方法 public File(String pa ...
- 【刷题】BZOJ 4289 PA2012 Tax
Description 给出一个N个点M条边的无向图,经过一个点的代价是进入和离开这个点的两条边的边权的较大值,求从起点1到点N的最小代价.起点的代价是离开起点的边的边权,终点的代价是进入终点的边的边 ...
- 解题:SDOI 2014 重建
题面 做这个这个题需要稍微深入理解一点矩阵树定理:套矩阵树定理得到的东西是有意义的,它是“所有生成树边权乘积之和”(因为度数矩阵是点的边权和,邻接矩阵是边权),即$\sum_{t}\prod_{e∈t ...
- bzoj4807 車
题目大意: Description 众所周知,車是中国象棋中最厉害的一子之一,它能吃到同一行或同一列中的其他棋子.車跟車显然不能在一起打 起来,于是rly一天又借来了许多许多的車在棋盘上摆了起来……他 ...
- 【POJ1958】汉诺塔+
题目大意:给定一个四个柱子的汉诺塔,N 个盘子,求最少多少步移动到另一个柱子上. 题解:\(f[n]=min(2*f[i]+d[n-i])\),其中 \(d[i]\) 为汉诺三塔最小移动次数.M 塔同 ...
- php编程——验证码的实现(session方法)
index.PHP(实现输入验证码页面)代码如下: <html><head><title>check code</title></head> ...
- Oracle 重要知识点
这些是最简单的,理解这些再去看其他的高深一点的吧....... 游标 oracle里面的游标分为四种情况,分别是LOOP循环,FOR循环,删除,更新 1.LOOP循环 检索EMP表.使用LOOP循环语 ...
- C语言复习---获取矩阵的对角和
#include <stdio.h> #include <stdlib.h> #include <math.h> #define MAX 5 int main() ...
- JAVA记录-JSP指令
JSP中有三种类型的指令标签 - 序号 指令 说明 1 <%@ page ... %> 定义页面相关属性,如脚本语言,错误页面和缓冲要求. 2 <%@ include ... %&g ...
- mysql出现ERROR 2002 (HY000): Can't connect to local MySQL server through socket '/var/run/mysqld/mysqld.sock' 错误
init 神奇..其他的都没有成功,这个居然成功了!! 还试验过:sudo mysqld restart啥的,都没有用......