Web Service——CXF+Spring 整合
结合spring框架来实现CXF发布SOAP协议的服务,步骤基本相同,所不同的是的多了一些配置项,步骤如下
1. 服务端
第一步:创建web项目(引入jar包)
第二步:创建SEI接口
import javax.jws.WebService;

import javax.xml.ws.BindingType;

import javax.xml.ws.soap.SOAPBinding;

@WebService

@BindingType(SOAPBinding.SOAP12HTTP_BINDING)

public interface WeatherInterface {

    public String QueryWeather(String cityName);

}
第三步:创建SEI实现类
public class WeatherInterfaceImpl implements WeatherInterface {

    @Override

    public String QueryWeather(String cityName) {

        System.out.println("from client..." + cityName);

        if ("北京".equals(cityName)) {

            return "晴转多云";

        } else {

            return "雨转小雪";

        }

    }

}
第四步:配置spring配置文件,applicationContext.xml,用<jaxws:server>标签发布服务,设置1.服务地址;2.设置服务接口;3.设置服务实现类
<?xml version="1.0" encoding="UTF-8"?>

<beans xmlns="http://www.springframework.org/schema/beans"

    xmlns:xsi="http://www.w3.org/2001/XMLSchema-instance" xmlns:jaxws="http://cxf.apache.org/jaxws"

    xmlns:jaxrs="http://cxf.apache.org/jaxrs" xmlns:cxf="http://cxf.apache.org/core"

    xsi:schemaLocation="http://www.springframework.org/schema/beans

                            http://www.springframework.org/schema/beans/spring-beans.xsd

                            http://cxf.apache.org/jaxrs http://cxf.apache.org/schemas/jaxrs.xsd

                            http://cxf.apache.org/jaxws http://cxf.apache.org/schemas/jaxws.xsd

                            http://cxf.apache.org/core http://cxf.apache.org/schemas/core.xsd">

    <!-- <jaxws:server发布SOAP协议的服务 ,对JaxWsServerFactoryBean类封装-->

    <jaxws:server address="/weather" serviceClass="com.zang.ws.cxf.server.WeatherInterface">

        <jaxws:serviceBean>

            <ref bean="weatherInterface"/>

        </jaxws:serviceBean>

        <!-- 配置拦截器 -->

        <jaxws:inInterceptors>

            <ref bean="inIntercepter"/>

        </jaxws:inInterceptors>

        <jaxws:outInterceptors>

            <ref bean="outIntercepter"/>

        </jaxws:outInterceptors>

    </jaxws:server>

    <!-- 配置拦截器的bean -->

    <bean name="inIntercepter" class="org.apache.cxf.interceptor.LoggingInInterceptor"/>

    <bean name="outIntercepter" class="org.apache.cxf.interceptor.LoggingOutInterceptor"/>

    <!-- 配置服务实现类 -->

    <bean name="weatherInterface" class="com.zang.ws.cxf.server.WeatherInterfaceImpl"/>

</beans>
第五步:配置web.xml,配置spring配置文件地址和加载的listener,配置CXF的servlet。
<?xml version="1.0" encoding="UTF-8"?>

<web-app xmlns:xsi="http://www.w3.org/2001/XMLSchema-instance"

    xmlns="http://xmlns.jcp.org/xml/ns/javaee"

    xsi:schemaLocation="http://xmlns.jcp.org/xml/ns/javaee http://xmlns.jcp.org/xml/ns/javaee/web-app_3_1.xsd"

    id="WebApp_ID" version="3.1">

    <display-name>ws_cxf_spring_server</display-name>

    <!-- 设置spring的环境 -->

    <context-param>

        <!--contextConfigLocation是不能修改的 -->

        <param-name>contextConfigLocation</param-name>

        <param-value>classpath:applicationContext.xml</param-value>

    </context-param>

    <listener>

        <listener-class>org.springframework.web.context.ContextLoaderListener</listener-class>

    </listener>

    <!-- 配置CXF的Servlet -->

    <servlet>

        <servlet-name>CXF</servlet-name>

        <servlet-class>org.apache.cxf.transport.servlet.CXFServlet</servlet-class>

    </servlet>

    <servlet-mapping>

        <servlet-name>CXF</servlet-name>

        <url-pattern>/ws/*</url-pattern>

    </servlet-mapping>

    <welcome-file-list>

        <welcome-file>index.jsp</welcome-file>

    </welcome-file-list>

</web-app>
第六步:部署到tomcat下,启动tomcat
第七步:测试服务,阅读使用说明书 地址: http://localhost:8089/ws_cxf_spring_server/ws/weather?wsdl
如果直接创建实现类,可以使用Endpoint标签发布服务。步骤如下
创建实现类
@WebService

public class HelloWorld {

    public String sayHello(String name){

        return "hello,"+name;

    }

}
之前通过创建SEI接口实现时,applicationContext.xml中是用<jaxws:server>标签来发布服务;而直接通过创建类来实现时,applicationContext.xml中应使用<jaxws:endpoint>标签来发布服务。
<!-- <jaxws:endpoint发布SOAP协议的服务 ,对Endpoint类封装-->

<jaxws:endpoint address="/hello" implementor="com.zang.ws.cxf.server.HelloWorld"/>
重启tomcat,访问说明书 http://localhost:8089/ws_cxf_spring_server/ws/hello?wsdl
项目结构

2. 客户端
第一步:引入jar包
第二步:生成客户端代码 wsdl2java命令,详见客户端实现
第三步:配置spring配置文件,applicationContent.xml
<?xml version="1.0" encoding="UTF-8"?>

<beans xmlns="http://www.springframework.org/schema/beans"

    xmlns:xsi="http://www.w3.org/2001/XMLSchema-instance" xmlns:jaxws="http://cxf.apache.org/jaxws"

    xmlns:jaxrs="http://cxf.apache.org/jaxrs" xmlns:cxf="http://cxf.apache.org/core"

    xsi:schemaLocation="http://www.springframework.org/schema/beans

                            http://www.springframework.org/schema/beans/spring-beans.xsd

                            http://cxf.apache.org/jaxrs http://cxf.apache.org/schemas/jaxrs.xsd

                            http://cxf.apache.org/jaxws http://cxf.apache.org/schemas/jaxws.xsd

                            http://cxf.apache.org/core http://cxf.apache.org/schemas/core.xsd">

    <!-- <jaxws:client实现客户端 ,对JaxWsProxyFactoryBean类封装 -->

    <jaxws:client id="weatherClient"

        address="http://127.0.0.1:8089/ws_cxf_spring_server/ws/weather"

        serviceClass="com.zang.cxf.weather.WeatherInterface" />

</beans>
第四步:从spring上下文件获取服务实现类,调用查询方法,打印
import org.springframework.context.ApplicationContext;

import org.springframework.context.support.ClassPathXmlApplicationContext;

import com.zang.cxf.weather.WeatherInterface;

public class WeatheClient {

    public static void main(String[] args) {

        // 初始化spring的上下文

        ApplicationContext context = new ClassPathXmlApplicationContext("classpath:applicationContext.xml");

     // 调用查询方法

        WeatherInterface weatherInterface = (WeatherInterface) context.getBean("weatherClient");

        String weather = weatherInterface.queryWeather("济南");

        System.out.println(weather);

    }

}
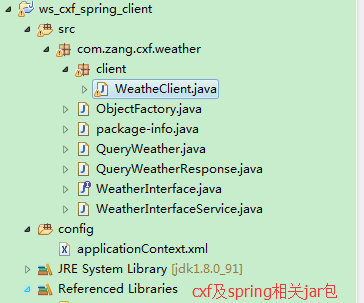
项目结构
Web Service——CXF+Spring 整合的更多相关文章
- Web Service——CXF发布REST服务
1. 什么是REST REST,英文representational state transfer(表象性状态转变)或者表述性状态转移,REST是web服务的一种架构风格,使用HTTP.URI.XML ...
- Building a RESTful Web Service Using Spring Boot In Eclipse
一.构建restful web service 创建Maven的java web工程,maven的pom文件加入依赖包 创建包hello Greeting.java package hello; pu ...
- Web Service CXF的工作流程
我们一起走进系统的内部,跟随每一个调用,去透视系统的每一个层面. 一.我们定义整个目录都在CXFServlet的监控之下 <servlet> <servlet-name>CXF ...
- Web Service——CXF
1. 什么是CXF Apache CXF = Celtix + Xfire,开始叫 Apache CeltiXfire,后来更名为 Apache CXF 了,以下简称为 CXF.Apache CXF ...
- 翻译-使用Spring调用SOAP Web Service
原文链接: http://spring.io/guides/gs/consuming-web-service/ 调用SOAP web service 本指南将指导你使用Spring调用一个基于SOAP ...
- java框架之Spring(4)-Spring整合Hibernate和Struts2
准备 导包 Struts2 导入 Struts2 zip 包解压目录下 'apps/struts-blank.war' 中所有 jar 包,如下: asm-3.3.jar asm-commons-3. ...
- [C#]動態叫用Web Service
http://www.dotblogs.com.tw/jimmyyu/archive/2009/04/22/8139.aspx 摘要 Web Service對大家來說想必都不陌生,也大都了解Web S ...
- Building a RESTful Web Service(转)
Building a RESTful Web Service This guide walks you through the process of creating a "hello wo ...
- 【转】Building a RESTful Web Service
目标 构建一个service,接收如下HTTP GET请求: [plain] view plain copy http://localhost:8080/greeting 并返回如下JSON格式的 ...
随机推荐
- Windows怎样实时同步文件夹?Java+Spring+Quartz+Tomcat集群实现
我有一台服务器上加了两块硬盘.其中有个目录下的数据非常重要.假设是D:\data目录.这个目录下有几十个G的文件. 我希望能把这个文件夹里的内容同步到另一块硬盘的目录下,假设是E:\data 我希望最 ...
- [SQLite] SQLite学习手册(数据库和事务)
转载地址:http://www.cnblogs.com/stephen-liu74/archive/2012/02/18/2322575.html 一.Attach数据库: ATTACH DATABA ...
- 中国计算机学会CCF推荐国际学术会议和期刊目录(PDF版,2015年)
total: CCF推荐国际学术会议和期刊目录(下载) parts: 点击下载: 计算机体系结构并行与分布计算存储系统.pdf 点击下载: 计算机网络.pdf 点击下载: 网络与信息安全.pdf ...
- 【BZOJ】【2286】【SDOI2011】消耗战
虚树+树形DP Orz ZYF……果然好神…… 建虚树先按dfn排序,再用一个单调栈来维护当前这条[链],往里加边……说实话还没弄懂- - 留个坑吧…… RE的原因:这条链往出退的时候没写top--; ...
- BULLET物理DEMO最新版本
鼠标右键按下并拖动 旋转视角WSAD 前后左右RF 上下QE ...
- cocos2dx游戏存储举例及其注意事项
今天白白跟大家分享一下cocos2dx中游戏的存储及需要注意的事项 cocos2dx中自带了存储类:CCUserDefault ,倘若需要存储的数据量教大的话,建议使用数据库来存储 现在先给大家看一下 ...
- THINKPHP URL模块大小写导致404问题
最近我使用THINKPHP开发了一个项目在本地的集成开发环境wampserver做开发时并没有出现问题 上传到linux系统也没有出现问题,但当上传到windows平台上就出现了问题"文件4 ...
- Java 实例 - 队列(Queue)用法
队列是一种特殊的线性表,它只允许在表的前端进行删除操作,而在表的后端进行插入操作. LinkedList类实现了Queue接口,因此我们可以把LinkedList当成Queue来用. 以下实例演示了队 ...
- [Node.js]22. Level 4: Dependency
Add two dependencies to your package.json file, connect and underscore. You'll want to useconnect ve ...
- [android错误] requires API level *
Call requires API level (current min ): android.content.res.Resources#getBoolean 参考文档: http://stacko ...