ELK之es常用查询语句
参考:https://www.cnblogs.com/kyleinjava/p/10497042.html
https://blog.csdn.net/luanpeng825485697/article/details/83411704
elasticsearch定义了两种查询方式
一.索引(index),type,document相关语句
1,列出所有索引状态
GET /_cat/indices?v
可以使用kibana的dev tools

health status index                       uuid                   pri rep docs.count docs.deleted store.size pri.store.size

yellow open   metricbeat-6.3.1-2019.09.30 AzJBakNPSP-OqcByGT9xOw   1   1      53244            0       10mb           10mb

yellow open   watcher_alarms              AIc2q3VhTLedzu6ljScOjA   5   1          0            0      1.2kb          1.2kb

yellow open   website                     Big3pMt4QTmx4rCii_7jqw   5   1          0            0      1.1kb          1.1kb

yellow open   metricbeat-6.3.1-2019.09.29 Lv8UC-H7Q4GRShXvCKVwkg   1   1     135000            0     25.4mb         25.4mb

yellow open   watcher_alarms-2019.09.27   kJOeaPQXRAOI17qB11eL-A   5   1       1033            0    383.6kb        383.6kb

yellow open   watcher_alarms-2019.09.26   GAAJ8Uc1QvuoxjUWau6Dcg   5   1       1876            0    619.9kb        619.9kb

green  open   .kibana                     3DFTWNpIQ4yMq3wYNmxfPw   1   0        130            2    292.4kb        292.4kb

yellow open   watcher_alarms-2019.09.28   H4KySJ6lQqaKYb6r7-8TzA   5   1         43            0    593.6kb        593.6kb

yellow open   system-log-2019.09          uCdgYBmASpCjxO9-DyGyOg   5   1      49005            0     42.7mb         42.7mb

yellow open   watcher_alarms-2019.09.29   eYDS-TN4RLqOpY0D1OExEQ   5   1        133            0    319.9kb        319.9kb
字段说明
health:健康状态 red,yellow,green

status:状态open

index:索引名

uuid:唯一标识符uuid

pri:主分片数

rep:副本数

docs.count:总计多少条日志

docs.deleted:删除记录

store.size:存储该index文件的大小

pri.store.size:主存储大小
2,查询索引详细信息
GET /index1,index2     查询索引index1和索引index2的基本信息

GET /_all    查询所有的基本信息

GET /s*    使用通配符来查询所有以s开头的索引信息
3,创建索引
setting中可以设置索引的的主分片数number_of_shards默认为5,和主分片的副本数number_of_replicas默认是1;
mapping中主要设置各个type的映射关系
PUT /my_index

{

    "settings": {... any setting ...}

    "mappings": {

        "type_one": {... any mappings ...},

        "type_two":  {... any mappings ...},

        ...

    }

}
创建一个索引gb
PUT /gb

{

  "mappings": {

    "tweet" : {

      "properties" : {

        "tweet" : {

          "type" :    "text",

          "analyzer": "english"

        },

        "date" : {

          "type" :   "date"

        },

        "name" : {

          "type" :   "text"

        },

        "user_id" : {

          "type" :   "long"

        }

      }

    }

  }

}
创建成功提示
{

  "acknowledged": true,

  "shards_acknowledged": true,

  "index": "index1"

}
查看刚创建的索引gb的详细信息
GET /gb
{

  "gb": {

    "aliases": {},

    "mappings": {

      "tweet": {

        "properties": {

          "date": {

            "type": "date"

          },

          "name": {

            "type": "text"

          },

          "tweet": {

            "type": "text",

            "analyzer": "english"

          },

          "user_id": {

            "type": "long"

          }

        }

      }

    },

    "settings": {

      "index": {

        "creation_date": "1569814449442",

        "number_of_shards": "5",

        "number_of_replicas": "1",

        "uuid": "841k18xLSHOOltY_1UKrSA",

        "version": {

          "created": "6020499"

        },

        "provided_name": "index1"

      }

    }

  }

}
4,删除索引
DELETE /index1 #删除索引index1

DELETE /_all #删除所有索引,慎用

DELETE /*
5,在索引的映射中增加一个字段
PUT /gb/_mapping/tweet

{

  "properties": {

    "tag": {

      "type": "text",

      "index": false

    }

  }

}
运行成功返回
{

  "acknowledged": true

}
增加字段之前的映射mapping信息
使用命令 查看
GET /gb/_mapping
返回
{

  "gb": {

    "mappings": {

      "tweet": {

        "properties": {

          "date": {

            "type": "date"

          },

          "name": {

            "type": "text"

          },

          "tweet": {

            "type": "text",

            "analyzer": "english"

          },

          "user_id": {

            "type": "long"

          }

        }

      }

    }

  }

}
添加成功以后查看
{

  "gb": {

    "mappings": {

      "tweet": {

        "properties": {

          "date": {

            "type": "date"

          },

          "name": {

            "type": "text"

          },

          "tag": {

            "type": "text",

            "index": false

          },

          "tweet": {

            "type": "text",

            "analyzer": "english"

          },

          "user_id": {

            "type": "long"

          }

        }

      }

    }

  }

}

6,查看某个type的映射关系
GET /{index}/_mapping/{type}
GET /gb/_mapping/tweet

///返回

{

  "gb": {

    "mappings": {

      "tweet": {

        "properties": {

          "date": {

            "type": "date"

          },

          "name": {

            "type": "text"

          },

          "tag": {

            "type": "text",

            "index": false

          },

          "tweet": {

            "type": "text",

            "analyzer": "english"

          },

          "user_id": {

            "type": "long"

          }

        }

      }

    }

  }

}
7,在索引文档中添加或者替换文档
在添加的时候id并不是必须的,如果没有id则会随机产生一个id需要使用POST才能随机生成id
往索引gb里面添加一条数据指定id为1
PUT /gb/tweet/1

{

  "username":"liuym",

  "user_id":16

}
返回
{

  "_index": "gb",

  "_type": "tweet",

  "_id": "1",

  "_version": 1,

  "result": "created",

  "_shards": {

    "total": 2,

    "successful": 1,

    "failed": 0

  },

  "_seq_no": 0,

  "_primary_term": 1

}
搜索刚刚添加的数据
GET /gb/_server
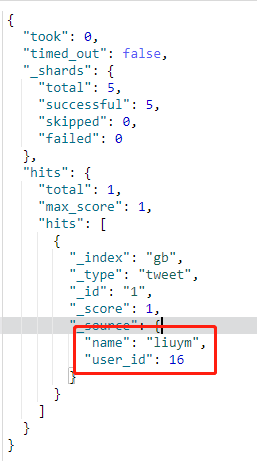
也可以通过GET方式查询id查看
GET /gb/tweet/1

///返回

{

  "_index": "gb",

  "_type": "tweet",

  "_id": "1",

  "_version": 1,

  "found": true,

  "_source": {

    "username": "liuym",

    "user_id": 16

  }

}
也可以只查看_source中部分字段,例如只查看name
GET /gb/tweet/1?_source=name
8,更新索引文档中的内容
PUT /{index}/{type}/{id}

POST  /{index}/{type}/{id}/_update
一种是使用PUT方法旧数据全部覆盖,使用新数据代替
PUT /gb/tweet/1

{

  "name":"zhangsan",

  "user_id":8

}
修改后内容
{

  "_index": "gb",

  "_type": "tweet",

  "_id": "1",

  "_version": 6,

  "found": true,

  "_source": {

    "name": "zhangsan",

    "user_id": 9

  }

}
一种是通过POST方式,只对部分字段进行修改
POST gb/tweet/1/_update

{

 "doc":{

   "username": "zhansan"

 }

}
PS:注意最后加更新_update 内部需要加doc
9,删除文档
DELETE /{index}/{type}/{id}
删除id为1的文档
DELETE /gb/tweet/1
返回
{

  "_index": "gb",

  "_type": "tweet",

  "_id": "1",

  "_version": 14,

  "result": "deleted",

  "_shards": {

    "total": 2,

    "successful": 1,

    "failed": 0

  },

  "_seq_no": 14,

  "_primary_term": 1

}
查看没有数据了
GET /gb/tweet/1
返回
{

  "_index": "gb",

  "_type": "tweet",

  "_id": "1",

  "found": false

}
found为false就是没有发现
10,批处理
批量添加
POST /gb/tweet/_bulk

{"index":{"_id":"1"}}

{"name":"zhangsan"}

{"index":{"_id":"2"}}

{"name":"lisi"}
返回
{

  "took": 39,

  "errors": false,

  "items": [

    {

      "index": {

        "_index": "gb",

        "_type": "tweet",

        "_id": "1",

        "_version": 1,

        "result": "created",

        "_shards": {

          "total": 2,

          "successful": 1,

          "failed": 0

        },

        "_seq_no": 6,

        "_primary_term": 1,

        "status": 201

      }

    },

    {

      "index": {

        "_index": "gb",

        "_type": "tweet",

        "_id": "2",

        "_version": 1,

        "result": "created",

        "_shards": {

          "total": 2,

          "successful": 1,

          "failed": 0

        },

        "_seq_no": 4,

        "_primary_term": 1,

        "status": 201

      }

    }

  ]

}
查看
GET /gb/_search
返回
{

  "took": 3,

  "timed_out": false,

  "_shards": {

    "total": 5,

    "successful": 5,

    "skipped": 0,

    "failed": 0

  },

  "hits": {

    "total": 2,

    "max_score": 1,

    "hits": [

      {

        "_index": "gb",

        "_type": "tweet",

        "_id": "2",

        "_score": 1,

        "_source": {

          "name": "lisi"

        }

      },

      {

        "_index": "gb",

        "_type": "tweet",

        "_id": "1",

        "_score": 1,

        "_source": {

          "name": "zhangsan"

        }

      }

    ]

  }

}
批量更新与删除
POST /gb/tweet/_bulk

{"update":{"_id":"1"}}

{"doc":{"name":"wangwu"}}

{"delete":{"_id":"2"} }
修改_id为1的name字段,删除_id为2的数据
返回
{

  "took": 48,

  "errors": false,

  "items": [

    {

      "update": {

        "_index": "gb",

        "_type": "tweet",

        "_id": "1",

        "_version": 2,

        "result": "updated",

        "_shards": {

          "total": 2,

          "successful": 1,

          "failed": 0

        },

        "_seq_no": 7,

        "_primary_term": 1,

        "status": 200

      }

    },

    {

      "delete": {

        "_index": "gb",

        "_type": "tweet",

        "_id": "2",

        "_version": 2,

        "result": "deleted",

        "_shards": {

          "total": 2,

          "successful": 1,

          "failed": 0

        },

        "_seq_no": 5,

        "_primary_term": 1,

        "status": 200

      }

    }

  ]

}
查看是否修改成功
GET /gb/tweet/_search
返回
{

  "took": 1,

  "timed_out": false,

  "_shards": {

    "total": 5,

    "successful": 5,

    "skipped": 0,

    "failed": 0

  },

  "hits": {

    "total": 1,

    "max_score": 1,

    "hits": [

      {

        "_index": "gb",

        "_type": "tweet",

        "_id": "1",

        "_score": 1,

        "_source": {

          "name": "wangwu"

        }

      }

    ]

  }

}
修改字段成功并且删除了_id为2的数据
11,批量导入大量数据
curl -H "Content-Type: application/json" -XPOST "localhost:9200/bank/account/_bulk?pretty&refresh" --data-binary "@accounts.json"
12,查询文档数
#查询所有文档数

GET /_count
返回
{

  "count": 759185,

  "_shards": {

    "total": 61,

    "successful": 61,

    "skipped": 0,

    "failed": 0

  }

}
#查询索引gb中的文档数

GET /gb/_count
#查询某个type的文档数

GET /gb/tweet/_count
二,简单查询
1,使用GET请求
GET /gb/tweet/_search
返回
{

  "took": 2,    #查询执行时间单位是毫秒

  "timed_out": false, #查询是否超时

  "_shards": {  #表示查询参与的分片总数,以及这些分片成功了多少个失败了多少个

    "total": 5,

    "successful": 5,

    "skipped": 0,

    "failed": 0

  },

  "hits": {  #所有查询到的结果

    "total": 1, #匹配的文档总数

    "max_score": 1, #结果中最大评分

    "hits": [

      {

        "_index": "gb", #索引名称

        "_type": "tweet", #type名称

        "_id": "1",      #id名称

        "_score": 1,   #评分

        "_source": {   #存储的数据源信息

          "name": "wangwu"

        }

      }

    ]

  }

}
2,同时查询多索引多类型的数据
GET /_search  #在所有索引中搜索所有的类型

GET /gb/_search #在gb索引中搜索所有的类型

GET /gb,us/_search #在 gb 和 us 索引中搜索所有的文档

GET /g*,u*/_search #在任何以 g 或者 u 开头的索引中搜索所有的类型

GET /gb/tweet/_search #在gb索引中搜索tweet类型

GET /gb,us/user,tweet/_search在 gb 和 us 索引中搜索 user 和 tweet 类型

GET /_all/user,tweet/_search在所有的索引中搜索 user 和 tweet 类型
3,不查询文档的元数据,只查询source部分的数据
GET /{index}/{type}/{id}/_source
示例
GET /gb/tweet/1/_source
返回
{

  "name": "wangwu"

}
三,请求体查询
1,查询所有文档
默认评分是1,可以通过设置boost来,由于有些代理服务器不支持GET请求带请求体,所以实际中还是要用POST请求。
GET /gb/_search

{

  "query": {

    "match_all": {}

  }

}
返回
{

  "took": 11,

  "timed_out": false,

  "_shards": {

    "total": 5,

    "successful": 5,

    "skipped": 0,

    "failed": 0

  },

  "hits": {

    "total": 1,

    "max_score": 1,

    "hits": [

      {

        "_index": "gb",

        "_type": "tweet",

        "_id": "1",

        "_score": 1,

        "_source": {

          "name": "wangwu"

        }

      }

    ]

  }

}
2,分页查询所有文档
GET /system-log-2019.09/_search

{

  "query": {

    "match_all": {}

  },

  "from": 0,

  "size": 2

}
从头开始,每次显示2条第一页返回如下
{

  "took": 0,

  "timed_out": false,

  "_shards": {

    "total": 5,

    "successful": 5,

    "skipped": 0,

    "failed": 0

  },

  "hits": {

    "total": 60361,

    "max_score": 1,

    "hits": [

      {

        "_index": "system-log-2019.09",

        "_type": "doc",

        "_id": "X9GKbG0BHXMu0O5TBI8U",

        "_score": 1,

        "_source": {

          "message": "Sep 26 15:14:25 salt-test systemd: Reloading.",

          "@version": "1",

          "type": "system-log",

          "host": "salt-test",

          "path": "/var/log/messages",

          "@timestamp": "2019-09-26T07:14:25.503Z"

        }

      },

      {

        "_index": "system-log-2019.09",

        "_type": "doc",

        "_id": "YNGKbG0BHXMu0O5TBI8U",

        "_score": 1,

        "_source": {

          "message": """Sep 26 15:14:25 salt-test filebeat: 2019-09-26T15:14:25.362+0800#011ERROR#011pipeline/output.go:100#011Failed to connect to backoff(elasticsearch(http://192.168.1.4:9200)): Connection marked as failed because the onConnect callback failed: 400 Bad Request: {"error":{"root_cause":[{"type":"invalid_index_name_exception","reason":"Invalid index name [_ilm], must not start with '_', '-', or '+'","index_uuid":"_na_","index":"_ilm"}],"type":"invalid_index_name_exception","reason":"Invalid index name [_ilm], must not start with '_', '-', or '+'","index_uuid":"_na_","index":"_ilm"},"status":400}""",

          "@version": "1",

          "type": "system-log",

          "host": "salt-test",

          "path": "/var/log/messages",

          "@timestamp": "2019-09-26T07:14:25.503Z"

        }

      }

    ]

  }

}
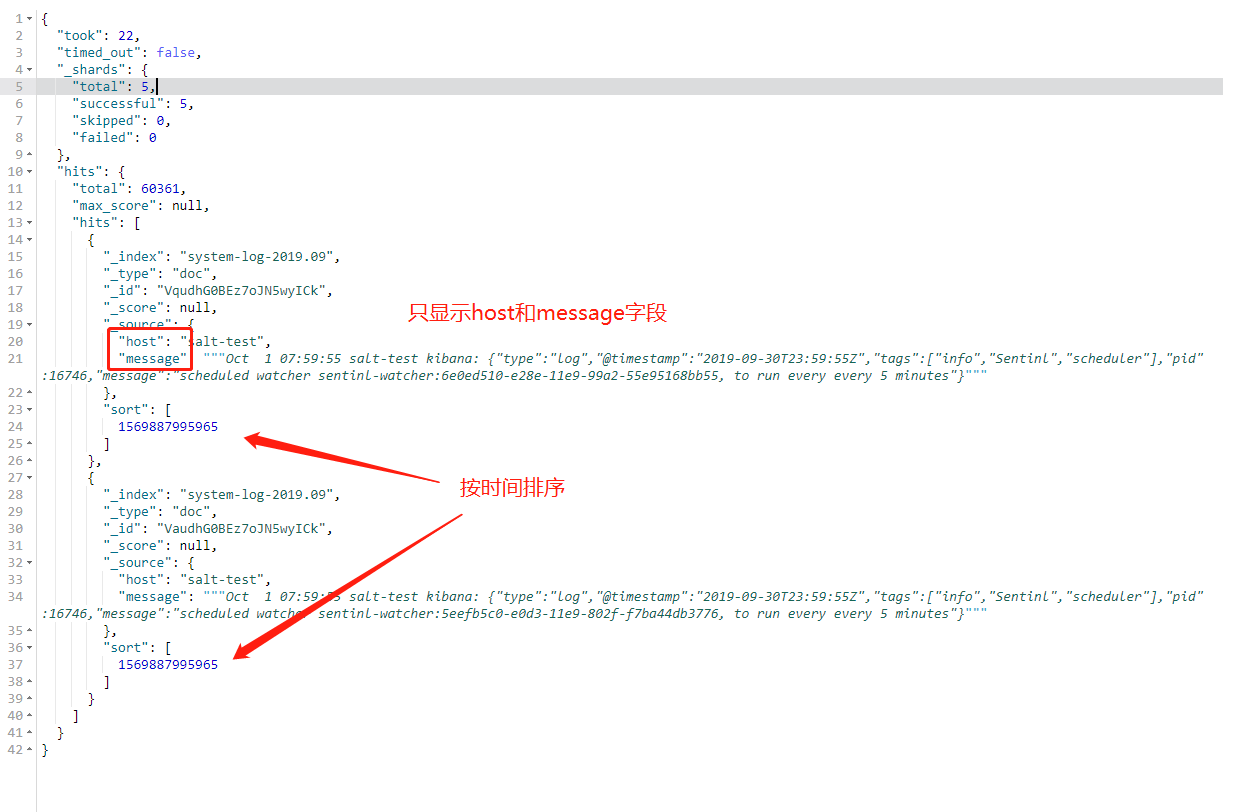
3,条件查询并排序
查询host名为salt-test的主机,只显示message和host字段,按时间倒序排列,从头开始页大小为2
GET /system-log-2019.09/_search

{

  "query": {

    "match": {

      "host":"salt-test"

    }

  },

  "_source": [

    "host",

    "@timestamp"

    ],

  "sort": [

    {

        "@timestamp": "desc"

    }

  ],

  "from": 0,

  "size": 2

}
4,全文检索
索引中只要有任意一个匹配拆分后词就可以出现在结果中,只是匹配都越高越的排越前面
GET /gb/_search

{

  "query": {

    "match": {

      "name":"wangwu"

    }

  }

}
ELK之es常用查询语句的更多相关文章
- 23个MySQL常用查询语句
23个MySQL常用查询语句 一查询数值型数据: SELECT * FROM tb_name WHERE sum > 100; 查询谓词:>,=,<,<>,!=,!> ...
- Hibernate常用查询语句
Hibernate常用查询语句 Hib的检索方式1'导航对象图检索方式.通过已经加载的对象,调用.iterator()方法可以得到order对象如果是首次执行此方法,Hib会从数据库加载关联的orde ...
- MySQL常用查询语句汇总(不定时更新)
在这篇文章中我会通过一些例子来介绍日常编程中常用的SQL语句 目录: ## 1.数据库的建立 ## 1.数据库的建立 实例将ER图的形式给出: 由此转换的4个关系模式: ...
- mysql—常用查询语句总结
关于MySQL常用的查询语句 一查询数值型数据: ; 查询谓词:>,=,<,<>,!=,!>,!<,=>,=< 二查询字符串 SELECT * FROM ...
- Cisco 路由交换 常用查询语句
基本信息查询语句 #查看全配置信息 #show running-configure #查看vlan信息 #show vlan brief #查看物理直连信息 #show cdp neighbors d ...
- pg_sql常用查询语句整理
#pg_sql之增删改查 #修改: inset into table_name (id, name, age, address ) select replace(old_id,old_id,new_i ...
- Mysql 常用查询语句
SELECT * FROM table1 ,,,,,,,,) ) SELECT * FROM table3 WHERE t3Date >= '2011-08-10' SELECT * FROM ...
- MySQL常用查询语句集合《转》
一查询数值型数据: SELECT * FROM tb_name WHERE sum > 100; 查询谓词:>,=,<,<>,!=,!>,!<,=>,= ...
- ORACLE数据库管理常用查询语句
/*查看表空间的名称及大小*/ SELECT t.tablespace_name, round(SUM(bytes / (1024 * 1024)), 0) ts_size FROM dba_tabl ...
随机推荐
- 【CSS】Table样式
一.table td的宽度详解 Table只有Table的宽度是可以设置的,并且各个浏览器理解一致 原则上应该将table的宽度设置成一个固定的值,而不应该设置成一个根据屏幕变化的值 Table的宽度 ...
- 博客系统的使用(typecho、WordPress等等)
一.下载,解压,安装 二.Apache配置虚拟主机,(host文件修改) 三.开启php.ini中pdo类型的扩展适配数据库 四.按照指示页面配置 五.操作控制面板和blog前台
- 通过 frp 实现群晖的 drive 远端同步
通过 frp 实现 drive 同步 其实其他的也类似, 只是指定 tcp 的端口不一致就可以. frp 实现的外网端口映射"肥肠"方便. 也推广下 frp 的地址 frp-git ...
- vuex(用了vue就上了一条不归路的贼船)
一.Vuex是干什么用的? 它是用于对复杂应用进行状态管理用的(官方说法是它是一种状态管理模式). “杀鸡不用宰牛刀”.对于简单的项目,根本用不着Vuex这把“宰牛刀”.那简单的项目用什么呢?用Vue ...
- Xshell6如何传输文件
Xshell6如何传输文件 /或者直接在本地用notepad nftp插件上传本地文件,直观,更方便 上传文件 1.打开xshell6软件,连接服务器. 2.yum安装一款工具.#yum inst ...
- SpringBoot整合ElasticSearch:基于Jest技术
1.给pom.xml添加依赖 <!--SpringBoot默认使用SpringData ElasticSearch模块进行操作 <dependency> <groupId> ...
- MyBatis项目配置案例详解与Web下的增删改查实现[附项目源码]
MyBatis项目案例 项目图示: 项目源码地址:https://github.com/JluTiger/mybatispro 1.项目功能 项目案例:后台管理系统用户数据维护平台 所有用户数据查询 ...
- 两个int类型的数据相加,有可能会出现超出int的表示范围。
两个int类型的数据相加,有可能会出现超出int的表示范围. /* 移位运算符: <<(左移) 规律:一个操作数进行左移运算的时候,结果就是等于操作数乘以2的n次方,n就是左移 的位数. ...
- LeetCode 第 155 场周赛
一.最小绝对差(LeetCode-5189) 1.1 题目描述 1.2 解题思路 数组排好序,获取最小的差值即可. 1.3 解题代码 public class Solution { class Tes ...
- 今天闲来无事给我这老伙计A4L换个机油
今天闲来无事给我这老伙计A4L换个机油 今天天气不错正好心血来潮给我的老伙计做个小保健.跟我这么久了也不能亏待是吧,也很久没来论坛了顺便冒个泡给我们版主晶晶交个作业要不然又要揍我了. ...