品优购商城项目(六)CAS客户端与SpringSecurity集成
cas单点登录旨在解决传统登录模式session在分布式项目中共享登录信息的问题。
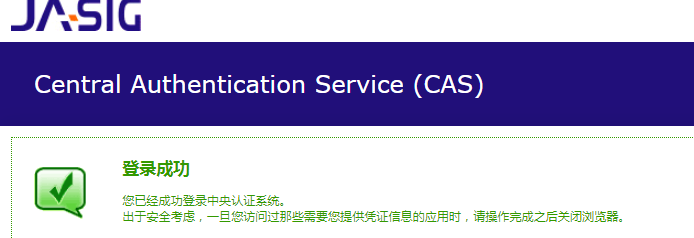
本文cas服务器使用 4.0版本,仅供学习参考。把 cas.war 直接部署在tomcat即可,这里有个固定的用户名和密码 casuser /Mellon
修改密码在 cas/WEB-INF/deployerConfigContext.xml
<bean id="primaryAuthenticationHandler"

          class="org.jasig.cas.authentication.AcceptUsersAuthenticationHandler">

        <property name="users">

            <map>

                <entry key="casuser" value="Mellon"/>

                <entry key="admin" value=""/>

            </map>

        </property>

    </bean>
需要重启tomcat才能失效
一、 CAS服务端配置
1、端口修改
如果我们不希望用8080端口访问CAS, 可以修改端口
(1)修改TOMCAT的端口
打开tomcat 目录 conf\server.xml 找到下面的配置

将端口8080,改为9100
(2)修改CAS配置文件(直接修改tomcat部署的cas)
修改cas的WEB-INF/cas.properties
server.name=http://localhost:9100
2、去除https认证
CAS默认使用的是HTTPS协议,如果使用HTTPS协议需要SSL安全证书(需向特定的机构申请和购买) 。如果对安全要求不高或是在开发测试阶段,可使用HTTP协议。我们这里讲解通过修改配置,让CAS使用HTTP协议。
(1)修改cas的WEB-INF/deployerConfigContext.xml
<!-- Required for proxy ticket mechanism. -->
<bean id="proxyAuthenticationHandler"
class="org.jasig.cas.authentication.handler.support.HttpBasedServiceCredentialsAuthenticationHandler"
p:httpClient-ref="httpClient" p:requireSecure="false"/>
这里需要增加参数p:requireSecure="false",requireSecure属性意思为是否需要安全验证,即HTTPS,false为不采用
(2)修改cas的/WEB-INF/spring-configuration/ticketGrantingTicketCookieGenerator.xml
<bean id="ticketGrantingTicketCookieGenerator" class="org.jasig.cas.web.support.CookieRetrievingCookieGenerator"

        p:cookieSecure="false"

        p:cookieMaxAge=""

        p:cookieName="CASTGC"

        p:cookiePath="/cas" />
参数p:cookieSecure="true",同理为HTTPS验证相关,TRUE为采用HTTPS验证,FALSE为不采用https验证。
参数p:cookieMaxAge="-1",是COOKIE的最大生命周期,-1为无生命周期,即只在当前打开的窗口有效,关闭或重新打开其它窗口,仍会要求验证。可以根据需要修改为大于0的数字,比如3600等,意思是在3600秒内,打开任意窗口,都不需要验证。我们这里将cookieSecure改为false , cookieMaxAge 改为3600
(3)修改cas的WEB-INF/spring-configuration/warnCookieGenerator.xml
<bean id="warnCookieGenerator" class="org.jasig.cas.web.support.CookieRetrievingCookieGenerator"

        p:cookieSecure="false"

        p:cookieMaxAge=""

        p:cookieName="CASPRIVACY"

        p:cookiePath="/cas" />
我们这里将cookieSecure改为false , cookieMaxAge 改为3600
(4)登出跳转的配置 ,修改 cas 系统的配置文件 cas-servlet.xml
<bean id="logoutAction" class="org.jasig.cas.web.flow.LogoutAction"

p:servicesManager-ref="servicesManager"

p:followServiceRedirects="${cas.logout.followServiceRedirects:true}"/>
改为 true 后,可以在退出时跳转页面到目标页面,修改 index.jsp 的退出链接
<a href="http://localhost:9100/cas/logout?service=http://www.baidu.com">退出登录</a>
二、CAS集成数据库
达到用户登录从数据库验证账号密码的目的。
(1)修改cas服务端中web-inf下deployerConfigContext.xml ,添加如下配置
<bean id="dataSource" class="com.mchange.v2.c3p0.ComboPooledDataSource"

              p:driverClass="com.mysql.jdbc.Driver"

              p:jdbcUrl="jdbc:mysql://127.0.0.1:3306/pinyougoudb?characterEncoding=utf8"

              p:user="root"

              p:password="" />

<bean id="passwordEncoder"

class="org.jasig.cas.authentication.handler.DefaultPasswordEncoder"

        c:encodingAlgorithm="MD5"

        p:characterEncoding="UTF-8" />

<bean id="dbAuthHandler"

          class="org.jasig.cas.adaptors.jdbc.QueryDatabaseAuthenticationHandler"

          p:dataSource-ref="dataSource"

          p:sql="select password from tb_user where username = ?"

          p:passwordEncoder-ref="passwordEncoder"/>
然后在配置文件开始部分找到 bean authenticationManager 修改
<bean id="authenticationManager" class="org.jasig.cas.authentication.PolicyBasedAuthenticationManager">

        <constructor-arg>

            <map>

                <!--

                   | IMPORTANT

                   | Every handler requires a unique name.

                   | If more than one instance of the same handler class is configured, you must explicitly

                   | set its name to something other than its default name (typically the simple class name).

                   -->

                <entry key-ref="proxyAuthenticationHandler" value-ref="proxyPrincipalResolver" />

                <!--<entry key-ref="primaryAuthenticationHandler" value-ref="primaryPrincipalResolver" />-->

                <entry key-ref="dbAuthHandler" value-ref="primaryPrincipalResolver"/>

            </map>

        </constructor-arg>
其中<entry key-ref="primaryAuthenticationHandler" value-ref="primaryPrincipalResolver" />一句是使用固定的用户名和密码,我们在下面可以看到这两个bean ,如果我们使用数据库认证用户名和密码,需要将这句注释掉。添加<entry key-ref="dbAuthHandler" value-ref="primaryPrincipalResolver"/>使用数据库数据验证
(2)将以下三个jar包放入webapps\cas\WEB-INF\lib下

重启tomcat 登录
三、CAS服务端界面改造
主要修改cas默认的登录等页面,用自己的页面。
1、拷贝资源
(1)将品优购的登陆页login.html 拷贝到cas系统下WEB-INF\view\jsp\default\ui 目录下,将 css 、js、img等文件夹拷贝合并到 cas 目录下
(2) 将原来的casLoginView.jsp 改名(可以为之后的修改操作做参照),将login.html改名为casLoginView.jsp
2、修改页面casLoginView.jsp 内容
(1)添加指令
<%@ page pageEncoding="UTF-8" %>

<%@ page contentType="text/html; charset=UTF-8" %>

<%@ taglib prefix="c" uri="http://java.sun.com/jsp/jstl/core" %>

<%@ taglib prefix="spring" uri="http://www.springframework.org/tags" %>

<%@ taglib prefix="form" uri="http://www.springframework.org/tags/form" %>

<%@ taglib prefix="fn" uri="http://java.sun.com/jsp/jstl/functions" %>
(2)修改form标签
<form:form method="post" id="fm1" commandName="${commandName}" htmlEscape="true" class="sui-form">

......

</form:form>
(3)修改用户名框
<form:input id="username" tabindex=""

    accesskey="${userNameAccessKey}" path="username" autocomplete="off" htmlEscape="true"

    placeholder="邮箱/用户名/手机号" class="span2 input-xfat" />
(4)修改密码框
<form:password  id="password" tabindex="" path="password"

      accesskey="${passwordAccessKey}" htmlEscape="true" autocomplete="off"

      placeholder="请输入密码" class="span2 input-xfat"   />
(5)修改登陆按钮
<input type="hidden" name="lt" value="${loginTicket}" />

<input type="hidden" name="execution" value="${flowExecutionKey}" />

<input type="hidden" name="_eventId" value="submit" />

<input class="sui-btn btn-block btn-xlarge btn-danger" accesskey="l" value="登陆" type="submit" />
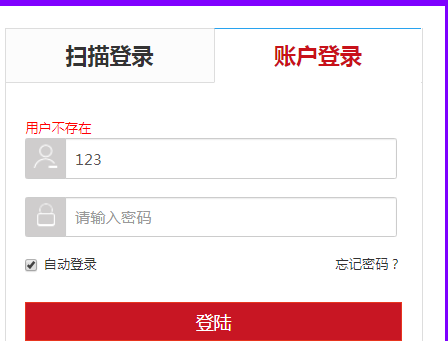
3、错误提示
(1)在表单内加入错误提示框
<form:errors path="*" id="msg" cssClass="errors" element="div" htmlEscape="false" />
(2)修改错误提示信息为中文
这个提示信息是在WEB-INF\classes目录下的messages.properties文件中,错误信息可以自定义,记得转成unicode编码
#用户不存在,信息可以自定义转unicode防止中文乱码

authenticationFailure.AccountNotFoundException=\u7528\u6237\u4E0D\u5B58\u5728

#密码错误同上

authenticationFailure.FailedLoginException=\u5BC6\u7801\u9519\u8BEF
设置国际化为zn_CN ,修改WEB-INF/cas-servlet.xml
 <!-- Locale Resolver -->

  <bean id="localeResolver" class="org.springframework.web.servlet.i18n.CookieLocaleResolver" p:defaultLocale="zh_CN" />
四、CAS客户端与SpringSecurity集成
1、用户中心实现单点登录
(1)pom.xml 引入springSecurity、cas客户端和springSecurity Cas整合包依赖
 <dependency>

            <groupId>org.springframework.security</groupId>

            <artifactId>spring-security-web</artifactId>

            <version>4.1..RELEASE</version>

        </dependency>

        <dependency>

            <groupId>org.springframework.security</groupId>

            <artifactId>spring-security-config</artifactId>

            <version>4.1..RELEASE</version>

        </dependency>

        <dependency>

            <groupId>org.springframework.security</groupId>

            <artifactId>spring-security-cas</artifactId>

            <version>4.1..RELEASE</version>

        </dependency>

        <dependency>

            <groupId>org.jasig.cas.client</groupId>

            <artifactId>cas-client-core</artifactId>

            <version>3.3.</version>

            <exclusions>

                <exclusion>

                    <groupId>org.slf4j</groupId>

                    <artifactId>log4j-over-slf4j</artifactId>

                </exclusion>

            </exclusions>

        </dependency>
(2)将用户中心相关的页面(home-开头的)拷贝至 pinnyougou-user-web
(3)web.xml 添加spring-security过滤器,设置首页为home-index.html
<welcome-file-list>

        <welcome-file>home-index.html</welcome-file>

    </welcome-file-list>
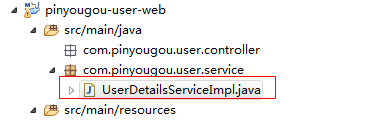
(4)构建UserDetailsServiceImpl.java
import org.springframework.security.core.GrantedAuthority;

import org.springframework.security.core.authority.SimpleGrantedAuthority;

import org.springframework.security.core.userdetails.User;

import org.springframework.security.core.userdetails.UserDetails;

import org.springframework.security.core.userdetails.UserDetailsService;

import org.springframework.security.core.userdetails.UsernameNotFoundException;

import java.util.ArrayList;

import java.util.List;

public class UserDetailServiceImpl implements UserDetailsService {

    @Override

    public UserDetails loadUserByUsername(String username) throws UsernameNotFoundException {

        System.out.println("经过认证类:"+username);

        List<GrantedAuthority> authorities=new ArrayList();

        authorities.add(new SimpleGrantedAuthority("ROLE_USER"));

        return new User(username,"",authorities);

    }

}
(5)添加spring-security.xml,并做以下修改
配置匿名访问资源
<?xml version="1.0" encoding="UTF-8"?>

<beans:beans xmlns="http://www.springframework.org/schema/security"

    xmlns:beans="http://www.springframework.org/schema/beans" xmlns:xsi="http://www.w3.org/2001/XMLSchema-instance"

    xsi:schemaLocation="http://www.springframework.org/schema/beans http://www.springframework.org/schema/beans/spring-beans.xsd

                        http://www.springframework.org/schema/security http://www.springframework.org/schema/security/spring-security.xsd">

    <!-- 匿名访问资源 -->

    <http pattern="/css/**" security="none"></http>

    <http pattern="/img/**" security="none"></http>

    <http pattern="/js/**" security="none"></http>

    <http pattern="/plugins/**" security="none"></http>

    <http pattern="/register.html" security="none"></http>

    <http pattern="/user/add.do" security="none"></http>

    <http pattern="/user/sendCode.do" security="none"></http>

    <!--   entry-point-ref  入口点引用 -->

    <http use-expressions="false" entry-point-ref="casProcessingFilterEntryPoint">

        <intercept-url pattern="/**" access="ROLE_USER"/>

        <csrf disabled="true"/>

        <!-- custom-filter为过滤器, position 表示将过滤器放在指定的位置上,before表示放在指定位置之前  ,after表示放在指定的位置之后  -->

        <custom-filter ref="casAuthenticationFilter"  position="CAS_FILTER" />

        <custom-filter ref="requestSingleLogoutFilter" before="LOGOUT_FILTER"/>

        <custom-filter ref="singleLogoutFilter" before="CAS_FILTER"/>

    </http>

      <!-- CAS入口点 开始 -->

    <beans:bean id="casProcessingFilterEntryPoint" class="org.springframework.security.cas.web.CasAuthenticationEntryPoint">

        <!-- 单点登录服务器登录URL -->

        <beans:property name="loginUrl" value="http://localhost:9100/cas/login"/>

        <beans:property name="serviceProperties" ref="serviceProperties"/>

    </beans:bean>

    <beans:bean id="serviceProperties" class="org.springframework.security.cas.ServiceProperties">

        <!--service 配置自身工程的根地址+/login/cas   -->

        <beans:property name="service" value="http://localhost:9106/login/cas"/>

    </beans:bean>

    <!-- CAS入口点 结束 -->

    <!-- 认证过滤器 开始 -->

    <beans:bean id="casAuthenticationFilter" class="org.springframework.security.cas.web.CasAuthenticationFilter">

        <beans:property name="authenticationManager" ref="authenticationManager"/>

    </beans:bean>

        <!-- 认证管理器 -->

    <authentication-manager alias="authenticationManager">

        <authentication-provider  ref="casAuthenticationProvider">

        </authentication-provider>

    </authentication-manager>

        <!-- 认证提供者 -->

    <beans:bean id="casAuthenticationProvider"     class="org.springframework.security.cas.authentication.CasAuthenticationProvider">

        <beans:property name="authenticationUserDetailsService">

            <beans:bean class="org.springframework.security.core.userdetails.UserDetailsByNameServiceWrapper">

                <beans:constructor-arg ref="userDetailsService" />

            </beans:bean>

        </beans:property>

        <beans:property name="serviceProperties" ref="serviceProperties"/>

        <!-- ticketValidator 为票据验证器 -->

        <beans:property name="ticketValidator">

            <beans:bean class="org.jasig.cas.client.validation.Cas20ServiceTicketValidator">

                <beans:constructor-arg index="" value="http://localhost:9100/cas"/>

            </beans:bean>

        </beans:property>

        <beans:property name="key" value="an_id_for_this_auth_provider_only"/>

    </beans:bean>

            <!-- 认证类 -->

    <beans:bean id="userDetailsService" class="com.smallshop.user.service.UserDetailServiceImpl"/>

    <!-- 认证过滤器 结束 -->

    <!-- 单点登出  开始  -->

    <beans:bean id="singleLogoutFilter" class="org.jasig.cas.client.session.SingleSignOutFilter"/>

    <!-- 经过此配置,当用户在地址栏输入本地工程 /logout/cas  -->

    <beans:bean id="requestSingleLogoutFilter" class="org.springframework.security.web.authentication.logout.LogoutFilter">

        <beans:constructor-arg value="http://localhost:9100/cas/logout?service=http://localhost:9103"/>

        <beans:constructor-arg>

            <beans:bean class="org.springframework.security.web.authentication.logout.SecurityContextLogoutHandler"/>

        </beans:constructor-arg>

        <beans:property name="filterProcessesUrl" value="/logout/cas"/>

    </beans:bean>

    <!-- 单点登出  结束 -->

</beans:beans>
2、页面显示用户名
(1)pinyougou-user-web创建LoginController.java
import org.springframework.security.core.context.SecurityContextHolder;

import org.springframework.web.bind.annotation.RequestMapping;

import org.springframework.web.bind.annotation.RestController;

import java.util.HashMap;

import java.util.Map;

@RestController

@RequestMapping("/login")

public class LoginController {

    @RequestMapping("/name")

    public Map showName(){

        String name = SecurityContextHolder.getContext().getAuthentication().getName();

        Map map=new HashMap();

        map.put("loginName", name);

        return map;

    }

}
(2)创建loginService.js
//服务层

app.service('loginService',function($http){

    //读取列表数据绑定到表单中

    this.showName=function(){

        return $http.get('../login/name.do');

    }

});
(3)创建indexController.js
//首页控制器

app.controller('indexController',function($scope,loginService){

    $scope.showName=function(){

            loginService.showName().success(

                    function(response){

                        $scope.loginName=response.loginName;

                    }

            );

    }

});
(4)修改home-index.html 引入js
<scripttype="text/javascript"src="plugins/angularjs/angular.min.js"></script>

    <scripttype="text/javascript"src="js/base.js"></script>

    <scripttype="text/javascript"src="js/service/loginService.js"></script>

    <scripttype="text/javascript"src="js/controller/indexController.js"></script>
指令,调用方法查询登陆名
<bodyng-app="pinyougou"ng-controller="indexController"ng-init="showName()">
显示用户名
<spanclass="name">{{loginName}}</span>
3、退出登录
spring-security.xml设置退出登录后的跳转地址
<!-- 经过此配置,当用户在地址栏输入本地工程 /logout/cas  -->

    <beans:bean id="requestSingleLogoutFilter" class="org.springframework.security.web.authentication.logout.LogoutFilter">

        <beans:constructor-arg value="http://localhost:9100/cas/logout?service=http://localhost:9103"/>

        <beans:constructor-arg>

            <beans:bean class="org.springframework.security.web.authentication.logout.SecurityContextLogoutHandler"/>

        </beans:constructor-arg>

        <beans:property name="filterProcessesUrl" value="/logout/cas"/>

    </beans:bean>
页面
<span class="safe"><a href="logout/cas">退出登录 </a></span>
品优购商城项目(六)CAS客户端与SpringSecurity集成的更多相关文章
- 品优购商城项目(二)mybatis分页插件
品优购商城项目第二天,使用mybatis分页插件实现分页.主要实现的是 SSM整合mybatis分页. 一.引用mybatis分页插件 SqlMapConfig.xml <?xml versio ...
- 品优购商城项目(三)安全框架SpringSecurity
品优购商城项目第三阶段 1.springSecurity的基本用法与shiro类似. 2.BCrypt加密算法比MD5更加智能和安全,能自动加盐再加密,生成的密码是60位比md5的32位更占空间(可以 ...
- 品优购商城项目(二)AngularJS、自动代码生成器、select2下拉多选框
品优购商城想项目第二阶段 AngularJS.自动代码生成器.select2下拉多选框 完成了课程第三天.第四天的的任务. 1.学习了AngularJs前端的mvc分层思想,js部分分成control ...
- 品优购商城项目(一)mybatis逆向工程
第一阶段 dubboX和mybatis逆向工程 用了四天时间才完成品优购项目前两天的任务. 1.其中主要遇到的坑就是zookeeper服务消费者无法调用的问题.造成这个问题的主要原因就是忽略了dubb ...
- 品优购商城项目(五)消息中间件 ActiveMQ
消息中间件用于降低各个项目模块的耦合,适用于不需要等待返回消息才能进入下一个业务环节的模块,以及实时要求性不高的业务模块. 一.JMS JMS(Java Messaging Service)是Java ...
- CAS客户端与SpringSecurity集成
4. CAS客户端与SpringSecurity集成 4.1 Spring Security测试工程搭建 (1)建立Maven项目casclient_demo3 ,引入spring依赖和spring ...
- 品优购(IDEA版)-第一天
# 品优购(IDEA版)-第一天 品优购IDEA版应该是2019年的新项目.目前只有视频.资料其他都还是旧的. ## 1.学习目标 1:了解电商行业特点以及理解电商的模式 2:了解整体品优购的架构特点 ...
- 项目二:品优购 第二天 AngularJS使用 brand商品页面的增删改查
品优购电商系统开发 第2章 品牌管理 传智播客.黑马程序员 1.前端框架AngularJS入门 1.1 AngularJS简介 AngularJS 诞生于2009年,由Misko Hevery 等人 ...
- 使用IDEA实现品优购项目搭建
转发自 https://www.jianshu.com/p/4710a87b65fa 使用idea实现品优购项目搭建 1.使用idea实现品优购项目搭建 本篇文章只针对品优购第一天使用 IDEA 搭建 ...
随机推荐
- php中的Throwables和ParseError
<?php //Throwables //ParseError try { include 'config.php'; } catch (\ParseError $e) { echo 'Pars ...
- web万维网 -- 基础概念
Web(万维网World Wide Web的简称)是个包罗万象的万花筒,不同的人从不同的角度观察,对于Web究竟是什么会得出大不相同的观点. 百科:web(World Wide Web)即全球广域网, ...
- 浏览器绘图模型的解释:renderObject、renderlayer
先来看这幅经典的图: https://juejin.im/entry/590801780ce46300617c89b8 renderObject相当于iOS 的view renderlayer完成了一 ...
- LeetCode 286. Walls and Gates
原题链接在这里:https://leetcode.com/problems/walls-and-gates/ 题目: You are given a m x n 2D grid initialized ...
- REdis一致性方案探讨
REdis功能强大众所周知,能够大幅简化开发和提供大并发高性能,但截止到REdis-5.0.5仍然存在如下几大问题: 一致性问题 这是由于REdis的主从复制采用的是异步复制,异常时可能发生主节点的数 ...
- 小胖的奇偶(Viojs1112)题解
原题: 题目描述 huyichen和xuzhenyi在玩一个游戏:他写一个由0和1组成的序列. huyichen选其中的一段(比如第3位到第5位),问他这段里面有奇数个1 还是偶数个1.xuzheny ...
- 洛谷 P1396
P1396 传送门 扯些题外话 讲真的我刚看到这个题的时候真的傻fufu的..... 大体题意 找出从s走到t的拥挤度最大值最小.. 思路 说最大值最小可能就会有dalao开始二分了. 想我这种的蒟蒻 ...
- 字符串Hash学习笔记
[toc] # 以下内容作废,太多错误了,等我有时间重写 说一下什么是Hash,说白了就是把一大坨字符用一些神奇的数来表示,可以说是把字符加密了. 简单一点就是一个像函数一样的东西,你放进去一个值,它 ...
- CSS注册页面案例
<!DOCTYPE html> <html lang="en"> <head> <meta charset="UTF-8&quo ...
- yum 安装,可以list,但是无法安装Error downloading packages: 。。。。 No such file or directory
yum 安装,可以list,但是无法安装Error downloading packages: .... No such file or directory # yum install nano Lo ...