学习Spring——两个你熟悉的不能再熟悉的场景使用
最近公众号受邀获取了留言和赠送模板的权限,小开心(欢迎去公众号JackieZheng围观)。
我们大致的了解了Spring这个框架对于依赖注入的使用和诠释可谓是淋漓尽致。因为有了Spring的这个IOC也好DI也好,我们把上街买菜的事情变成了菜主动送上门的活,这样的“生活方式”大大的提高了我们对于Spring框架的用户体验。
今天主要说两件事,想必凡是稍稍接触过Spring框架开发的对于这些场景肯定都是眼熟透了——Spring如何使用多个外部属性文件以及基于注解方式配置Bean。
1. Spring使用多个外部属性文件
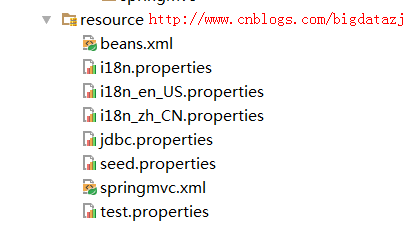
这个截图并不稀奇,甚至完全看不出什么逻辑,下面分别贴出各个配置文件的内容
beans.xml
...

<bean id="dataSource" class="org.apache.commons.dbcp.BasicDataSource" destroy-method="close">

    <property name="driverClassName" value="${jdbc.driver}"/>

    <property name="url" value="${jdbc.url}"/>

    <property name="username" value="${jdbc.username}"/>

    <property name="password" value="${jdbc.password}"/>

</bean>

...
jdbc.properites
jdbc.driver=com.mysql.jdbc.Driver

jdbc.url=jdbc:mysql://localhost:3306/shake?useUnicode=true&characterEncoding=utf-8

jdbc.username=root

jdbc.password=admin
没错,这就是你绝对见过的,在Spring中最常见对于数据源的配置
- 你完全可以把jdbc.driver的值写在beans.xml文件中,但是对于大型项目,某一天你需要该其中的配置,那就必须从庞大而臃肿的beans.xml文件找到你要修改的位置,并且胆战心惊的确认是不是还有遗漏的地方。
- 你完全可以把这些针对性的配置提取到一个外部属性文件当中。写成jdbc.properties的模样,这样修改起来,省时省心省力。
- 光有以上的配置还是无法工作的,因为spring的beans.xml文件并不知道该去哪里查找相应的变量,并为变量赋值。所以还需要在beans.xml中添加如下标签<context:property-placeholder location="jdbc.properties"/>
测试代码
写上如下的测试方法,可以用来验证上述配置是否正确
@Test

public void testJDBCConfiguration() throws SQLException {

    ApplicationContext act=new ClassPathXmlApplicationContext("beans.xml");

    DataSource dataSource = (DataSource) act.getBean("dataSource");

    System.out.println(dataSource.getConnection());

}

显然我们得到了理想的结果
那么问题来了,如果我们需要使用多个外部属性文件,怎么做?
直接按照上面的套路再拷贝一份试试
beans.xml
...

<context:property-placeholder location="test.properties"/>

<bean id="dataSource1" class="org.apache.commons.dbcp.BasicDataSource" destroy-method="close">

    <property name="driverClassName" value="${test.driver}"/>

    <property name="url" value="${test.url}"/>

    <property name="username" value="${test.username}"/>

    <property name="password" value="${test.password}"/>

</bean>

...
test.properties
test.driver = com.mysql.jdbc.Driver

test.url = jdbc:mysql://localhost:3306/shake

test.username=root

test.password=admin
测试方法
@Test

public void testJDBCConfiguration() throws SQLException {

    ApplicationContext act=new ClassPathXmlApplicationContext("beans.xml");

    DataSource dataSource = (DataSource) act.getBean("dataSource1");

    System.out.println(dataSource.getConnection());

}
以下是报错信息
org.springframework.beans.factory.BeanDefinitionStoreException: Invalid bean definition with name 'dataSource1' defined in class path resource [beans.xml]: Could not resolve placeholder 'test.driver' in string value "${test.driver}"; nested exception is java.lang.IllegalArgumentException: Could not resolve placeholder 'test.driver' in string value "${test.driver}"

	at org.springframework.beans.factory.config.PlaceholderConfigurerSupport.doProcessProperties(PlaceholderConfigurerSupport.java:211)

	at org.springframework.beans.factory.config.PropertyPlaceholderConfigurer.processProperties(PropertyPlaceholderConfigurer.java:223)

	at org.springframework.beans.factory.config.PropertyResourceConfigurer.postProcessBeanFactory(PropertyResourceConfigurer.java:86)

	at ...org.springframework.context.support.ClassPathXmlApplicationContext.<init>(ClassPathXmlApplicationContext.java:83)

	at com.jackie.springmvc.TestCollections.testJDBCConfiguration(TestCollections.java:186)

	at sun.reflect.NativeMethodAccessorImpl.invoke0(Native Method)

	at sun.reflect.NativeMethodAccessorImpl.invoke(NativeMethodAccessorImpl.java:62)

	at sun.reflect.DelegatingMethodAccessorImpl.invoke(DelegatingMethodAccessorImpl.java:43)

	at org.junit.runners.model.FrameworkMethod$1.runReflectiveCall(FrameworkMethod.java:47)

	at org.junit.internal.runners.model.ReflectiveCallable.run(ReflectiveCallable.java:12)

	at org.junit.runners.model.FrameworkMethod.invokeExplosively(FrameworkMethod.java:44)

	at org.junit.internal.runners.statements.InvokeMethod.evaluate(InvokeMethod.java:17)

	at org.junit.runners.ParentRunner.runLeaf(ParentRunner.java:271)

	at org.junit.runners.BlockJUnit4ClassRunner.runChild(BlockJUnit4ClassRunner.java:70)

	at org.junit.runners.BlockJUnit4ClassRunner.runChild(BlockJUnit4ClassRunner.java:50)

	at org.junit.runners.ParentRunner$3.run(ParentRunner.java:238)

	at org.junit.runners.ParentRunner$1.schedule(ParentRunner.java:63)

	at org.junit.runners.ParentRunner.runChildren(ParentRunner.java:236)

	at org.junit.runners.ParentRunner.access$000(ParentRunner.java:53)

	at org.junit.runners.ParentRunner$2.evaluate(ParentRunner.java:229)

	at org.junit.runners.ParentRunner.run(ParentRunner.java:309)

	at org.junit.runner.JUnitCore.run(JUnitCore.java:160)

	at com.intellij.junit4.JUnit4IdeaTestRunner.startRunnerWithArgs(JUnit4IdeaTestRunner.java:74)

	at com.intellij.rt.execution.junit.JUnitStarter.prepareStreamsAndStart(JUnitStarter.java:211)

	at com.intellij.rt.execution.junit.JUnitStarter.main(JUnitStarter.java:67)

	at sun.reflect.NativeMethodAccessorImpl.invoke0(Native Method)

	at sun.reflect.NativeMethodAccessorImpl.invoke(NativeMethodAccessorImpl.java:62)

	at com.intellij.rt.execution.application.AppMain.main(AppMain.java:134)

Caused by: java.lang.IllegalArgumentException: Could not resolve placeholder 'test.driver' in string value "${test.driver}"

	at org.springframework.util.PropertyPlaceholderHelper.parseStringValue(PropertyPlaceholderHelper.java:174)

	at ...

	at org.springframework.beans.factory.config.PlaceholderConfigurerSupport.doProcessProperties(PlaceholderConfigurerSupport.java:208)

	... 35 more
报错的主要原因来源于不识别test.driver这个变量。
究其原因是因为beans.xml对于<context:property-placeholder location="jdbc.properties"/>这样的标签,如果有多个这样的定义,只会生效第一个,后面的都会忽略,这就造成了spring没有办法找到test.driver是在哪个文件中定义的。
解决方法
采用通配符的方式,只定义一次,但是可以匹配多个外部属性文件
<context:property-placeholder location="classpath*:*.properties"/>
这样就能够正常运行上面的测试方法。
2.基于注解的方式配置Bean
与之经常同时出场的还有基于XML的方式配置Bean,我想大家都见过或了解autowired=byName和autowired=byType。这两种都是基于XML方式对于Bean采用基于名字和基于类型进行匹配的。
但是这种方式有他的不足之处,所以在实际的项目中应用的不多。
- 在 Bean 配置文件里设置 autowire 属性进行自动装配将会装配 Bean 的所有属性. 然而, 若只希望装配个别属性时, autowire 属性就不够灵活了.
- autowire 属性要么根据类型自动装配, 要么根据名称自动装配, 不能两者兼而有之.
- 一般情况下,在实际的项目中很少使用自动装配功能,因为和自动装配功能所带来的好处比起来,明确清晰的配置文档更有说服力一些
所以你看到以及用到比较多的应该是基于注解的方式配置Bean
beans.xml
<?xml version="1.0" encoding="UTF-8"?>

<beans xmlns="http://www.springframework.org/schema/beans"

	xmlns:xsi="http://www.w3.org/2001/XMLSchema-instance"

	xmlns:context="http://www.springframework.org/schema/context"

	xsi:schemaLocation="http://www.springframework.org/schema/beans http://www.springframework.org/schema/beans/spring-beans.xsd

		http://www.springframework.org/schema/context http://www.springframework.org/schema/context/spring-context-4.0.xsd">

	<context:component-scan base-package="com.jackie.spring.annotation.generic"></context:component-scan>

</beans>
该spring配置文件及其简洁,我们甚至看不到声明bean,只有Context:component-scang该标签意为spring会扫描com.jackie.spring.annotation.generic包下面的所有相关类。相关类是指具有以下字样的注解:
@Component: 基本注解, 标识了一个受 Spring 管理的组件
@Respository: 标识持久层组件
@Service: 标识服务层(业务层)组件
@Controller: 标识表现层组件
标注了如上注解的类都是受Spring管辖的。
同时我们还需要如下几个类
BaseBao.java
public class BaseDao<T> {

	public void save(T entity){

		System.out.println("Save:" + entity);

	}

}
BaseService.java
public class BaseService<T> {

	private BaseDao<T> dao;

	public void addNew(T entity){

		System.out.println("addNew by " + dao);

		dao.save(entity);

	}

}
UserBao.java
@Repository

public class UserDao extends BaseDao<User>{

}
UserService.java
@Service

public class UserService extends BaseService<User>{

}
Main.java
public class Main {

	public static void main(String[] args) {

		ApplicationContext ctx = new ClassPathXmlApplicationContext("beans.xml");

		UserService userService = (UserService) ctx.getBean("userService");

		userService.addNew(new User());

	}

}
1. 这里BaseBao和UserBao以及BaseService和UserService有一个简单的继承关系。
2. UserBao类上加上了注解@Repository表示其为持久层的bean,UserService类上加上了注解@Service表示其为业务层的bean
3. 这时候执行main方法,会报错
Exception in thread "main" addNew by null
java.lang.NullPointerException
at com.jackie.spring.annotation.generic.BaseService.addNew(BaseService.java:12)
at com.jackie.spring.annotation.generic.Main.main(Main.java:13)
原因很简单,BaseService中不识别BaseBao这个bean,因为我们并没有声明过这个类,也没有注入,这时候需要在该类前加上注解
@Autowired

private BaseDao<T> dao;
加上@Autowired表示Spring装配了该bean,从而就不会报空指针异常了。最终执行结果:
addNew by com.jackie.spring.annotation.generic.UserDao@32d2fa64

Save:com.jackie.spring.annotation.generic.User@1d8d30f7
4. Spring 还支持 @Resource 和 @Inject 注解,这两个注解和 @Autowired 注解的功用类似
至此,我们熟悉了不能再熟悉的两大场景
- Spring如何调用外部属性文件
- Spring如何调用多个外部属性文件
- Spring基于注解的方式注入bean的使用场景(反正我是一直在用,你们呢???)
如果您觉得阅读本文对您有帮助,请点一下“推荐”按钮,您的“推荐”将是我最大的写作动力!如果您想持续关注我的文章,请扫描二维码,关注JackieZheng的微信公众号,我会将我的文章推送给您,并和您一起分享我日常阅读过的优质文章。

友情赞助
如果你觉得博主的文章对你那么一点小帮助,恰巧你又有想打赏博主的小冲动,那么事不宜迟,赶紧扫一扫,小额地赞助下,攒个奶粉钱,也是让博主有动力继续努力,写出更好的文章^^。
1. 支付宝 2. 微信


学习Spring——两个你熟悉的不能再熟悉的场景使用的更多相关文章
- 我该如何学习spring源码以及解析bean定义的注册
如何学习spring源码 前言 本文属于spring源码解析的系列文章之一,文章主要是介绍如何学习spring的源码,希望能够最大限度的帮助到有需要的人.文章总体难度不大,但比较繁重,学习时一定要耐住 ...
- 学习Spring——依赖注入
前言: 又开始动笔开了“学习Spring”系列的头…… 其实一开始写“学习SpringMVC”的几篇文章是出于想系统的了解下Spring以及SpringMVC,因为平时在公司中虽然每天都在使用Spri ...
- 菜鸟学习Spring——60s配置XML方法实现简单AOP
一.概述. 上一篇博客讲述了用注解的形式实现AOP现在讲述另外一种AOP实现的方式利用XML来实现AOP. 二.代码演示. 准备工作参照上一篇博客<菜鸟学习Spring--60s使用annota ...
- 深入浅出学习Spring框架(四):IoC和AOP的应用——事务配置
在前文 深入浅出学习Spring框架(一):通过Demo阐述IoC和DI的优势所在. 深入浅出学习Spring框架(三):AOP 详解 分别介绍了Spring的核心功能——IoC和AOP,光讲知识远远 ...
- 学习Spring Boot:(二十六)使用 RabbitMQ 消息队列
前言 前面学习了 RabbitMQ 基础,现在主要记录下学习 Spring Boot 整合 RabbitMQ ,调用它的 API ,以及中间使用的相关功能的记录. 相关的可以去我的博客/RabbitM ...
- 跟着刚哥学习Spring框架--AOP(五)
AOP AOP(Aspect Oriented Programming),即面向切面编程,可以说是OOP(Object Oriented Programming,面向对象编程)的补充和完善.OOP引入 ...
- 跟着刚哥学习Spring框架--通过XML方式配置Bean(三)
Spring配置Bean有两种形式(XML和注解) 今天我们学习通过XML方式配置Bean 1. Bean的配置方式 通过全类名(反射)的方式 √ id:标识容器中的bean.id唯一. √ cl ...
- 跟着刚哥学习Spring框架--Spring容器(二)
Spring容器 启动Spring容器(实例化容器) -- IOC容器读取Bean配置创建Bean实例之前,必须对它进行实例化(加载启动),这样才可以从容器中获取Bean的实例并使用. Bean是S ...
- 【转】Spring学习---Spring IoC容器的核心原理
[原文] Spring的两个核心概念:IoC和AOP的雏形,Spring的历史变迁和如今的生态帝国. IoC和DI的基本概念 IoC(控制反转,英文含义:Inverse of Control)是Spr ...
随机推荐
- Travis CI用来持续集成你的项目
这里持续集成基于GitHub搭建的博客为项目 工具: zqz@ubuntu:~$ node --version v4.2.6 zqz@ubuntu:~$ git --version git versi ...
- 闰秒导致MySQL服务器的CPU sys过高
今天,有个哥们碰到一个问题,他有一个从库,只要是启动MySQL,CPU使用率就非常高,其中sys占比也比较高,具体可见下图. 注意:他的生产环境是物理机,单个CPU,4个Core. 于是,他抓取了CP ...
- 关于全局ID,雪花(snowflake)算法的说明
上次简单的说一下:http://www.cnblogs.com/dunitian/p/6041745.html#uid C#版本的国外朋友已经封装了,大家可以去看看:https://github.co ...
- 在 SAE 上部署 ThinkPHP 5.0 RC4
缘起 SAE 和其他的平台有些不同,不能在服务器上运行 Composer 来安装各种包,必须把源码都提交上去.一般的做法,可能是直接把源码的所有文件复制到目录中,添加到版本库.不过,这样就失去了与上游 ...
- 如何利用ETW(Event Tracing for Windows)记录日志
ETW是Event Tracing for Windows的简称,它是Windows提供的原生的事件跟踪日志系统.由于采用内核(Kernel)层面的缓冲和日志记录机制,所以ETW提供了一种非常高效的事 ...
- angular2系列教程(八)In-memory web api、HTTP服务、依赖注入、Observable
大家好,今天我们要讲是angular2的http功能模块,这个功能模块的代码不在angular2里面,需要我们另外引入: index.html <script src="lib/htt ...
- Android公共title的应用
我们在开发Android应用中,写每一个页面的时候都会建一个title,不是写一个LinearLayout就是写一个RelativeLayout,久而久之就会觉得这样繁琐,尤其几个页面是只是标题不一样 ...
- 【Machine Learning】Python开发工具:Anaconda+Sublime
Python开发工具:Anaconda+Sublime 作者:白宁超 2016年12月23日21:24:51 摘要:随着机器学习和深度学习的热潮,各种图书层出不穷.然而多数是基础理论知识介绍,缺乏实现 ...
- obj.style.z-index的正确写法
obj.style.z-index的正确写法 今天发现obj.style.z-index在js里面报错,后来才知道在js里应该把含"-"的字符写成驼峰式,例如obj.style.z ...
- C# 泛型
C# 泛型 1.定义泛型类 在类定义中包含尖括号语法,即可创建泛型类: class MyGenericClass<T> { //Add code } 其中T可以遵循C#命名规则的任意字符. ...