WebComponent魔法堂:深究Custom Element 之 面向痛点编程
前言
最近加入到新项目组负责前端技术预研和选型,一直偏向于以Polymer为代表的WebComponent技术线,于是查阅各类资料想说服老大向这方面靠,最后得到的结果是:"资料99%是英语无所谓,最重要是UI/UX上符合要求,技术的事你说了算。",于是我只好乖乖地去学UI/UX设计的事,木有设计师撑腰的前端是苦逼的:(嘈吐一地后,还是挤点时间总结一下WebComponent的内容吧,为以后作培训材料作点准备。
浮在水面上的痛
组件噪音太多了!
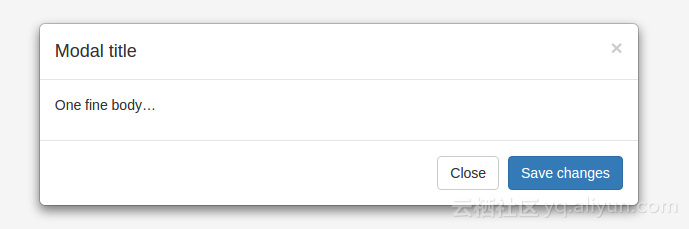
在使用Bootstrap的Modal组件时,我们不免要Ctrl+c然后Ctrl+v下面一堆代码
<div class="modal fade" tabindex="-1" role="dialog">
<div class="modal-dialog" role="document">
<div class="modal-content">
<div class="modal-header">
<button type="button" class="close" data-dismiss="modal" aria-label="Close"><span aria-hidden="true">×</span></button>
<h4 class="modal-title">Modal title</h4>
</div>
<div class="modal-body">
<p>One fine body…</p>
</div>
<div class="modal-footer">
<button type="button" class="btn btn-default" data-dismiss="modal">Close</button>
<button type="button" class="btn btn-primary">Save changes</button>
</div>
</div><!-- /.modal-content -->
</div><!-- /.modal-dialog -->
</div><!-- /.modal -->
一个不留神误删了一个结束标签,或拼错了某个class或属性那就悲催了,此时一个语法高亮、提供语法检查的编辑器是如此重要啊!但是我其实只想配置个Modal而已。
由于元素信息由标签标识符,元素特性和树层级结构组成,所以排除噪音后提取的核心配置信息应该如下(YAML语法描述):
dialog:

  modal: true

  children:

    header:

      title: Modal title

      closable: true

    body:

      children:

        p:

          textContent: One fine body…

    footer

      children:

        button:

          type: close

          textContent: Close

        button:

          type: submit

          textContent: Save changes
转换成HTML就是
<dialog modal>
<dialog-header title="Modal title" closable></dialog-header>
<dialog-body>
<p>One fine body…</p>
</dialog-body>
<dialog-footer>
<dialog-btn type="close">Close</dialog-btn>
<dialog-btn type="submit">Save changes</dialog-btn>
</dialog-footer>
</dialog>
而像Alert甚至可以极致到这样
<alert>是不是很简单啊?</alert>
可惜浏览器木有提供<alert></alert>,那怎么办呢?
手打牛丸模式1
既然浏览器木有提供,那我们自己手写一个吧!
<script>
'use strict'
class Alert{
constructor(el = document.createElement('ALERT')){
this.el = el
const raw = el.innerHTML
el.dataset.resolved = ''
el.innerHTML = `<div class="alert alert-warning alert-dismissible fade in">
<button type="button" class="close" aria-label="Close">
<span aria-hidden="true">×</span>
</button>
${raw}
</div>`
el.querySelector('button.close').addEventListener('click', _ => this.close())
}
close(){
this.el.style.display = 'none'
}
show(){
this.el.style.display = 'block'
}
}
function registerElement(tagName, ctorFactory){
[...document.querySelectorAll(`${tagName}:not([data-resolved])`)].forEach(ctorFactory)
}
function registerElements(ctorFactories){
for(let k in ctorFactories){
registerElement(k, ctorFactories[k])
}
}
清爽一下!
<alert>舒爽多了!</alert>

<script>

registerElements({alert: el => new Alert(el)})

</script>
复盘找问题
虽然表面上实现了需求,但存在2个明显的缺陷
- 不完整的元素实例化方式
原生元素有2种实例化方式
a. 声明式
<!-- 由浏览器自动完成 元素实例化 和 添加到DOM树 两个步骤 -->

<input type="text">
b. 命令式
// 元素实例化

const input = new HTMLInputElement() // 或者 document.createElement('INPUT')

input.type = 'text'

// 添加到DOM树

document.querySelector('#mount-node').appendChild(input)
由于声明式注重What to do,而命令式注重How to do,并且我们操作的是DOM,所以采用声明式的HTML标签比命令式的JavaScript会来得简洁平滑。但当我们需要动态实例化元素时,命令式则是最佳的选择。于是我们勉强可以这样
// 元素实例化

const myAlert = new Alert()

// 添加到DOM树

document.querySelector('#mount-node').appendChild(myAlert.el)

/*

由于Alert无法正常实现HTMLElement和Node接口,因此无法实现

document.querySelector('#mount-node').appendChild(myAlert)

myAlert和myAlert.el的差别在于前者的myAlert是元素本身,而后者则是元素句柄,其实没有明确哪种更好,只是原生方法都是支持操作元素本身,一下来个不一致的句柄不蒙才怪了

*/
即使你能忍受上述的代码,那通过innerHTML实现半声明式的动态元素实例化,那又怎么玩呢?是再手动调用一下registerElement('alert', el => new Alert(el))吗?
更别想通过document.createElement来创建自定义元素了。
2. 有生命无周期
元素的生命从实例化那刻开始,然后经历如添加到DOM树、从DOM树移除等阶段,而想要更全面有效地管理元素的话,那么捕获各阶段并完成相应的处理则是唯一有效的途径了。
生命周期很重要
当定义一个新元素时,有3件事件是必须考虑的:
- 元素自闭合: 元素自身信息的自包含,并且不受外部上下文环境的影响;
- 元素的生命周期: 通过监控元素的生命周期,从而实现不同阶段完成不同任务的目录;
- 元素间的数据交换: 采用property in, event out的方式与外部上下文环境通信,从而与其他元素进行通信。
元素自闭合貌似无望了,下面我们试试监听元素的生命周期吧!
手打牛丸模式2
通过constructor我们能监听元素的创建阶段,但后续的各个阶段呢?可幸的是可以通过MutationObserver监听document.body来实现:)
最终得到的如下版本:
'use strict'
class Alert{
constructor(el = document.createElement('ALERT')){
this.el = el
this.el.fireConnected = () => { this.connectedCallback && this.connectedCallback() }
this.el.fireDisconnected = () => { this.disconnectedCallback && this.disconnectedCallback() }
this.el.fireAttributeChanged = (attrName, oldVal, newVal) => { this.attributeChangedCallback && this.attributeChangedCallback(attrName, oldVal, newVal) }
const raw = el.innerHTML
el.dataset.resolved = ''
el.innerHTML = `<div class="alert alert-warning alert-dismissible fade in">
<button type="button" class="close" aria-label="Close">
<span aria-hidden="true">×</span>
</button>
${raw}
</div>`
el.querySelector('button.close').addEventListener('click', _ => this.close())
}
close(){
this.el.style.display = 'none'
}
show(){
this.el.style.display = 'block'
}
connectedCallback(){
console.log('connectedCallback')
}
disconnectedCallback(){
console.log('disconnectedCallback')
}
attributeChangedCallback(attrName, oldVal, newVal){
console.log('attributeChangedCallback')
}
}
function registerElement(tagName, ctorFactory){
[...document.querySelectorAll(`${tagName}:not([data-resolved])`)].forEach(ctorFactory)
}
function registerElements(ctorFactories){
for(let k in ctorFactories){
registerElement(k, ctorFactories[k])
}
}
const observer = new MutationObserver(records => {
records.forEach(record => {
if (record.addedNodes.length && record.target.hasAttribute('data-resolved')){
// connected
record.target.fireConnected()
}
else if (record.removedNodes.length){
// disconnected
const node = [...record.removedNodes].find(node => node.hasAttribute('data-resolved'))
node && node.fireDisconnected()
}
else if ('attributes' === record.type && record.target.hasAttribute('data-resolved')){
// attribute changed
record.target.fireAttributeChanged(record.attributeName, record.oldValue, record.target.getAttribute(record.attributeName))
}
})
})
observer.observe(document.body, {attributes: true, childList: true, subtree: true})
registerElement('alert', el => new Alert(el))
总结
千辛万苦撸了个基本不可用的自定义元素模式,但通过代码我们进一步了解到对于自定义元素我们需要以下基本特性:
- 自定义元素可通过原有的方式实例化(
<custom-element></custom-element>,new CustomElement()和document.createElement('CUSTOM-ELEMENT')) - 可通过原有的方法操作自定义元素实例(如
document.body.appendChild等) - 能监听元素的生命周期
下一篇《WebComponent魔法堂:深究Custom Element 之 标准构建》中,我们将一同探究H5标准中Custom Element API,并利用它来实现满足上述特性的自定义元素:)
尊重原创,转载请注明来自: http://www.cnblogs.com/fsjohnhuang/p/5918677.html _肥仔John
感谢
Custom ELement
Custom ELement v1
MutationObserver
WebComponent魔法堂:深究Custom Element 之 面向痛点编程的更多相关文章
- WebComponent魔法堂:深究Custom Element 之 标准构建
前言 通过<WebComponent魔法堂:深究Custom Element 之 面向痛点编程>,我们明白到其实Custom Element并不是什么新东西,我们甚至可以在IE5.5上定 ...
- WebComponent魔法堂:深究Custom Element 之 从过去看现在
前言 说起Custom Element那必然会想起那个相似而又以失败告终的HTML Component.HTML Component是在IE5开始引入的新技术,用于对原生元素作功能"增强& ...
- CSS魔法堂:深入理解line-height和vertical-align
前言 一直听说line-height是指两行文本的基线间的距离,然后又说行高等于行距,最近还听说有个叫行间距的家伙,@张鑫旭还说line-height和vertical-align基情四射,贵圈真乱啊 ...
- JS魔法堂:属性、特性,傻傻分不清楚
一.前言 或许你和我一样都曾经被下面的代码所困扰 var el = document.getElementById('dummy'); el.hello = "test"; con ...
- CSS魔法堂:"那不是bug,是你不懂我!" by inline-block
前言 每当来个需要既要水平排版又要设置固定高宽时,我就会想起display:inline-block,还有为了支持IE5.5/6/7的hack*display:inline;*zoom:1;.然后发 ...
- CSS魔法堂:小结一下Box Model与Positioning Scheme
前言 对于Box Model和Positioning Scheme中3种定位模式的细节,已经通过以下几篇文章记录了我对其的理解和思考. <CSS魔法堂:重新认识Box Model.IFC.B ...
- HTML5魔法堂:全面理解Drag & Drop API
一.前言 在HTML4的时代,各前端工程师为了实现拖拽功能可说是煞费苦心,初听HTML5的DnD API觉得那些痛苦的日子将一去不复返,但事实又是怎样的呢?下面我们一起来看看DnD API的真面 ...
- CSS魔法堂:Absolute Positioning就这个样
前言 当我们以position:absolute之名让元素脱离Normal flow的控制后,以为通过left和top属性值即可让元素得以无限的自由时,却发现还有各种神秘的力量左右着它的来去,于是我们 ...
- CSS魔法堂:你真的懂text-align吗?
前言 也许提及text-align你会想起水平居中,但除了这个你对它还有多少了解呢?本篇打算和大家一起来跟text-align来一次负距离的交往,你准备好了吗? text-align属性详解 The ...
随机推荐
- UWP开发之Template10实践二:拍照功能你合理使用了吗?(TempState临时目录问题)
最近在忙Asp.Net MVC开发一直没空更新UWP这块,不过有时间的话还是需要将自己的经验和大家分享下,以求共同进步. 在上章[UWP开发之Template10实践:本地文件与照相机文件操作的MVV ...
- html5的web存储
在html5标准之前,web存储信息需要cookie来完成,但是cookie不适合大量数据存储.因为需要等待服务器响应,所以速度慢/效率低. 本地存储的特点: localstorage是仅存储在用户的 ...
- 套用JQuery EasyUI列表显示数据、分页、查询
声明,本博客从csdn搬到cnblogs博客园了,以前的csdn不再更新,朋友们可以到这儿来找我的文章,更多的文章会发表,谢谢关注! 有时候闲的无聊,看到extjs那么肥大,真想把自己的项目改了,最近 ...
- ASP.NET Core 中文文档 第四章 MVC(3.9)视图组件
作者: Rick Anderson 翻译: 娄宇(Lyrics) 校对: 高嵩 章节: 介绍视图组件 创建视图组件 调用视图组件 演练:创建一个简单的视图组件 附加的资源 查看或下载示例代码 介绍视图 ...
- [原创]java使用JDBC向MySQL数据库批次插入10W条数据测试效率
使用JDBC连接MySQL数据库进行数据插入的时候,特别是大批量数据连续插入(100000),如何提高效率呢?在JDBC编程接口中Statement 有两个方法特别值得注意:通过使用addBatch( ...
- 排序算法----调用库函数qsort进行快速排序
功 能: 快速排序 头文件:stdlib.h 用 法: void qsort(void *base,int nelem,int width,int (*fcmp)(const void *,const ...
- Collections
2017-01-06 22:50:43 数据结构和算法 <如何学习数据结构?>:https://www.zhihu.com/question/21318658 <How do I ...
- SpringMVC初始化参数绑定--日期格式
一.初始化参数绑定[一种日期格式] 配置步骤: ①:在applicationcontext.xml中只需要配置一个包扫描器即可 <!-- 包扫描器 --> <context:comp ...
- 【AutoMapper官方文档】DTO与Domin Model相互转换(下)
写在前面 AutoMapper目录: [AutoMapper官方文档]DTO与Domin Model相互转换(上) [AutoMapper官方文档]DTO与Domin Model相互转换(中) [Au ...
- 【腾讯Bugly干货分享】移动App入侵与逆向破解技术-iOS篇
本文来自于腾讯bugly开发者社区,非经作者同意,请勿转载,原文地址:http://dev.qq.com/topic/577e0acc896e9ebb6865f321 如果您有耐心看完这篇文章,您将懂 ...