微信小程序富文本编辑,Thinkphp5.1
内容很简单,代码做了注释可以看一下
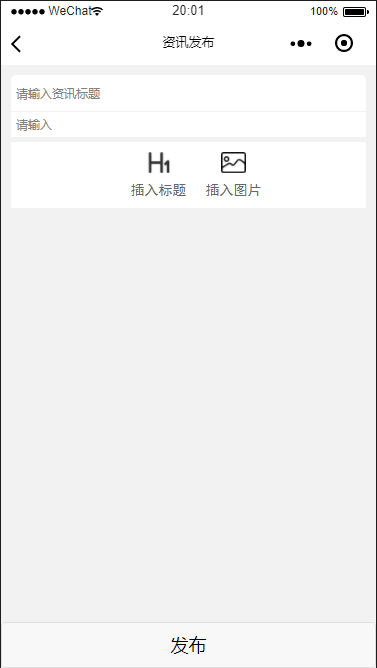
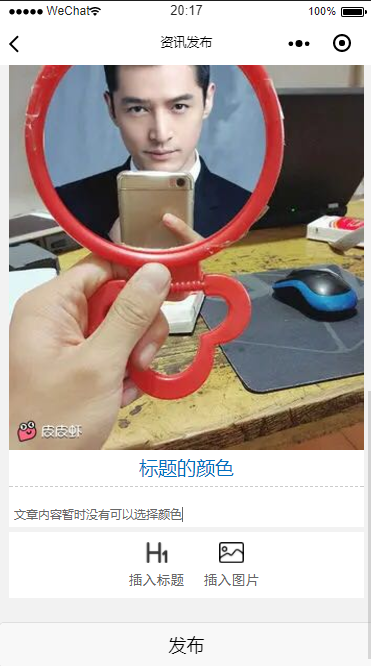
主要是把 文本 标题 标题颜色 图片 赋值到数组内,
举例:


小程序代码 直接copy可用。
.wxml
<form bindsubmit='formsubmit'>
  <view class='main'>
    <input class='title' name="title" placeholder="请输入资讯标题" value=''></input>
    <view class='border'>
      <textarea placeholder="请输入" class='textarea' auto-height='true' bindblur="initialization" name="describe" maxlength="100000" value='{{initialization}}' />
      <block wx:for="{{controller}}" wx:for-item="item" wx:key="index">
        <view class='pic'>
          <image src="{{item.pic}}" mode="widthFix"></image>
          <view class='del' bindtap='del' data-index="{{index}}">
            <image mode="widthFix" src='/Share/image/delete.png'></image>
          </view>
        </view>
        <input name="titles{{index}}" placeholder="请输入标题" class='heading' bindblur="bindtitle" style='display:{{item.display}};color:{{item.color}}'></input>
        <view class='row'>

          <textarea placeholder="请输入" auto-height='true' class='textarea' focus wx:if="{{show}}" bindfocus="bintext" bindblur="bindblur" data-index="{{index}}" name="title{{index}}" value='{{item.text}}' />

        </view>
      </block>
      <view class='choice'>
        <view class="addpic" bindtap='bintitle'>
          <view class='selc'>
            <image mode="widthFix" src='/Share/image/title.png'></image>
          </view>
          <text>插入标题</text>
        </view>
        <view class='addtitle' bindtap='binpic'>
          <view class='selc'>
            <image mode="widthFix" src='/Share/image/pic.png'></image>
          </view>
          <text>插入图片</text>
        </view>
        <view class='clear'></view>
      </view>
    </view>
    <view class='null'></view>

  </view>
  <view class="modals modals-bottom-dialog" hidden="{{hideModal}}">
    <view class="modals-cancel" bindtap="hideModal"></view>
    <view class="bottom-dialog-body bottom-pos" animation="{{animationData}}">
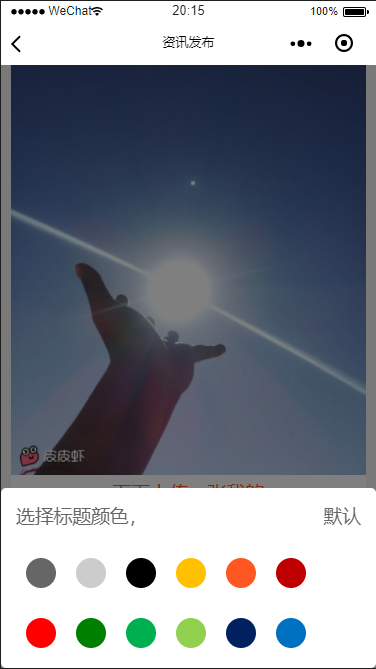
      <text>选择标题颜色,</text>
      <text class='right' bindtap='bincolor' data-color="#666">默认</text>
      <view class='clear'></view>
      <view class='selector'>
        <view class='color co0' bindtap='bincolor' data-color="#666"></view>
        <view class='color co1' bindtap='bincolor' data-color="#ccc"></view>
        <view class='color co2' bindtap='bincolor' data-color="#000"></view>
        <view class='color co3' bindtap='bincolor' data-color="#ffc000"></view>
        <view class='color co4' bindtap='bincolor' data-color="#ff5722"></view>
        <view class='color co5' bindtap='bincolor' data-color="#c00000"></view>
        <view class='color co6' bindtap='bincolor' data-color="#ff0000"></view>
        <view class='color co7' bindtap='bincolor' data-color="#008000"></view>
        <view class='color co8' bindtap='bincolor' data-color="#00b050"></view>
        <view class='color co9' bindtap='bincolor' data-color="#92d050"></view>
        <view class='color co10' bindtap='bincolor' data-color="#002060"></view>
        <view class='color co11' bindtap='bincolor' data-color="#0070c0"></view>
        <view class='color co12' bindtap='bincolor' data-color="#00b0f0"></view>
        <view class='color co13' bindtap='bincolor' data-color="#7030a0"></view>
        <view class='clear'></view>
      </view>
    </view>
  </view>
  <button class='submit' form-type='submit'>发布</button>
</form>
.wxcs
page {
  background: #f2f2f2;
}

.main {
  margin: 20rpx;
  background: white;
  border-radius: 10rpx;
}

.title {
  color: #666;
  font-size: 24rpx;
  border-bottom: 1px solid #f2f2f2;
  padding: 10rpx;
}

.textarea {
  padding: 10rpx;
  font-size: 24rpx;
}

.heading {
  font-size: 38rpx;
  text-align: center;
  border-bottom: 1px dashed #ccc;
  padding-bottom: 10rpx;
  margin-bottom: 30rpx;
}

.pic image {
  width: 100%;
  height: auto;
}

textarea {
  width: 100%;
  color: #666;
  font-size: 32rpx;
  padding-bottom: 10rpx;
}

.choice {
  padding: 20rpx;
  border-top: 10rpx solid #f2f2f2;
}

.selc {
  width: 150rpx;
  height: 60rpx;
}

.choice .addpic {
  width: 150rpx;
  text-align: center;
  font-size: 28rpx;
  color: #666;
  float: left;
  margin-left: 200rpx;
  font-family: '黑体';
}

.choice .addpic image {
  width: 50rpx;
}

.choice .addtitle {
  width: 150rpx;
  text-align: center;
  font-size: 28rpx;
  color: #666;
  float: left;
  font-family: '黑体';
}

.choice .addtitle image {
  width: 50rpx;
}

.null {
  height: 120rpx;
  background: #f2f2f2;
}

.submit {
  width: 100%;
  position: fixed;
  bottom:;
}

.clear {
  clear: both;
}

.right {
  float: right;
}

.left {
  float: left;
}

/*颜色选择*/

.submitview {
  z-index:;
}

.modals {
  position: fixed;
  z-index:;
  top:;
  left:;
  right:;
  bottom:;
}

.modals-cancel {
  position: absolute;
  z-index:;
  top:;
  left:;
  right:;
  bottom:;
  background-color: rgba(0, 0, 0, 0.5);
}

.bottom-dialog-body {
  position: absolute;
  border-radius: 10rpx;
  z-index:;
  bottom:;
  left:;
  right:;
  padding: 30rpx;
  height: 300rpx;
  background-color: #fff;
}

/*动画前初始位置*/

.bottom-pos {
  -webkit-transform: translateY(100%);
  transform: translateY(100%);
}

.pic {
  position: relative;
}

.del {
  position: absolute;
  top: 20rpx;
  right: 0rpx;
  color: white;
  font-size: 28rpx;
  display: inline-block;
  padding: 10rpx;
  border-radius: 10rpx;
}

.del image {
  width: 80rpx;
  border-radius: 7rpx;
}

.modals text {
  display: inline-block;
  color: #666;
}

.selector {
  margin-top: 30rpx;
}

.color {
  width: 60rpx;
  height: 60rpx;
  float: left;
  margin: 30rpx 20rpx;
  border-radius: 50%;
}

.co0 {
  background: #666;
}

.co1 {
  background: #ccc;
}

.co2 {
  background: #000;
}

.co3 {
  background: #ffc000;
}

.co4 {
  background: #ff5722;
}

.co5 {
  background: #c00000;
}

.co6 {
  background: #f00;
}

.co7 {
  background: #008000;
}

.co8 {
  background: #00b050;
}

.co9 {
  background: #92d050;
}

.co10 {
  background: #002060;
}

.co11 {
  background: #0070c0;
}

.co12 {
  background: #00b0f0;
}

.co13 {
  background: #7030a0;
}

/*颜色选择END*/
.wxjs
const app = getApp()
const util = require('../../utils/util.js'); //封装wx.request 以下util.request可以用wx.request代替
Page({
data: {
dataList: [], //储存图片
index: null, //当前点击位置
text: null, //储存当前输入内容
initialization: null,
show: true,
controller: [
// { pic: "/Share/image/images/bgqq_01.png", text: "可以", title:"",display: "none", color:""} //举例
],
hideModal: true, //模态框的状态 true-隐藏 false-显示
animationData: {}, //
picarr: []
},
onLoad: function() {
var that = this;
console.log(that.data.controller);
},
//提交表单,事先处理图片上传,上传完图片后再调用that.submit()上传数据 参数为广本外的 title文章主标题跟describe文章描述
formsubmit: function(e) {
var that = this;
var controller = that.data.controller;
var title = e.detail.value.title;
var describe = e.detail.value.describe;
wx.showLoading({
title: "发布中...",
mask: true
})
for (var i = 0; i < controller.length; i++) {
wx.uploadFile({
url: util.rootDocment + '/app/Dynamics/upload',
filePath: controller[i].pic,
name: 'file',
header: {
'content-type': 'multipart/form-data'
},
success(res) {
var newarray = {
pic: res.data
}
that.setData({
picarr: that.data.picarr.concat(newarray)
})
that.submit(title, describe);
}
})
}
},
//上传数据
submit: function(title, describe) {
var that = this;
var controller = that.data.controller;
var str = "";
//将controller内容转字符串赋值到空字符串str中,因为图片是倒序的所以用var j来处理
for (var i = 0; i < controller.length; i++) {
var j = controller.length - i - 1;
str += that.data.picarr[j].pic + ',' + controller[i].title + ',' + controller[i].color + ',' + controller[i].text + '==';
}
//此时的str等于 "83c5e201903230829295134.jpg",,undefined,根据国际市场的单价,澳大利亚通过在一年内出售铁矿石从中国赚取利润。至少500亿美元。双方合作良好,但澳大利亚采取了一些不合理的行动。澳大利亚怎么了?事实证明,由于多年的贸易,澳大利亚背后的铁矿石交易商有自己的脾气。=="ceb17201903230829292802.jpg",,undefined,由于中国是一个严重依赖铁矿石的国家,他们知道自己开始经常定价,而不是减少交易量。这是澳大利亚旧生活的结果。重要的是要知道他们的大部分订单来自中国。突然,来自澳大利亚的650亿份订单消失了,这让他们意识到了问题的严重性。=="a12be201903230829296884.png",小程序很重要,undefined,==
//以上用==号来作为一个数组的结束,以方便后端处理
util.request(
"/app/Dynamics/ins", {
userid: app.globalData.userid,
title: title,
describe: describe,
content: str
},
function(res) {
wx.hideLoading();
setTimeout(function() {
wx.reLaunch({
url: "/pages/dynamic/index?id=" + app.globalData.userid
})
}, 2000)
}
)
console.log(str);
},
/* 添加图片*/
binpic: function() {
var that = this;
//这里考虑到性能,对于图片张数做了限制
if (that.data.dataList.length >= 9) { //超过四张
wx.showModal({
title: '温馨提示',
content: '最多只能添加一张图片哦',
confirmText: "我知道了",
confirmColor: "#000000",
showCancel: false,
success: function(res) {
if (res.confirm) {} else if (res.cancel) {}
}
})
} else { //添加图片
wx.showActionSheet({
itemList: ['从相册选择', '拍照'],
itemColor: '#000000',
success: function(res) {
var choseType = res.tapIndex == 0 ? "album" : res.tapIndex == 1 ? "camera" : "";
if (choseType != "") {
wx.chooseImage({
sizeType: ['original'], //原图
sourceType: [choseType],
count: 1, //每次添加一张
success: function(res) {
wx.showLoading({
title: "上传中...",
mask: true
})
console.log(res);
var info = {
pic: res.tempFilePaths[0], //存储本地地址
temp: true, //标记是否是临时图片
value: '', //存储图片下方相邻的输入框的内容
}
that.data.dataList.splice(that.data.imgIndex, 0, info);
var newarray = {
pic: res.tempFilePaths[0],
text: "",
display: "none",
title: ""
}
that.setData({
dataList: that.data.dataList,
controller: that.data.controller.concat(newarray)
})
wx.hideLoading();
}
})
}
},
fail: function(res) {
console.log(res.errMsg)
}
})
}
},
//描述离开赋值
initialization: function(e) {
var that = this;
that.setData({
initialization: e.detail.value
})
},
//点击插入标题显示标题
bintitle: function(e) {
var that = this;
var index = that.data.index;
console.log(that.data.controller);
that.showModal();
that.setData({
["controller[" + index + "].display"]: "block"
})
},
//标题输入离开后赋值到controller
bindtitle: function(e) {
var that = this;
var index = that.data.index;
console.log(e.detail.value);
that.setData({
['controller[' + index + '].title']: e.detail.value
})
},
//点击textarea获取当前index
bintext: function(e) {
var that = this;
console.log(e);
that.setData({
index: e.target.dataset.index
})
},
//文本内容离开时触发
bindblur: function(e) {
var that = this;
var index = that.data.index;
console.log(e.detail.value);
that.setData({
["controller[" + index + "].text"]: e.detail.value,
text: e.detail.value
})
},
//删除当前图片
del: function(e) {
var that = this;
var index = e.currentTarget.dataset.index
console.log(index);
console.log(e);
wx.showModal({
title: '提示',
content: '是否删除该记录',
success: function(res) {
if (res.confirm) {
var text = that.data.controller[index].text;
var controller = that.data.controller;
controller.splice(index);
//删除图片把当前的文本内容添加到上面文本内容中,如果index=0代表上面没有文本内容,则加到描述中
if (index == 0) {
that.setData({
initialization: that.data.initialization + '\n' + that.data.text
})
} else {
index = index - 1;
that.setData({
["controller[" + index + "].text"]: that.data.controller[index].text + '\n' + that.data.text
})
}
//End
that.setData({
controller: controller
})
console.log("删除成功");
console.log(that.data.controller);
}
}
})
// console.log(that.data.controller);
},
// 显示遮罩层
showModal: function() {
var that = this;
that.setData({
hideModal: false,
show: false
})
var animation = wx.createAnimation({
duration: 600, //动画的持续时间 默认400ms 数值越大,动画越慢 数值越小,动画越快
timingFunction: 'ease', //动画的效果 默认值是linear
})
this.animation = animation
setTimeout(function() {
that.fadeIn(); //调用显示动画
}, 200)
},
// 隐藏遮罩层
hideModal: function() {
var that = this;
var animation = wx.createAnimation({
duration: 800, //动画的持续时间 默认400ms 数值越大,动画越慢 数值越小,动画越快
timingFunction: 'ease', //动画的效果 默认值是linear
})
this.animation = animation
that.fadeDown(); //调用隐藏动画
setTimeout(function() {
that.setData({
hideModal: true,
show: true
})
}, 720) //先执行下滑动画,再隐藏模块
},
//动画集
fadeIn: function() {
this.animation.translateY(0).step()
this.setData({
animationData: this.animation.export() //动画实例的export方法导出动画数据传递给组件的animation属性
})
},
fadeDown: function() {
this.animation.translateY(300).step()
this.setData({
animationData: this.animation.export(),
})
},
//颜色选择
bincolor: function(e) {
var that = this;
var color = e.currentTarget.dataset.color
var index = that.data.index
console.log(that.data.index);
console.log(color);
that.setData({
["controller[" + index + "].color"]: color,
hideModal: true,
show: true
})
}
});
Think PHP
增加到数据库
    public function ins()
    {
        $param = request()->param();
        $dyn = new Dynamic();
        $data['userid'] = $param['userid'];
        $data['title']  = $param['title'];
        $data['describe'] = $param['describe'];
        $data['content']  = $param['content'];
        $dyn->allowField(true)->save($data);
    }
数据查询(注意)
因为我们上传的是一个字符串,所以在查询时需要把字符串分割成数组后得出文章段落,再把文章的段落分割成数组得到我们要的标题 图片 内容等数据 ,最后把它们全部赋值到一个数组内用json的方式return给小程序前端请求
    public function sel()
    {
        $param = request()->param();
        $res = $dyn->where("id",$param['id'])->find();
        $content = trim($res['content'],"==");    //去除字符串中最后的==
        $content = explode("==", $content);        //以==为结尾,把字符串转为数组
        //遍历以上数组,以,号再次分割转为数组 用于再次遍历得出文章的次标题与颜色图片内容等。
        foreach($content as $key=>$val){
            $test[$key] = explode(",", $val);
        }
        //以下为文本外的 id  主标题  描述  上传时间
        $result['id']        = $res['id'];
        $result['title']        = $res['title'];
        $result['describe']    = $res['describe'];
        $result['create_time'] = $res['create_time'];
        // 将上面的test遍历,拿到以下数据 全部赋值到$result
        foreach($test as $key=>$val){
            $result['content'][$key]['title'] = $val[1];    //标题
            $result['content'][$key]['color'] = $val[2];    //标题颜色
            $pic = trim($val[0],""");
            $result['content'][$key]['pic'] = $Com->dispose($pic);    //图片
            $result['content'][$key]['content'] = $val[3];    //内容
        }
        return json_encode($result);
    }
//END 到这就全部结束了,如写的不好,请多指点,
第一次发,如有问题请留言,请指点,最后多谢支持(鞠躬)
微信小程序富文本编辑,Thinkphp5.1的更多相关文章
- [微信小程序] 微信小程序富文本-wxParse的使用
最近小程序蛮火的,公司要做于是学了一点点小程序 不知道你们有没有遇到过这种问题: 从公司服务器获取的文章内容是有HTML标签格式的一段内容,但是微信是不支持这些标签的,怎么办呢? 1.一般网站后台的文 ...
- 微信小程序富文本渲染组件html2wxml及html2wxml代码块格式化在ios下字体过大问题
1.组件使用: 之前微信小程序的富文本渲染组件用的wxParse,对普通富文本确实可以,但是对于代码格式pre标签则无法使用. 下面这个html2wxml很不错,可以支持代码高亮. 详细文档:http ...
- 微信小程序-富文本解析插件wxParse基础使用及问题解决
一.插件准备 在github上可以直接下载该插件:https://github.com/icindy/wxParse 二.基本使用 1.将插件导入项目: 将wxParse文件夹放在项目目录下,如图: ...
- 微信小程序富文本中的图片大小超出屏幕
这个问题我在小程序社区中提的,后来有个帮我回答了这个问题,我试了一下可以. 解决办法是过滤富文本内容,给图片标签添加一个样式,限制图片的最大宽度. replace(/\<img/gi, '& ...
- 微信小程序 富文本插件 循环渲染方式
感谢GitHub https://github.com/icindy/wxParse/wiki/wxParse%E5%A4%9A%E6%95%B0%E6%8D%AE%E5%BE%AA%E7%8E%AF ...
- 微信小程序富文本
<div class="weui-panel__bd pad-all fs13 " > <rich-text nodes="{{detail.conte ...
- 适用于 Mpvue 的微信小程序富文本解析自定义组件
废话不多说,直接上方法: 首先 npm 安装 mpvue-wxparse npm i mpvue-wxparse 接下来:使用 <template> <div> <wxP ...
- 微信小程序学习指南
作者:初雪链接:https://www.zhihu.com/question/50907897/answer/128494332来源:知乎著作权归作者所有.商业转载请联系作者获得授权,非商业转载请注明 ...
- 微信小程序开源项目库汇总
最近做了一个微信小程序开源项目库汇总,里面集合了OpenDigg 上的优质的微信小程序开源项目库,方便移动开发人员便捷的找到自己需要的项目工具等,感兴趣的可以到GitHub上给个star. UI组件 ...
随机推荐
- 通过http流发送post请求
一般都是用curl扩展来完成,看了手册的通过stream的方式更加简单. 请求脚本stream.php $url = 'http://localhost/stream_api.php'; $body ...
- ubuntu开机执行指令或脚本
vi /etc/rc.d/rc.localz 将指令添加到exit 0之前,保存.
- 利率计算v4.0--测试--软件工程
利率计算v4.0--测试 package Test; import Model.Interest; import Service.CompoundInterestService; import Ser ...
- GlobalMemoryStatusEx获取内存
typedef struct _MEMORYSTATUSEX { DWORD dwLength; DWORD dwMemoryLoad; DWORDLONG ullTotalPhys; DWORDLO ...
- 如何规范移动应用交互设计?UI/UX设计师须知的11个小技巧
以下内容由Mockplus团队翻译整理,仅供学习交流,Mockplus是更快更简单的原型设计工具. 十年前,手机的使用只是为了沟通. 而近几年,情况发生了很大变化,我们很难找到不使用手机的人.手机在极 ...
- 关于流程图设计,你需要Get的几点必备知识
流程图(Flow Chart)这个概念对很多人来说并不陌生,但如果让你定义或者举例说明什么是产品流程图,恐怕还是有难度的.或许诸如“用户体验”.“交互设计”.“逻辑关系”等词会像走马灯般闪现在你的脑海 ...
- linq join一些忘记的操作
- dns记录类型(转)
NS:(Domain Name System,域名系统),因特网上作为域名和IP地址相互映射的一个分布式数据库,能够使用户更方便的访问互联网,而不用去记住能够被机器直接读取的IP数串.通过主机名,最终 ...
- docker-compose up启动又停止,需要加tty为true
如果docker-compose.yml如下,则用docker-compose up -d启动起来的容器可能会立即停止. version: '2' services: mir-http-repo: i ...
- nodename nor servname provided, or not known
mac来使用redis然后产生上述错误,据说是用户名的问题 解决: 打开终端: cat /private/etc/hosts sudo vi /private/etc/hosts 将错误的那个名字加入 ...
