制作高仿QQ的聊天系统(上)—— 布局文件 & 减少过度绘制
由于没有自己的服务器,我就找了个能实现双方通信的SDK,这个SDK是友盟的用户反馈SDK。本系列的博文关注的不是网络通信,而是如何在网络通信机制已经做好的情况下,做出一个可用的聊天系统。其实,刚开始做的时候觉得适配器挺难的,但后来发现实现和QQ相同的布局文件也需要技术,所以本篇就来详细的说下布局文件该怎么写。
一、主界面

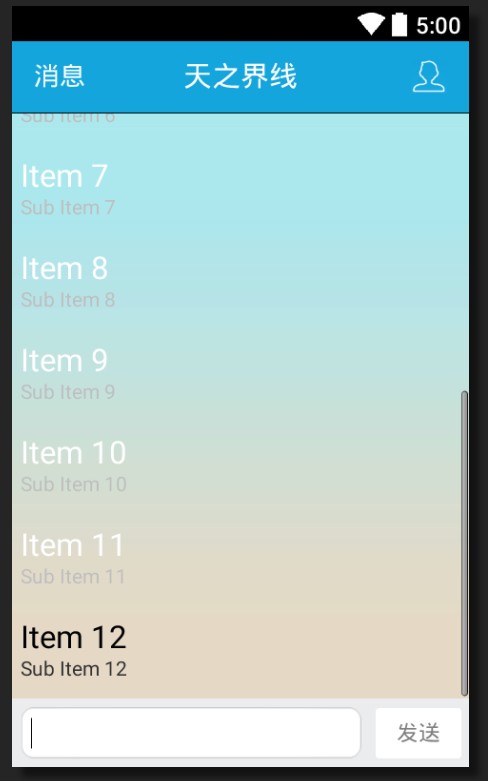
主界面的元素分为三块,一个是标题栏,还有是中间的listview,最后是下方的输入区域。整体分析后发现顶部的
1.1 ActionBar
标题栏我们没办法用系统自带的actionbar来做,因为主要的文字是居中的,所以就自己做个actionbar吧。RelativeLayout是actionbar的父布局,里面放两个textview和一个imageview。左右两边的控件都是紧邻父控件,中间的“天之界限”是水平+垂直居中。这部分的布局没啥难度,所以直接贴代码了。
    <RelativeLayout

        android:id="@+id/actionbar_layout"

        android:layout_width="match_parent"

        android:layout_height="50dp"

        android:layout_alignParentTop="true"

        android:background="#14a5dc" >

        <TextView

            android:layout_width="wrap_content"

            android:layout_height="wrap_content"

            android:layout_centerHorizontal="true"

            android:layout_centerVertical="true"

            android:gravity="center_horizontal|center_vertical"

            android:text="天之界线"

            android:textColor="#ffffff"

            android:textSize="20sp" />

        <TextView

            android:layout_width="wrap_content"

            android:layout_height="wrap_content"

            android:layout_alignParentLeft="true"

            android:layout_centerVertical="true"

            android:layout_marginLeft="15dp"

            android:text="消息"

            android:textColor="#ffffff"

            android:textSize="18sp" />

        <ImageView

            android:layout_width="25dp"

            android:layout_height="25dp"

            android:layout_alignParentRight="true"

            android:layout_centerVertical="true"

            android:layout_marginRight="15dp"

            android:src="@drawable/user_pic" />

    </RelativeLayout>
1.2 ListView
listview放置的是我们的聊天信息,但因为我们的聊天信息需要有下拉刷新的功能,所以需要给listview再套一个下拉刷新的控件,这个控件可以自由选择,我选择的是android自带的SwipeRefreshLayout。这样我们就知道中间的布局是怎么做的了。

如果我们仅仅是简单的放了listview,再加个背景就会出现过度绘制。所以我们必须来分析下布局,核心思想:让背景图片仅仅停留在看得到的地方。因为actionbar和底部的inputbox都是有自己背景的,所以我们的背景图仅仅需要添加到listview中,但因为listview和activity都是有背景的,所以我们完全可以给activity设置为透明背景。
<activity

            android:name="com.kale.mycmcc.CustomActivity"

            android:launchMode="singleTop"

            android:theme="@android:style/Theme.Translucent.NoTitleBar" />
这样就保证了当前界面仅仅有一层背景,减少过度绘制。此外,我们的listview应该在每次发送一条信息后自动滚动到底部,因此需要给listview添加两个属性:
android:stackFromBottom="true"
android:transcriptMode="alwaysScroll"
然后我们再清除掉listview的item之间的分割线,这个分割线我是用java代码处理的:mListView.setDivider(null);
现在技术难点全部攻克,直接产生如下代码:
    <android.support.v4.widget.SwipeRefreshLayout

        android:id="@+id/swipe_container"

        android:layout_width="match_parent"

        android:layout_height="wrap_content"

        android:layout_above="@+id/conversation_editText"

        android:layout_below="@+id/actionbar_layout" >

        <ListView

            android:id="@+id/conversation_listView"

            android:layout_width="match_parent"

            android:layout_height="wrap_content"

            android:background="@drawable/conversation_bg"

            android:stackFromBottom="true"

            android:transcriptMode="alwaysScroll" />

    </android.support.v4.widget.SwipeRefreshLayout>
1.3 InputBox
底部的输入框是由editText和button组成的,外加一个背景的view,用来填充灰色的背景。


这里我们需要满足的是edittext随着输入的文字的数目而变高,这就需要让editview来主导布局。而button一直是在布局的右下方,背景的view也应该是紧贴edittext的顶部,这里为了做出边界的效果,所以还设置了边距。
背景的view和紧贴这edittext的上边距,为了设置边框效果所以这里设置了-6dp作为顶部的边框。
    <View

        android:id="@+id/input_box_layout"

        android:layout_width="match_parent"

        android:layout_height="wrap_content"

        android:layout_alignParentBottom="true"

        android:layout_alignTop="@+id/conversation_editText"

        android:layout_marginTop="-6dp"

        android:background="#ebecee" />
这里的Button有可用和不可用的样式,当editText中没有文字那么button变为不可用的,如果editText中有文字,那么button就变成蓝色,表示可用。
btn_enabled_shape.xml
<?xml version="1.0" encoding="utf-8"?>

<shape xmlns:android="http://schemas.android.com/apk/res/android"

    android:shape="rectangle" >

    <corners android:radius="5dp" />

    <solid android:color="#02a7e3" />

</shape>
btn_unabled_shape.xml
<?xml version="1.0" encoding="utf-8"?>

<shape xmlns:android="http://schemas.android.com/apk/res/android"

    android:shape="rectangle" >

    <corners android:radius="5dp" />

    <solid android:color="#ffffff" />

</shape>
btn_bg_selector.xml
<?xml version="1.0" encoding="utf-8"?>

<selector xmlns:android="http://schemas.android.com/apk/res/android" >

    <item android:state_enabled="true"

        android:drawable="@drawable/btn_enabled_shape" />

    <item android:state_enabled="false"

        android:drawable="@drawable/btn_unabled_shape"/>

    <!-- 默认样式 -->

    <item android:drawable="@drawable/btn_enabled_shape"/>

</selector>
Button的布局文件
    <Button

        android:id="@+id/conversation_send_btn"

        android:layout_width="60dp"

        android:layout_height="35dp"

        android:layout_alignParentBottom="true"

        android:layout_alignParentRight="true"

        android:layout_marginBottom="6dp"

        android:layout_marginLeft="3dp"

        android:layout_marginRight="5dp"

        android:background="@drawable/btn_bg_selector"

        android:enabled="false"

        android:gravity="center"

        android:text="发送"

        android:textSize="15sp" />
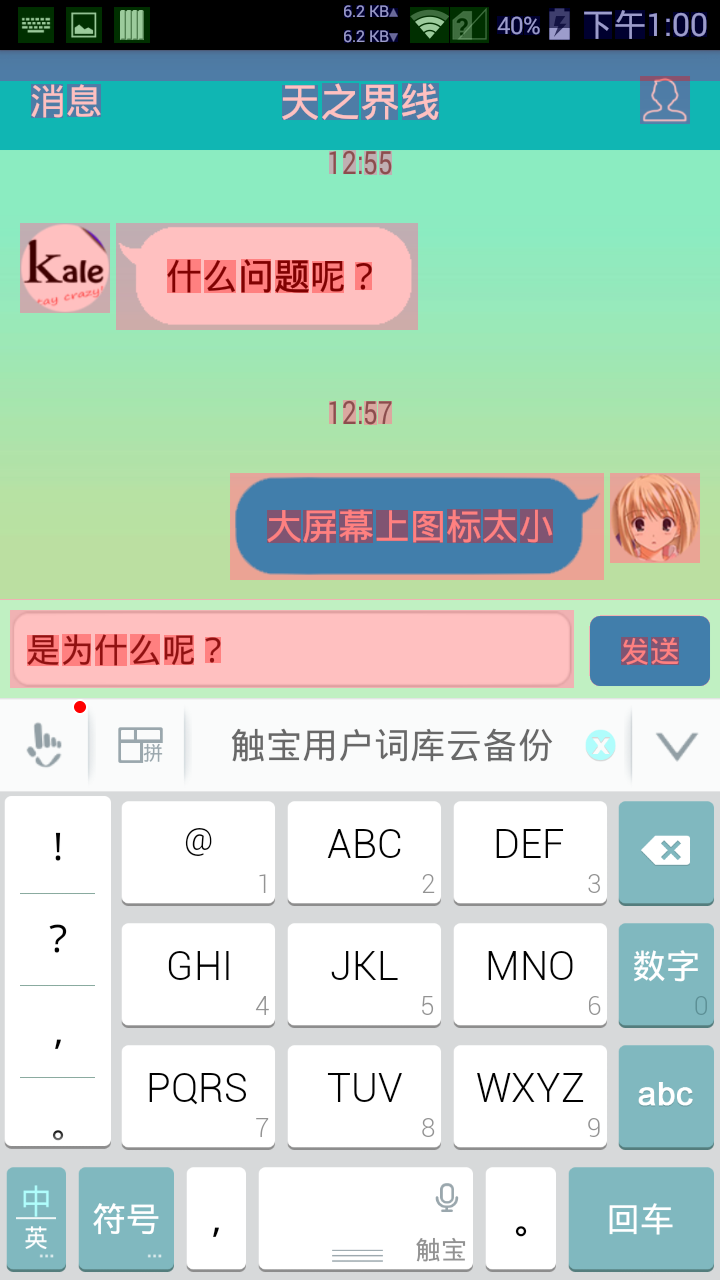
EditText的布局文件就很简单了,没什么特别的,本来想给自带的输入法添加要给发送按钮的,但由于第三方的输入法不支持,所以没出来效果。我们设想中的edittext会自动获取焦点,进入activity直接弹出输入法,所以就加了一个requestFocus属性。
    <EditText

        android:id="@+id/conversation_editText"

        android:layout_width="match_parent"

        android:layout_height="wrap_content"

        android:layout_alignParentBottom="true"

        android:layout_alignParentLeft="true"

        android:layout_margin="5dp"

        android:layout_toLeftOf="@+id/conversation_send_btn"

        android:background="@drawable/input_box"

        android:ems="10"

        android:gravity="center_vertical"

        android:hint=" "

        android:imeOptions="actionSearch"

        android:padding="8dp"

        android:textSize="17sp" >

        <requestFocus />

    </EditText>
1.4 主界面全部的布局代码
<RelativeLayout xmlns:android="http://schemas.android.com/apk/res/android"

    xmlns:tools="http://schemas.android.com/tools"

    android:id="@+id/umeng_fb_container"

    android:layout_width="match_parent"

    android:layout_height="match_parent">

    <RelativeLayout

        android:id="@+id/actionbar_layout"

        android:layout_width="match_parent"

        android:layout_height="50dp"

        android:layout_alignParentTop="true"

        android:background="#14a5dc" >

        <TextView

            android:layout_width="wrap_content"

            android:layout_height="wrap_content"

            android:layout_centerHorizontal="true"

            android:layout_centerVertical="true"

            android:gravity="center_horizontal|center_vertical"

            android:text="天之界线"

            android:textColor="#ffffff"

            android:textSize="20sp" />

        <TextView

            android:layout_width="wrap_content"

            android:layout_height="wrap_content"

            android:layout_alignParentLeft="true"

            android:layout_centerVertical="true"

            android:layout_marginLeft="15dp"

            android:text="消息"

            android:textColor="#ffffff"

            android:textSize="18sp" />

        <ImageView

            android:layout_width="25dp"

            android:layout_height="25dp"

            android:layout_alignParentRight="true"

            android:layout_centerVertical="true"

            android:layout_marginRight="15dp"

            android:src="@drawable/user_pic" />

    </RelativeLayout>

    <android.support.v4.widget.SwipeRefreshLayout

        android:id="@+id/swipe_container"

        android:layout_width="match_parent"

        android:layout_height="wrap_content"

        android:layout_above="@+id/conversation_editText"

        android:layout_below="@+id/actionbar_layout" >

        <ListView

            android:id="@+id/conversation_listView"

            android:layout_width="match_parent"

            android:layout_height="wrap_content"

            android:background="@drawable/conversation_bg"

            android:stackFromBottom="true"

            android:transcriptMode="alwaysScroll" />

    </android.support.v4.widget.SwipeRefreshLayout>

    <View

        android:id="@+id/input_box_layout"

        android:layout_width="match_parent"

        android:layout_height="wrap_content"

        android:layout_alignParentBottom="true"

        android:layout_alignTop="@+id/conversation_editText"

        android:layout_marginTop="-6dp"

        android:background="#ebecee" />

    <Button

        android:id="@+id/conversation_send_btn"

        android:layout_width="60dp"

        android:layout_height="35dp"

        android:layout_alignParentBottom="true"

        android:layout_alignParentRight="true"

        android:layout_marginBottom="6dp"

        android:layout_marginLeft="3dp"

        android:layout_marginRight="5dp"

        android:background="@drawable/btn_bg_selector"

        android:enabled="false"

        android:gravity="center"

        android:text="发送"

        android:textSize="15sp" />

    <EditText

        android:id="@+id/conversation_editText"

        android:layout_width="match_parent"

        android:layout_height="wrap_content"

        android:layout_alignParentBottom="true"

        android:layout_alignParentLeft="true"

        android:layout_margin="5dp"

        android:layout_toLeftOf="@+id/conversation_send_btn"

        android:background="@drawable/input_box"

        android:ems="10"

        android:gravity="center_vertical"

        android:hint=" "

        android:imeOptions="actionSearch"

        android:padding="8dp"

        android:textSize="17sp" >

        <requestFocus />

    </EditText>

</RelativeLayout>
二、开发者消息的布局文件
2.1 头像和文字气泡
因为这里用的是用户反馈的SDK,所以模拟的是开发者和用户交流的场景,开发者发送的消息会变成item放入listview中。

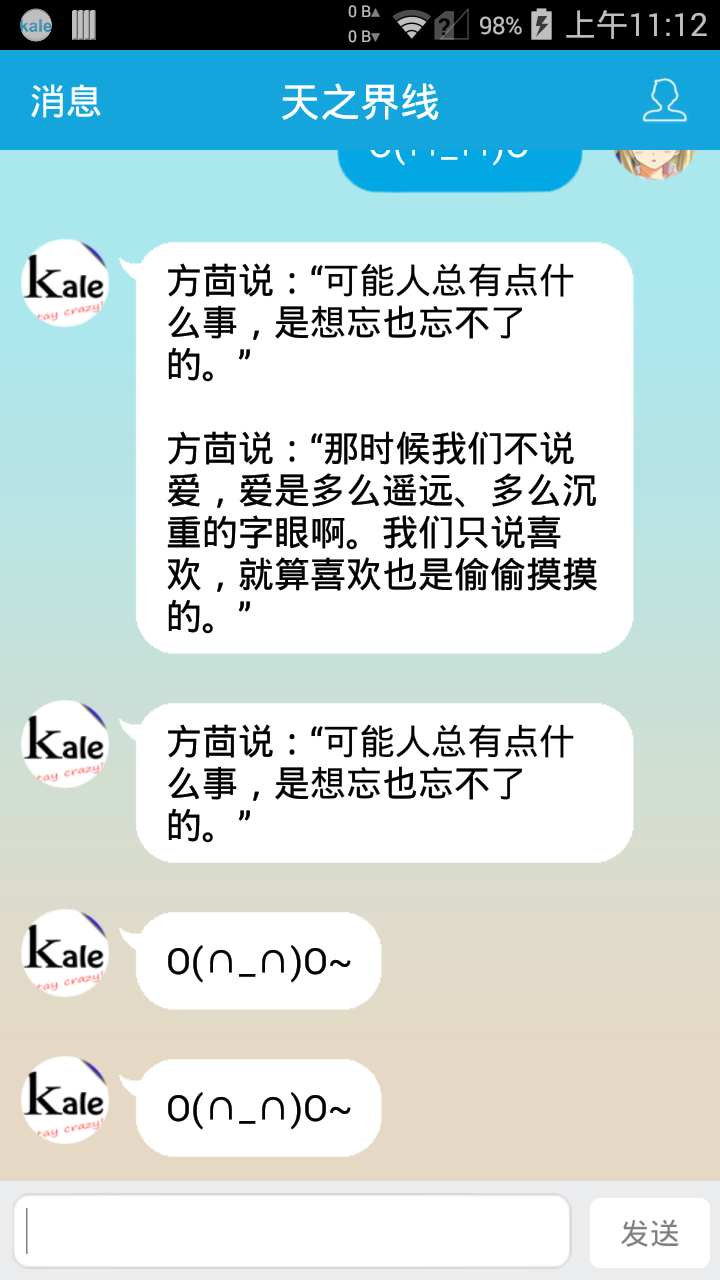
布局文件比较简单,开发者的头像在父控件的左边,接着是一个textview,这个textview的背景是一个气泡。头像应该永远在item的左上方,而气泡应该可以随着文字的多少来改变自己的高度。下面的示例图显示了长文字和短文字的效果:

因此,textView仅仅是应该在头像的右边,至于宽度是按照内容来定的。
    <ImageView

        android:id="@+id/head_imageView"

        android:layout_width="45dp"

        android:layout_height="45dp"

        android:layout_alignParentLeft="true"

        android:layout_alignParentTop="true"

        android:layout_marginRight="3dp"

        android:src="@drawable/dev_head_photo" />

    <TextView

        android:id="@+id/reply_textView"

        android:layout_width="wrap_content"

        android:layout_height="wrap_content"

        android:layout_marginRight="30dp"

        android:layout_toRightOf="@id/head_imageView"

        android:background="@drawable/dev_msg_box"

        android:gravity="center_vertical"

        android:paddingBottom="10dp"

        android:paddingLeft="25dp"

        android:paddingRight="18dp"

        android:paddingTop="8dp"

        android:textColor="#010101"

        android:textSize="18sp" />
2.2 信息发送时间
我的设想中每条消息应该都带一个发送时间的,如果两条消息间隔5分钟就显示下时间,因此还需要在消息的底部放入一个textview设置时间。因为这里的时间view应该是在需要显示的时候就出现,不应该总是出现,所以我用了ViewStub来做处理。ViewStub中的view会在可见时才进行绘制,很容易实现延迟绘制。
    <ViewStub

        android:id="@+id/time_view_stub"

        android:layout_width="match_parent"

        android:layout_height="wrap_content"

        android:layout_below="@id/reply_textView"

        android:layout_centerHorizontal="true"

        android:layout_marginTop="30dp"

        android:layout="@layout/umeng_fb_msg_time" />
这里的ViewStub中包含了一个textview,它的代码是放在另一个布局中的,方便用户消息布局文件共用它。代码如下:
<TextView xmlns:android="http://schemas.android.com/apk/res/android"

    android:id="@+id/msg_Time_TextView"

    android:layout_width="wrap_content"

    android:layout_height="wrap_content"

    android:gravity="center"

    android:textColor="#666666"

    android:layout_gravity="center_horizontal"

    android:textScaleX="0.8"

    android:textSize="16sp"

    android:text="xxxxxxxxxxxx"/>
好了,这样我们就知道开发者回复的item左边是头像,一个textview紧贴着头像的右侧,整个布局的最下方是一个显示时间的textview,这个textview用stubView进行处理。
2.3 全部代码
<?xml version="1.0" encoding="utf-8"?>

<RelativeLayout xmlns:android="http://schemas.android.com/apk/res/android"

    android:layout_width="match_parent"

    android:layout_height="wrap_content"

    android:padding="10dp" >

    <ImageView

        android:id="@+id/head_imageView"

        android:layout_width="45dp"

        android:layout_height="45dp"

        android:layout_alignParentLeft="true"

        android:layout_alignParentTop="true"

        android:layout_marginRight="3dp"

        android:src="@drawable/dev_head_photo" />

    <TextView

        android:id="@+id/reply_textView"

        android:layout_width="wrap_content"

        android:layout_height="wrap_content"

        android:layout_marginRight="30dp"

        android:layout_toRightOf="@id/head_imageView"

        android:background="@drawable/dev_msg_box"

        android:gravity="center_vertical"

        android:paddingBottom="10dp"

        android:paddingLeft="25dp"

        android:paddingRight="18dp"

        android:paddingTop="8dp"

        android:textColor="#010101"

        android:textSize="18sp" />

    <ViewStub

        android:id="@+id/time_view_stub"

        android:layout_width="match_parent"

        android:layout_height="wrap_content"

        android:layout_below="@id/reply_textView"

        android:layout_centerHorizontal="true"

        android:layout_marginTop="30dp"

        android:layout="@layout/umeng_fb_msg_time" />

</RelativeLayout>
三、用户消息的布局文件
3.1 头像

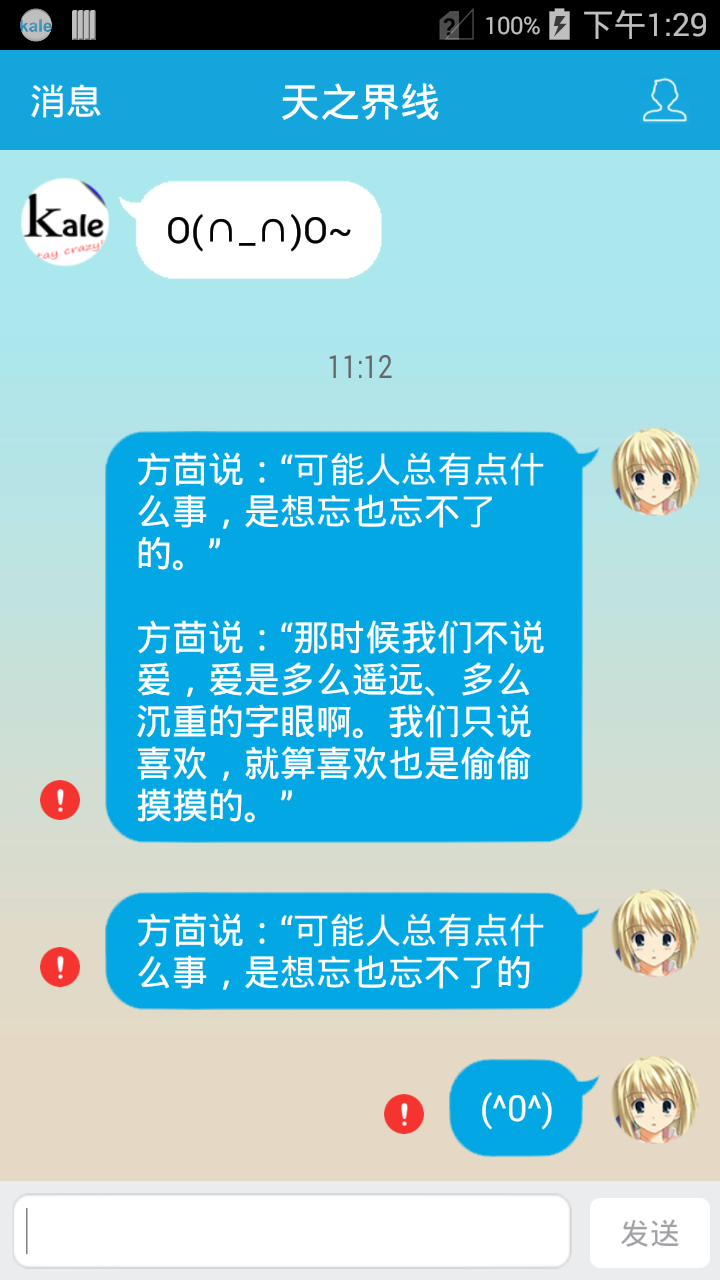
用户的消息和开发者的消息类似,但要复杂一点。因为用户的消息是在右边的,并且要有发送消息的指示器,比如正在发送的进度条,发送失败时显示的感叹号。而这两个指示控件又是在消息气泡的左边,所以必须用相对布局。在做这个相对布局的时候我发现很难做到头像、气泡、指示器依次放置,所以不得已把头像独立了出来,让指示器和消息气泡放入一个布局中。
头像的imageview代码如下:
  <ImageView

        android:id="@+id/head_imageView"

        android:layout_width="45dp"

        android:layout_height="45dp"

        android:layout_alignParentRight="true"

        android:layout_alignParentTop="true"

        android:layout_marginLeft="3dp"

        android:src="@drawable/user_head_photo" />
3.2 消息气泡 + 指示器
当气泡仅仅有一个指示器的时候,指示器应该在气泡的左边并且在气泡的垂直居中位置,但如果文字很多,指示器就不需要垂直居中了。所以指示器的安排应该是气泡的左边,距离气泡底部一定的距离。指示器有两种状态,一种是进度条表示消息正在发送,一种是感叹号,表示消息发送失败。

气泡和指示器的布局代码如下:
    <RelativeLayout

        android:id="@+id/repley_layout"

        android:layout_width="wrap_content"

        android:layout_height="wrap_content"

        android:layout_marginLeft="10dp"

        android:layout_toLeftOf="@id/head_imageView">

        <TextView

            android:id="@+id/reply_textView"

            android:layout_width="wrap_content"

            android:layout_height="wrap_content"

            android:layout_alignParentTop="true"

            android:layout_marginLeft="30dp"

            android:background="@drawable/user_msg_box"

            android:gravity="center_vertical"

            android:paddingBottom="10dp"

            android:paddingLeft="18dp"

            android:paddingRight="25dp"

            android:paddingTop="8dp"

            android:textColor="#ffffff"

            android:textSize="18sp" />

        <ImageView

            android:id="@+id/msg_error_imageView"

            android:layout_width="20dp"

            android:layout_height="20dp"

            android:layout_alignBottom="@id/reply_textView"

            android:layout_alignParentLeft="true"

            android:layout_marginBottom="14dp"

            android:src="@drawable/msg_error_pic" />

        <ProgressBar

            android:id="@+id/msg_senting_progressBar"

            style="?android:attr/progressBarStyleSmall"

            android:layout_width="15dp"

            android:layout_height="15dp"

            android:layout_alignBottom="@id/reply_textView"

            android:layout_alignParentLeft="true"

            android:layout_marginBottom="16dp"

            android:layout_marginLeft="3dp"

            android:visibility="visible" />

    </RelativeLayout>
3.3 消息发送时间
这部分的代码和之前讲述的完全一致,直接贴出来了。
    <ViewStub

        android:id="@+id/time_view_stub"

        android:layout_width="match_parent"

        android:layout_height="wrap_content"

        android:layout_below="@id/repley_layout"

        android:layout_centerHorizontal="true"

        android:layout_marginTop="30dp"

        android:layout="@layout/umeng_fb_msg_time" />
3.4 全部代码
<?xml version="1.0" encoding="utf-8"?>

<RelativeLayout xmlns:android="http://schemas.android.com/apk/res/android"

    xmlns:tools="http://schemas.android.com/tools"

    android:layout_width="match_parent"

    android:layout_height="wrap_content"

    android:padding="10dp">

  <ImageView

        android:id="@+id/head_imageView"

        android:layout_width="45dp"

        android:layout_height="45dp"

        android:layout_alignParentRight="true"

        android:layout_alignParentTop="true"

        android:layout_marginLeft="3dp"

        android:src="@drawable/user_head_photo" />

    <RelativeLayout

        android:id="@+id/repley_layout"

        android:layout_width="wrap_content"

        android:layout_height="wrap_content"

        android:layout_marginLeft="10dp"

        android:layout_toLeftOf="@id/head_imageView">

        <TextView

            android:id="@+id/reply_textView"

            android:layout_width="wrap_content"

            android:layout_height="wrap_content"

            android:layout_alignParentTop="true"

            android:layout_marginLeft="30dp"

            android:background="@drawable/user_msg_box"

            android:gravity="center_vertical"

            android:paddingBottom="10dp"

            android:paddingLeft="18dp"

            android:paddingRight="25dp"

            android:paddingTop="8dp"

            android:textColor="#ffffff"

            android:textSize="18sp" />

        <ImageView

            android:id="@+id/msg_error_imageView"

            android:layout_width="20dp"

            android:layout_height="20dp"

            android:layout_alignBottom="@id/reply_textView"

            android:layout_alignParentLeft="true"

            android:layout_marginBottom="14dp"

            android:src="@drawable/msg_error_pic" />

        <ProgressBar

            android:id="@+id/msg_senting_progressBar"

            style="?android:attr/progressBarStyleSmall"

            android:layout_width="15dp"

            android:layout_height="15dp"

            android:layout_alignBottom="@id/reply_textView"

            android:layout_alignParentLeft="true"

            android:layout_marginBottom="16dp"

            android:layout_marginLeft="3dp"

            android:visibility="visible" />

    </RelativeLayout>

    <ViewStub

        android:id="@+id/time_view_stub"

        android:layout_width="match_parent"

        android:layout_height="wrap_content"

        android:layout_below="@id/repley_layout"

        android:layout_centerHorizontal="true"

        android:layout_marginTop="30dp"

        android:layout="@layout/umeng_fb_msg_time" />

</RelativeLayout>
制作高仿QQ的聊天系统(上)—— 布局文件 & 减少过度绘制的更多相关文章
- 制作高仿QQ的聊天系统(下)—— Adapter & Activity
一.适配器 1.1 分页显示数据 因为聊天信息数目很多,所以adpter需要做分页处理,这里的分页处理是我自己实现的,如果有更好的办法欢迎在评论中告知.我们从友盟的反馈SDK中能得到聊天的list,我 ...
- 史上最简单,一步集成侧滑(删除)菜单,高仿QQ、IOS。
重要的话 开头说,not for the RecyclerView or ListView, for the Any ViewGroup. 本控件不依赖任何父布局,不是针对 RecyclerView. ...
- Android实现高仿QQ附近的人搜索展示
本文主要实现了高仿QQ附近的人搜索展示,用到了自定义控件的方法 最终效果如下 1.下面展示列表我们可以使用ViewPager来实现(当然如果你不觉得麻烦,你也可以用HorizontalScrollVi ...
- 高仿QQ即时聊天软件开发系列之三登录窗口用户选择下拉框
上一篇高仿QQ即时聊天软件开发系列之二登录窗口界面写了一个大概的布局和原理 这一篇详细说下拉框的实现原理 先上最终效果图 一开始其实只是想给下拉框加一个placeholder效果,让下拉框在未选择未输 ...
- 高仿QQ即时聊天软件开发系列之二登录窗口界面
继上一篇高仿QQ即时聊天软件开发系列之一开端之后,开始做登录窗口 废话不多说,先看效果,只有界面 可能还有一些细节地方没有做,例如那个LOGO嘛,不要在意这些细节 GIF虽短,可是这做起来真难,好吧因 ...
- 高仿QQ头像截取
花费了半天时间,把 仿QQ头像截取的方法整理了下,并制作了一个demo以供大家参考,基本上实现了qq中我的资料界面上(包括背景透明化,上滑标题栏显示,下拉隐藏等)的大致效果,先上图看效果吧: 支持的功 ...
- Android 高仿QQ滑动弹出菜单标记已读、未读消息
在上一篇博客<Android 高仿微信(QQ)滑动弹出编辑.删除菜单效果,增加下拉刷新功能>里,已经带着大家学习如何使用SwipeMenuListView这一开源库实现滑动列表弹出菜单,接 ...
- C#制作高仿360安全卫士窗体<二>
继上次C#制作高仿360安全卫士窗体<一>发布之后响应还不错,我的博客放肆雷特也来了不少的新朋友,在这里先谢谢大家的支持!我自己也反复看了一下觉得对不起大家,写的非常乱而且很少文字介绍.在 ...
- C#制作高仿360安全卫士窗体(四)- 水晶按钮
项目越来越紧,我也乐此不疲.自从上次C#制作高仿360安全卫士窗体(三)出来之后,就开始有一些人在说为什么还在坚持写这么落后的东西.我想说的是,我是从事企业信息化工作的,所有程序都只对内部使用.所以只 ...
随机推荐
- APP性能测试开始之旅
你是不是也跟我一样在工作中存在着同样的问题,APP版本在上线后不断的会有市场人员或者用户反馈页面加载慢,进入页面loading很久(实际我们设置的加载超时是15秒,15秒内加载出内容则显示,15秒外未 ...
- 注解实现json序列化的时候自动进行数据脱敏
https://blog.csdn.net/liufei198613/article/details/79009015
- Class PropertyPlaceholderHelper的使用
1.代码 private static Properties properties = new Properties(); public static String getProperties(Str ...
- Android - Base64
Android 将图片转换为Base64 public void convertToBase64(View view) throws IOException { //获取ImageView的图片 Bi ...
- 前端网页、php与mysql数据库字符编码(解决中文等乱码问题)
web开发中经常涉及前端网页——php——mysql之间的数据交互,当数据只有英文时通常不会有什么问题,但一旦涉及中文,三个地方的某一处字符编码不一致(如,网页使用的时gbk而mysql使用utf-8 ...
- android studio svn 创建分支
创建分支或标签 从哪里复制 工作副本 用这个变体去创建分支,并带着当地的改变.通常,服务项将被 添加带历史 , 不仅仅只有目标目录. 每个不同于根的版本文件 ,将被指定的复制.它推荐 去更新 工作副本 ...
- 20172308《Java软件结构与数据结构》第三周学习总结
教材学习内容总结 第 5 章 队列 队列: 一种线性集合,其元素从一端加入,从另一端删除 元素处理:FIFO 与栈的比较 异:(1) 栈的处理过程只在栈的某一端进行:队列的处理过程在队列的两端进行.( ...
- JAVA初学练手项目,学生管理系统
github地址:https://github.com/qscqesze/StudentManager 简单描述一下: UI层面用于接受用户的处理信息,然后移交给StudentDao去处理数据. 其中 ...
- Western Subregional of NEERC, Minsk, Wednesday, November 4, 2015 Problem K. UTF-8 Decoder 模拟题
Problem K. UTF-8 Decoder 题目连接: http://opentrains.snarknews.info/~ejudge/team.cgi?SID=c75360ed7f2c702 ...
- CentOS 7 上安装vim 解決 centos -bash: vim: command not found
用CentOS上使用vim竟然用不了,报错没有该命令 centos -bash: vim: command not found 那么如何安裝 vim 呢? ---------------------- ...
