Programming 2D Games 读书笔记(第五章)
http://www.programming2dgames.com/chapter5.htm
示例一:Planet
真正示例的开始,首先是载入2张图片
1.Graphics添加了2个方法
loadTexture和drawSprite
loadTexture方法得到一个IRECT3DTEXTURE9接口
//=============================================================================

// Load the texture into default D3D memory (normal texture use)

// For internal engine use only. Use the TextureManager class to load game textures.

// Pre: filename is name of texture file.

//      transcolor is transparent color

// Post: width and height = size of texture

//       texture points to texture

// Returns HRESULT

//=============================================================================

HRESULT Graphics::loadTexture(const char *filename, COLOR_ARGB transcolor,

                                UINT &width, UINT &height, LP_TEXTURE &texture)

{

    // The struct for reading file info

    D3DXIMAGE_INFO info;

    result = E_FAIL;

    try{

        if(filename == NULL)

        {

            texture = NULL;

            return D3DERR_INVALIDCALL;

        }

        // Get width and height from file

        result = D3DXGetImageInfoFromFile(filename, &info);

        if (result != D3D_OK)

            return result;

        width = info.Width;

        height = info.Height;

        // Create the new texture by loading from file

        result = D3DXCreateTextureFromFileEx(

            device3d,           //3D device

            filename,           //image filename

            info.Width,         //texture width

            info.Height,        //texture height

            1,                  //mip-map levels (1 for no chain)

            0,                  //usage

            D3DFMT_UNKNOWN,     //surface format (default)

            D3DPOOL_DEFAULT,    //memory class for the texture

            D3DX_DEFAULT,       //image filter

            D3DX_DEFAULT,       //mip filter

            transcolor,         //color key for transparency

            &info,              //bitmap file info (from loaded file)

            NULL,               //color palette

            &texture );         //destination texture

    } catch(...)

    {

        throw(GameError(gameErrorNS::FATAL_ERROR, "Error in Graphics::loadTexture"));

    }

    return result;

}
drawSprite方法则是画精灵元素
//=============================================================================

// Draw the sprite described in SpriteData structure

// Color is optional, it is applied like a filter, WHITE is default (no change)

// Pre : sprite->Begin() is called

// Post: sprite->End() is called

// spriteData.rect defines the portion of spriteData.texture to draw

//   spriteData.rect.right must be right edge + 1

//   spriteData.rect.bottom must be bottom edge + 1

//=============================================================================

void Graphics::drawSprite(const SpriteData &spriteData, COLOR_ARGB color)

{

    if(spriteData.texture == NULL)      // if no texture

        return;

    // Find center of sprite

    D3DXVECTOR2 spriteCenter=D3DXVECTOR2((float)(spriteData.width/2*spriteData.scale),

                                        (float)(spriteData.height/2*spriteData.scale));

    // Screen position of the sprite

    D3DXVECTOR2 translate=D3DXVECTOR2((float)spriteData.x,(float)spriteData.y);

    // Scaling X,Y

    D3DXVECTOR2 scaling(spriteData.scale,spriteData.scale);

    if (spriteData.flipHorizontal)  // if flip horizontal

    {

        scaling.x *= -1;            // negative X scale to flip

        // Get center of flipped image.

        spriteCenter.x -= (float)(spriteData.width*spriteData.scale);

        // Flip occurs around left edge, translate right to put

        // Flipped image in same location as original.

        translate.x += (float)(spriteData.width*spriteData.scale);

    }

    if (spriteData.flipVertical)    // if flip vertical

    {

        scaling.y *= -1;            // negative Y scale to flip

        // Get center of flipped image

        spriteCenter.y -= (float)(spriteData.height*spriteData.scale);

        // Flip occurs around top edge, translate down to put

        // Flipped image in same location as original.

        translate.y += (float)(spriteData.height*spriteData.scale);

    }

    // Create a matrix to rotate, scale and position our sprite

    D3DXMATRIX matrix;

    D3DXMatrixTransformation2D(

        &matrix,                // the matrix

        NULL,                   // keep origin at top left when scaling

        0.0f,                   // no scaling rotation

        &scaling,               // scale amount

        &spriteCenter,          // rotation center

        (float)(spriteData.angle),  // rotation angle

        &translate);            // X,Y location

    // Tell the sprite about the matrix "Hello Neo"

    sprite->SetTransform(&matrix);

    // Draw the sprite

    sprite->Draw(spriteData.texture,&spriteData.rect,NULL,NULL,color);

}
2.Texture的2个包装类
TextureManager(依赖loadTexture)用于载入一个IRECT3DTEXTURE9对象,Image类(依赖drawSprite)用于获取TextureManager的IRECT3DTEXTURE9对象并进行绘制

TextureManager
//=============================================================================

// Loads the texture file from disk.

// Post: returns true if successful, false if failed

//=============================================================================

bool TextureManager::initialize(Graphics *g, const char *f)

{

    try{

        graphics = g;                       // the graphics object

        file = f;                           // the texture file

        hr = graphics->loadTexture(file, TRANSCOLOR, width, height, texture);

        if (FAILED(hr))

        {

            SAFE_RELEASE(texture);

            return false;

        }

    }

    catch(...) {return false;}

    initialized = true;                    // set true when successfully initialized

    return true;

}
Image
//=============================================================================

// Draw this image using the specified SpriteData.

//   The current SpriteData.rect is used to select the texture.

// Pre : spriteBegin() is called

// Post: spriteEnd() is called

//=============================================================================

void Image::draw(SpriteData sd, COLOR_ARGB color)

{

    if (!visible || graphics == NULL)

        return;

    sd.rect = spriteData.rect;                  // use this Images rect to select texture

    sd.texture = textureManager->getTexture();  // get fresh texture incase onReset() was called

    if(color == graphicsNS::FILTER)             // if draw with filter

        graphics->drawSprite(sd, colorFilter);  // use colorFilter

    else

        graphics->drawSprite(sd, color);        // use color as filter

}
Spacewar载入图片
1.initialize
//=============================================================================

// Initializes the game

// Throws GameError on error

//=============================================================================

void Spacewar::initialize(HWND hwnd)

{

    Game::initialize(hwnd); // throws GameError

    // nebula texture

    if (!nebulaTexture.initialize(graphics,NEBULA_IMAGE))

        throw(GameError(gameErrorNS::FATAL_ERROR, "Error initializing nebula texture"));

    // planet texture

    if (!planetTexture.initialize(graphics,PLANET_IMAGE))

        throw(GameError(gameErrorNS::FATAL_ERROR, "Error initializing planet texture"));

    // nebula

    if (!nebula.initialize(graphics,0,0,0,&nebulaTexture))

        throw(GameError(gameErrorNS::FATAL_ERROR, "Error initializing nebula"));

    // planet

    if (!planet.initialize(graphics,0,0,0,&planetTexture))

        throw(GameError(gameErrorNS::FATAL_ERROR, "Error initializing planet"));

    // place planet in center of screen

    planet.setX(GAME_WIDTH*0.5f  - planet.getWidth()*0.5f);

    planet.setY(GAME_HEIGHT*0.5f - planet.getHeight()*0.5f);

    return;

}
2.render
//=============================================================================

// Render game items

//=============================================================================

void Spacewar::render()

{

    graphics->spriteBegin();                // begin drawing sprites

    nebula.draw();                          // add the orion nebula to the scene

    planet.draw();                          // add the planet to the scene

    graphics->spriteEnd();                  // end drawing sprites

}
呈现了2个图片

示例二:Spaceship
动画
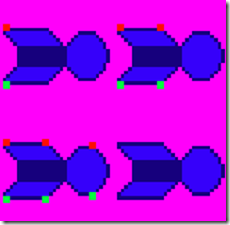
重复更新1张图的4个位置
//=============================================================================

// update

// typically called once per frame

// frameTime is used to regulate the speed of movement and animation

//=============================================================================

void Image::update(float frameTime)

{

    if (endFrame - startFrame > 0)          // if animated sprite

    {

        animTimer += frameTime;             // total elapsed time

        if (animTimer > frameDelay)

        {

            animTimer -= frameDelay;

            currentFrame++;

            if (currentFrame < startFrame || currentFrame > endFrame)

            {

                if(loop == true)            // if looping animation

                    currentFrame = startFrame;

                else                        // not looping animation

                {

                    currentFrame = endFrame;

                    animComplete = true;    // animation complete

                }

            }

            setRect();                      // set spriteData.rect

        }

    }

}
//=============================================================================

//  Set spriteData.rect to draw currentFrame

//=============================================================================

inline void Image::setRect()

{

    // configure spriteData.rect to draw currentFrame

    spriteData.rect.left = (currentFrame % cols) * spriteData.width;

    // right edge + 1

    spriteData.rect.right = spriteData.rect.left + spriteData.width;

    spriteData.rect.top = (currentFrame / cols) * spriteData.height;

    // bottom edge + 1

    spriteData.rect.bottom = spriteData.rect.top + spriteData.height;

}
示例三:Spaceship Movement
各种效果叠加组成的动画效果(图片更换,角度,大小,位置)来模拟
//=============================================================================

// Update all game items

//=============================================================================

void Spacewar::update()

{

    ship.update(frameTime);

    ship.setDegrees(ship.getDegrees() + frameTime * ROTATION_RATE); // rotate ship

    ship.setScale(ship.getScale() - frameTime * SCALE_RATE);    // make ship smaller

    ship.setX(ship.getX() + frameTime * SHIP_SPEED);    // move ship right

    if (ship.getX() > GAME_WIDTH)                       // if off screen right

    {

        ship.setX((float)-ship.getWidth());             // position off screen left

        ship.setScale(SHIP_SCALE);                      // set to starting size

    }

}
示例四:Spaceship Control
根据键盘来移动元素
//=============================================================================

// Update all game items

//=============================================================================

void Spacewar::update()

{

    if(input->isKeyDown(SHIP_RIGHT_KEY))            // if move right

    {

        ship.setX(ship.getX() + frameTime * SHIP_SPEED);

        if (ship.getX() > GAME_WIDTH)               // if off screen right

            ship.setX((float)-ship.getWidth());     // position off screen left

    }

    if(input->isKeyDown(SHIP_LEFT_KEY))             // if move left

    {

        ship.setX(ship.getX() - frameTime * SHIP_SPEED);

        if (ship.getX() < -ship.getWidth())         // if off screen left

            ship.setX((float)GAME_WIDTH);           // position off screen right

    }

    if(input->isKeyDown(SHIP_UP_KEY))               // if move up

    {

        ship.setY(ship.getY() - frameTime * SHIP_SPEED);

        if (ship.getY() < -ship.getHeight())        // if off screen top

            ship.setY((float)GAME_HEIGHT);          // position off screen bottom

    }

    if(input->isKeyDown(SHIP_DOWN_KEY))             // if move down

    {

        ship.setY(ship.getY() + frameTime * SHIP_SPEED);

        if (ship.getY() > GAME_HEIGHT)              // if off screen bottom

            ship.setY((float)-ship.getHeight());    // position off screen top

    }

    ship.update(frameTime);

}
Programming 2D Games 读书笔记(第五章)的更多相关文章
- Programming 2D Games 读书笔记(第四章)
示例一:Game Engine Part 1 更加完善游戏的基本流程 Graphics添加了以下几个方法,beginScene和endScene提高绘图,showBackbuffer去掉了clea ...
- Programming 2D Games 读书笔记(第六章)
http://www.programming2dgames.com/chapter6.htm 示例一:Bounce 边界碰撞测试 velocity为移动的速度, 超过右边界,velocity.x为 ...
- Programming 2D Games 读书笔记(第三章)
示例一:DirectX Window Graphics类用于初始化Direct 3D 主流程: 仅需要粗体部分 try{ // Create Graphics object graphics = ...
- Programming 2D Games 读书笔记(第二章)
本意还是想了解DirectX的,由于网上拿不到书的pdf文档,幸好有作者的源代码示例,想完整的看一下,基本的游戏需要的点. 下面直接以代码为例,仅用于帮助自身理解 http://www.progr ...
- 《Linux内核设计与实现》第四周读书笔记——第五章
<Linux内核设计与实现>第四周读书笔记--第五章 20135301张忻 估算学习时间:共1.5小时 读书:1.0 代码:0 作业:0 博客:0.5 实际学习时间:共2.0小时 读书:1 ...
- 《Linux内核设计与实现》读书笔记——第五章
<Linux内核设计与实现>读书笔记--第五章 标签(空格分隔): 20135321余佳源 第五章 系统调用 操作系统中,内核提供了用户进程与内核进行交互的一组接口.这些接口让应用程序受限 ...
- Programming Entity Framework-dbContext 学习笔记第五章
### Programming Entity Framework-dbContext 学习笔记 第五章 将图表添加到Context中的方式及容易出现的错误 方法 结果 警告 Add Root 图标中的 ...
- 《Linux内核设计与实现》读书笔记 第五章 系统调用
第五章系统调用 系统调用是用户进程与内核进行交互的接口.为了保护系统稳定可靠,避免应用程序恣意忘形. 5.1与内核通信 系统调用在用户空间进程和硬件设备间添加了一个中间层, 作用:为用户空间提供了一种 ...
- Getting Started With Hazelcast 读书笔记(第五章,第六章)
第五章 监听 本章应该是Hazelcast的核心机制了,Hazelcast通过注册各种监听器获悉集群中其他应用对数据的修改,成员的加入,退出等. 分为3个层次. 1.EntryListener(对数据 ...
随机推荐
- Chrome插件笔记之content_scripts
一.概论 说这个之前先看一个段子,讲的是甲方有一奇葩客户,这客户看一网站某些样式很别扭不得劲,非要让乙方修改,乍一听没毛病,但关键是这网站不是乙方家的,根本没有修改权限,怎么办,客户就是上帝,上帝的要 ...
- python版本管理工具pyenv和包管理工具pipenv
一.pyenv版本管理工具 pyenv是一个python版本管理工具,可以实现轻松切换多个python版本 它可根据每个用户更改全局python版本,也可以为每个项目指定python版本,还可以管理v ...
- hdu 4348 To the moon (主席树)
版权声明:本文为博主原创文章,未经博主允许不得转载. hdu 4348 题意: 一个长度为n的数组,4种操作 : (1)C l r d:区间[l,r]中的数都加1,同时当前的时间戳加1 . (2)Q ...
- [HNOI2007]梦幻岛宝珠 「套路:分层 $DP$」
显然直接 \(01\) 背包会超时并且超空间 套路:分层 \(DP\) 「考虑将每个子结构看作一层(也就是包含了不止 \(1\) 个物品的信息),并且大层不会对小层造成影响,可以考虑先进行每一层的自我 ...
- 揭开webRTC媒体服务器的神秘面纱——WebRTC媒体服务器&开源项目介绍
揭开webRTC媒体服务器的神秘面纱--WebRTC媒体服务器&开源项目介绍 WebRTC生态系统是非常庞大的.当我第一次尝试理解WebRTC时,网络资源之多让人难以置信.本文针对webRTC ...
- apache虚拟主机配置及常用安全配置
环境准备: 服务器系统:CentOS 6.5 安装lamp环境: yum -y install mysql mysql-server php php-mysql httpd php-gd* freet ...
- Angular2 CLI安装
官方文档: https://angular.cn/docs/ts/latest/cli-quickstart.html 实现步骤: 1.设置开发环境 2.创建新项目以及应用的骨架 3.启动开启服务 4 ...
- OI 助手 | 简洁快速的 OI 工具箱 (原 竞赛目录生成)
原竞赛目录生成 (4.0 版本前) 开发者:abc2237512422 OI 助手是一个轻量简洁的 OI 工具箱.你可以使用它来快速进行 OI 竞赛中一些繁琐的操作,例如生成竞赛目录.对拍.它为你省去 ...
- django为url写测试用例
这个和为orm写测试用例类似. 但为了区分文件,还是建议在app目录下,用tests_orm.py,tests_url.py这类单独文件加以区分. urls.py如果如这样. from django. ...
- Windows 7 x64环境下SDK Manager闪退的解决方法
1.下载并解压:http://dl.google.com/android/adt/adt-bundle-windows-x86_64-20140702.zip 2.安装JDK,否则SDK Manage ...