kubeadm安装部署kubernetes 1.11.3(单主节点)
由于此处docker代理无法使用,因此,请各位设置有效代理进行部署,勿使用文档中的docker代理。整体部署步骤不用改动。谢谢各位支持。
1、部署背景
操作系统版本:CentOS Linux release 7.5. (Core)

docker-ce版本:18.06.-ce

kubernetes版本:1.11.

kubeadm版本:v1.11.3
2、节点划分
master节点:

    主机名:k8s-master-

    ip地址:192.168.40.52

node1节点:

    主机名:k8s-node-

    ip地址:192.168.40.53

node2节点:

    主机名:k8s-node-

    ip地址:192.168.40.54
3、部署前提
、关闭selinux、firewalld。

、开启内核转发。
3、关闭swap交换分区
4、master免密钥登录所有node节点
5、所有节点配置ntp时间同步服务,保证节点时间一致。
6、加载ipvs相关模块
4、集群所有节点初始化
、加载ipvs相关模块以及安装依赖关系

    安装依赖。

    yum install ipset ipvsadm conntrack-tools.x86_64 -y

    加载模块。

    modprobe ip_vs_rr

    modprobe ip_vs_wrr

    modprobe ip_vs_sh

    modprobe ip_vs

    查看模块加载信息。

    lsmod| grep ip_vs

、开启内核转发,并使之生效

cat <<EOF | tee /etc/sysctl.d/k8s.conf

net.ipv4.ip_forward =

net.bridge.bridge-nf-call-ip6tables =

net.bridge.bridge-nf-call-iptables =

EOF

sysctl -p /etc/sysctl.d/k8s.conf
、关闭selinux,关闭swap分区,关闭firewalld。

#关闭防火墙,并且禁止自动启动。
systemctl stop firewalld
systemctl disable firewalld

#关闭selinux
sed -i 's#enforcing#disabled#ig' /etc/sysconfig/selinux

#关闭swap分区
swapoff -a && sysctl -w vm.swappiness=0

#修改文件最大打开数量
echo -e '*\tsoft\tnproc\t4096\nroot\tsoft\tnproc\tunlimited' > /etc/security/limits.d/20-nproc.conf
echo -e '* soft nofile 65536\n* hard nofile 65536' > /etc/security/limits.conf
、配置时间同步以及hosts解析,以及实现master节点通过免密钥登录node节点

#安装ntp命令,同时配置任务计划
yum install ntp -y
任务计划命令如下:
*/5 * * * *  /usr/sbin/ntpdate  0.centos.pool.ntp.org > /dev/null 2> /dev/null

#配置服务器通过hostname可以解析,保证master和node节点上一致,内容如下:
192.168.40.52 k8s-master-52 master
192.168.40.53 k8s-node-53
192.168.40.54 k8s-node-54

#配置master节点通过免秘钥登录node节点
ssh-keygen -t rsa
一路回车,生成公钥和私钥。

ssh-copy-id -i ~/.ssh/id_rsa.pub k8s-node-53
ssh-copy-id -i ~/.ssh/id_rsa.pub k8s-node-54
初始化完成之后,最好能重启服务器。
5、在master节点进行操作
1、配置kubernetes yum源。
vim /etc/yum.repos.d/kubernetes.repo,内容如下:

[kubernetes]

name=kubernetes

baseurl=https://mirrors.aliyun.com/kubernetes/yum/repos/kubernetes-el7-x86_64/

enabled=

gpgcheck=0

2、配置docker-ce yum源。
yum install -y yum-utils device-mapper-persistent-data lvm2
yum-config-manager --add-repo http://mirrors.aliyun.com/docker-ce/linux/centos/docker-ce.repo

3、安装docker-ce、kubernetes。
yum install docker-ce kubelet kubeadm kubectl
软件及依赖的版本如下:


4、配置docker容器代理、启动docker-ce,同时配置docker、kubelet开机自动启动。
配置代理如下:
  编辑文件:/usr/lib/systemd/system/docker.service
  Environment="HTTPS_PROXY=http://www.ik8s.io:10080"
  Environment="NO_PROXY=127.0.0.0/8,192.168.0.0/16"

重新加载相关服务配置。
systemctl daemon-reload

#启动docker
systemctl start docker

#配置docker、kubelet开机自动启动
systemctl enable docker
systemctl enable kubelet
在此处,kubelet不用启动,在kubeadm初始化服务器的时候,初始化完成,会自动启动kubelet服务。
5、初始化master节点
[root@k8s-master-52 ]# kubeadm init --kubernetes-version=v1.11.3 --pod-network-cidr=10.244.0.0/16 --service-cidr=10.96.0.0/12
命令解析:
  --kubernetes-version=v1.11.3:指定kubernetes版本
  --pod-network-cidr=10.244.0.0/16:指定pod网络地址池
  --service-cidr=10.96.0.0/12:指定service网络地址池

命令执行输出如下:

查看端口占用情况,如下:

其中6443为apiserver的https端口。
创建配置文件,使kubectl客户端能正常进行命令进行kubernetes集群的相关操作。
6、在node节点操作
、配置kubernetes yum源。
vim /etc/yum.repos.d/kubernetes.repo,内容如下: [kubernetes]
name=kubernetes
baseurl=https://mirrors.aliyun.com/kubernetes/yum/repos/kubernetes-el7-x86_64/
enabled=
gpgcheck= 、配置docker-ce yum源。
yum install -y yum-utils device-mapper-persistent-data lvm2
yum-config-manager --add-repo http://mirrors.aliyun.com/docker-ce/linux/centos/docker-ce.repo 、安装docker-ce、kubernetes。
yum install docker-ce kubelet kubeadm kubectl
软件及依赖的版本如下:
配置代理如下:
编辑文件:/usr/lib/systemd/system/docker.service
Environment="HTTPS_PROXY=http://www.ik8s.io:10080"
Environment="NO_PROXY=127.0.0.0/8,192.168.0.0/16" 重新加载相关服务配置。
systemctl daemon-reload #启动docker
systemctl start docker #配置docker、kubelet开机自动启动
systemctl enable docker
systemctl enable kubelet
在此处,kubelet不用启动,在kubeadm初始化服务器的时候,初始化完成,会自动启动kubelet服务。 5、安装flannel网络插件。
[root@k8s-node-53 ~]# kubeadm join 192.168.40.52:6443 --token k5mudw.bri3lujvlsxffbqo --discovery-token-ca-cert-hash sha256:f6cf089d5aff3230996f75ca71e74273095c901c1aa45f1325ade0359aeb336e
[preflight] running pre-flight checks
[WARNING RequiredIPVSKernelModulesAvailable]: the IPVS proxier will not be used, because the following required kernel modules are not loaded: [ip_vs_sh ip_vs ip_vs_rr ip_vs_wrr] or no builtin kernel ipvs support: map[ip_vs_wrr:{} ip_vs_sh:{} nf_conntrack_ipv4:{} ip_vs:{} ip_vs_rr:{}]
you can solve this problem with following methods:
1. Run 'modprobe -- ' to load missing kernel modules;
2. Provide the missing builtin kernel ipvs support
I0913 21:13:20.983878 1794 kernel_validator.go:81] Validating kernel version
I0913 21:13:20.983943 1794 kernel_validator.go:96] Validating kernel config
[WARNING SystemVerification]: docker version is greater than the most recently validated version. Docker version: 18.06.1-ce. Max validated version: 17.03
[discovery] Trying to connect to API Server "192.168.40.52:6443"
[discovery] Created cluster-info discovery client, requesting info from "https://192.168.40.52:6443"
[discovery] Requesting info from "https://192.168.40.52:6443" again to validate TLS against the pinned public key
[discovery] Cluster info signature and contents are valid and TLS certificate validates against pinned roots, will use API Server "192.168.40.52:6443"
[discovery] Successfully established connection with API Server "192.168.40.52:6443"
[kubelet] Downloading configuration for the kubelet from the "kubelet-config-1.11" ConfigMap in the kube-system namespace
[kubelet] Writing kubelet configuration to file "/var/lib/kubelet/config.yaml"
[kubelet] Writing kubelet environment file with flags to file "/var/lib/kubelet/kubeadm-flags.env"
[preflight] Activating the kubelet service
[tlsbootstrap] Waiting for the kubelet to perform the TLS Bootstrap...
[patchnode] Uploading the CRI Socket information "/var/run/dockershim.sock" to the Node API object "k8s-node-53" as an annotation
This node has joined the cluster:
* Certificate signing request was sent to master and a response
was received.
* The Kubelet was informed of the new secure connection details.
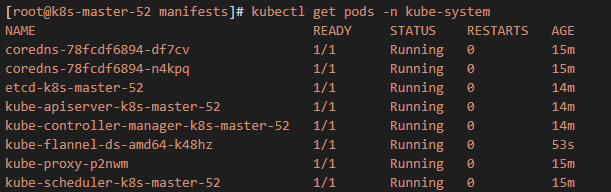
Run 'kubectl get nodes' on the master to see this node join the cluster.
将k8s-node-54节点加入k8s集群。
[root@k8s-node-54 ~]# kubeadm join 192.168.40.52:6443 --token k5mudw.bri3lujvlsxffbqo --discovery-token-ca-cert-hash sha256:f6cf089d5aff3230996f75ca71e74273095c901c1aa45f1325ade0359aeb336e
[preflight] running pre-flight checks
[WARNING RequiredIPVSKernelModulesAvailable]: the IPVS proxier will not be used, because the following required kernel modules are not loaded: [ip_vs_sh ip_vs ip_vs_rr ip_vs_wrr] or no builtin kernel ipvs support: map[ip_vs:{} ip_vs_rr:{} ip_vs_wrr:{} ip_vs_sh:{} nf_conntrack_ipv4:{}]
you can solve this problem with following methods:
1. Run 'modprobe -- ' to load missing kernel modules;
2. Provide the missing builtin kernel ipvs support
I0913 21:21:03.915755 11043 kernel_validator.go:81] Validating kernel version
I0913 21:21:03.915806 11043 kernel_validator.go:96] Validating kernel config
[WARNING SystemVerification]: docker version is greater than the most recently validated version. Docker version: 18.06.1-ce. Max validated version: 17.03
[discovery] Trying to connect to API Server "192.168.40.52:6443"
[discovery] Created cluster-info discovery client, requesting info from "https://192.168.40.52:6443"
[discovery] Requesting info from "https://192.168.40.52:6443" again to validate TLS against the pinned public key
[discovery] Cluster info signature and contents are valid and TLS certificate validates against pinned roots, will use API Server "192.168.40.52:6443"
[discovery] Successfully established connection with API Server "192.168.40.52:6443"
[kubelet] Downloading configuration for the kubelet from the "kubelet-config-1.11" ConfigMap in the kube-system namespace
[kubelet] Writing kubelet configuration to file "/var/lib/kubelet/config.yaml"
[kubelet] Writing kubelet environment file with flags to file "/var/lib/kubelet/kubeadm-flags.env"
[preflight] Activating the kubelet service
[tlsbootstrap] Waiting for the kubelet to perform the TLS Bootstrap...
[patchnode] Uploading the CRI Socket information "/var/run/dockershim.sock" to the Node API object "k8s-node-54" as an annotation
This node has joined the cluster:
* Certificate signing request was sent to master and a response
was received.
* The Kubelet was informed of the new secure connection details.
Run 'kubectl get nodes' on the master to see this node join the cluster.
7、创建角色,使用k8s dashboard查看集群状态。
vim dashboard-admin.yaml

内容如下:

apiVersion: rbac.authorization.k8s.io/v1beta1

kind: ClusterRoleBinding

metadata:

  name: kubernetes-dashboard

  labels:

    k8s-app: kubernetes-dashboard

roleRef:

  apiGroup: rbac.authorization.k8s.io

  kind: ClusterRole

  name: cluster-admin

subjects:

- kind: ServiceAccount

  name: kubernetes-dashboard

  namespace: kube-system
执行以下命令创建角色:
kubectl create -f dashboard-admin.yaml
8、安装k8s dashboard
vim kubernetes-dashboard.yaml
内容如下:

apiVersion: v1

kind: Secret

metadata:

  labels:

    k8s-app: kubernetes-dashboard

  name: kubernetes-dashboard-certs

  namespace: kube-system

type: Opaque

---

# ------------------- Dashboard Service Account ------------------- #

apiVersion: v1

kind: ServiceAccount

metadata:

  labels:

    k8s-app: kubernetes-dashboard

  name: kubernetes-dashboard

  namespace: kube-system

---

# ------------------- Dashboard Role & Role Binding ------------------- #

kind: Role

apiVersion: rbac.authorization.k8s.io/v1

metadata:

  name: kubernetes-dashboard-minimal

  namespace: kube-system

rules:

  # Allow Dashboard to create 'kubernetes-dashboard-key-holder' secret.

- apiGroups: [""]

  resources: ["secrets"]

  verbs: ["create"]

  # Allow Dashboard to create 'kubernetes-dashboard-settings' config map.

- apiGroups: [""]

  resources: ["configmaps"]

  verbs: ["create"]

  # Allow Dashboard to get, update and delete Dashboard exclusive secrets.

- apiGroups: [""]

  resources: ["secrets"]

  resourceNames: ["kubernetes-dashboard-key-holder", "kubernetes-dashboard-certs"]

  verbs: ["get", "update", "delete"]

  # Allow Dashboard to get and update 'kubernetes-dashboard-settings' config map.

- apiGroups: [""]

  resources: ["configmaps"]

  resourceNames: ["kubernetes-dashboard-settings"]

  verbs: ["get", "update"]

  # Allow Dashboard to get metrics from heapster.

- apiGroups: [""]

  resources: ["services"]

  resourceNames: ["heapster"]

  verbs: ["proxy"]

- apiGroups: [""]

  resources: ["services/proxy"]

  resourceNames: ["heapster", "http:heapster:", "https:heapster:"]

  verbs: ["get"]

---

apiVersion: rbac.authorization.k8s.io/v1

kind: RoleBinding

metadata:

  name: kubernetes-dashboard-minimal

  namespace: kube-system

roleRef:

  apiGroup: rbac.authorization.k8s.io

  kind: Role

  name: kubernetes-dashboard-minimal

subjects:

- kind: ServiceAccount

  name: kubernetes-dashboard

  namespace: kube-system

---

# ------------------- Dashboard Deployment ------------------- #

kind: Deployment

apiVersion: apps/v1beta2

metadata:

  labels:

    k8s-app: kubernetes-dashboard

  name: kubernetes-dashboard

  namespace: kube-system

spec:

  replicas: 1

  revisionHistoryLimit: 10

  selector:

    matchLabels:

      k8s-app: kubernetes-dashboard

  template:

    metadata:

      labels:

        k8s-app: kubernetes-dashboard

    spec:

      containers:

      - name: kubernetes-dashboard

        image: k8s.gcr.io/kubernetes-dashboard-amd64:v1.10.0

        ports:

        - containerPort: 8443

          protocol: TCP

        args:

          - --auto-generate-certificates

          # Uncomment the following line to manually specify Kubernetes API server Host

          # If not specified, Dashboard will attempt to auto discover the API server and connect

          # to it. Uncomment only if the default does not work.

          # - --apiserver-host=http://my-address:port

        volumeMounts:

        - name: kubernetes-dashboard-certs

          mountPath: /certs

          # Create on-disk volume to store exec logs

        - mountPath: /tmp

          name: tmp-volume

        livenessProbe:

          httpGet:

            scheme: HTTPS

            path: /

            port: 8443

          initialDelaySeconds: 30

          timeoutSeconds: 30

      volumes:

      - name: kubernetes-dashboard-certs

        secret:

          secretName: kubernetes-dashboard-certs

      - name: tmp-volume

        emptyDir: {}

      serviceAccountName: kubernetes-dashboard

      # Comment the following tolerations if Dashboard must not be deployed on master

      tolerations:

      - key: node-role.kubernetes.io/master

        effect: NoSchedule

---

# ------------------- Dashboard Service ------------------- #

kind: Service

apiVersion: v1

metadata:

  labels:

    k8s-app: kubernetes-dashboard

  name: kubernetes-dashboard

  namespace: kube-system

spec:

  type: NodePort

  ports:

    - port: 443

      targetPort: 8443

      nodePort: 30001

  selector:

    k8s-app: kubernetes-dashboard
执行以下命令安装dashboard:
kubectl apply -f kubernetes-dashboard.yaml
访问dashboard url如下:
https://192.168.40.54:30001
此处使用集群中任一节点ip,即可访问dashboard页面。
9、生成token认证文件
在主节点上进行执行。
[root@k8s-master-52 opt]# kubectl -n kube-system describe secret $(kubectl -n kube-system get secret | grep admin-user | awk '{print $1}')
Name: admin-user-token-hddfq
Namespace: kube-system
Labels: <none>
Annotations: kubernetes.io/service-account.name=admin-user
kubernetes.io/service-account.uid=2d23955c-b75d-11e8-a770-5254007ec152
Type: kubernetes.io/service-account-token
Data
====
ca.crt: 1025 bytes
namespace: 11 bytes
token: eyJhbGciOiJSUzI1NiIsImtpZCI6IiJ9.eyJpc3MiOiJrdWJlcm5ldGVzL3NlcnZpY2VhY2NvdW50Iiwia3ViZXJuZXRlcy5pby9zZXJ2aWNlYWNjb3VudC9uYW1lc3BhY2UiOiJrdWJlLXN5c3RlbSIsImt1YmVybmV0ZXMuaW8vc2VydmljZWFjY291bnQvc2VjcmV0Lm5hbWUiOiJhZG1pbi11c2VyLXRva2VuLWhkZGZxIiwia3ViZXJuZXRlcy5pby9zZXJ2aWNlYWNjb3VudC9zZXJ2aWNlLWFjY291bnQubmFtZSI6ImFkbWluLXVzZXIiLCJrdWJlcm5ldGVzLmlvL3NlcnZpY2VhY2NvdW50L3NlcnZpY2UtYWNjb3VudC51aWQiOiIyZDIzOTU1Yy1iNzVkLTExZTgtYTc3MC01MjU0MDA3ZWMxNTIiLCJzdWIiOiJzeXN0ZW06c2VydmljZWFjY291bnQ6a3ViZS1zeXN0ZW06YWRtaW4tdXNlciJ9.5GakSIdKw7H62P5Bk3c8879Jc68cAN9gcQRMYvaWLo-Cq6cwnpOoz6fwYm1AoFRfJ_ddMoctqB_rp72j_AqSO0ihp3_H_1dX31bo_ddp1xtj5Yg3IswhcxU2RCBmoIn0JmgCeWxoIt_KAYpNJBJqJKR5oIS2hr_Xfew5GNXRC6_OE9fm7ljRy4XqkBTaj6_1K0wUrmoC4WFHQGZzTUq6mmVsJlD_o3J35sMzi993WtP0APeBc6v66RokHW5EAECN9__ipA9cQlqmtLkgFydORMvUmd4bOWNFoNticx_M6poDlzTLRqmKY5I3mxJmhCCHr2gp7X0auo1enLW765t-7g
使用最后生成的token认证内容登录dashboard。
kubeadm安装部署kubernetes 1.11.3(单主节点)的更多相关文章
- 使用 Kubeadm 安装部署 Kubernetes 1.12.1 集群
手工搭建 Kubernetes 集群是一件很繁琐的事情,为了简化这些操作,就产生了很多安装配置工具,如 Kubeadm ,Kubespray,RKE 等组件,我最终选择了官方的 Kubeadm 主要是 ...
- Kubeadm 安装部署 Kubernetes 集群
阅读目录: 准备工作 部署 Master 管理节点 部署 Minion 工作节点 部署 Hello World 应用 安装 Dashboard 插件 安装 Heapster 插件 后记 相关文章:Ku ...
- centos7使用kubeadm安装部署kubernetes 1.14
应用背景: 截止目前为止,高热度的kubernetes版本已经发布至1.14,在此记录一下安装部署步骤和过程中的问题排查. 部署k8s一般两种方式:kubeadm(官方称目前已经GA,可以在生产环境使 ...
- 使用 kubeadm 安装部署 kubernetes 1.9-部署heapster插件
1.先到外网下载好镜像倒进各个节点 2.下载yaml文件和创建应用 mkdir -p ~/k8s/heapster cd ~/k8s/heapster wget https://raw.githubu ...
- kubernetes系列03—kubeadm安装部署K8S集群
本文收录在容器技术学习系列文章总目录 1.kubernetes安装介绍 1.1 K8S架构图 1.2 K8S搭建安装示意图 1.3 安装kubernetes方法 1.3.1 方法1:使用kubeadm ...
- [转帖]centos7 使用kubeadm 快速部署 kubernetes 国内源
centos7 使用kubeadm 快速部署 kubernetes 国内源 https://www.cnblogs.com/qingfeng2010/p/10540832.html 前言 搭建kube ...
- 安装部署 Kubernetes 集群
安装部署 Kubernetes 集群 阅读目录: 准备工作 部署 Master 管理节点 部署 Minion 工作节点 部署 Hello World 应用 安装 Dashboard 插件 安装 Hea ...
- Kubernetes探索学习001--Centos7.6使用kubeadm快速部署Kubernetes集群
Centos7.6使用kubeadm快速部署kubernetes集群 为什么要使用kubeadm来部署kubernetes?因为kubeadm是kubernetes原生的部署工具,简单快捷方便,便于新 ...
- kubeadm快速部署kubernetes(十九)
安装要求 部署Kubernetes集群机器需要满足以下几个条件: 一台或多台机器,操作系统 CentOS7.x-86_x64 硬件配置:2GB或更多RAM,2个CPU或更多CPU,硬盘30GB或更多 ...
随机推荐
- 包学会之浅入浅出 Vue.js:开学篇
2016年,乃至接下来整个2017年,如果你要问前端技术框架什么最火,那无疑就是前端三巨头:React.Angular.Vue.没错,什么jQuery,seaJs,gulp等都逐渐脱离了热点.面试的时 ...
- C# winform 设置WebBowser 内核版本
一种是在网页头部 用 <meta http-equiv="X-UA-Compatible" content="IE=edge"> 使用当前浏览器最新 ...
- python 回溯法 子集树模板 系列 —— 3、0-1背包问题
问题 给定N个物品和一个背包.物品i的重量是Wi,其价值位Vi ,背包的容量为C.问应该如何选择装入背包的物品,使得放入背包的物品的总价值为最大? 分析 显然,放入背包的物品,是N个物品的所有子集的其 ...
- 【第五课】LNMP环境的入门
目录 一. LNMP环境介绍 二.Mysql的二进制免编译安装 三.PHP 7.2.5编译部署 四.Nginx的编译安装 五.YUM安装Nginx 一. LNMP环境介绍 LNMP(Linux + N ...
- [CF1062F]Upgrading Cities[拓扑排序]
题意 一张 \(n\) 点 \(m\) 边的 \(DAG\) ,问有多少个点满足最多存在一个点不能够到它或者它不能到. \(n,m\leq 3\times 10^5\) 分析 考虑拓扑排序,如果 \( ...
- 关于web.xml3.0启动报错
九月 08, 2017 10:18:19 上午 org.apache.tomcat.util.digester.SetPropertiesRule begin 警告: [SetPropertiesRu ...
- install opencv 2.4.10 with issue :"nvcc fatal : Unsupported gpu architecture 'compute_11'"
issue: nvcc fatal : Unsupported gpu architecture 'compute_11'CMake Error at cuda_compile_generated ...
- JNI探秘-----FileInputStream的read方法详解
作者:zuoxiaolong8810(左潇龙),转载请注明出处,特别说明:本博文来自博主原博客,为保证新博客中博文的完整性,特复制到此留存,如需转载请注明新博客地址即可. 上一章我们已经分析过File ...
- Js_封装JQ库为插件
//在jQuery匿名函数中,采用jQuery.extend();方法创建jQuery插件 //在jQuery匿名函数中, 采用对象.属性 = 函数的方式创建jQuery插件 (function ($ ...
- 使用阿里云Python SDK管理ECS安全组
准备工作 本机操作系统:CentOS7 python版本:python2.7.5 还需要准备如下信息: 一个云账号.Access Key ID.Access Key Secret.安全组ID.Regi ...