Send Push Notifications to iOS Devices using Xcode 8 and Swift 3, APNs Auth Key
Send Push Notifications to iOS Devices using Xcode 8 and Swift 3
OCT 6, 2016
Push notifications are a great way to ensure your users re-engage with your app every once in a while, but implementing them on iOS can be challenging, especially with all of the changes in Xcode and Swift, not to mention the various iOS versions which deprecate the notification classes we grew accustomed to in the past.
The Internet is overflowing with guides on how to implement iOS push notifications -- however, many of these guides are cumbersome, complicated, not up-to-date with Swift 3 and Xcode 8, and/or don't provide backward-compatibility with all iOS versions that support Swift (iOS 7 - iOS 10). Also, they do not make use of the new APNs Auth Keys which greatly simplify the steps involved in sending push notifications.
By following this guide, you'll be able to implement push notifications in your iOS app and send notifications from Node.js, using the latest technologies and without much hassle!

Preparations
First off, open your iOS project in Xcode 8. If you don't have Xcode 8 yet, be sure to update via the App Store. If you don't have an iOS project yet, simply create a new one. Make sure that your codebase has been updated to use Swift 3.
Second, make sure that you have an active Apple Developer Program Membership, which costs $100/year. It is a requirement in order to send push notifications to your iOS app. Also, make sure Xcode is configured to use the iCloud account which contains your active Apple Developer Program Membership.
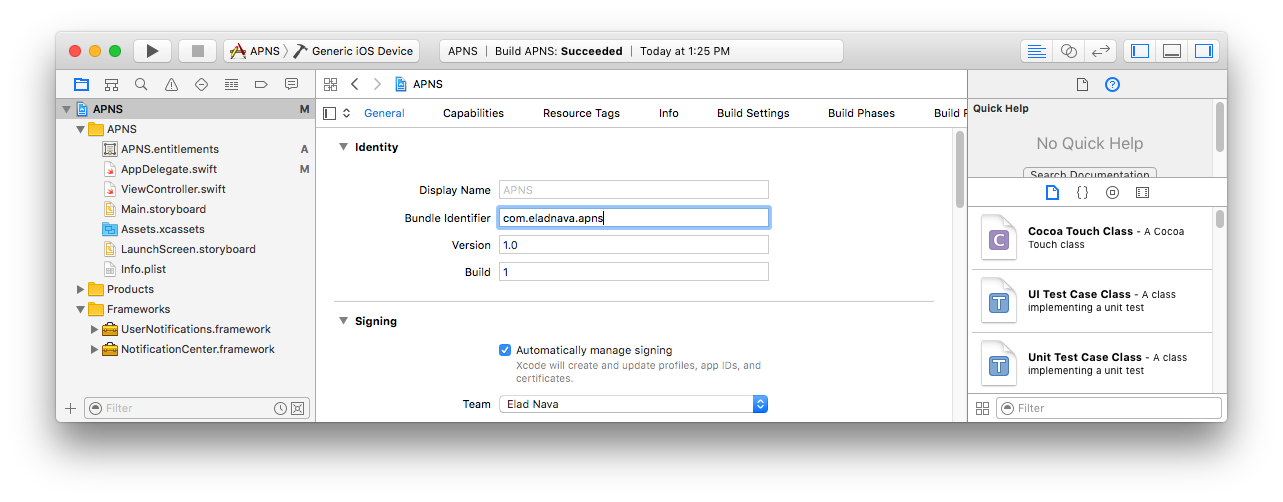
Third, make sure that your app has a Bundle Identifier configured in the project editor:
Enabling Push Notifications
The first step in setting up push notifications is enabling the feature within Xcode 8 for your app. Simply go to the project editor for your target and then click on theCapabilities tab. Look for Push Notifications and toggle its value to ON:

Xcode should display two checkmarks indicating that the capability was successfully enabled. Behind the scenes, Xcode creates an App ID in the Developer Center and enables the Push Notifications service for your app.
Registering Devices
Devices need to be uniquely identified to receive push notifications.
Every device that installs your app is assigned a unique device token by APNs that you can use to push it at any given time. Once the device has been assigned a unique token, it should be persisted in your backend database.
A sample device token looks like this:
5311839E985FA01B56E7AD74334C0137F7D6AF71A22745D0FB50DED665E0E882
To request a device token for the current device, open AppDelegate.swift and add the following to the didFinishLaunchingWithOptions callback function, before the return statement:
// iOS 10 support

if #available(iOS 10, *) {

    UNUserNotificationCenter.current().requestAuthorization(options:[.badge, .alert, .sound]){ (granted, error) in }

    application.registerForRemoteNotifications()

}

// iOS 9 support

else if #available(iOS 9, *) {

    UIApplication.shared.registerUserNotificationSettings(UIUserNotificationSettings(types: [.badge, .sound, .alert], categories: nil))

    UIApplication.shared.registerForRemoteNotifications()

}

// iOS 8 support

else if #available(iOS 8, *) {

    UIApplication.shared.registerUserNotificationSettings(UIUserNotificationSettings(types: [.badge, .sound, .alert], categories: nil))

    UIApplication.shared.registerForRemoteNotifications()

}

// iOS 7 support

else {

    application.registerForRemoteNotifications(matching: [.badge, .sound, .alert])

}
In iOS 10, a new framework called UserNotifications was introduced and must be imported in order to access the UNUserNotificationCenter class.
Add the following import statement to the top of AppDelegate.swift:
import UserNotifications
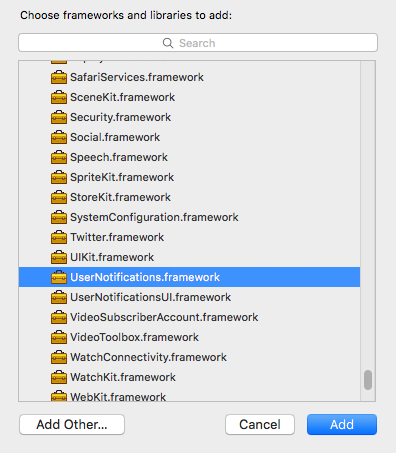
Next, go to the project editor for your target, and in the General tab, look for the Linked Frameworks and Libraries section.
Click + and select UserNotifications.framework:
Next, add the following callbacks in AppDelegate.swift which will be invoked when APNs has either successfully registered or failed registering the device to receive notifications:
// Called when APNs has assigned the device a unique token

func application(_ application: UIApplication, didRegisterForRemoteNotificationsWithDeviceToken deviceToken: Data) {

    // Convert token to string

    let deviceTokenString = deviceToken.reduce("", {$0 + String(format: "%02X", $1)})

    // Print it to console

    print("APNs device token: \(deviceTokenString)")

    // Persist it in your backend in case it's new

}

// Called when APNs failed to register the device for push notifications

func application(_ application: UIApplication, didFailToRegisterForRemoteNotificationsWithError error: Error) {

    // Print the error to console (you should alert the user that registration failed)

    print("APNs registration failed: \(error)")

}
It's up to you to implement logic that will persist the token in your application backend. Later in this guide, your backend server will connect to APNs and send push notifications by providing this very same device token to indicate which device(s) should receive the notification.
Note that the device token may change in the future due to various reasons, so useNSUserDefaults, a local key-value store, to persist the token locally and only update your backend when the token has changed, to avoid unnecessary requests.
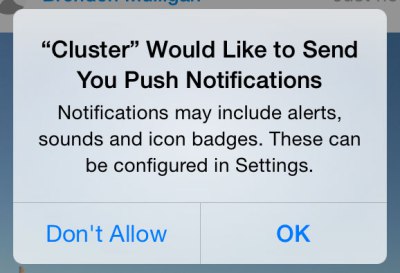
Run your app on a physical iOS device (the iOS simulator cannot receive notifications) after making the necessary modifications to AppDelegate.swift. Look for the following dialog, and press OK to permit your app to receive push notifications:
Within a second or two, the Xcode console should display your device's unique token. Copy it and save it for later.
Prepare to Receive Notifications
Add the following callback in AppDelegate.swift which will be invoked when your app receives a push notification sent by your backend server:
// Push notification received

func application(_ application: UIApplication, didReceiveRemoteNotification data: [AnyHashable : Any]) {

    // Print notification payload data

    print("Push notification received: \(data)")

}
Note that this callback will only be invoked whenever the user has either clicked or swiped to interact with your push notification from the lock screen / Notification Center, or if your app was open when the push notification was received by the device.
It's up to you to develop the actual logic that gets executed when a notification is interacted with. For example, if you have a messenger app, a "new message" push notification should open the relevant chat page and cause the list of messages to be updated from the server. Make use of the data object which will contain any data that you send from your application backend, such as the chat ID, in the messenger app example.
It's important to note that in the event your app is open when a push notification is received, the user will not see the notification at all, and it is up to you to notify the user in some way. This StackOverflow question lists some possible workarounds, such as displaying an in-app banner similar to the stock iOS notification banner.
Generate an APNs Auth Key
The next step involves generating an authentication key that will allow your backend server to authenticate with APNs when it wants to send one or more of your devices a push notification.
Up until a few months ago, the alternative to this was a painful process that involved filling out a Certificate Signing Request in Keychain Access, uploading it to the Developer Center, downloading a signed certificate, and exporting its private key from Keychain Access (not to mention converting both certificates to .pem format). This certificate would then expire and need to be renewed every year and would only be valid for one deployment scheme: Development or Production.
Thankfully, Apple has greatly simplified the process of authenticating with APNs with the introduction of APNs Auth Keys, which never expire (unless revoked by you) and work for all deployment schemes.
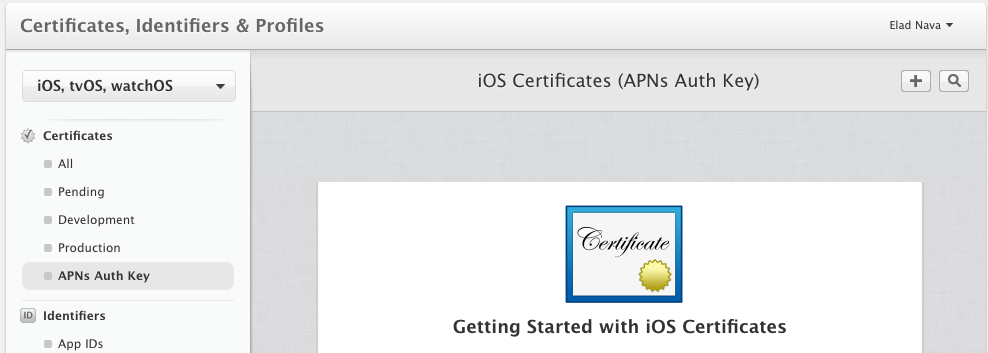
Open the APNs Auth Key page in your Developer Center and click the + button to create a new APNs Auth Key.
In the next page, select Apple Push Notification Authentication Key (Sandbox & Production) and click Continue at the bottom of the page.

Apple will then generate a .p8 key file containing your APNs Auth Key.
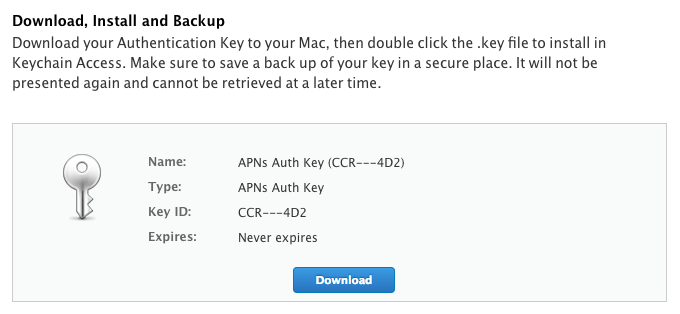
Download the .p8 key file to your computer and save it for later. Also, be sure to write down the Key ID somewhere, as you'll need it later when connecting to APNs.
Send Push Notifications
Now it's time to set up your backend to connect to APNs to send notifications to devices! For the purpose of this guide and for simplicity, I'll choose to do this in Node.js. If you already have a backend implemented in another development language, look for another guide better-tailored for you, or simply follow along to send a test push notification to your device.
Make sure you have Node.js v4 or newer installed on your local machine and run the following in a directory of your choice:
mkdir apns

cd apns

npm init --yes

npm install apn --save
These commands will initiate a new Node.js project and install the amazing apn package from npm, which authenticates with APNs and sends your push notifications.
Next, copy the .p8 file you just downloaded into the apns folder we created. Name it apns.p8 for simplicity.
Create a new file in the apns folder named app.js using your favorite editor, and paste the following code inside:
var apn = require('apn');
// Set up apn with the APNs Auth Key
var apnProvider = new apn.Provider({
token: {
key: 'apns.p8', // Path to the key p8 file
keyId: 'ABCDE12345', // The Key ID of the p8 file (available at https://developer.apple.com/account/ios/certificate/key)
teamId: 'ABCDE12345', // The Team ID of your Apple Developer Account (available at https://developer.apple.com/account/#/membership/)
},
production: false // Set to true if sending a notification to a production iOS app
});
// Enter the device token from the Xcode console
var deviceToken = '5311839E985FA01B56E7AD74444C0157F7F71A2745D0FB50DED665E0E882';
// Prepare a new notification
var notification = new apn.Notification();
// Specify your iOS app's Bundle ID (accessible within the project editor)
notification.topic = 'my.bundle.id';
// Set expiration to 1 hour from now (in case device is offline)
notification.expiry = Math.floor(Date.now() / 1000) + 3600;
// Set app badge indicator
notification.badge = 3;
// Play ping.aiff sound when the notification is received
notification.sound = 'ping.aiff';
// Display the following message (the actual notification text, supports emoji)
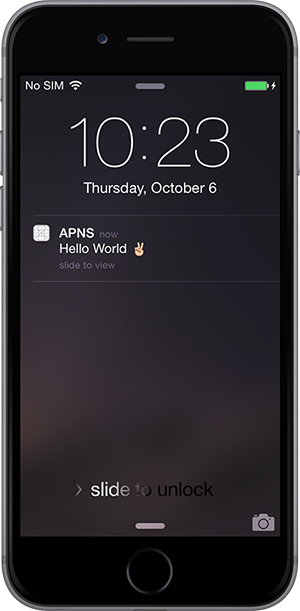
notification.alert = 'Hello World \u270C';
// Send any extra payload data with the notification which will be accessible to your app in didReceiveRemoteNotification
notification.payload = {id: 123};
// Actually send the notification
apnProvider.send(notification, deviceToken).then(function(result) {
// Check the result for any failed devices
console.log(result);
});
There are several things to do before running this code:
- Configure the
keyIdproperty with the APNs Auth Key ID (available athttps://developer.apple.com/account/ios/certificate/key) - Configure the
teamIdproperty with your Apple Developer Account Team ID (available at https://developer.apple.com/account/#/membership/) - Configure
deviceTokenwith the device token you generated after running your application and checking the console - Configure
notification.topicwith your application's Bundle ID which is accessible in the project editor
Now, lock your device, run node app.js and lo-and-behold, provided you did everything right, your iOS device should be able to receive the notification!
Interacting with the notification will print the following in your Xcode console since didReceiveRemoteNotification is invoked:
[AnyHashable("id"): 123, AnyHashable("aps"): {

    alert = "Hello World \U270c";

    badge = 3;

    sound = "ping.aiff";

}]
I hope you were able to get through this tutorial with ease. Let me know if this helped you in the comments below!
Send Push Notifications to iOS Devices using Xcode 8 and Swift 3, APNs Auth Key的更多相关文章
- iOS 中的Push Notifications简单实现(APNS)
Android中的通知只有一种,就是Local Notifications,而iOS中除了Local Notifications外,还有一种Push Notifications.ios的这2种noti ...
- [PWA] Add Push Notifications to a PWA with React in Chrome and on Android
On Android and in Chrome (but not on iOS), it's possible to send push notifications with a PWA. We'l ...
- iOS8 Push Notifications
本文转载至 http://blog.csdn.net/pjk1129/article/details/39551887 原贴地址:https://parse.com/tutorials/ios-p ...
- (转)pem, cer, p12 and the pains of iOS Push Notifications encryption
转自:http://cloudfields.net/blog/ios-push-notifications-encryption/ The serious pains of setting up a ...
- Xcode - Your development team, "", does not support the Push Notifications capability.
1.问题描述: 从git上checkout了别人的一个工程文件,选择team时,Xcode显示如下问题 Your development team, "xxx.xxx.xxx", ...
- Apple Remote Push Notifications
1.帮助文档参考: https://developer.apple.com/library/ios/documentation/NetworkingInternet/Conceptual/Remote ...
- iOS 10、Xcode 8 遇到部分问题解决记录
今天把iphone 6 升级到ios10 后,用Xcode 7进行真机调试的时候提示: Could not find Developer Disk Image 果断准备升级到Xcode 8 .但是想保 ...
- [Erlang 0106] Erlang实现Apple Push Notifications消息推送
我们的IOS移动应用要实现消息推送,告诉用户有多少条消息未读,类似下图的效果(笑果),特把APNS和Erlang相关解决方案笔记于此备忘. 上面图片中是Apple Notif ...
- Send push notification on Apple (APNS) on c#.net
原文: http://apns-c-sharp-net-vikram-jain.blogspot.com ======================= Please, Install your ce ...
随机推荐
- linux 硬盘速度测试
[root@iZ25oat874uZ data]# time dd if=/dev/zero of=/var/test bs=8k count=1000000 1000000+0 records in ...
- android回收AnimationDrawable动画的每一帧的图片资源,而释放内存
回收每一帧的图片,释放内存资源 private void tryRecycleAnimationDrawable(AnimationDrawable animationDrawables) { if ...
- C# 利用占位符替换word中的字符串和添加图片
利用占位符替换word中的字符串和添加图片 ///<summary> /// 替换word模板文件内容,包括表格中内容 /// 调用如下:WordStr ...
- ios企业应用部署
最近公司要整一套企业内部用的应用,ios版本不上线要求可以随时下载使用,先是申请了企业者开发账号,然后发布应用,部署在自己服务器上供用户下载安装. 第一步:准备好应用相关的东西,基本上就是两个文件,x ...
- anguar.js tutorial demo
http://docs.angularjs.cn/tutorial angular 入门demo : PhoneCat Tutorial App 别人的DEMO(官方版):http://angular ...
- 针对不同浏览器,CSS如何写
我们在开发DIV+CSS页面时候常常会遇到开发出的网页的一些地方在各大浏览器比如微软IE6.微软IE7.微软IE8.火狐浏览器.谷歌浏览器有一些不同,如宽度.高度等地方有相差误.IE6比较老的版本浏览 ...
- Tomcat配置错误导致Quartz执行两次问题
以下基于tomcat服务器 我们通常将域名映射到指定服务器的端口上,以通过域名直接访问服务,如http://www.abc.com域名已绑定到本机的80端口,项目名wechat,则直接访问http:/ ...
- android 指示器 tablatyout
<android.support.design.widget.TabLayout/>android 材料设计中新出的控件 package com.weavey.loadinglayout; ...
- javap查看class文件
通过JVM编译java文件生成class字节码文件,很多时候很想用工具打开看看,目前还不清楚哪一个软件专门查看class文件的,但是通过windows下的javap命令可以查看详细的class文件 S ...
- IOS UITableView移除底部空白行
tableView.tableFooterView = [[UIView alloc] initWithFrame:CGRectZero];