VUE实现Studio管理后台(完结):标签式输入、名值对输入、对话框(modal dialog)
一周的时间,几乎每天都要工作十几个小时,敲代码+写作文,界面原型算是完成了,下一步是写内核的HTML处理引擎,纯JS实现。本次实战展示告一段落,等RXEditor下一个版本完成,再继续分享吧。
剩下的功能:标签式输入、名值对输入、对话框(modal dialog),边框输入,全部完成。
演示地址:https://vular.cn/studio-ui/
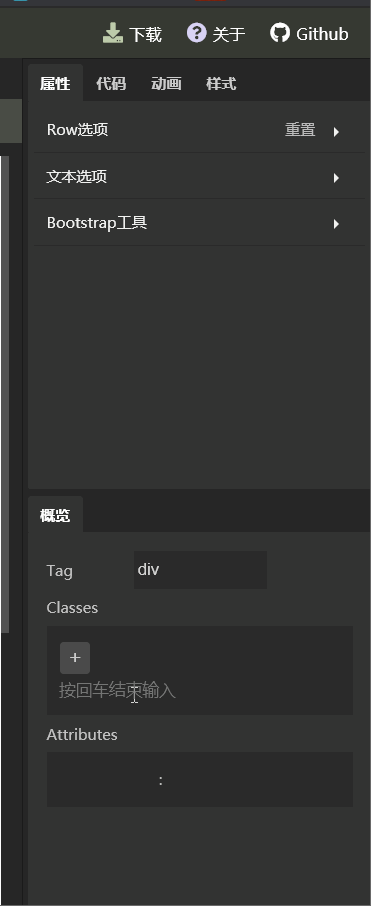
css class输入,样式跟属性输入,效果:
对话框(model dialog效果)
前几期功能效果总览:

标签输入框用来输入CSS class,名字一如既往的好听,就叫RxLabelInput吧。
输入值一个数组,因为有多处要操作数组,增、删、改、克隆、比较等。比较好的一个方式是把Array类用继承的方式重写一下,把这写方法加到里面。但是RXEidtor内核用纯JS实现,并放在一个iFrame里面,它跟主界面只能通过windows message传递数据,带有方法的类无法作为消息被传递,暂时先不用这个方法,只把相关功能抽取成独立函数,放在valueOperate.js里面。
如果以后数组操作量更大,再考虑转成一个通用的数组类。
前几期介绍过,使用计算属性changed来标识数据是否被修改过,changed计算属性内部,需要比较两个值是否相等,普通字符串不会有问题,要比较数组用这样的方式最方便,先排序、转成字符串、比较字符串:
aValue.sort().toString() === bValue.sort().toString()
数组的sort方法会改变原来的数组值,会引发数据刷新,从而再次调用计算属性,形成死循环,调试了很长时间,就算空数组也会死循环。所以,需要把数据复制一份出来,再比较:
if(Array.isArray(a) && Array.isArray(b)){

  //复制数组

  let aValue = a.concat()

  //复制数组

  let bValue = b.concat()

  //比较数组

  return aValue.sort().toString() === bValue.sort().toString()

}
组件代码:
<template>

  <div class="label-list">

    <div

      class="label-item"

      v-for = "val in inputValue"

    >

      {{val}}

      <span

        class="remove-button"

        @click="remove(val)"

      >×</span>

    </div>

    <div style="width: 100%"></div>

    <div class="add-button"

      @click="addClick"

    >+</div>

    <div style="width: 100%"></div>

    <input

      v-show="isAdding"

      v-model="newValue"

      autofocus="autofocus"

      :placeholder="$t('widgets.enter-message')"

      @keyup.13 = "finishAdd"

      ref="inputControl"

    />

  </div>

</template>

<script>

import {addToArray, removeFromArray} from './valueOperate'

export default {

  props:{

    value:{ default:[] },

  },

  computed:{

    inputValue: {

      get:function() {

        return this.value;

      },

      set:function(val) {

        this.$emit('input', val);

      },

    },

  },

  data () {

    return {

      isAdding : false,

      newValue : '',

    }

  },

  methods: {

    addClick(){

      this.isAdding = true;

      this.$refs.inputControl.style.display = 'block'

      this.$refs.inputControl.focus()

    },

    finishAdd(){

      if(this.newValue){

        this.newValue.split(' ').forEach((val)=>{

          if(val){

            addToArray(val, this.inputValue)

          }

        })

        this.newValue = ''

      }

      this.isAdding = false

    },

    remove(val){

      removeFromArray(val, this.inputValue)

    }

  },

}

</script>

<style>

 .label-list{

    background: rgba(0,0,0, 0.15);

    display: flex;

    flex-flow: row;

    flex-wrap: wrap;

    padding:10px;

  }

  .label-list .label-item{

    padding:0 3px;

    background: rgba(255,255,255, 0.15);

    margin:1px;

    border-radius: 3px;

    height: 24px;

    display: flex;

    align-items: center;

  }

  .label-list .remove-button{

    cursor: pointer;

    margin-left: 2px;

  }

  .label-list .add-button{

    background: rgba(255,255,255, 0.15);

    width: 24px;

    height: 22px;

    display: flex;

    align-items: center;

    justify-content: center;

    border-radius: 3px;

    margin: 1px;

    margin-top:3px;

    font-size: 16px;

    padding-bottom:3px;

    cursor: pointer;

  }

  .label-list input{

    outline: 0;

    border: 0;

    background: transparent;

    color: #fff;

    margin-top:4px;

  }

</style>
用于输入html属性(attributes)和样式(style)的名值对输入控件,也有一个拉风的名字:RxNameValueInput。
这个控件的传入值v-model是一个对象,作为一个对象,动态增删属性再加排序,会稍微有些不便,所以组件内部处理时,把这个对象转换成一个二维数组:
mounted () {

  for(var name in this.inputValue){

    this.valueArray.push([name, this.inputValue[name]])

  }

},
然后watch这个数组,当它有变化时,逆向转化成对象,相当于完成一个双向绑定,逆向转化代码:
watch: {

  valueArray() {

    this.inputValue = {}

    for(var i = 0; i < this.valueArray.length; i++){

      let name = this.valueArray[i][0]

      let value = this.valueArray[i][1]

      this.inputValue[name] = value

    }

  }

}
整个组件的代码:
<template>

  <div class="name-value-box">

    <div class="name-value-row"

      v-for="(item, i) in valueArray"

    >

      <div class="name-input">

        <input v-model="item[0]"

          @blur = "nameBlur(i)"

        >

      </div>

      <div class="separator">:</div>

      <div class="value-input">

        <input v-model="item[1]">

      </div>

      <div class="clear-button"

        @click="remove(i)"

      >×</div>

    </div>

    <div class="name-value-row">

      <div class="name-input">

        <input

          v-model="newName"

          @keyup.13 = "addNew"

          @blur = "newBlur"

          ref="newName"

        >

      </div>

      <div class="separator">:</div>

      <div class="value-input">

        <input

          v-model="newValue"

          @keyup.13 = "addNew"

          @blur = "newBlur"

        >

      </div>

      <div class="button-placeholder"

      ></div>

    </div>

  </div>

</template>

<script>

export default {

  props:{

    value:{ default:{} },

  },

  computed:{

    inputValue: {

      get:function() {

        return this.value;

      },

      set:function(val) {

        this.$emit('input', val);

      },

    },

  },

  data () {

    return {

      valueArray : [],

      newName : '',

      newValue : '',

    }

  },

  mounted () {

    for(var name in this.inputValue){

      this.valueArray.push([name, this.inputValue[name]])

    }

  },

  methods: {

    addClick(){

    },

    nameBlur(i){

      this.valueArray[i][0] = this.valueArray[i][0].trim()

      if(!this.valueArray[i][0]){

        this.remove(i)

      }

    },

    remove(i){

      this.valueArray.splice(i, 1)

    },

    addNew(){

      this.newName = this.newName.trim()

      if(this.newName && !this.exist(this.newName)){

        this.valueArray.push([this.newName, this.newValue])

        this.newName = ''

        this.newValue = ''

        this.$refs.newName.focus()

      }

    },

    newBlur(){

      this.newName = this.newName.trim()

      this.newValue = this.newValue.trim()

      if(this.newName && this.newValue){

        this.addNew()

      }

    },

    exist(name){

      for(var i = 0; i < this.valueArray.length; i++){

        if(this.valueArray[i][0] === name){

          return true

        }

      }

      return false

    }

  },

  watch: {

    valueArray() {

      this.inputValue = {}

      for(var i = 0; i < this.valueArray.length; i++){

        let name = this.valueArray[i][0]

        let value = this.valueArray[i][1]

        this.inputValue[name] = value

      }

    }

  }

}

</script>

<style>

 .name-value-box{

    background: rgba(0,0,0, 0.15);

    display: flex;

    flex-flow: column;

    padding:10px;

  }

  .name-value-box .add-button{

    background: rgba(255,255,255, 0.15);

    width: 24px;

    height: 22px;

    display: flex;

    align-items: center;

    justify-content: center;

    border-radius: 3px;

    margin: 1px;

    margin-top:3px;

    font-size: 16px;

    padding-bottom:3px;

    cursor: pointer;

  }

  .name-value-row{

    width: 100%;

    display: flex;

    flex-flow: row;

    height: 24px;

    align-items: center;

    font-size: 11px;

  }

  .name-value-row .name-input input, .name-value-row .value-input input{

    width: 100%;

    background: transparent;

    color:#bababa;

    outline: 0;

    border: 0;

  }

  .name-value-row .separator{

    width: 5px;

    display: flex;

    justify-content: center;

    flex-shrink: 0;

    color: #bababa;

  }

  .name-value-row .name-input{

    flex: 1;

  }

  .name-value-row .value-input{

    flex: 1.5;

    padding-left:3px;

  }

  .name-value-row .clear-button{

    display: flex;

    align-items: center;

    justify-content: center;

    width: 20px;

    height: 17px;

    background: rgba(255,255,255,0.1);

    border-radius: 3px;

    margin:1px;

    font-size: 12px;

    padding-bottom: 3px;

    cursor: pointer;

  }

  .name-value-row .button-placeholder{

    width: 20px;

    height: 20px;

    background: transparent;

  }

</style>
还实现了一个边框输入控件,这个控件没有成长为通用控件的潜力,就不介绍了,感兴趣的直接看源码,名字叫:RxBorderInput。
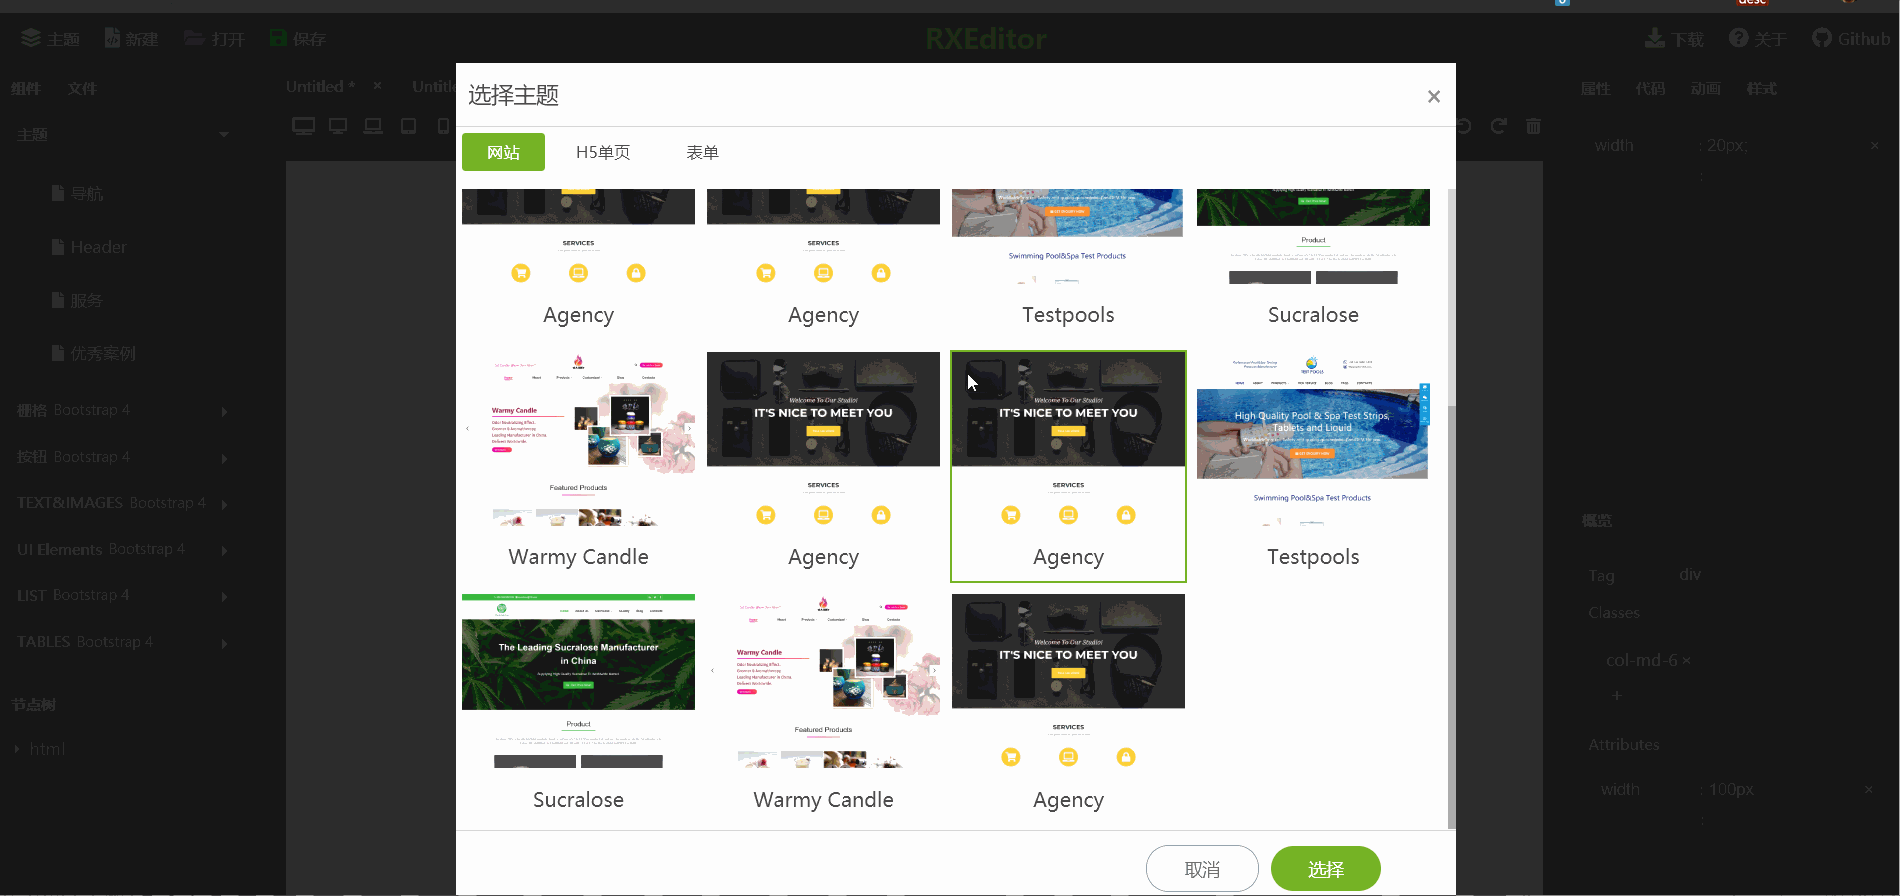
最后实现的一个控件时对话框 ,Modal Dialog,目前有两处地方用到它,一处时主题选择对话框,一处时关于(about)对话框。
这两处共用了通用对话框Modal,通过v-model传入控制对话框是否显示的值,通过卡槽Slot传入对话框内容,Modal代码:
<template>

  <div v-if="inputValue" class="modal-mask" @click="inputValue = false">

    <div

      class="modal"

      :style="{

        top : top,

        left : left,

        width :width,

        height : height,

      }"

      @click="modalClick"

    >

      <slot></slot>

    </div>

  </div>

</template>

<script>

export default {

  name: 'Modal',

  props:{

    value:{ default:'' },

    width:{ default: '800px'},

    height:{ default: 'calc(100vh - 80px)'},

    top:{default: '40px'},

    left:{default: 'calc(50% - 400px)'},

  },

  computed:{

    inputValue: {

      get:function() {

        return this.value;

      },

      set:function(val) {

        this.$emit('input', val);

      },

    },

  },

  data () {

    return {

    }

  },

  methods: {

    modalClick(event){

      event.stopPropagation()

    },

  },

}

</script>

<style>

.modal-mask{

  position: fixed;

  z-index: 9999;

  top:0;

  left: 0;

  width: 100vw;

  height: 100vh;

  background: rgba(20, 20, 20, 0.9);

}

.modal-mask .modal{

  position: fixed;

  top:50%;

  left:50%;

  background: #fff;

  box-shadow: 3px 3px 6px 3px rgba(0, 0, 0, 0.1);

  transform: all 0.3s;

  display: flex;

  flex-flow: column;

  color: #474747;

}

</style>
还可以通过属性传入对话框宽、高、位置等信息。调用样例,也是about对话框的代码:
<template>

  <Modal v-model="inputValue"

    width='600px'

    height='400px'

    top ="calc(50% - 200px)"

    left ="calc(50% - 300px)"

  >

    <div class="dialog-head">

      <div><i class="fas fa-question-circle"></i> {{$t('about.about-title')}} </div>

      <span

        class="close-button"

        @click="inputValue = false"

      >×</span>

    </div>

    <div class="dialog-body about-content">

      本程序是RXEditor第二版的界面原型。<br/>

      基于VUE实现,代码已转入RXeditor项目。<br />

      本原型不再维护,仅供学习参考。<br />

      RXEditor是一个开源的,可视化的,HTML编辑工具,基于Bootstrap实现。<br />

      RXEditor 代码地址:<a href="https://github.com/vularsoft/rxeditor" target="_blank">https://github.com/vularsoft/rxeditor</a>

      演示地址:<a href="https://vular.cn/rxeditor/" target="_blank" >https://vular.cn/rxeditor</a>

    </div>

    <div class="dialog-footer">

      <div class="dialog-button confirm-btn"

        @click="inputValue = false"

      >{{$t('about.close')}}</div>

    </div>

  </Modal>

</template>

<script>

import Modal from './Modal.vue'

export default {

  name: 'AboutDialog',

  components:{

    Modal,

  },

  props:{

    value:{ default:'' },

  },

  computed:{

    inputValue: {

      get:function() {

        return this.value;

      },

      set:function(val) {

        this.$emit('input', val);

      },

    },

  },

}

</script>

<style>

.about-content{

  display: flex;

  justify-content: center;

  align-items:flex-start;

  font-size:14px;

  line-height: 32px;

  padding-left: 40px;

}

.about-content a{

  color: #75b325;

}

.about-content a:hover{

  color: #60921e;

  text-decoration: underline;

}

</style>
到此为止,本是实战项目全部完成,感谢大家的阅读、关注。接下来会把这些代码应用在RxEditor中,具体是否要分享RxEditor内核,要看以后个人精力与时间。
本展示项目全部代码,请参考Github:https://github.com/vularsoft/studio-ui
若有有问题,请留言交流。
VUE实现Studio管理后台(完结):标签式输入、名值对输入、对话框(modal dialog)的更多相关文章
- VUE实现Studio管理后台(十三):按钮点选输入控件,input输入框系列
按钮点选输入,是一个非常简单的控件,20分钟就能完成的一个控件.先看效果: 根据以前的设定,通过json数据动态生成这两个按钮,示例中这两个按钮对应的json代码: { label:'标题', val ...
- VUE实现Studio管理后台(二):Slot实现选项卡tab切换效果,可自由填装内容
作为RXEditor的主界面,Studio UI要使用大量的选项卡TAB切换,我梦想的TAB切换是可以自由填充内容的.可惜自己不会实现,只好在网上搜索一下,就跟现在你做的一样,看看有没有好事者实现了类 ...
- VUE实现Studio管理后台(十):OptionBox,一个综合属性输入界面,可以级联重置
为了便于阅读代码,已经把测试数据分离出来,放在了mock目录下: 阅读代码的话,稍微留意一下就好.本次介绍RXEditor界面最重要的部分,属性输入组件,该组件可以显示是否有数据被修改,还可以批量重置 ...
- VUE实现Studio管理后台(一):鼠标拖放改变窗口大小
近期改版RXEditor,把改版过程,用到的技术点,记录下来.昨天完成了静态页面的制作,制作过程并未详细记录,后期已经不愿再补了,有些遗憾.不过工作成果完整保留在github上,地址:https:// ...
- VUE实现Studio管理后台(三):支持多语言国际化(vue-i18n)
RXEditor的第一版本是英文版,有些朋友看起来觉得不习惯,后来因为惰性,不愿意再修改旧代码加入中文版,这次提前就把这个问题解决了,克服惰性最好的方式,就是想到就尽快去做,避免拖延. 本来计划在界面 ...
- VUE实现Studio管理后台(七):树形结构,文件树,节点树共用一套代码NodeTree
本次介绍的内容,稍稍复杂了一点,用VUE实现树形结构.目前这个属性结构还没有编辑功能,仅仅是展示.明天再开一篇文章,介绍如何增加编辑功能,标题都想好了.先看今天的展示效果: 构建树必须用到递归,使用s ...
- VUE实现Studio管理后台(九):开关(Switch)控件,输入框input系列
接下来几篇作文,会介绍用到的输入框系列,今天会介绍组普通的调用方式,因为RXEditor要求复杂的输入功能,后面的例子会用VUE的component动态调用,就没有今天的这么直观了,控件的实现原理都一 ...
- vue_shop(基于vue电商管理后台网站)
vue_shop 目录 vue_shop day01 实现登录功能 项目预开发处理 Login.vue完整代码: 处理步骤: 添加element-ui的表单组件 添加第三方字体: 添加表单验证 导入a ...
- 在微信框架模块中,基于Vue&Element前端的后台管理功能介绍
微信开发包括公众号.企业微信.微信小程序等方面的开发内容,需要对腾信的微信API接口进行封装:包括事件.菜单.订阅用户.多媒体文件.图文消息.消息群发.微信支付和企业红包.摇一摇设备.语义理解.微信小 ...
随机推荐
- 隐马尔可夫随机场HMM
概率知识点: 0=<P(A)<=1 P(True)=1;P(False)=0 P(A)+P(B)-P(A and B) = P(A or B) P(A|B)=P(A,B)/P(B) =&g ...
- 86)PHP,PDO常用函数
(1) (2) 举例:假如我的sql语句有问题,那么我输出这两个函数所产生的信息. 还有一组函数: 分别是,开启事务,回滚事务,提交事务,判断是否处于事务中. errorInfo() 错误信 ...
- python数据类型:字符串
字符串是python中最常见的数据类型,使用单引号或双引号创建字符串 python不支持单字符类型,单字符在python中也是字符串 文档原文:http://www.runoob.com/python ...
- isdigital()函数
函数说明: 主要用于检查其参数是否为十进制数字字符. 头文件: C——#include<ctype.h> C++——#include<cctype> 函数定义: int is ...
- htaccess 伪静态的规则
利用htaccess文件可以很好的进行站点伪静态,并且形成的目标地址与真正的静态页面几乎一模一样,如abc.html等,伪静态可以非常好的结合SEO来提高站点的排名,并且也能给人一种稳定的印象. 由于 ...
- jmeter如何解决乱码问题
使用jmeter的时候时常遇到中文乱码的情况,下面总结一下几个解决方法,方便以后进行复习. 1.添加后置处理器Beanshell PostProcessor,在输入框内写入“prve.setDateE ...
- Qt QImag图像保存、格式转换
图像保存bool QImage::save(const QString &fileName, const char *format = Q_NULLPTR, int quality = -1) ...
- 关于js中的比较时遇到的坑
关于JavaScript中比较遇到的坑 当你的要比较数字的大小但是你的数字确是字符串时,就会出错比如说: console.log('5' > '6') // fasle consloe.log( ...
- java的自增和自减
class Untitled { public static void main(String[] args) { int a = 3; int b = a++; //a先赋值给b,然后a再自己加1 ...
- python的拆包(扫盲)
什么是拆包 拆包: 对于函数中的多个返回数据, 去掉元组, 列表 或者字典 直接获取里面数据的过程. 怎么拆包 1) 对列表进行拆包 my_list = [1, 3.14, "hello&q ...