使用tap、Fragment等相关相关知识点。实现类似微信的界面
实验结果,可以实现通过左右活动来切换不同的界面。也可以通过点击不同的下方按钮来实现切换不同的界面。
自己也添加了相关的自己编写的小页面来展示相关的效果。主要的是对于碎片Fragment对于tap的相关应用。
具体的实验结果如下:
- private void initDatas() {
- mFragments = new ArrayList<>();
- //将四个Fragment加入集合中
- mFragments.add(new WeixinFragment());
- mFragments.add(new FrdFragment());
- mFragments.add(new AddressFragment());
- mFragments.add(new SettingFragment());
- //初始化适配器
- mAdapter = new FragmentPagerAdapter(getSupportFragmentManager()) {
- @Override
- public Fragment getItem(int position) {//从集合中获取对应位置的Fragment
- return mFragments.get(position);
- }
- @Override
- public int getCount() {//获取集合中Fragment的总数
- return mFragments.size();
- }
- };
- //不要忘记设置ViewPager的适配器
- mViewPager.setAdapter(mAdapter);
- //设置ViewPager的切换监听
- mViewPager.addOnPageChangeListener(new ViewPager.OnPageChangeListener() {
- @Override
- //页面滚动事件
- public void onPageScrolled(int position, float positionOffset, int positionOffsetPixels) {
- }
- //页面选中事件
- @Override
- public void onPageSelected(int position) {
- //设置position对应的集合中的Fragment
- mViewPager.setCurrentItem(position);
- resetImgs();
- selectTab(position);
- }
- @Override
- //页面滚动状态改变事件
- public void onPageScrollStateChanged(int state) {
- }
- });
- }
- 这是对于此工程的主要代码的应用。就是对于Adapter的相关应用
在默认情况下,调用 PagerAdapter#notifyDataSetChanged() 并不会刷新已经存在的页面排序。需要我们重写 PagerAdapter#getItemPosition() 方法。该方法返回刷新后已经存在 fragment 的新位置。并且已经预定义好了两个常量 POSITION_NONE 和 POSITION_UNCHANGED,分别表示原先存在的 fragment 现在已经不在列表中了和原先存在的 fragment 刷新后位置没有发生改变。示例:
- @Override
- public int getItemPosition(Object object) {
- Fragment f = (Fragment) object;
- long id = f.getArguments().getLong("id");
- int index = indexOfId(id);
- return index == -1 ? POSITION_NONE : index;
- }
这里传入的 object 参数是 PagerAdaper#instantiateItem() 方法的返回值,在 FragmentPagerAdapter 中实际上是我们在 FragmentPagerAdapter#getItem() 中返回的
- @Override
- public Object instantiateItem(ViewGroup container, int position) {
- if (mCurTransaction == null) {
- mCurTransaction = mFragmentManager.beginTransaction();
- }
- final long itemId = getItemId(position);
- // Do we already have this fragment?
- String name = makeFragmentName(container.getId(), itemId);
- Fragment fragment = mFragmentManager.findFragmentByTag(name);
- if (fragment != null) {
- if (DEBUG) Log.v(TAG, "Attaching item #" + itemId + ": f=" + fragment);
- mCurTransaction.attach(fragment);
- } else {
- fragment = getItem(position);
- if (DEBUG) Log.v(TAG, "Adding item #" + itemId + ": f=" + fragment);
- mCurTransaction.add(container.getId(), fragment,
- makeFragmentName(container.getId(), itemId));
- }
- if (fragment != mCurrentPrimaryItem) {
- fragment.setMenuVisibility(false);
- fragment.setUserVisibleHint(false);
- }
- return fragment;
- }
因为一般情况下,我们会把数据通过 Fragment#setArguments() 传递给 fragment 实例,所以就先从实例对象中获取到 fragment 的相关信息,然后确定 fragment 在新列表中的位置返回即可。这样,在我们调用 PagerAdapter#notifyDataSetChange() 之后,就会根据这个值调整已有的 fragment 的顺序并且创建新的还不存在的 fragment。假如该方法直接返回 POSITION_NONE,那么将会导致所有的 fragment 重建,在 fragment 创建开销比较大时,就会造成性能上的瓶颈。
如上重写了 getItemPosition() 了之后会发现当页面多了之后就出现了 bug。这是因为在 PagerAdapter 中默认使用 position 来唯一标识 fragment,在页面多之后就需要重建和销毁 fragment,而怎么找到需要销毁和重建的 fragment 呢,就是通过 position。
本次实验的实验结果如下:这就是产生的页面(通过点击下表或者是左右滑动都可以实现页面的跳转)


下面是主要的程序代码:
MainActivity.java
- package com.example.wenandroidcheck11;
- import android.os.Bundle;
- import android.view.View;
- import android.view.View.OnClickListener;
- import android.view.Window;
- import android.widget.ImageButton;
- import android.widget.LinearLayout;
- import java.util.ArrayList;
- import java.util.List;
- import androidx.fragment.app.Fragment;
- import androidx.fragment.app.FragmentActivity;
- import androidx.fragment.app.FragmentPagerAdapter;
- import androidx.viewpager.widget.ViewPager;
- public class MainActivity extends FragmentActivity implements OnClickListener {
- //声明ViewPager
- private ViewPager mViewPager;
- //适配器
- private FragmentPagerAdapter mAdapter;
- //装载Fragment的集合
- private List<Fragment> mFragments;
- //四个Tab对应的布局
- private LinearLayout mTabWeixin;
- private LinearLayout mTabFrd;
- private LinearLayout mTabAddress;
- private LinearLayout mTabSetting;
- //四个Tab对应的ImageButton
- private ImageButton mImgWeixin;
- private ImageButton mImgFrd;
- private ImageButton mImgAddress;
- private ImageButton mImgSetting;
- @Override
- protected void onCreate(Bundle savedInstanceState) {
- super.onCreate(savedInstanceState);
- requestWindowFeature(Window.FEATURE_NO_TITLE);
- setContentView(R.layout.activity_main);
- initViews();//初始化控件
- initEvents();//初始化事件
- initDatas();//初始化数据
- }
- private void initDatas() {
- mFragments = new ArrayList<>();
- //将四个Fragment加入集合中
- mFragments.add(new WeixinFragment());
- mFragments.add(new FrdFragment());
- mFragments.add(new AddressFragment());
- mFragments.add(new SettingFragment());
- //初始化适配器
- mAdapter = new FragmentPagerAdapter(getSupportFragmentManager()) {
- @Override
- public Fragment getItem(int position) {//从集合中获取对应位置的Fragment
- return mFragments.get(position);
- }
- @Override
- public int getCount() {//获取集合中Fragment的总数
- return mFragments.size();
- }
- };
- //不要忘记设置ViewPager的适配器
- mViewPager.setAdapter(mAdapter);
- //设置ViewPager的切换监听
- mViewPager.addOnPageChangeListener(new ViewPager.OnPageChangeListener() {
- @Override
- //页面滚动事件
- public void onPageScrolled(int position, float positionOffset, int positionOffsetPixels) {
- }
- //页面选中事件
- @Override
- public void onPageSelected(int position) {
- //设置position对应的集合中的Fragment
- mViewPager.setCurrentItem(position);
- resetImgs();
- selectTab(position);
- }
- @Override
- //页面滚动状态改变事件
- public void onPageScrollStateChanged(int state) {
- }
- });
- }
- private void initEvents() {
- //设置四个Tab的点击事件
- mTabWeixin.setOnClickListener(this);
- mTabFrd.setOnClickListener(this);
- mTabAddress.setOnClickListener(this);
- mTabSetting.setOnClickListener(this);
- }
- //初始化控件
- private void initViews() {
- mViewPager = (ViewPager) findViewById(R.id.id_viewpager);
- mTabWeixin = (LinearLayout) findViewById(R.id.id_tab_weixin);
- mTabFrd = (LinearLayout) findViewById(R.id.id_tab_frd);
- mTabAddress = (LinearLayout) findViewById(R.id.id_tab_address);
- mTabSetting = (LinearLayout) findViewById(R.id.id_tab_setting);
- mImgWeixin = (ImageButton) findViewById(R.id.id_tab_weixin_img);
- mImgFrd = (ImageButton) findViewById(R.id.id_tab_frd_img);
- mImgAddress = (ImageButton) findViewById(R.id.id_tab_address_img);
- mImgSetting = (ImageButton) findViewById(R.id.id_tab_setting_img);
- }
- @Override
- public void onClick(View v) {
- //先将四个ImageButton置为灰色
- resetImgs();
- //根据点击的Tab切换不同的页面及设置对应的ImageButton为绿色
- switch (v.getId()) {
- case R.id.id_tab_weixin:
- selectTab(0);
- break;
- case R.id.id_tab_frd:
- selectTab(1);
- break;
- case R.id.id_tab_address:
- selectTab(2);
- break;
- case R.id.id_tab_setting:
- selectTab(3);
- break;
- }
- }
- private void selectTab(int i) {
- //根据点击的Tab设置对应的ImageButton为绿色
- switch (i) {
- case 0:
- mImgWeixin.setImageResource(R.mipmap.tab_weixin_pressed);
- break;
- case 1:
- mImgFrd.setImageResource(R.mipmap.tab_find_frd_pressed);
- break;
- case 2:
- mImgAddress.setImageResource(R.mipmap.tab_address_pressed);
- break;
- case 3:
- mImgSetting.setImageResource(R.mipmap.tab_settings_pressed);
- break;
- }
- //设置当前点击的Tab所对应的页面
- mViewPager.setCurrentItem(i);
- }
- //将四个ImageButton设置为灰色
- private void resetImgs() {
- mImgWeixin.setImageResource(R.mipmap.tab_weixin_normal);
- mImgFrd.setImageResource(R.mipmap.tab_find_frd_normal);
- mImgAddress.setImageResource(R.mipmap.tab_address_normal);
- mImgSetting.setImageResource(R.mipmap.tab_settings_normal);
- }
- }
SettingFragment.java
- package com.example.wenandroidcheck11;
- import android.os.Bundle;
- import android.view.LayoutInflater;
- import android.view.View;
- import android.view.ViewGroup;
- import androidx.annotation.Nullable;
- import androidx.fragment.app.Fragment;
- public class SettingFragment extends Fragment {
- @Nullable
- @Override
- public View onCreateView(LayoutInflater inflater, @Nullable ViewGroup container, @Nullable Bundle savedInstanceState) {
- View view = inflater.inflate(R.layout.tab4, container, false);
- return view;
- }
- }
WeixinFragment.java
- package com.example.wenandroidcheck11;
- import android.os.Bundle;
- import android.view.LayoutInflater;
- import android.view.View;
- import android.view.ViewGroup;
- import androidx.annotation.Nullable;
- import androidx.fragment.app.Fragment;
- public class WeixinFragment extends Fragment {
- @Nullable
- @Override
- public View onCreateView(LayoutInflater inflater, @Nullable ViewGroup container, @Nullable Bundle savedInstanceState) {
- View view = inflater.inflate(R.layout.tab1, container, false);
- return view;
- }
- }
FrdFragment.java
- package com.example.wenandroidcheck11;
- import android.os.Bundle;
- import android.view.LayoutInflater;
- import android.view.View;
- import android.view.ViewGroup;
- import androidx.annotation.Nullable;
- import androidx.fragment.app.Fragment;
- public class FrdFragment extends Fragment {
- @Nullable
- @Override
- public View onCreateView(LayoutInflater inflater, @Nullable ViewGroup container, @Nullable Bundle savedInstanceState) {
- View view = inflater.inflate(R.layout.tab2, container, false);
- return view;
- }
- }
AddressFragment.java
- package com.example.wenandroidcheck11;
- import android.os.Bundle;
- import android.view.LayoutInflater;
- import android.view.View;
- import android.view.ViewGroup;
- import androidx.annotation.Nullable;
- import androidx.fragment.app.Fragment;
- public class AddressFragment extends Fragment {
- @Nullable
- @Override
- public View onCreateView(LayoutInflater inflater, @Nullable ViewGroup container, @Nullable Bundle savedInstanceState) {
- View view = inflater.inflate(R.layout.tab3, container, false);
- return view;
- }
- }
activity_main.xml
- <?xml version="1.0" encoding="utf-8"?>
- <LinearLayout
- xmlns:android="http://schemas.android.com/apk/res/android"
- xmlns:tools="http://schemas.android.com/tools"
- android:orientation="vertical"
- android:layout_width="match_parent"
- android:layout_height="match_parent"
- tools:context=".MainActivity">
- <include layout="@layout/top"/>
- <androidx.viewpager.widget.ViewPager
- android:id="@+id/id_viewpager"
- android:layout_width="match_parent"
- android:layout_height="0dp"
- android:layout_weight="1">
- </androidx.viewpager.widget.ViewPager>
- <include layout="@layout/bottom"/>
- </LinearLayout>
bottom.xml
- <?xml version="1.0" encoding="utf-8"?>
- <LinearLayout xmlns:android="http://schemas.android.com/apk/res/android"
- android:layout_width="match_parent"
- android:layout_height="55dp"
- android:gravity="center"
- android:background="@color/material_blue_grey_800"
- android:orientation="horizontal">
- <LinearLayout
- android:layout_width="0dp"
- android:layout_height="wrap_content"
- android:layout_weight="1"
- android:id="@+id/id_tab_weixin"
- android:gravity="center"
- android:orientation="vertical">
- <ImageButton
- android:id="@+id/id_tab_weixin_img"
- android:clickable="false"
- android:layout_width="wrap_content"
- android:layout_height="wrap_content"
- android:src="@mipmap/tab_weixin_pressed"
- android:background="#00000000"/>
- <TextView
- android:layout_width="wrap_content"
- android:layout_height="wrap_content"
- android:textColor="#ffffff"
- android:text="微信"/>
- </LinearLayout>
- <LinearLayout
- android:id="@+id/id_tab_frd"
- android:layout_width="0dp"
- android:layout_height="wrap_content"
- android:layout_weight="1"
- android:gravity="center"
- android:orientation="vertical">
- <ImageButton
- android:id="@+id/id_tab_frd_img"
- android:clickable="false"
- android:layout_width="wrap_content"
- android:layout_height="wrap_content"
- android:src="@mipmap/tab_find_frd_normal"
- android:background="#00000000"/>
- <TextView
- android:layout_width="wrap_content"
- android:layout_height="wrap_content"
- android:textColor="#ffffff"
- android:text="朋友"/>
- </LinearLayout>
- <LinearLayout
- android:id="@+id/id_tab_address"
- android:layout_width="0dp"
- android:layout_height="wrap_content"
- android:layout_weight="1"
- android:gravity="center"
- android:orientation="vertical">
- <ImageButton
- android:id="@+id/id_tab_address_img"
- android:clickable="false"
- android:layout_width="wrap_content"
- android:layout_height="wrap_content"
- android:src="@mipmap/tab_address_normal"
- android:background="#00000000"/>
- <TextView
- android:layout_width="wrap_content"
- android:layout_height="wrap_content"
- android:textColor="#ffffff"
- android:text="通讯录"/>
- </LinearLayout>
- <LinearLayout
- android:id="@+id/id_tab_setting"
- android:layout_width="0dp"
- android:layout_height="wrap_content"
- android:layout_weight="1"
- android:gravity="center"
- android:orientation="vertical">
- <ImageButton
- android:id="@+id/id_tab_setting_img"
- android:clickable="false"
- android:layout_width="wrap_content"
- android:layout_height="wrap_content"
- android:src="@mipmap/tab_settings_normal"
- android:background="#00000000"/>
- <TextView
- android:layout_width="wrap_content"
- android:layout_height="wrap_content"
- android:textColor="#ffffff"
- android:text="设置"/>
- </LinearLayout>
- </LinearLayout>
dialog_data.xml
- <?xml version="1.0" encoding="utf-8"?>
- <LinearLayout xmlns:android="http://schemas.android.com/apk/res/android"
- android:layout_width="match_parent"
- android:layout_height="wrap_content"
- android:gravity="center_horizontal"
- android:orientation="vertical">
- <DatePicker
- android:id="@+id/datePicker"
- android:layout_width="match_parent"
- android:layout_height="wrap_content"
- android:calendarViewShown="false"
- android:endYear="2027"
- android:startYear="2007" />
- </LinearLayout>
dialog_time.xml
- <?xml version="1.0" encoding="utf-8"?>
- <LinearLayout xmlns:android="http://schemas.android.com/apk/res/android"
- android:layout_width="match_parent"
- android:layout_height="wrap_content"
- android:gravity="center"
- android:orientation="vertical">
- <TimePicker
- android:id="@+id/timePicker"
- android:layout_width="match_parent"
- android:layout_height="wrap_content"></TimePicker>
- </LinearLayout>
tab1.xml
- <?xml version="1.0" encoding="utf-8"?>
- <LinearLayout xmlns:android="http://schemas.android.com/apk/res/android"
- android:orientation="vertical"
- android:layout_width="match_parent"
- android:layout_height="match_parent">
- <TextView
- android:id="@+id/texnum1"
- android:layout_width="match_parent"
- android:layout_height="wrap_content"
- android:text="添加新的小账单"
- android:textSize="30dp"
- android:gravity="center_horizontal"
- android:padding="5dp"
- android:background="@color/baise"
- android:layout_marginBottom="10dp"
- />
- <LinearLayout
- android:id="@+id/ming"
- android:layout_width="match_parent"
- android:layout_height="wrap_content"
- android:orientation="horizontal">
- <TextView
- android:layout_width="wrap_content"
- android:layout_height="wrap_content"
- android:text="对应的金额:"
- android:padding="8dp"
- android:background="@color/qianhuang"
- android:layout_marginRight="5dp"
- android:textSize="18sp" />
- <EditText
- android:layout_width="match_parent"
- android:layout_height="wrap_content"
- android:hint="请输入相应的金额"
- android:inputType="number"
- android:lines="2"
- android:padding="8dp"
- android:background="@color/baise"
- android:layout_marginBottom="10dp"
- />
- </LinearLayout>
- <EditText
- android:layout_width="match_parent"
- android:layout_height="wrap_content"
- android:hint="请输入新账单的相关内容"
- android:lines="12"
- android:padding="8dp"
- android:background="@color/baise"
- android:layout_marginBottom="10dp"
- android:inputType="textMultiLine"
- android:gravity="top"
- />
- <LinearLayout
- android:id="@+id/ll_date"
- android:layout_width="match_parent"
- android:layout_height="wrap_content"
- android:orientation="horizontal">
- <TextView
- android:layout_width="wrap_content"
- android:layout_height="wrap_content"
- android:text="选择日期:"
- android:padding="8dp"
- android:background="@color/baise"
- android:textSize="18sp" />
- <TextView
- android:id="@+id/tv_date"
- android:layout_width="match_parent"
- android:layout_height="wrap_content"
- android:padding="8dp"
- android:background="@color/qianhuang"
- android:textSize="18sp" />
- </LinearLayout>
- <LinearLayout
- android:id="@+id/ll_time"
- android:layout_width="match_parent"
- android:layout_height="wrap_content"
- android:layout_marginTop="10dp"
- android:orientation="horizontal">
- <TextView
- android:layout_width="wrap_content"
- android:layout_height="wrap_content"
- android:text="选择时间:"
- android:padding="8dp"
- android:background="@color/baise"
- android:textSize="18sp" />
- <TextView
- android:id="@+id/tv_time"
- android:layout_width="match_parent"
- android:layout_height="wrap_content"
- android:background="@color/qianhuang"
- android:padding="8dp"
- android:layout_marginBottom="10dp"
- android:textSize="18sp" />
- </LinearLayout>
- <TextView
- android:id="@+id/age"
- android:layout_width="wrap_content"
- android:layout_height="wrap_content"
- android:text="@string/wen5"
- android:background="@color/chengse"
- android:layout_marginBottom="10dp"
- android:textSize="25sp" />
- <RadioGroup
- android:layout_width="wrap_content"
- android:layout_height="wrap_content"
- android:id="@+id/radGrpAge"
- android:orientation="horizontal"
- android:textSize="30sp"
- android:checkedButton="@+id/radBtnAgeRange1">
- <RadioButton
- android:id="@+id/radBtnAgeRange1"
- android:textSize="20sp"
- android:layout_height="wrap_content"
- android:layout_width="wrap_content"
- android:text="@string/wen1"/>
- <RadioButton
- android:id="@+id/radBtnAgeRange2"
- android:textSize="20sp"
- android:layout_height="wrap_content"
- android:layout_width="wrap_content"
- android:text="@string/wen2"/>
- <RadioButton
- android:id="@+id/radBtnAgeRange3"
- android:textSize="20sp"
- android:layout_height="wrap_content"
- android:layout_width="wrap_content"
- android:text="@string/wen3"/>
- <RadioButton
- android:id="@+id/radBtnAgeRange4"
- android:textSize="20sp"
- android:layout_height="wrap_content"
- android:layout_width="wrap_content"
- android:text="@string/wen4"/>
- </RadioGroup>
- <LinearLayout
- android:id="@+id/wenbut"
- android:layout_width="match_parent"
- android:layout_height="wrap_content"
- android:layout_marginTop="10dp"
- android:orientation="horizontal">
- <Button
- android:id="@+id/wenbut1"
- android:layout_width="wrap_content"
- android:layout_height="wrap_content"
- android:text="返回"
- android:background="#87CEFA"
- android:layout_marginLeft="50dp"
- />
- <Button
- android:id="@+id/wenbut2"
- android:layout_width="wrap_content"
- android:layout_height="wrap_content"
- android:text="确认"
- android:background="#87CEFA"
- android:layout_marginLeft="50dp"
- />
- </LinearLayout>
- </LinearLayout>
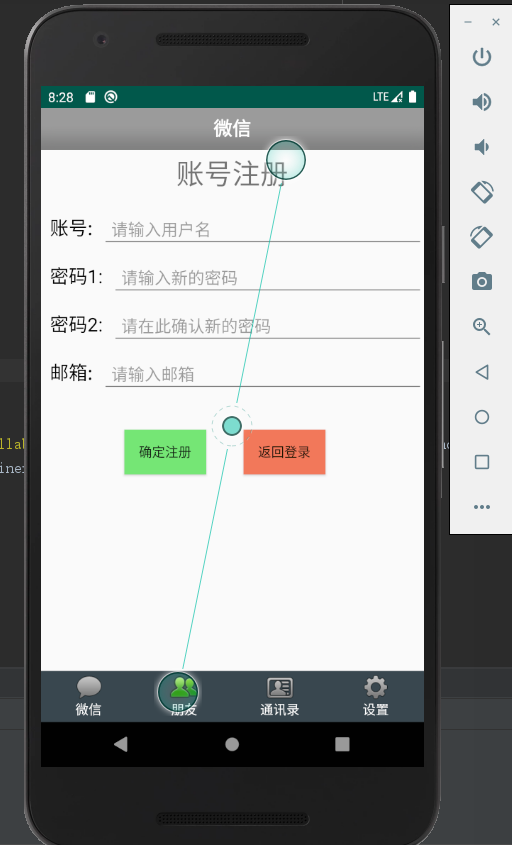
tab2.xml
- <?xml version="1.0" encoding="utf-8"?>
- <RelativeLayout xmlns:android="http://schemas.android.com/apk/res/android"
- xmlns:app="http://schemas.android.com/apk/res-auto"
- android:orientation="vertical"
- android:layout_width="match_parent"
- android:layout_height="match_parent">
- <TextView
- android:layout_marginTop="60dp"
- android:id="@+id/reg_number1"
- android:layout_width="wrap_content"
- android:layout_height="wrap_content"
- android:padding="10dp"
- android:text="账号:"
- android:textColor="#000"
- android:textSize="20dp" />
- <EditText
- android:layout_alignBottom="@+id/reg_number1"
- android:layout_toRightOf="@+id/reg_number1"
- android:id="@+id/reg_username"
- android:layout_width="match_parent"
- android:layout_height="wrap_content"
- android:hint="请输入用户名"
- android:padding="10dp" />
- <TextView
- android:id="@+id/reg_number2"
- android:layout_marginTop="5dp"
- android:layout_width="wrap_content"
- android:layout_height="wrap_content"
- android:layout_below="@+id/reg_number1"
- android:padding="10dp"
- android:text="密码1:"
- android:textColor="#000"
- android:textSize="20dp" />
- <EditText
- android:layout_alignBottom="@id/reg_number2"
- android:layout_toRightOf="@+id/reg_number2"
- android:id="@+id/reg_password"
- android:layout_width="match_parent"
- android:layout_height="wrap_content"
- android:hint="请输入新的密码"
- android:padding="10dp" />
- <TextView
- android:id="@+id/reg_number3"
- android:layout_marginTop="5dp"
- android:layout_width="wrap_content"
- android:layout_height="wrap_content"
- android:layout_below="@+id/reg_number2"
- android:padding="10dp"
- android:text="密码2:"
- android:textColor="#000"
- android:textSize="20dp" />
- <EditText
- android:layout_alignBottom="@id/reg_number3"
- android:layout_toRightOf="@+id/reg_number3"
- android:id="@+id/reg_password2"
- android:layout_width="match_parent"
- android:layout_height="wrap_content"
- android:hint="请在此确认新的密码"
- android:padding="10dp" />
- <TextView
- android:id="@+id/reg_number4"
- android:layout_marginTop="5dp"
- android:layout_width="wrap_content"
- android:layout_height="wrap_content"
- android:layout_below="@+id/reg_number3"
- android:padding="10dp"
- android:text="邮箱:"
- android:textColor="#000"
- android:textSize="20dp" />
- <EditText
- android:layout_alignBottom="@id/reg_number4"
- android:layout_toRightOf="@+id/reg_number4"
- android:id="@+id/reg_mail"
- android:layout_width="match_parent"
- android:layout_height="wrap_content"
- android:hint="请输入邮箱"
- android:padding="10dp" />
- <Button
- android:layout_width="wrap_content"
- android:layout_height="wrap_content"
- android:text="确定注册"
- android:background="#74e674"
- android:id="@+id/reg_btn_sure"
- android:layout_marginTop="38dp"
- android:layout_below="@+id/reg_mail"
- android:layout_marginLeft="90dp" />
- <Button
- android:layout_width="wrap_content"
- android:layout_height="wrap_content"
- android:text="返回登录"
- android:background="#f27758"
- android:id="@+id/reg_btn_login"
- android:layout_alignBottom="@id/reg_btn_sure"
- android:layout_toRightOf="@id/reg_btn_sure"
- android:layout_marginLeft="40dp"
- />
- <TextView
- android:layout_width="wrap_content"
- android:layout_height="wrap_content"
- android:layout_centerHorizontal="true"
- android:text="账号注册"
- android:textSize="30dp"
- android:layout_marginTop="5dp"
- />
- </RelativeLayout>
tab3.xml
- <?xml version="1.0" encoding="utf-8"?>
- <LinearLayout xmlns:android="http://schemas.android.com/apk/res/android"
- android:orientation="vertical"
- android:layout_width="match_parent"
- android:layout_height="match_parent">
- <TextView
- android:layout_width="match_parent"
- android:layout_height="match_parent"
- android:gravity="center"
- android:textSize="30sp"
- android:text="The Address Tab!"/>
- </LinearLayout>
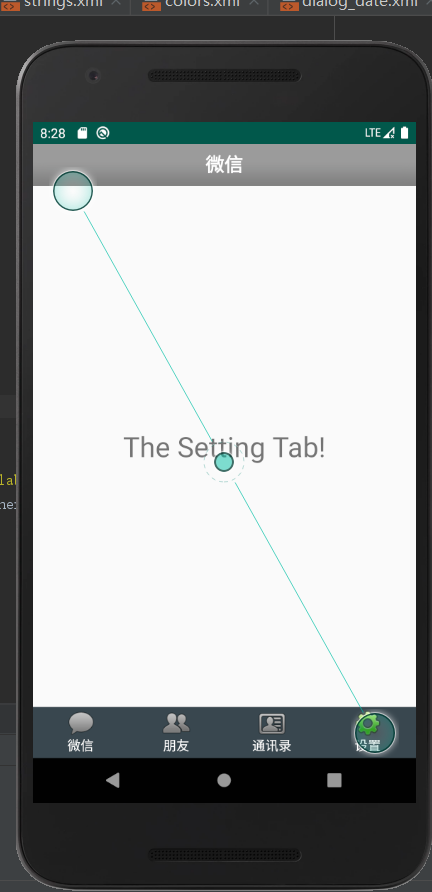
tab4.xml
- <?xml version="1.0" encoding="utf-8"?>
- <LinearLayout xmlns:android="http://schemas.android.com/apk/res/android"
- android:orientation="vertical"
- android:layout_width="match_parent"
- android:layout_height="match_parent">
- <TextView
- android:layout_width="match_parent"
- android:layout_height="match_parent"
- android:gravity="center"
- android:textSize="30sp"
- android:text="The Setting Tab!"/>
- </LinearLayout>
top.xml
- <?xml version="1.0" encoding="utf-8"?>
- <LinearLayout xmlns:android="http://schemas.android.com/apk/res/android"
- android:orientation="vertical"
- android:background="@android:drawable/title_bar"
- android:gravity="center"
- android:layout_width="match_parent"
- android:layout_height="45dp">
- <TextView
- android:layout_width="wrap_content"
- android:layout_height="wrap_content"
- android:text="微信"
- android:textColor="#ffffff"
- android:textSize="20sp"
- android:textStyle="bold"/>
- </LinearLayout>
其次就是关于一些mipmap、colors、strings、的相关的使用。在此就不一一介绍了。
使用tap、Fragment等相关相关知识点。实现类似微信的界面的更多相关文章
- android学习相关intent和fragment的先关知识点
对于使用intent,主要是用来进行活动之间的跳转,然后就是通过intent向下一个活动传递数据,还有就是想上一个活动传递数据. 实例: 先添加按钮的点击事件,当点击按钮时进行事件的触发,主要代码是 ...
- dubbo相关的知识点总结
dubbo最近提交到了apache,成为了apache的孵化项目,又开始活跃起来了.就官方在git上面的说明文档和其他资料,学习总结以下dubbo的一些知识点. .The dubbo protocol ...
- ksar、sar及相关内核知识点解析
关键词:sar.sadc.ksar./proc/stat./proc/cpuinfo./proc/meminfo./proc/diskstats. 在之前有简单介绍过sar/ksar,最近在使用中感觉 ...
- Hbase框架原理及相关的知识点理解、Hbase访问MapReduce、Hbase访问Java API、Hbase shell及Hbase性能优化总结
转自:http://blog.csdn.net/zhongwen7710/article/details/39577431 本blog的内容包含: 第一部分:Hbase框架原理理解 第二部分:Hbas ...
- Python基础总结之第八天开始【while循环以及for循环,循环嵌套等循环相关的知识点】(新手可相互督促)
ennnnn,年薪20万的梦想是不是又进了一步: 循环,什么是循环,循环就是电池有电,手机屏幕可以循环一整天的使用:循环就是地球不毁灭,太阳日复一日的出现...... 不接受反驳,谢谢!~ 只要条件满 ...
- python相关遗漏知识点补充
python中的相关帮助命令 假设s是一个字符串, 那么dir(s)可以列出字符串对象的所有属性(方法也是函数属性),其中有下划线的部分与类重 载有关,用来表示python实现细节,没有下划线的属性是 ...
- mysql 和字符串截取相关的知识点
LOCATE(',','123,456') - 1) SELECT LEFT('123,456',3); SELECT LEFT('123,456',LOCATE(',','123,456') - 1 ...
- Oracle相关的知识点
1. 如何在Oracle SQLPlus中执行SQL Script文件 以下面的格式在提示符中输入@{file name} SQL>@{file} 假设你要运行的文件的名字是script.sql ...
- 与html相关的知识点整理
梳理html时发现的一些问题.总结一下,答案大都从网上找来. 一.html 与 htm 的区别 没有本质的区别..htm是在win32时代,系统只能识别3位扩展名时使用的.现在一般都使用.html. ...
随机推荐
- C++ 函数模板/类模板
#include <iostream> #include <vector> using namespace std; template < class T > // ...
- TCP/IP协议基本知识
1.TCP/IP协议中主机与主机之间通信的三要素: IP地址(IP address) 子网掩码(subnet mask) IP路由(IP router) 2.IP地址的分类及每一类的范围: A类1-1 ...
- (转)C++中的new
转载自:http://blog.csdn.net/sparkliang/article/details/3650324 C++中的new其实是一个很糊弄人的术语,它有两种不同的含义,new运算符(ne ...
- 【springboot spring mybatis】看我怎么将springboot与spring整合mybatis与druid数据源
目录 概述 1.mybatis 2.druid 壹:spring整合 2.jdbc.properties 3.mybatis-config.xml 二:java代码 1.mapper 2.servic ...
- 关于Idea中不能使用Scanner在console
遇到了麻烦,在Idea中使用@Test运行程序时,scanner在控制台无法输入,然后来回折腾... 创建了一个新的类里面含有main方法,可以完美运行scanner: 重新回来,发现还是不行, 创建 ...
- python高阶函数&异常处理
高阶函数 1.什么是高阶函数 在Python中,变量可以指向函数 函数名也是变量 既然变量可以指向函数,函数的参数能接收变量,那么一个函数就可以接收另一个函数作为参数,这种函数就称之为高阶函数. ma ...
- C++类复习及新的认识 6.1.1+6.1.2内容(适合看过一遍书的新手)
作者水平有限,文字表述大多摘抄课本,源码部分由课本加自己改编而成,所有代码均在vs2019中编译通过 定义类操作 class Tdate { public: void Set(int m, int d ...
- go:内置函数 | 闭包 | 数组 | 切片 | 排序 | map | 锁
内置函数 1.close: 主要是用来关闭channel 2.len:用来求长度,比如string.array.slice.map.channel 3.new与make都是用来分配内存 new用来分配 ...
- 解决WSL在执行32位程序时报错“Exec format error”的问题
当你尝试在WSL上运行32位的程序时,shell将会报错:cannot execute binary file: Exec format error. 这是因为WSL目前暂不支持32位的ELF可执行文 ...
- 《数据库优化》- MySQL视图
一.什么是视图 视图,是基于一个表或多个表或视图的逻辑表,本身不包含数据,通过它可以对表里面的数据进行查询和修改,视图基于的表称为基表.视图是存储在数据字典里的一条select语句. 通俗地讲,视图就 ...