六、Django之表单和类视图-Part 4
一、表单form
为了接收用户的投票选择,我们需要在前端页面显示一个投票界面。让我们重写先前的polls/detail.html文件,代码如下:
<h1>{{ question.question_text }}</h1>

{% if error_message %}<p><strong>{{ error_message }}</strong></p>{% endif %}

<form action="{% url 'polls:vote' question.id %}" method="post">

{% csrf_token %}

{% for choice in question.choice_set.all %}

    <input type="radio" name="choice" id="choice{{ forloop.counter }}" value="{{ choice.id }}" />

    <label for="choice{{ forloop.counter }}">{{ choice.choice_text }}</label><br />

{% endfor %}

<input type="submit" value="Vote" />
简要说明:
- 上面的模板显示一系列单选按钮,按钮的值是选项的ID,按钮的名字是字符串"choice"。这意味着,当你选择了其中某个按钮,并提交表单,一个包含数据choice=#的POST请求将被发送到指定的url,#是被选择的选项的ID。这就是HTML表单的基本概念。
- 如果你有一定的前端开发基础,那么form标签的action属性和method属性你应该很清楚它们的含义,action表示你要发送的目的url,method表示提交数据的方式,一般分POST和GET。
- forloop.counter是DJango模板系统专门提供的一个变量,用来表示你当前循环的次数,一般用来给循环项目添加有序数标。
- 由于我们发送了一个POST请求,就必须考虑一个跨站请求伪造的安全问题,简称CSRF(具体含义请百度)。Django为你提供了一个简单的方法来避免这个困扰,那就是在form表单内添加一条{% csrf_token %}标签,标签名不可更改,固定格式,位置任意,只要是在form表单内。这个方法对form表单的提交方式方便好使,但如果是用ajax的方式提交数据,那么就不能用这个方法了。
现在,让我们创建一个处理提交过来的数据的视图。前面我们已经写了一个“占坑”的vote视图的url(polls/urls.py):
url(r'^(?P<question_id>[0-9]+)/vote/$', views.vote, name='vote'),
以及“占坑”的vote视图函数(polls/views.py),我们把坑填起来:
from django.shortcuts import get_object_or_404, render

from django.http import HttpResponseRedirect, HttpResponse

from django.urls import reverse

from .models import Choice, Question

# ...

def vote(request, question_id):

    question = get_object_or_404(Question, pk=question_id)

    try:

        selected_choice = question.choice_set.get(pk=request.POST['choice'])

    except (KeyError, Choice.DoesNotExist):

        # 发生choice未找到异常时,重新返回表单页面,并给出提示信息

        return render(request, 'polls/detail.html', {

        'question': question,

        'error_message': "You didn't select a choice.",

        })

    else:

        selected_choice.votes += 1

        selected_choice.save()

        # 成功处理数据后,自动跳转到结果页面,防止用户连续多次提交。

        return HttpResponseRedirect(reverse('polls:results', args=(question.id,)))
有些新的东西,我们要解释一下:
- request.POST是一个类似字典的对象,允许你通过键名访问提交的数据。本例中,request.POST[’choice’]返回被选择选项的ID,并且值的类型永远是string字符串,那怕它看起来像数字!同样的,你也可以用类似的手段获取GET请求发送过来的数据,一个道理。
- request.POST[’choice’]有可能触发一个KeyError异常,如果你的POST数据里没有提供choice键值,在这种情况下,上面的代码会返回表单页面并给出错误提示。PS:通常我们会给个默认值,防止这种异常的产生,例如request.POST[’choice’,None],一个None解决所有问题。
- 在选择计数器加一后,返回的是一个HttpResponseRedirect而不是先前我们常用的HttpResponse。HttpResponseRedirect需要一个参数:重定向的URL。这里有一个建议,当你成功处理POST数据后,应当保持一个良好的习惯,始终返回一个HttpResponseRedirect。这不仅仅是对Django而言,它是一个良好的WEB开发习惯。
- 我们在上面HttpResponseRedirect的构造器中使用了一个reverse()函数。它能帮助我们避免在视图函数中硬编码URL。它首先需要一个我们在URLconf中指定的name,然后是传递的数据。例如'/polls/3/results/',其中的3是某个question.id的值。重定向后将进入polls:results对应的视图,并将question.id传递给它。白话来讲,就是把活扔给另外一个路由对应的视图去干。
当有人对某个问题投票后,vote()视图重定向到了问卷的结果显示页面。下面我们来写这个处理结果页面的视图(polls/views.py):
from django.shortcuts import get_object_or_404, render

def results(request, question_id):

    question = get_object_or_404(Question, pk=question_id)

*     return render(request, 'polls/results.html', {'question': question})
同样,还需要写个模板polls/templates/polls/results.html。(路由、视图、模板、模型!都是这个套路....)
<h1>{{ question.question_text }}</h1>

<ul>

{% for choice in question.choice_set.all %}

    <li>{{ choice.choice_text }} -- {{ choice.votes }} vote{{ choice.votes|pluralize }}</li>

{% endfor %}

</ul>

<a href="{% url 'polls:detail' question.id %}">Vote again?</a>
现在你可以到浏览器中访问/polls/1/了,投票吧。你会看到一个结果页面,每投一次,它的内容就更新一次。如果你提交的时候没有选择项目,则会得到一个错误提示。
如果你在前面漏掉了一部分操作没做,比如没有创建choice选项对象,那么可以按下面的操作,补充一下:
F:\Django_course\mysite>python manage.py shell

Python 3.6.1 (v3.6.1:69c0db5, Mar 21 2017, 18:41:36) [MSC v.1900 64 bit (AMD64)] on win32

Type "help", "copyright", "credits" or "license" for more information.

(InteractiveConsole)

>>> from polls.models import Question

>>> q = Question.objects.get(pk=1)

>>> q.choice_set.create(choice_text='Not much', votes=0)

<Choice: Choice object>

>>> q.choice_set.create(choice_text='The sky', votes=0)

<Choice: Choice object>

>>> q.choice_set.create(choice_text='Just hacking again', votes=0)

<Choice: Choice object>
为了方便大家,我将当前状态下的各主要文件内容一并贴出,供大家对照参考!
1--完整的mysite/urls.py文件如下:
from django.conf.urls import url,include

from django.contrib import admin

urlpatterns = [

    url(r'^admin/', admin.site.urls),

    url(r'^polls/', include('polls.urls')),

]
2--完整的mysite/settings.py文件如下:
import os

# Build paths inside the project like this: os.path.join(BASE_DIR, ...)

BASE_DIR = os.path.dirname(os.path.dirname(os.path.abspath(__file__)))

# Quick-start development settings - unsuitable for production

# See https://docs.djangoproject.com/en/1.11/howto/deployment/checklist/

# SECURITY WARNING: keep the secret key used in production secret!

SECRET_KEY = '85vvuta(p05ow!4pz2b0qbduu0%pq6x5q66-ei*pg+-lbdr#m^'

# SECURITY WARNING: don't run with debug turned on in production!

DEBUG = True

ALLOWED_HOSTS = []

# Application definition

INSTALLED_APPS = [

    'polls',

    'django.contrib.admin',

    'django.contrib.auth',

    'django.contrib.contenttypes',

    'django.contrib.sessions',

    'django.contrib.messages',

    'django.contrib.staticfiles',

]

MIDDLEWARE = [

    'django.middleware.security.SecurityMiddleware',

    'django.contrib.sessions.middleware.SessionMiddleware',

    'django.middleware.common.CommonMiddleware',

    'django.middleware.csrf.CsrfViewMiddleware',

    'django.contrib.auth.middleware.AuthenticationMiddleware',

    'django.contrib.messages.middleware.MessageMiddleware',

    'django.middleware.clickjacking.XFrameOptionsMiddleware',

]

ROOT_URLCONF = 'mysite.urls'

TEMPLATES = [

    {

        'BACKEND': 'django.template.backends.django.DjangoTemplates',

        'DIRS': [os.path.join(BASE_DIR, 'templates')]

        ,

        'APP_DIRS': True,

        'OPTIONS': {

            'context_processors': [

                'django.template.context_processors.debug',

                'django.template.context_processors.request',

                'django.contrib.auth.context_processors.auth',

                'django.contrib.messages.context_processors.messages',

            ],

        },

    },

]

WSGI_APPLICATION = 'mysite.wsgi.application'

# Database

# https://docs.djangoproject.com/en/1.11/ref/settings/#databases

DATABASES = {

    'default': {

        'ENGINE': 'django.db.backends.sqlite3',

        'NAME': os.path.join(BASE_DIR, 'db.sqlite3'),

    }

}

# Password validation

# https://docs.djangoproject.com/en/1.11/ref/settings/#auth-password-validators

AUTH_PASSWORD_VALIDATORS = [

    {

        'NAME': 'django.contrib.auth.password_validation.UserAttributeSimilarityValidator',

    },

    {

        'NAME': 'django.contrib.auth.password_validation.MinimumLengthValidator',

    },

    {

        'NAME': 'django.contrib.auth.password_validation.CommonPasswordValidator',

    },

    {

        'NAME': 'django.contrib.auth.password_validation.NumericPasswordValidator',

    },

]

# Internationalization

# https://docs.djangoproject.com/en/1.11/topics/i18n/

LANGUAGE_CODE = 'en-us'

TIME_ZONE = 'Asia/Shanghai'

USE_I18N = True

USE_L10N = True

USE_TZ = True
3--完整的polls/views.py应该如下所示:
from django.shortcuts import reverse

from django.shortcuts import HttpResponseRedirect

from django.shortcuts import get_object_or_404

from django.shortcuts import HttpResponse

from django.shortcuts import render

from .models import Choice

from .models import Question

from django.template import loader

# Create your views here.

def index(request):

    latest_question_list = Question.objects.order_by('-pub_date')[:5]

    template = loader.get_template('polls/index.html')

    context = {

        'latest_question_list': latest_question_list,

    }

    return HttpResponse(template.render(context, request))

def detail(request, question_id):

    question = get_object_or_404(Question, pk=question_id)

    return render(request, 'polls/detail.html', {'question': question})

def results(request, question_id):

    question = get_object_or_404(Question, pk=question_id)

    return render(request, 'polls/results.html', {'question': question})

def vote(request, question_id):

    question = get_object_or_404(Question, pk=question_id)

    try:

        selected_choice = question.choice_set.get(pk=request.POST['choice'])

    except (KeyError, Choice.DoesNotExist):

        return render(request, 'polls/detail.html', {

            'question': question,

            'error_message': "You didn't select a choice.",

        })

    else:

        selected_choice.votes += 1

        selected_choice.save()

        return HttpResponseRedirect(reverse('polls:results', args=(question.id,)))
4--完整的polls/urls.py应该如下所示:
from django.conf.urls import url

from . import views

app_name = 'polls'

urlpatterns = [

    # ex: /polls/

    url(r'^$', views.index, name='index'),

    # ex: /polls/5/

    url(r'^(?P<question_id>[0-9]+)/$', views.detail, name='detail'),

    # ex: /polls/5/results/

    url(r'^(?P<question_id>[0-9]+)/results/$', views.results, name='results'),

    # ex: /polls/5/vote/

    url(r'^(?P<question_id>[0-9]+)/vote/$', views.vote, name='vote'),

]
5--完整的polls/model.py文件如下:
from django.db import models

import datetime

from django.utils import timezone

# Create your models here.

class Question(models.Model):

    question_text = models.CharField(max_length=200)

    pub_date = models.DateTimeField('date published')

    def was_published_recently(self):

        return self.pub_date >= timezone.now() - datetime.timedelta(days=1)

    def __str__(self):

        return self.question_text

class Choice(models.Model):

    question = models.ForeignKey(Question, on_delete=models.CASCADE)

    choice_text = models.CharField(max_length=200)

    votes = models.IntegerField(default=0)

    def __str__(self):

        return self.choice_text
6--完整的polls/admin.py文件如下:
from django.contrib import admin

# Register your models here.

from .models import Question

admin.site.register(Question)
7--完整的templates/polls/index.html文件如下:
{% if latest_question_list %}

    <ul>

    {% for question in latest_question_list %}

        <li><a href="/polls/{{ question.id }}/">{{ question.question_text }}</a></li>

    {% endfor %}

    </ul>

{% else %}

    <p>No polls are available.</p>

{% endif %}
8--完整的templates/polls/detail.html文件如下:
<h1>{{ question.question_text }}</h1>

{% if error_message %}<p><strong>{{ error_message }}</strong></p>{% endif %}

<form action="{% url 'polls:vote' question.id %}" method="post">

{% csrf_token %}

{% for choice in question.choice_set.all %}

    <input type="radio" name="choice" id="choice{{ forloop.counter }}" value="{{ choice.id }}" />

    <label for="choice{{ forloop.counter }}">{{ choice.choice_text }}</label><br />

{% endfor %}

<input type="submit" value="Vote" />

</form>
9--完整的templates/polls/results.html文件如下:
<h1>{{ question.question_text }}</h1>

<ul>

{% for choice in question.choice_set.all %}

    <li>{{ choice.choice_text }} -- {{ choice.votes }} vote{{ choice.votes|pluralize }}</li>

{% endfor %}

</ul>

<a href="{% url 'polls:detail' question.id %}">Vote again?</a>
vote()视图没有对应的html模板,它直接跳转到results视图去了。
运行服务器,测试各功能:
这是问卷列表页面:

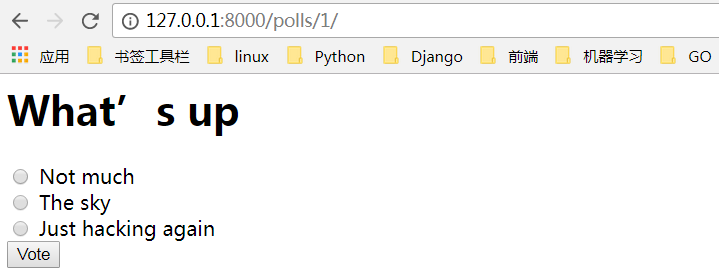
这是“what's up”问卷选项页面:
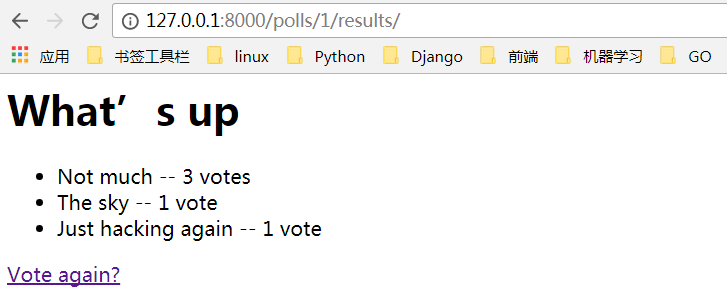
这是选择结果页面:
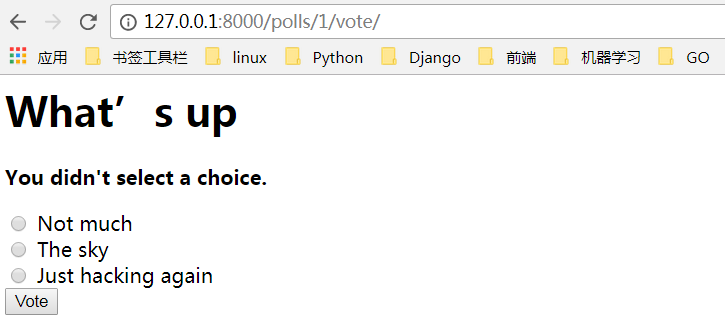
这是没有选择选项时,提示错误信息的页面:
二、 使用类视图:减少重复代码
上面的detail、index和results视图的代码非常相似,有点冗余,这是一个程序猿不能忍受的。他们都具有类似的业务逻辑,实现类似的功能:通过从URL传递过来的参数去数据库查询数据,加载一个模板,利用刚才的数据渲染模板,返回这个模板。由于这个过程是如此的常见,Django很善解人意的帮你想办法偷懒,于是它提供了一种快捷方式,名为“类视图”。
现在,让我们来试试看将原来的代码改为使用类视图的方式,整个过程分三步走:
- 修改URLconf设置
- 删除一些旧的无用的视图
- 采用基于类视图的新视图
PS:为什么本教程的代码来回改动这么频繁?
答:通常在写一个Django的app时,我们一开始就要决定使用类视图还是不用,而不是等到代码写到一半了才重构你的代码成类视图。但是本教程为了让你清晰的理解视图的内涵,“故意”走了一条比较曲折的路,因为我们的哲学是在你使用计算器之前你得先知道基本的数学公式。
1.改良URLconf
打开polls/urls.py文件,将其修改成下面的样子:
from django.conf.urls import url

from . import views

app_name = 'polls'

urlpatterns = [

    url(r'^$', views.IndexView.as_view(), name='index'),

    url(r'^(?P<pk>[0-9]+)/$', views.DetailView.as_view(), name='detail'),

    url(r'^(?P<pk>[0-9]+)/results/$', views.ResultsView.as_view(), name='results'),

    url(r'^(?P<question_id>[0-9]+)/vote/$', views.vote, name='vote'),

]
ps: 将原来的<question_id>修改成了.
2.修改视图
接下来,打开polls/views.py文件,删掉index、detail和results视图,替换成Django的类视图,如下所示:
from django.shortcuts import get_object_or_404, render

from django.http import HttpResponseRedirect

from django.urls import reverse

from django.views import generic

from .models import Choice, Question

class IndexView(generic.ListView):

    template_name = 'polls/index.html'

    context_object_name = 'latest_question_list'

    def get_queryset(self):

    """返回最近发布的5个问卷."""

        return Question.objects.order_by('-pub_date')[:5]

class DetailView(generic.DetailView):

    model = Question

    template_name = 'polls/detail.html'

class ResultsView(generic.DetailView):

    model = Question

    template_name ='polls/results.html'

def vote(request, question_id):

... # 这个视图未改变!!!
在这里,我们使用了两种类视图ListView和DetailView(它们是作为父类被继承的)。这两者分别代表“显示一个对象的列表”和“显示特定类型对象的详细页面”的抽象概念。
每一种类视图都需要知道它要作用在哪个模型上,这通过model属性提供。
DetailView类视图需要从url捕获到的称为"pk"的主键值,因此我们在url文件中将2和3条目的<question_id>修改成了。
默认情况下,DetailView类视图使用一个称作/_detail.html的模板。在本例中,实际使用的是polls/detail.html。template_name属性就是用来指定这个模板名的,用于代替自动生成的默认模板名。(一定要仔细观察上面的代码,对号入座,注意细节。)同样的,在resutls列表视图中,指定template_name为'polls/results.html',这样就确保了虽然resulst视图和detail视图同样继承了DetailView类,使用了同样的model:Qeustion,但它们依然会显示不同的页面。(模板不同嘛!so easy!)
类似的,ListView类视图使用一个默认模板称为/_list.html。我们也使用template_name这个变量来告诉ListView使用我们已经存在的 "polls/index.html"模板,而不是使用它自己默认的那个。
在教程的前面部分,我们给模板提供了一个包含question和latest_question_list的上下文变量。而对于DetailView,question变量会被自动提供,因为我们使用了Django的模型(Question),Django会智能的选择合适的上下文变量。然而,对于ListView,自动生成的上下文变量是question_list。为了覆盖它,我们提供了context_object_name属性,指定说我们希望使用latest_question_list而不是question_list。
六、Django之表单和类视图-Part 4的更多相关文章
- Part 4:表单和类视图--Django从入门到精通系列教程
该系列教程系个人原创,并完整发布在个人官网刘江的博客和教程 所有转载本文者,需在顶部显著位置注明原作者及www.liujiangblog.com官网地址. Python及Django学习QQ群:453 ...
- 第一个Django应用 - 第四部分:表单和类视图
一.表单form 为了接收用户的投票选择,我们需要在前端页面显示一个投票界面.让我们重写先前的polls/detail.html文件,代码如下: <h1>{{ question.quest ...
- Django内置的通用类视图
1.ListView 表示对象列表的一个页面. 执行这个视图的时候,self.object_list将包含视图正在操作的对象列表(通常是一个查询集,但不是必须). 属性: model: 指定模型 te ...
- Django学习笔记之Django Form表单详解
知识预览 构建一个表单 在Django 中构建一个表单 Django Form 类详解 使用表单模板 回到顶部 构建一个表单 假设你想在你的网站上创建一个简单的表单,以获得用户的名字.你需要类似这样的 ...
- django Form表单的使用
Form django表单系统中,所有的表单类都作为django.forms.Form的子类创建,包括ModelForm 关于django的表单系统,主要分两种 基于django.forms.Form ...
- Django form表单 组件
目录 Django form表单 组件 Form 组件介绍 普通方式手写注册功能 使用form组件实现注册功能 Form 常用字段与插件 常用字段(必备) 字段参数(必备) 内置验证(必备) 自定义效 ...
- python运维开发(十九)----Django后台表单验证、session、cookie、model操作
内容目录: Django后台表单验证 CSRF加密传输 session.cookie model数据库操作 Django后台Form表单验证 Django中Form一般有2种功能: 1.用于做用户提交 ...
- django form表单验证
一. django form表单验证引入 有时时候我们需要使用get,post,put等方式在前台HTML页面提交一些数据到后台处理例 ; <!DOCTYPE html> <html ...
- JS表单验证类HTML代码实例
以前用的比较多的一个JS表单验证类,对于个人来说已经够用了,有兴趣的可以在此基础上扩展成ajax版本.本表单验证类囊括了密码验证.英文4~10个 字符验证. 中文非空验证.大于10小于100的数字.浮 ...
随机推荐
- #001 GIT创建分支
GitHub创建分支 如何在github 创建 一个分支出来,进行开发,最后在 merge 到主干上. Git 操作命令 git branch branchName //创建一个分支 git chec ...
- ORACLE默认实例设置--linux
数据库实例多了之后,每次export的时候,显示的ORACLE_SID总不是自己经常用的那个,要是能让默认的自定义就好了. 现在就解释一下在linux环境中如何定义: 1.su - oracle 2. ...
- 利用Jquey.hover来实现 鼠标移入出现删除按钮,鼠标移出删除消失
Html代码 <div class="box"><div class="bmbox" onclick="$('.box:first' ...
- shell基础--变量的数值计算
变量的数值计算 1.$((表达式)) (1).实验1 [root@~_~ day4]# cat test.sh #!/bin/bash a=6 b=2 echo "a-b=$(($a-$b) ...
- --provider=docker时出现的问题
Vagrantfile类似: Vagrant.configure(") do |config| config.vm.box = "hashicorp/precise64" ...
- 支持xhr浏览器:超时设定、加载事件、进度事件
各个浏览器虽然都支持xhr,但还是有些差异. 1.超时设定 IE8为xhr对象添加了一个timeout属性,表示请求在等待响应多少毫秒后就终止.再给timeout这只一个数值后,如果在规定的时间内浏览 ...
- 使用Charles进行移动APP抓包分析
一.简介 Charles是目前最强大最流行的http抓包调试工具,Mac.Unix.Windows各个平台都支持.特别是做APP开发,调试与服务端的通信,Charles是必备工具. 目前Charles ...
- 【转载】Caffe + Ubuntu 14.04 + CUDA 6.5 新手安装配置指南
洋洋洒洒一大篇,就没截图了,这几天一直在折腾这个东西,实在没办法,不想用Linux但是,为了Caffe,只能如此了,安装这些东西,遇到很多问题,每个问题都要折磨很久,大概第一次就是这样的.想想,之后应 ...
- ARM汇编语言
---恢复内容开始--- arm汇编语言 汇编语言是一种程序设计语言,arm处理器是一种16/32位的嵌入式RISC微处理器.一开始我把这混为一谈了.ARM汇编的特点:汇编语言,又叫助记符语言. 1) ...
- x01.calc: 编程语言
想写终极程序,大都去写操作系统或编程语言了.编程语言可以极其复杂如C,也可以极简,只处理加减乘除如 calc. 1. 词法分析 %{ #include <stdio.h> #include ...