【Win10】开发中的新特性及原有的变更
声明:本文内容适用于 Visual Studio 2015 RC 及 Windows 10 10069 SDK 环境下,若以后有任何变更,请以新的特性为准。
一、Password 控件的小眼睛属性的变更
在 Windows 8.1(含 Windows 8) 及 Windows Phone 8.1 Runtime 中,Password 控件的小眼睛是由 IsPasswordRevealButtonEnabled 属性定义的,但是,尽管是相同的属性名字,却有着不同的表现形式。
Windows 8.1: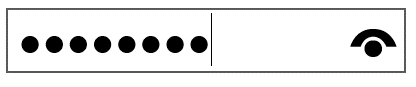
Windows Phone 8.1 Runtime: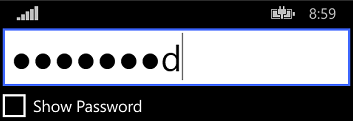
这就给开发人员带来困惑了,因为所占的空间大小不一样,导致整个页面的布局难以控制。(所谓的牵一发而动全身就是这种情况吧)
在 Windows 10 中,控制这个小眼睛变更为 Password 控件的 PasswordRevealMode 属性。这个属性是 PasswordRevealMode 枚举类型,分别有三个值:Peek、Hidden 和 Visible,对 Password 控件来说,Peek 是默认值。也就是说默认是这样的:

若设置为 Hidden,则不显示小眼睛;设置为 Visible,则 Password 控件直接显示密码原文,这时候样子就跟 TextBox 一个样。
PS:IsPasswordRevealButtonEnabled 属性在 Windows 10 的 Password 控件仍存在,但已被标注为过时。
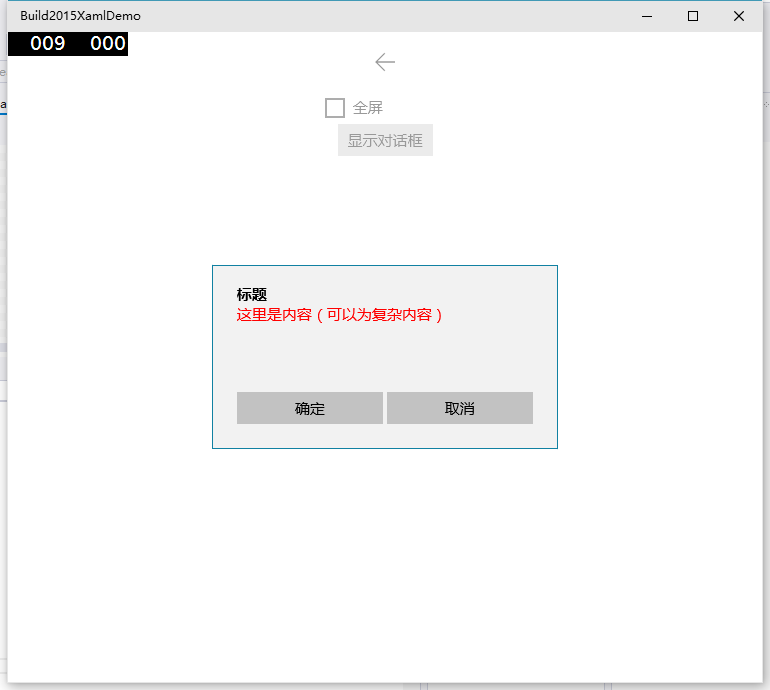
二、新的 ContentDialog 样式
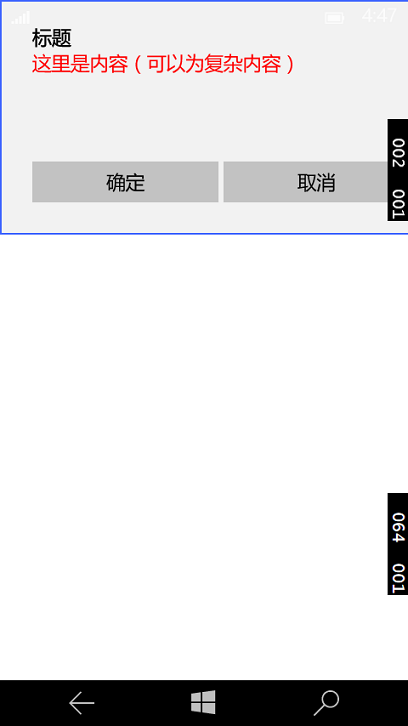
用法没有变,但外观我个人认为是变得更好看了,而且带有动画效果。
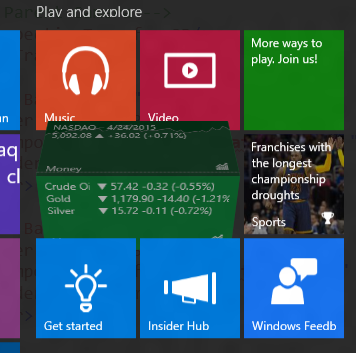
Desktop 下:
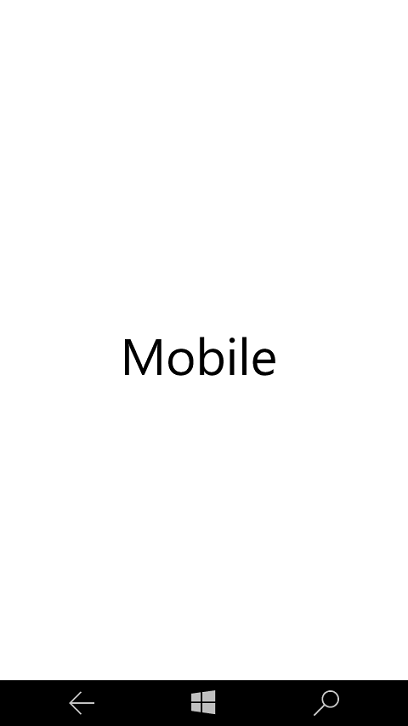
Mobile 下:
三、AutoSuggestBox
这个控件在 Windows Phone 8.1 Runtime 就已经存在了,但是在 Windows 8.1 中是没有的(取而代之的是 Windows 8.1 有 SearchBox 控件)。在大一统的思想下,AutoSuggestBox 控件将取代 SearchBox。
Desktop: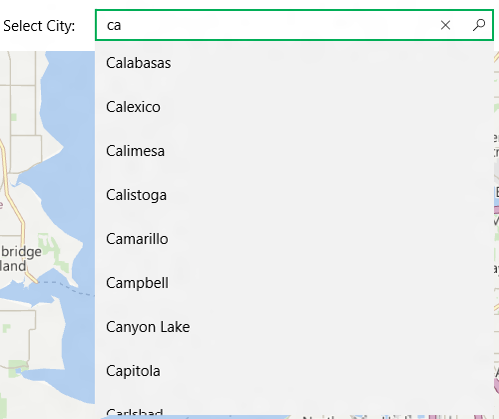
Mobile: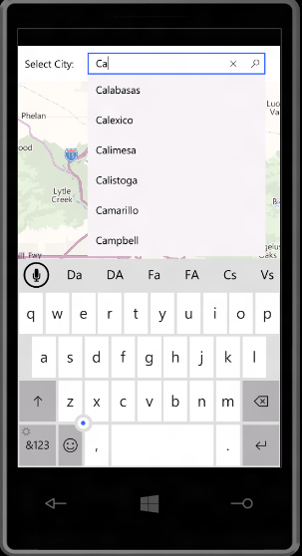
四、SplitView
这个控件暂时还没有官方的中文名称,因此有人喜欢叫汉堡、也有人喜欢叫侧滑菜单(主要视乎你怎么用这个控件)。这里我暂时还是用 SplitView 来称呼它。
1、示例
先来个示例代码:
<Page x:Class="Build2015XamlDemo.SplitViewPage"
xmlns="http://schemas.microsoft.com/winfx/2006/xaml/presentation"
xmlns:x="http://schemas.microsoft.com/winfx/2006/xaml"
xmlns:local="using:Build2015XamlDemo"
xmlns:d="http://schemas.microsoft.com/expression/blend/2008"
xmlns:mc="http://schemas.openxmlformats.org/markup-compatibility/2006"
mc:Ignorable="d">
<Grid Background="{ThemeResource ApplicationPageBackgroundThemeBrush}">
<Grid.RowDefinitions>
<RowDefinition Height="Auto" />
<RowDefinition Height="*" />
</Grid.RowDefinitions>
<StackPanel Orientation="Horizontal">
<FontIcon HorizontalAlignment="Left"
VerticalAlignment="Top"
x:Name="Hamburger"
FontFamily="Segoe MDL2 Assets"
Glyph=""
PointerPressed="BtnHam_Click" />
<SymbolIcon HorizontalAlignment="Left"
VerticalAlignment="Top"
Symbol="Back"
PointerReleased="BtnBack_Click" />
</StackPanel>
<SplitView Grid.Row="1"
x:Name="svw">
<SplitView.Pane>
<Grid Background="Gold">
<TextBlock Text="汉堡内容" />
</Grid>
</SplitView.Pane>
<Grid Background="LightBlue">
<TextBlock Text="主要内容" />
</Grid>
</SplitView>
</Grid>
</Page>
后台代码:
using Windows.UI.Xaml.Controls;

using Windows.UI.Xaml.Input;

namespace Build2015XamlDemo

{

    public sealed partial class SplitViewPage : Page

    {

        public SplitViewPage()

        {

            this.InitializeComponent();

        }

        private void BtnHam_Click(object sender, PointerRoutedEventArgs e)

        {

            e.Handled = true;

            svw.IsPaneOpen = !svw.IsPaneOpen;

        }

        private void BtnBack_Click(object sender, PointerRoutedEventArgs e)

        {

            e.Handled = true;

            Frame.GoBack();

        }

    }

}
PS:后台部分省略了个判断,作为示例不要在意。
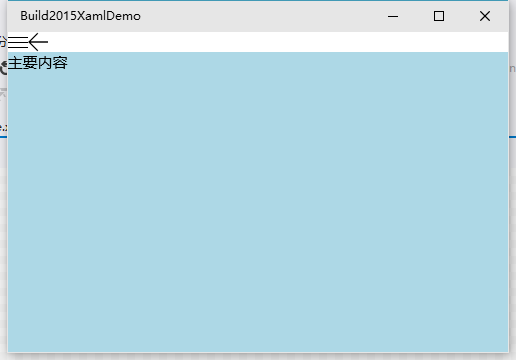
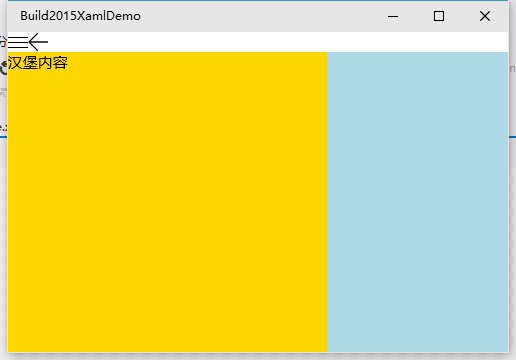
效果:
2、SplitView 的 DisplayMode 属性
这个属性算是 SplitView 里最重要的一个属性了,所以有必要说一下。DisplayMode 属性的类型是 SplitViewDisplayMode,是一个枚举类型。包含如下值:
- Overlay(SplitView 的 DisplayMode 属性的默认值)
- Inline
- CompactOverlay
- CompactInline
测试代码:
XAML:
<Page x:Class="Build2015XamlDemo.SplitViewModePage"
xmlns="http://schemas.microsoft.com/winfx/2006/xaml/presentation"
xmlns:x="http://schemas.microsoft.com/winfx/2006/xaml"
xmlns:local="using:Build2015XamlDemo"
xmlns:d="http://schemas.microsoft.com/expression/blend/2008"
xmlns:mc="http://schemas.openxmlformats.org/markup-compatibility/2006"
mc:Ignorable="d">
<Grid Background="{ThemeResource ApplicationPageBackgroundThemeBrush}">
<Grid.RowDefinitions>
<RowDefinition Height="Auto" />
<RowDefinition />
</Grid.RowDefinitions>
<StackPanel Orientation="Horizontal">
<FontIcon HorizontalAlignment="Left"
VerticalAlignment="Top"
x:Name="Hamburger"
FontFamily="Segoe MDL2 Assets"
Glyph=""
PointerPressed="BtnHam_Click" />
<SymbolIcon HorizontalAlignment="Left"
VerticalAlignment="Top"
Symbol="Back"
PointerReleased="BtnBack_Click" />
</StackPanel>
<SplitView x:Name="svw"
Grid.Row="1">
<SplitView.Pane>
<Grid Background="Gold">
<TextBlock Text="汉堡内容" />
</Grid>
</SplitView.Pane>
<Grid>
<ComboBox x:Name="cmb"
HorizontalAlignment="Center"
VerticalAlignment="Center" />
</Grid>
</SplitView>
</Grid>
</Page>
后台代码:
using System;

using Windows.UI.Xaml.Controls;

using Windows.UI.Xaml.Input;

namespace Build2015XamlDemo

{

    public sealed partial class SplitViewModePage : Page

    {

        public SplitViewModePage()

        {

            this.InitializeComponent();

            var modes = Enum.GetValues(typeof(SplitViewDisplayMode));

            foreach (var mode in modes)

            {

                cmb.Items.Add(mode.ToString());

            }

            cmb.SelectionChanged += Cmb_SelectionChanged;

            cmb.SelectedIndex = ;

        }

        private void Cmb_SelectionChanged(object sender, SelectionChangedEventArgs e)

        {

            if (cmb.SelectedItem != null)

            {

                var mode = (SplitViewDisplayMode)Enum.Parse(typeof(SplitViewDisplayMode), (string)cmb.SelectedItem);

                svw.DisplayMode = mode;

            }

        }

        private void BtnBack_Click(object sender, PointerRoutedEventArgs e)

        {

            e.Handled = true;

            Frame.GoBack();

        }

        private void BtnHam_Click(object sender, PointerRoutedEventArgs e)

        {

            e.Handled = true;

            svw.IsPaneOpen = !svw.IsPaneOpen;

        }

    }

}
Overlay:
在 Overlay 模式下,SplitView 在关闭状态下,Pane 里的内容不显示,在打开的状态下,Pane 里的内容就会像是在 Content 上覆盖一层。
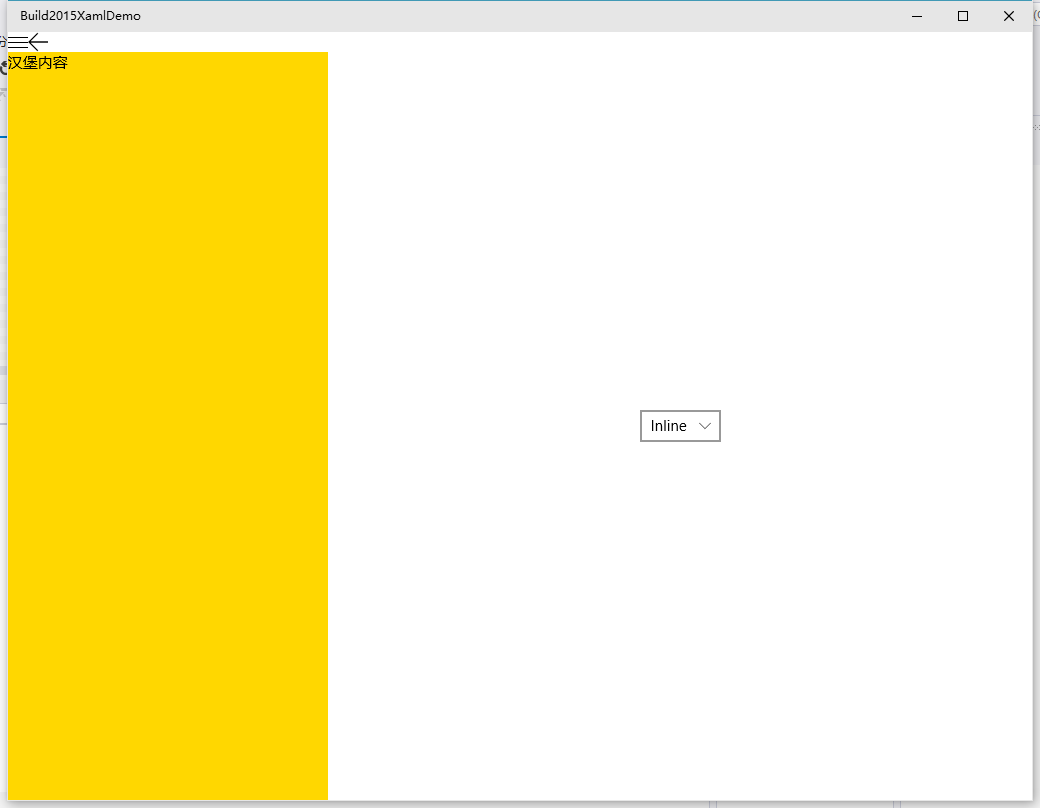
Inline:
此模式下,关闭状态与 Overlay 模式相同,不同的是在打开状态下,Pane 会推开 Content,形成左侧 Pane,右侧 Content 的效果。如图:
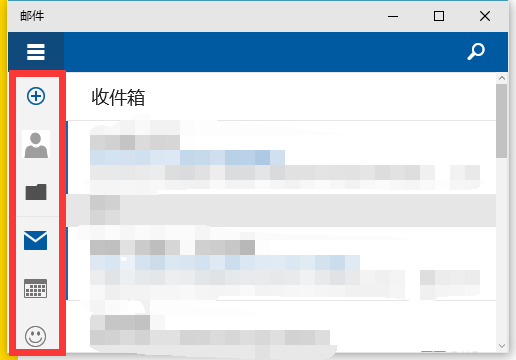
CompactOverlay、CompactInline:
打开模式参考上面,在关闭模式下,Pane 不会完全关闭,而是会留下一定的空间(该空间宽度由 SplitView 控件的 CompactPaneLength 属性决定,默认为 48),我们可以用来显示 Pane 里每一项的图标,例如 Windows 10 10074 中的邮件应用。
五、VisualStateTrigger
在当前 Web 页面开发中,因为越来越多的移动设备,响应式布局成为了一项重要的页面表示形式。经过时间验证,响应式布局的确十分有效。因此在 Windows 10 里,可以使用 VisualStateTrigger 来实现根据 App 的大小或其它因素来呈现不同的布局。
1、Demo 1 根据窗口宽度显示不同文本
XAML:
<Page x:Class="Build2015XamlDemo.VisualStateTriggerDemo1Page"

      xmlns="http://schemas.microsoft.com/winfx/2006/xaml/presentation"

      xmlns:x="http://schemas.microsoft.com/winfx/2006/xaml"

      xmlns:local="using:Build2015XamlDemo"

      xmlns:d="http://schemas.microsoft.com/expression/blend/2008"

      xmlns:mc="http://schemas.openxmlformats.org/markup-compatibility/2006"

      mc:Ignorable="d">

    <Grid Background="{ThemeResource ApplicationPageBackgroundThemeBrush}">

        <VisualStateManager.VisualStateGroups>

            <VisualStateGroup>

                <VisualState x:Name="narrow">

                    <VisualState.Setters>

                        <Setter Target="status.Text"

                                Value="Narrow view" />

                    </VisualState.Setters>

                    <VisualState.StateTriggers>

                        <AdaptiveTrigger MinWindowWidth="0" />

                    </VisualState.StateTriggers>

                </VisualState>

                <VisualState x:Name="wide">

                    <VisualState.Setters>

                        <Setter Target="status.Text"

                                Value="Wide view" />

                    </VisualState.Setters>

                    <VisualState.StateTriggers>

                        <AdaptiveTrigger MinWindowWidth="600" />

                    </VisualState.StateTriggers>

                </VisualState>

            </VisualStateGroup>

        </VisualStateManager.VisualStateGroups>

        <TextBlock x:Name="status"

                   FontSize="40"

                   HorizontalAlignment="Center"

                   VerticalAlignment="Center" />

    </Grid>

</Page>
效果:
2、为 SplitView 设置为响应式
对于大窗口来说,SplitView 我们当然是想完整显示,而对于小窗口或者移动设备,我们并不想推开主要内容(因为推开了位置就更加不足了),而是想“浮在”主要内容上,因此我们可以对 SplitView 作响应式处理。
<VisualState.Setters>

  <Setter Target="splitView.DisplayMode" Value="Inline" />

  </VisualState.Setters>

  <VisualState.StateTriggers>

    <AdaptiveTrigger MinWindowWidth="720" />

  </VisualState.StateTriggers>

  <VisualState.Setters>

    <Setter Target="splitView.DisplayMode" Value="Overlay" />

  </VisualState.Setters>

  <VisualState.StateTriggers>

    <AdaptiveTrigger MinWindowWidth= "0" />

   </VisualState.StateTriggers>
3、自定义 StateTrigger
在 10069 的 SDK 中,StateTrigger 就只有两种,一个是我们上面提到的 AdaptiveTrigger,另一个是 StateTrigger,这个 StateTrigger 十分简单,有一个 IsActive 属性,因此这个 StateTrigger 相当于一个开关,因为比较简单,所以大家可以自行尝试,这里就不给出示例了。
回到正题,我们要实现一个 StateTrigger,那我们先看看内置的 StateTrigger,它们都继承自 StateTriggerBase,而 StateTriggerBase 又继承自 DependencyObject,因此我们可以定义依赖属性(StateTrigger 的 IsActive 属性也是一个依赖属性)。接下来我们实现我们的代码(这里我们实现一个根据设备类型的 StateTrigger):
using Windows.UI.Xaml;

namespace Build2015XamlDemo

{

    public enum DeviceType

    {

        Unknown,

        Desktop,

        Mobile

    }

    public class DeviceTrigger : StateTriggerBase

    {

        public static readonly DependencyProperty DeviceProperty = DependencyProperty.Register(nameof(Device), typeof(DeviceType), typeof(DeviceTrigger), new PropertyMetadata(DeviceType.Unknown, DeviceChanged));

        public DeviceType Device

        {

            get

            {

                return (DeviceType)GetValue(DeviceProperty);

            }

            set

            {

                SetValue(DeviceProperty, value);

            }

        }

        private static void DeviceChanged(DependencyObject d, DependencyPropertyChangedEventArgs e)

        {

            var trigger = (DeviceTrigger)d;

            var value = (DeviceType)e.NewValue;

            var qualifiers = Windows.ApplicationModel.Resources.Core.ResourceContext.GetForCurrentView().QualifierValues;

            if (qualifiers.ContainsKey("DeviceFamily"))

            {

                switch (qualifiers["DeviceFamily"])

                {

                    case "Desktop":

                        trigger.SetActive(trigger.Device == DeviceType.Desktop);

                        break;

                    case "Mobile":

                        trigger.SetActive(trigger.Device == DeviceType.Mobile);

                        break;

                }

            }

        }

    }

}
其中 SetActive 方法传入一个布尔值,使该 StateTrigger 生效或失效。
XAML:
<Page x:Class="Build2015XamlDemo.VisualStateTriggerDemo2Page"
xmlns="http://schemas.microsoft.com/winfx/2006/xaml/presentation"
xmlns:x="http://schemas.microsoft.com/winfx/2006/xaml"
xmlns:local="using:Build2015XamlDemo"
xmlns:d="http://schemas.microsoft.com/expression/blend/2008"
xmlns:mc="http://schemas.openxmlformats.org/markup-compatibility/2006"
mc:Ignorable="d"> <Grid Background="{ThemeResource ApplicationPageBackgroundThemeBrush}">
<VisualStateManager.VisualStateGroups>
<VisualStateGroup>
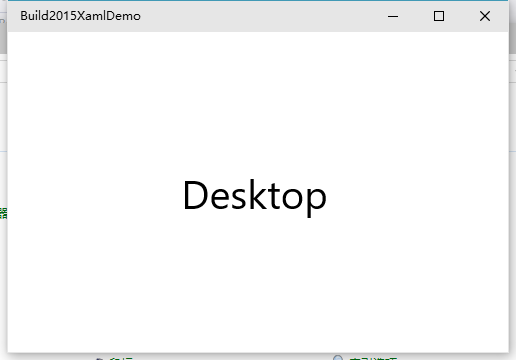
<VisualState x:Name="Desktop">
<VisualState.Setters>
<Setter Target="device.Text"
Value="Desktop" />
</VisualState.Setters>
<VisualState.StateTriggers>
<local:DeviceTrigger Device="Desktop" />
</VisualState.StateTriggers>
</VisualState>
<VisualState x:Name="Mobile">
<VisualState.Setters>
<Setter Target="device.Text"
Value="Mobile" />
</VisualState.Setters>
<VisualState.StateTriggers>
<local:DeviceTrigger Device="Mobile" />
</VisualState.StateTriggers>
</VisualState>
</VisualStateGroup>
</VisualStateManager.VisualStateGroups>
<TextBlock x:Name="device"
HorizontalAlignment="Center"
VerticalAlignment="Center"
FontSize="40" />
</Grid>
</Page>
效果:
六、RelativePanel
这是一个新的系统内置控件,我们可以叫它为相对面板。
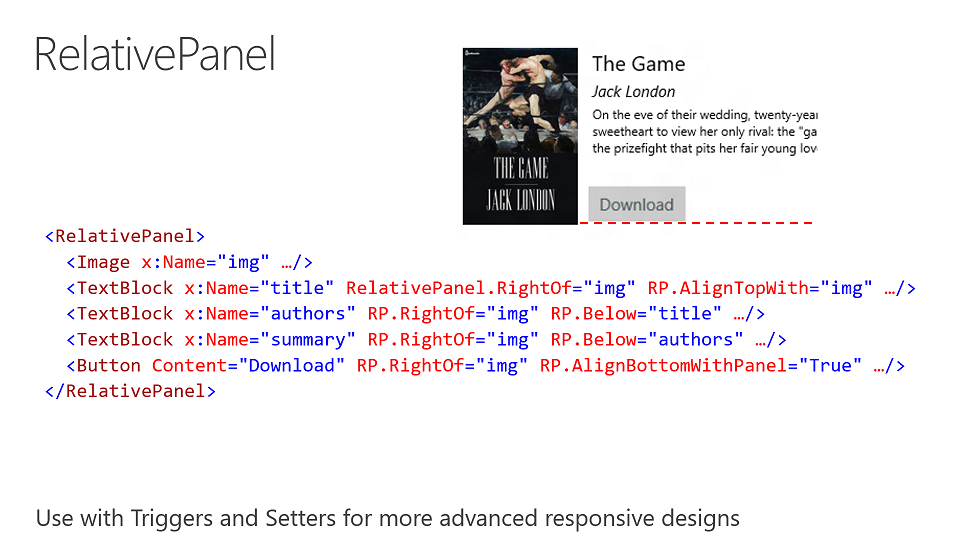
这幅图是今年 Build 大会 ppt 上的一页,上面很好地说明了这个控件应该如何使用。这个控件十分像安卓中的 RelativeLayout,因为安卓没怎么学过,这里就不班门弄斧了。
七、Transform3D(3D 变换)
实例代码:
<Page x:Class="Build2015XamlDemo.Transform3DPage"

      xmlns="http://schemas.microsoft.com/winfx/2006/xaml/presentation"

      xmlns:x="http://schemas.microsoft.com/winfx/2006/xaml"

      xmlns:local="using:Build2015XamlDemo"

      xmlns:d="http://schemas.microsoft.com/expression/blend/2008"

      xmlns:mc="http://schemas.openxmlformats.org/markup-compatibility/2006"

      mc:Ignorable="d">

    <Grid Background="{ThemeResource ApplicationPageBackgroundThemeBrush}">

        <Grid Background="Black">

            <Grid.Transform3D>

                <PerspectiveTransform3D />

            </Grid.Transform3D>

            <StackPanel HorizontalAlignment="Center"

                        VerticalAlignment="Center">

                <Border Width="200"

                        Height="100"

                        Background="#FF11321E">

                    <Border.Transform3D>

                        <CompositeTransform3D RotationX="-45"

                                              CenterY="100"></CompositeTransform3D>

                    </Border.Transform3D>

                    <TextBlock Text="Hello" />

                </Border>

                <Border Width="200"

                        Height="100"

                        Background="#FF0B5B29">

                    <Border.Transform3D>

                        <CompositeTransform3D RotationX="45"></CompositeTransform3D>

                    </Border.Transform3D>

                    <TextBlock Text="World" />

                </Border>

            </StackPanel>

        </Grid>

    </Grid>

</Page>
效果:
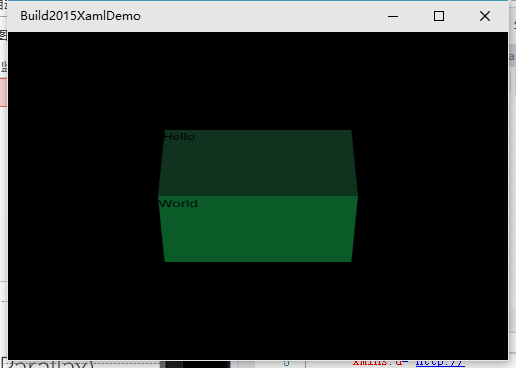
是不是有点立体的感觉呢?(●'◡'●)
现在 Windows 10 开始菜单中的磁贴 3D 变换效果也是用这种方式实现的哦。
八、自定义窗口标题栏
因为这点在我机子上显示的是错误的(SDK 没完成的原因吧),因此使用 Build 大会的 ppt 的图片好了。
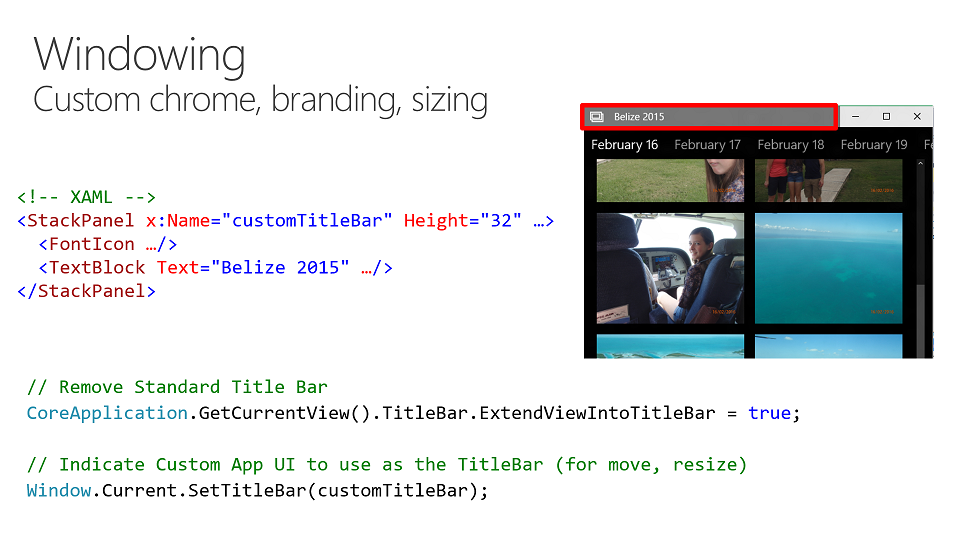
倒数第二行告诉系统使用自定义标题栏,不使用系统标题栏。
最后一行则使用已经渲染的控件作为标题栏。(需要注意的是“已渲染”这几个字,跟 RenderTargetBitmap 类的 Render 方法类似)
九、新的绑定——x:Bind
在 Windows 10 的 XAML 里,新添加了这种新的绑定方式,那么既然已经有旧的绑定({Binding}),那为什么还需要新的绑定呢?必然是有好处的。
这里有两幅 Build 大会 ppt 的图片:
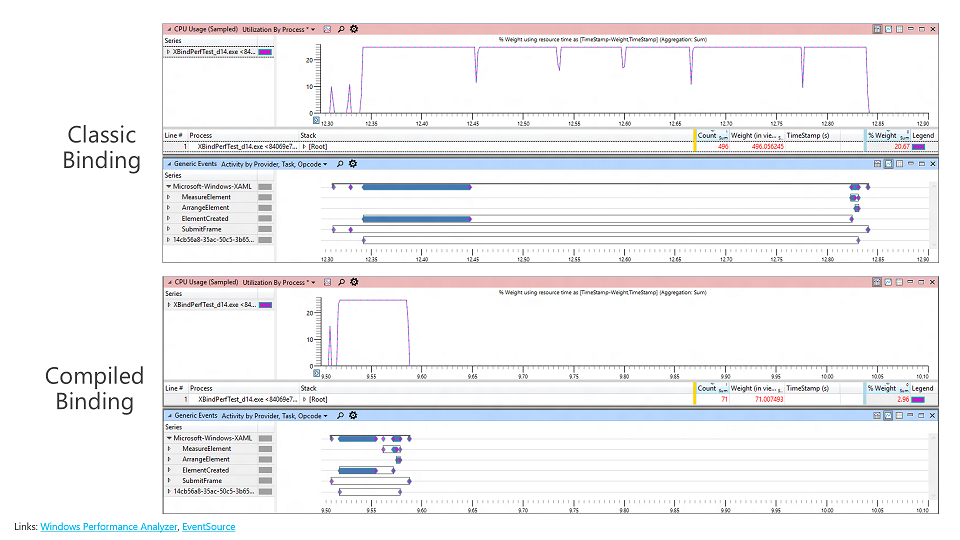

可以看出,无论是 CPU 占用还是内存占用,新的绑定({x:Bind})都要优于以前的绑定({Binding})。
1、为什么 x:Bind 的性能这么好?
在 Build 大会上,微软介绍 x:Bind 使用的是“compiled binding”,即编译时绑定。而传统的绑定,是动态的,例如数据源你可能在运行时从 int 变成 string 都说不定,因此系统不得不承受这些动态变换带来的损失。而新的绑定,是在编译时进行绑定,因此类型都是已知的,那么类型的转换也能够明确确定。
2、试试 x:Bind
XAML:
<TextBlock Text="{x:Bind Path=Relax}" />
后台 cs:
public sealed partial class XBindDemo1 : Page

    {

        private string Relax = "坐和放宽";

        public XBindDemo1()

        {

            this.InitializeComponent();

        }

    }
效果:
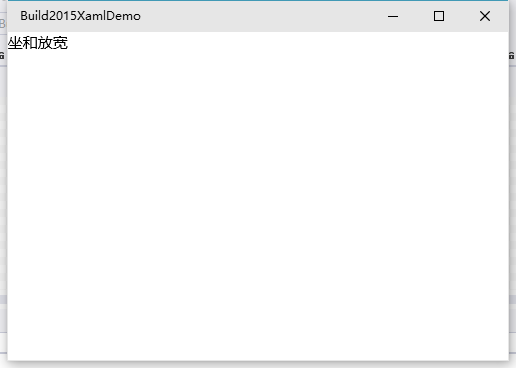
这是很不可思议的,我们没有声明 DataContext。但实现效果就是这么棒!
从 Build 大会的 ppt 我们知道:
- x:Bind 为强类型;
- x:Bind 的上下文为当前 Page 或 UserControl(且无法更改!);
- x:Bind 的 Mode 默认为 OneTime。
假如我们将上面的后台代码中的 Relax 误拼写为 Ralex 的话,编译会得到如下错误:

3、事件绑定
你没看错,新的绑定能够绑定事件处理了。
添加新的测试代码:
XAML:
<Button Content="click bind"

                    Click="{x:Bind Path=MyClick}" />
后台代码:
private async void MyClick(object sender, RoutedEventArgs e)

        {

            await new MessageDialog("you click button").ShowAsync();

        }
编译,运行,通过。
可能你会问,这样有什么意思,只不过将 Click="MyClick" 换成上面的写法而已,而且敲的代码更多了。
现在我们先将 MyClick 的第二个参数的类型改成 object 试试。
private async void MyClick(object sender, object e)

        {

            await new MessageDialog("you click button").ShowAsync();

        }
竟然能正常运行!!!
这就是新的绑定的威力,在事件的绑定上,有一定的“协变”(请与 C# 中协变区分清楚,这里只是借用一下概念,是两种完全不同的东西)。
那么什么样的方法才能够被绑定呢?
根据官方现在的文档,有以下几点需要注意。
- 没有方法参数,例如 void MyClick(){} 也能够被上面的 Click 所绑定;
- 完全匹配,跟上面最开始的代码一样;
- 方法参数是子类,例如上面将 RoutedEventArgs 修改为 object 后的情况。
- 不支持重载,例如上面三点的方法同时存在两个或以上就没法通过编译了。
- 暂时不是所有事件都支持,关于这点,我们只能在自己测试了,微软官方还没有详细文档说明那些事件是支持的。
- 由于没有传统绑定的 CommandParameter,所以这种情况下还是需要使用传统的绑定。
4、模板中使用 x:Bind
由于上面也说了,x:Bind 是强类型的,因此必须在模板中声明数据类型。
<ListView>

  <ListView.ItemTemplate>

    <DataTemplate x:DataType="local:FreeBookCategory">

      <StackPanel>

        <SymbolIcon Symbol="{x:Bind Symbol}"/>

        <TextBlock Text="{x:Bind Name}"/>

        <Button Click="{x:Bind Click}"/>

      </StackPanel>

    </DataTemplate>

  </ListView.ItemTemplate>

</ListView>
5、在资源字典中使用 x:Bind
这点在官方说明中是最为繁琐的。
首先我们新建一个资源文件,例如就叫 MyTemplate.xaml。
<ResourceDictionary xmlns="http://schemas.microsoft.com/winfx/2006/xaml/presentation"

                    xmlns:x="http://schemas.microsoft.com/winfx/2006/xaml"

                    xmlns:local="using:Build2015XamlDemo">

    <DataTemplate x:Key="RelaxTemplate" x:DataType="local:Person">

        <TextBlock Text="{x:Bind Name}" />

    </DataTemplate>

</ResourceDictionary>
Person 类的定义如下:
namespace Build2015XamlDemo

{

    public class Person

    {

        public string Name

        {

            get;

            set;

        }

    }

}
这时候编译是不通过的。
新建一个 MyTemplate.xaml.cs 的文件。
partial class MyTemplate

    {

        public MyTemplate()

        {

            InitializeComponent();

        }

    }
修改上面的 XAML 文件。
<ResourceDictionary x:Class="Build2015XamlDemo.MyTemplate"

                    xmlns="http://schemas.microsoft.com/winfx/2006/xaml/presentation"

                    xmlns:x="http://schemas.microsoft.com/winfx/2006/xaml"

                    xmlns:local="using:Build2015XamlDemo">

    <DataTemplate x:Key="RelaxTemplate" x:DataType="local:Person">

        <TextBlock Text="{x:Bind Name}" />

    </DataTemplate>

</ResourceDictionary>
注意多了一个x:Class,填写 MyTemplate 类的命名空间全路径。
这时候就可以编译通过了,之后就可以在其它地方使用这个 Template 了。
2015 年 10 月 29 日补充,在 xaml 页面中如何引用该模板。(下面的 Application 换成 Page、UserControl 同样)
<Application>

    <Application.Resources>

        <ResourceDictionary>

            <ResourceDictionary.MergedDictionaries>

                <local:MyTemplate />

            </ResourceDictionary.MergedDictionaries>

        </ResourceDictionary>

    </Application.Resources>

</Application>
在 10240 中实测,在此感谢“最硬的小石头”指出。
6、啰嗦一句
x:Bind 并不能完全代替旧的 Binding ,因为在上面也说了,x:Bind 是强类型的,因此像使用 Json.NET 的 JsonObject 或其它动态类型的情况下,仍然需要用到旧的 Binding。但是如果能使用新的绑定,则应该尽量使用新的绑定,因为性能有较大幅度的提升。
十、分阶段渲染
在 Windows 10 中的 XAML,增加了一种新语法实现分阶段渲染。这里我们还是用上面的 Person 类。新建页面,编写如下代码
<Page x:Class="Build2015XamlDemo.XPhaseDemo"

      xmlns="http://schemas.microsoft.com/winfx/2006/xaml/presentation"

      xmlns:x="http://schemas.microsoft.com/winfx/2006/xaml"

      xmlns:local="using:Build2015XamlDemo"

      xmlns:d="http://schemas.microsoft.com/expression/blend/2008"

      xmlns:mc="http://schemas.openxmlformats.org/markup-compatibility/2006"

      mc:Ignorable="d">

    <Grid Background="{ThemeResource ApplicationPageBackgroundThemeBrush}">

        <ListView ItemsSource="{x:Bind LotsOfPersons}">

            <ListView.ItemTemplate>

                <DataTemplate x:DataType="local:Person">

                    <Grid>

                        <TextBlock Text="{x:Bind Name}"

                                   Foreground="Red" />

                        <TextBlock Text="{x:Bind Name}"

                                   Foreground="Green"

                                   x:Phase="1" />

                    </Grid>

                </DataTemplate>

            </ListView.ItemTemplate>

        </ListView>

    </Grid>

</Page>
后台代码:
using System;

using System.Collections.Generic;

using Windows.UI.Xaml.Controls;

namespace Build2015XamlDemo

{

    public sealed partial class XPhaseDemo : Page

    {

        public List<Person> LotsOfPersons

        {

            get;

            set;

        }

        public XPhaseDemo()

        {

            this.InitializeComponent();

            LotsOfPersons = new List<Person>();

            for (int i = ; i < ; i++)

            {

                LotsOfPersons.Add(new Person()

                {

                    Name = Guid.NewGuid().ToString()

                });

            }

        }

    }

}
运行程序的话,应该会看见有一些红色,然后很快就变成绿色的。x:Phase 的值越大,越后渲染。
由于处理速度太快,因此也不太好截图,性能差点的机器应该会能看见效果的。
这点对于移动设备等性能较差的机器改善用户体验很有用。
转载请保留到该页面的链接http://www.cnblogs.com/h82258652/p/4508777.html。谢谢!
【Win10】开发中的新特性及原有的变更的更多相关文章
- 【Win10】开发中的新特性及原有的变更(二)
声明:本文内容适用于 Visual Studio 2015 RC 及 Windows 10 10069 SDK 环境下,若以后有任何变更,请以新的特性为准. 十一.x:Bind 中使用强制转换 这点是 ...
- iOS7开发中的新特性
iOS7到现在已经发布了有一段时间了.相信你现在已经了解了它那些开创性的视觉设计,已经了解了它的新的API,比如说SpirteKit,UIKit Dynamics以及TextKit,作为开发者 ...
- Webpack 3 中的新特性
本文简短地分享下最新发布的 Webpack 3 中的新特性,供大家参考. 1. Webpack 3 的新特性 6 月 20 日,Webpack 发布了最新的 3.0 版本,并在 Medium 发布了公 ...
- 使用示例带你提前了解 Java 9 中的新特性
使用示例带你提前了解 Java 9 中的新特性 转载来源:https://juejin.im/post/58c5e402128fe100603cc194 英文出处:https://www.journa ...
- HTML 5中的新特性
HTML 5中的新特性 html5新增了一些语义化更好的标签元素.首先,让我们来了解一下HTML语义化. 1.什么是HTML语义化? 根据内容的结构化(内容语义化),选择合适的标签(代码语义化)便于开 ...
- ASP.NET 5与MVC 6中的新特性
差点忘了提一句,MVC 6中默认的渲染引擎Razor也将得到更新,以支持C# 6中的新语法.而Razor中的新特性还不只这一点. 在某些情况下,直接在Web页面中嵌入某些JSON数据的方式可能比向服务 ...
- (数据科学学习手札73)盘点pandas 1.0.0中的新特性
本文对应脚本及数据已上传至我的Github仓库https://github.com/CNFeffery/DataScienceStudyNotes 1 简介 毫无疑问pandas已经成为基于Pytho ...
- 1 PHP 5.3中的新特性
1 PHP 5.3中的新特性 1.1 支持命名空间 (Namespace) 毫无疑问,命名空间是PHP5.3所带来的最重要的新特性. 在PHP5.3中,则只需要指定不同的命名空间即可,命名空间的分隔符 ...
- SuperMap iClient 7C——网络客户端GIS开发平台 产品新特性
SuperMap iClient 7C是空间信息和服务的可视化交互开发平台,是SuperMap服务器系列产品的统一客户端.产品基于统一的架构体系,面向Web端和移动端提供了多种类型的SDK开发包,帮助 ...
随机推荐
- Linux就业技术指导(七):游戏类运维重点流程解析
一,某游戏公司例行上线与更新流程示例 例行维护/更新流程 1.1 更新前天 提前确认好要更新的是什么,更新会有人通知你,一般是运营人员 比如:我们明天做什么什么更新 1.2 第2天更新 一般固定点更新 ...
- Windows10系统一键结束所有运行程序
当电脑及其卡顿的时候,想打开任务管理器关掉所有运行的程序的时候,也会变得及其困难.因此之前你如果有犀利的小程序设置,这都不会是问题. 1)空白处右键-新建-快捷方式 2)将下列代码复制到下列框中(注意 ...
- hdoj1078(介绍记忆化搜索及其模板)
题目链接:http://acm.hdu.edu.cn/showproblem.php?pid=1078 思路: 这是一道典型的记忆化搜索模板题. 先介绍记忆化搜索,本质是搜索+DP. 一般说来,动态规 ...
- 第七章 二叉搜索树 (d1)AVL树:重平衡
- springboot自定义消息转换器HttpMessageConverter
在SpringMVC中,可以使用@RequestBody和@ResponseBody两个注解,分别完成请求报文到对象和对象到响应报文的转换,底层这种灵活的消息转换机制就是利用HttpMessageCo ...
- [leetcode]215. Kth Largest Element in an Array 数组中第k大的元素
Find the kth largest element in an unsorted array. Note that it is the kth largest element in the so ...
- centos7下源码安装mysql5.7.16
一.下载源码包下载mysql源码包 http://mirrors.sohu.com/mysql/MySQL-5.7/mysql-5.7.16.tar.gz 二.安装约定: 用户名:mysql 安装目录 ...
- Luogu 1070 道路游戏
看完题面想了一会发现只会写$n^3$,愣了一会才想出了单调队列优化的做法. 90分算法: 设$f_{i, j, k}$表示第$i$分钟在第$j$座城市已经走了$k$步的最大价值,转移显然,时间复杂度$ ...
- Luogu 3959 [NOIP2017] 宝藏
NOIP2017最后一道题 挺难想的状压dp. 受到深度的条件限制,所以一般的状态设计带有后效性,这时候考虑把深度作为一维,这样子可以保证所有状态不重复计算一遍. 神仙预处理:先处理出一个点连到一个集 ...
- JMeter中用java修改文件名称
import java.io.File; String NewDataPath=bsh.args[0]; File SrcFile= new File(NewDataPath+"AutoTe ...