Flutter实战视频-移动电商-63.购物车_详细页显示购物车商品数量
63.购物车_详细页显示购物车商品数量
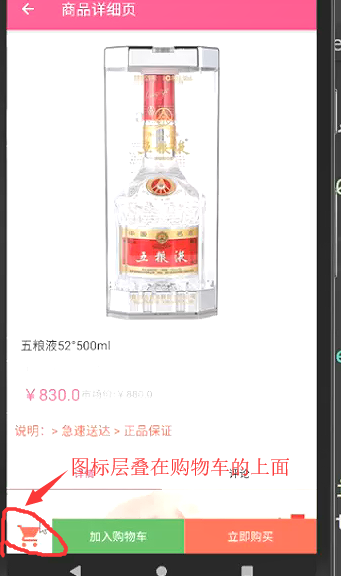
购物车的图标嵌套在statck组件里面
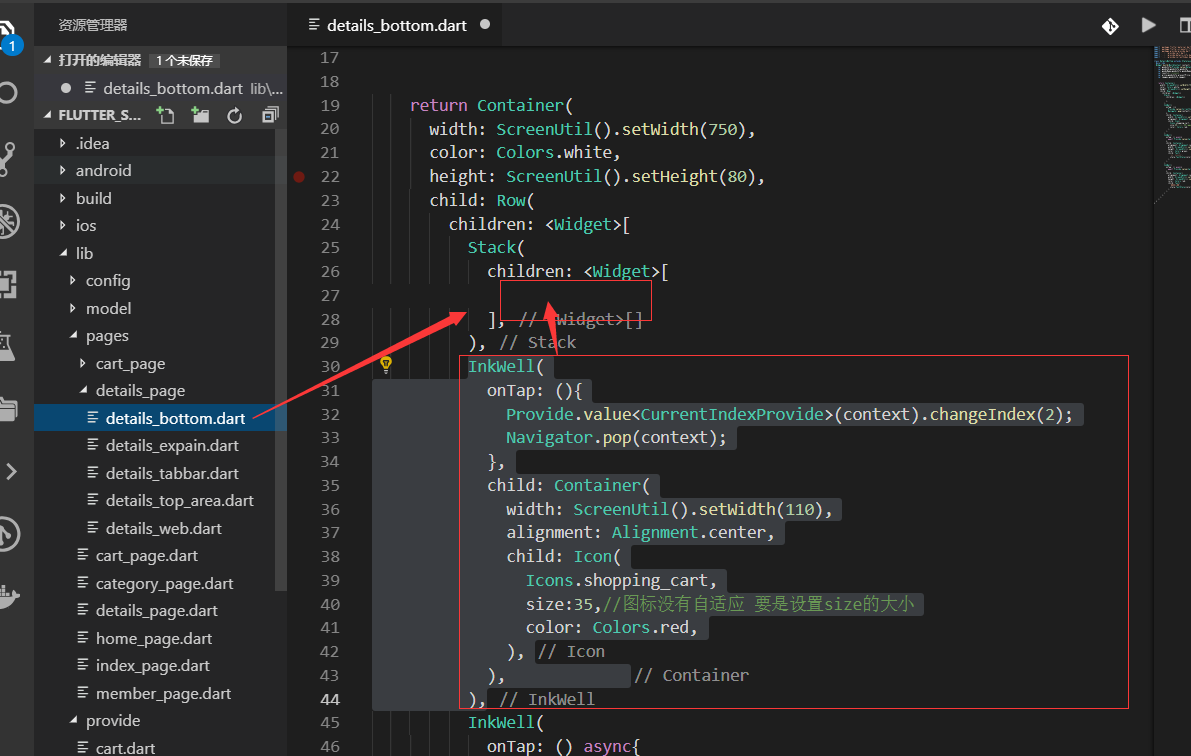
外层套了一个stack组件
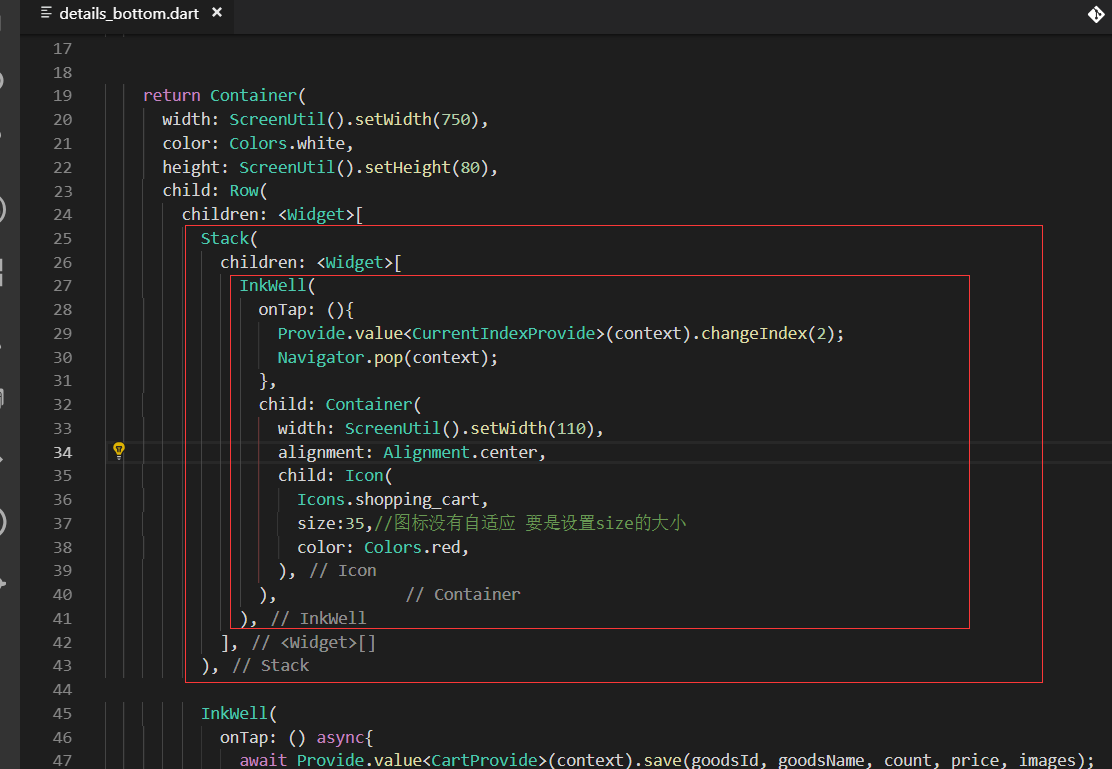
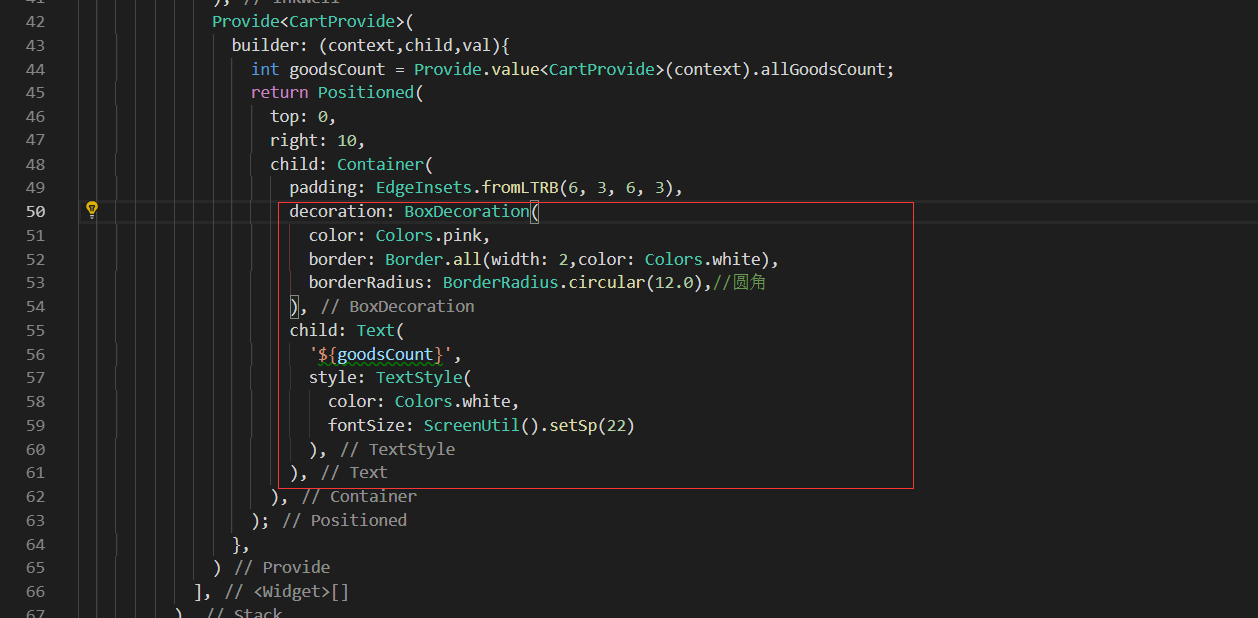
数量我们需要用Provide


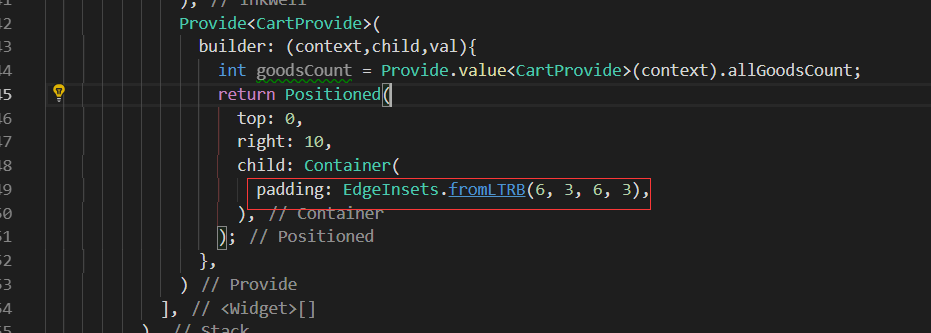
返回一个container来做样式
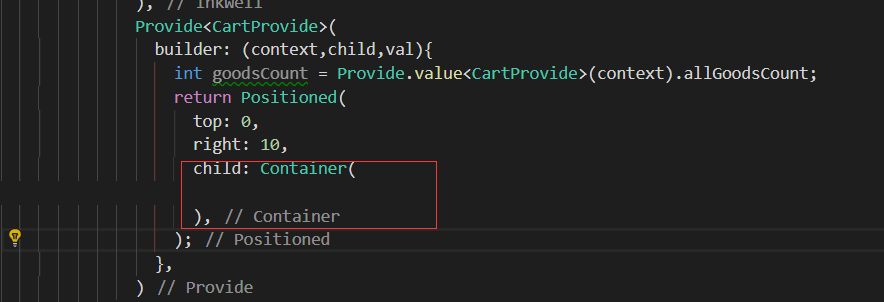
气泡效果,中间是个数字外面 是一个圆
如果想组成一个圆的形式,内边距就必须用formLRB这种形式

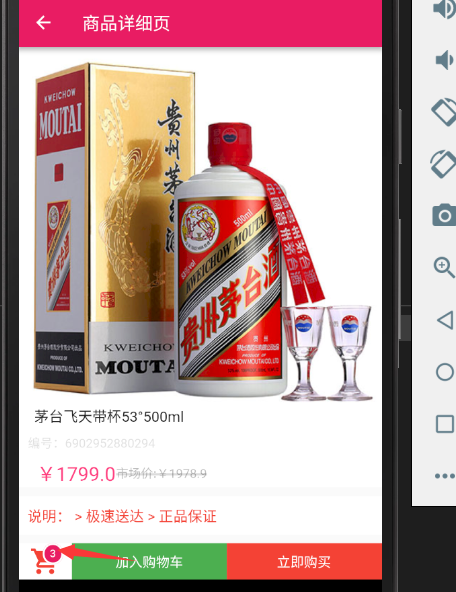
点击加入购物车后,数量发生变化provide/cart.dart
provide/cart.dart

效果展示:
最终代码
details_page/detail.dart
import 'package:flutter/material.dart';

import 'package:flutter_screenutil/flutter_screenutil.dart';

import 'package:provide/provide.dart';

import '../../provide/cart.dart';

import '../../provide/details_info.dart';

import '../../provide/currentIndex.dart';

class DetailsBottom extends StatelessWidget {

  @override

  Widget build(BuildContext context) {

    var goodsInfo=Provide.value<DetailsInfoProvide>(context).goodsInfo.data.goodInfo;//当前商品的详情

    var goodsId=goodsInfo.goodsId;

    var goodsName=goodsInfo.goodsName;

    var count=;//默认为1

    var price=goodsInfo.presentPrice;

    var images=goodsInfo.image1;

    return Container(

      width: ScreenUtil().setWidth(),

      color: Colors.white,

      height: ScreenUtil().setHeight(),

      child: Row(

        children: <Widget>[

          Stack(

            children: <Widget>[

              InkWell(

                onTap: (){

                  Provide.value<CurrentIndexProvide>(context).changeIndex();

                  Navigator.pop(context);

                },

                child: Container(

                  width: ScreenUtil().setWidth(),

                  alignment: Alignment.center,

                  child: Icon(

                    Icons.shopping_cart,

                    size:,//图标没有自适应 要是设置size的大小

                    color: Colors.red,

                  ),

                ),

              ),

              Provide<CartProvide>(

                builder: (context,child,val){

                  int goodsCount = Provide.value<CartProvide>(context).allGoodsCount;

                  return Positioned(

                    top: ,

                    right: ,

                    child: Container(

                      padding: EdgeInsets.fromLTRB(, , , ),

                      decoration: BoxDecoration(

                        color: Colors.pink,

                        border: Border.all(width: ,color: Colors.white),

                        borderRadius: BorderRadius.circular(12.0),//圆角

                      ),

                      child: Text(

                        '${goodsCount}',

                        style: TextStyle(

                          color: Colors.white,

                          fontSize: ScreenUtil().setSp()

                        ),

                      ),

                    ),

                  );

                },

              )

            ],

          ),

          InkWell(

            onTap: () async{

              await Provide.value<CartProvide>(context).save(goodsId, goodsName, count, price, images);

            },

            child: Container(

              alignment: Alignment.center,

              width: ScreenUtil().setWidth(),//750 - 110 再除以2 评分

              height: ScreenUtil().setHeight(),

              color: Colors.green,

              child: Text(

                '加入购物车',

                style:TextStyle(color:Colors.white,fontSize: ScreenUtil().setSp()),

              ),

            ),

          ),

          InkWell(

            onTap: () async{

              await Provide.value<CartProvide>(context).remove();

            },

            child: Container(

              alignment: Alignment.center,

              width: ScreenUtil().setWidth(),//750 - 110 再除以2 评分

              height: ScreenUtil().setHeight(),

              color: Colors.red,

              child: Text(

                '立即购买',

                style:TextStyle(color:Colors.white,fontSize: ScreenUtil().setSp()),

              ),

            ),

          )

        ],

      ),

    );

  }

}
provide/cart.dart
import 'package:flutter/material.dart';

import 'package:shared_preferences/shared_preferences.dart';

import 'dart:convert';

import '../model/cartInfo.dart';

class CartProvide with ChangeNotifier{

  String cartString="[]";//声明一个变量 做持久化的存储

  List<CartInfoModel> cartList=[];

  double allPrice = ;//总价格

  int allGoodsCount = ;//商品总数

  bool isAllCheck=true;//全选 默认true

  //声明一个异步的方法,购物车操作放在前台不在请求后台的数据

  save(goodsId,goodsName,count,price,images) async {

    SharedPreferences prefs = await SharedPreferences.getInstance();

    cartString= prefs.getString('cartInfo');//先从持久化中获取

    var temp = cartString==null?[]:json.decode(cartString.toString());

    //声明list 强制类型是Map

    List<Map> tempList=(temp as List).cast();//把temp转成list

    bool isHave=false;//是否已经存在了这条记录

    int ival=;//foreach循环的索引

    allPrice=;//总价先初始化为0

    allGoodsCount=;//所有商品数量

    //循环判断列表是否存在该goodsId的商品,如果有就数量+1

    tempList.forEach((item){

      if(item['goodsId']==goodsId){

        tempList[ival]['count']=item['count']+;

        cartList[ival].count++;

        isHave=true;

      }

      if(item['isCheck']){

        allPrice += (cartList[ival].price * cartList[ival].count);

        allGoodsCount += cartList[ival].count;

      }

      ival++;

    });

    //没有不存在这个商品,就把商品的json数据加入的tempList中

    if(!isHave){

      Map<String,dynamic> newGoods={

        'goodsId':goodsId,//传入进来的值

        'goodsName':goodsName,

        'count':count,

        'price':price,

        'images':images,

        'isCheck':true

      };

      tempList.add(newGoods);

      cartList.add(CartInfoModel.fromJson(newGoods));

      allPrice+=(count*price);

      allGoodsCount+=count;

    }

    cartString=json.encode(tempList).toString();//json数据转字符串

    // print('字符串》》》》》》》》》》》${cartString}');

    // print('字符串》》》》》》》》》》》${cartList}');

    prefs.setString('cartInfo', cartString);

    notifyListeners();

  }

  remove() async{

    SharedPreferences prefs=await SharedPreferences.getInstance();

    prefs.remove('cartInfo');

    cartList=[];

    print('清空完成----------------------');

    notifyListeners();

  }

  getCartInfo() async{

    SharedPreferences prefs=await SharedPreferences.getInstance();

    cartString=prefs.getString('cartInfo');//持久化中获得字符串

    print('购物车持久化的数据================>'+cartString);

    cartList=[];//把最终的结果先设置为空list

    if(cartString==null){

      cartList=[];//如果持久化内没有数据 那么就还是空的list

    }else{

      //声明临时的变量

      List<Map> tempList=(json.decode(cartString.toString()) as List).cast();

      allPrice=;//价格先初始化为0

      allGoodsCount=;//数量先初始化为0

      isAllCheck=true;//循环之前初始化一下

      tempList.forEach((item){

        if(item['isCheck']){

          allPrice+=(item['count']*item['price']);

          allGoodsCount +=item['count'];

        }else{

          isAllCheck=false;

        }

        cartList.add(CartInfoModel.fromJson(item));//json转成对象,加入到cartList中

      });

    }

    notifyListeners();//通知

  }

  //删除单个购物车商品

  deleteOneGoods(String goodsId) async{

    SharedPreferences prefs=await SharedPreferences.getInstance();

    cartString=prefs.getString('cartInfo');

    List<Map> tempList=(json.decode(cartString.toString()) as List).cast();

    int tempIndex=;//定义循环的索引

    int deleteIndex=;//要删除的索引

    tempList.forEach((item){

      if(item['goodsId']==goodsId){

        deleteIndex=tempIndex;

      }

      tempIndex++;

    });

    tempList.removeAt(deleteIndex);//删除

    //删除后转换成string进行持久化

    cartString=json.encode(tempList).toString();//list转字符串

    prefs.setString('cartInfo', cartString);

    await getCartInfo();//重新获取下列表数据,因为getCartInfo方法里面有通知,这里就不再调用了

  }

  changeCheckState(CartInfoModel cartItem) async{

    SharedPreferences prefs=await SharedPreferences.getInstance();

    cartString=prefs.getString('cartInfo');

    List<Map> tempList=(json.decode(cartString.toString()) as List).cast();

    int tempIndx=;//历史索引

    int changeIndex=;//改变的索引

    tempList.forEach((item){

      if(item['goodsId']==cartItem.goodsId){

        changeIndex=tempIndx;

      }

      tempIndx++;

    });

    tempList[changeIndex]=cartItem.toJson();//toJson就变成了Map值

    cartString=json.encode(tempList).toString();

    prefs.setString('cartInfo', cartString);

    await getCartInfo();//再次重新获取购物车的数据

  }

  //点击全选按钮操作

  changeAllCheckBtnState(bool isCheck) async{

    SharedPreferences prefs=await SharedPreferences.getInstance();

    cartString=prefs.getString('cartInfo');

    List<Map> tempList=(json.decode(cartString.toString()) as List).cast();

    List<Map> newList=[];//这里必须初始化为[]声明为一个空的值

    for(var item in tempList)

    {

      //dart在循环的时候是不允许改变老的值的

      var newItem=item;//把老的item赋值给新的item

      newItem['isCheck']=isCheck;

      newList.add(newItem);

    }

    cartString=json.encode(newList).toString();

    prefs.setString('cartInfo', cartString);

    await getCartInfo();//最后中心获取一下购物车的列表数据

  }

  //商品数量加减

  addOrReduceAction(var cartItem,String todo) async{

    SharedPreferences prefs=await SharedPreferences.getInstance();

    cartString=prefs.getString('cartInfo');

    List<Map> tempList=(json.decode(cartString.toString()) as List).cast();

    int tempIndex=;//循环的索引

    int changeIndex=;//要改变的索引

    tempList.forEach((item){

      if(item['goodsId']==cartItem.goodsId){

        changeIndex=tempIndex;

      }

      tempIndex++;

    });

    if(todo=='add'){

      cartItem.count++;

    }else if(cartItem.count>){

      cartItem.count--;//数量只有大于1才能减减

    }

    tempList[changeIndex]=cartItem.toJson();

    cartString=json.encode(tempList).toString();

    prefs.setString('cartInfo', cartString);

    await getCartInfo();//重新获取购物车数据

  }

}
Flutter实战视频-移动电商-63.购物车_详细页显示购物车商品数量的更多相关文章
- Flutter实战视频-移动电商-16.补充_保持页面状态
16.补充_保持页面状态 修正一个地方: 设置了item的高度为380 横向列表为380.最终build的高度也增加了50为430. 增加了上面的高度以后,下面那个横线划掉的价格可以显示出来了. 但是 ...
- Flutter实战视频-移动电商-09.首页_项目结构建立和获取数据
09.首页_项目结构建立和获取数据 在config下创建service_url.dart 用来配置我们后端接口的配置文件 一个变量存 接口地址,一个接口方法地址 所有后天请求数据的方法都放在这个文件夹 ...
- Flutter实战视频-移动电商-11.首页_屏幕适配方案讲解
11.首页_屏幕适配方案讲解 国人写的屏幕适配插件: https://github.com/OpenFlutter/flutter_screenutil 最新版本是0.5.1 在pubspec.yam ...
- Flutter实战视频-移动电商-13.首页_广告Banner组件制作
13.首页_广告Banner组件制作 主要是做这个小广告条. 其实就是读取一个图片做一个widget放到这里 使用stlessW快速生成 定义一个变量存放图片的url地址: 这样我们的广告条就写完了 ...
- Flutter实战视频-移动电商-15.首页_商品推荐模块编写
15.首页_商品推荐模块编写 商品推荐,我们做成可以横向滚动的 分析: 上面是标题,下面是ListView,里面是一个Column, column分三层,第一是图片,第二是价格,第三是市场价格 小细节 ...
- Flutter实战视频-移动电商-17.首页_楼层组件的编写技巧
17.首页_楼层组件的编写技巧 博客地址: https://jspang.com/post/FlutterShop.html#toc-b50 楼层的效果: 标题 stlessW快速生成: 接收一个St ...
- Flutter实战视频-移动电商-18.首页_火爆专区后台接口调试
18.首页_火爆专区后台接口调试 楼层结束之后有个火爆专区.到地图有个上拉加载的效果 lib/config/service_url.dart 首先找到我们的接口配置文件,增加接口的配置 lib/ser ...
- Flutter实战视频-移动电商-19.首页_火爆专区界面布局编写
19.首页_火爆专区界面布局编写 看一下图片的效果 一个标题栏,下面是多行两列.里面可以用column布局,外面用Warp流式布局 有得小伙伴说这里可以用网格布局,网格布局的话还是有一定的效率问题.这 ...
- Flutter实战视频-移动电商-20.首页_火爆专区上拉加载效果
20.首页_火爆专区上拉加载效果 上拉加载的插件比较都.没有一个一枝独秀的 可以自定义酷炫的header和footer 一直在更新 推荐使用这个插件: https://github.com/xuelo ...
随机推荐
- freescale-sdk linux移植一搭建编译环境脚本host-prepare.sh分析
接下来使用自己的课外歇息时间,对基于PowerPC架构freescale-sdk,进行linux移植和分析.主要參考官方文档freescale linux sdk START_HERE.html,首先 ...
- eclipse下Android工程名称的修改方法
eclipse下Android工程名称的修改方法 对于已经建立的工程,如果发现原来的工程名不合适,此时若想彻底更改工程名,需要三个步骤: 1.更改工程名 选中工程名,右键-->Refactor- ...
- ZOJ 1516 Uncle Tom's Inherited Land(二分匹配 最大匹配 匈牙利啊)
题目链接:http://acm.zju.edu.cn/onlinejudge/showProblem.do?problemId=516 Your old uncle Tom inherited a p ...
- 后端程序员看前端想死(二)进入页面之后js分析
在上一篇中分析了一下以网页的组成.header中引入的乱七八糟的东西,现在进入到js中进行分析了 tuhooo啊,你是要搞前端了么? nonono,好玩,学一下 打开页面之后执行js的几种方法 直接写 ...
- SPOJ - LCS 后缀自动机入门
LCS - Longest Common Substring A string is finite sequence of characters over a non-empty finite set ...
- 【BZOJ2339】[HNOI2011]卡农 组合数+容斥
[BZOJ2339][HNOI2011]卡农 题解:虽然集合具有无序性,但是为了方便,我们先考虑有序的情况,最后将答案除以m!即可. 考虑DP.如果我们已经知道了前m-1个集合,那么第m个集合已经是确 ...
- 设置开启telnet功能
今天访问服务器的时候发现ip可以ping通,但是不能访问,就telnet一下端口吧,谁知系统逗我:
- Unity编译时找不到AndroidSDK的问题 | Unable to list target platforms
解决方式 1.从官网下载一个旧版本的 Android SDK tools 25.2.3.tools_r25.2.3-windows.zip. 2. 解压 3. 替换原来sdk目录下tools
- ThinkPHP 静态页缓存
通过对ThinkPHP的学习,记录下静态页的缓存步骤,以便以后查阅: 1.配置配置文件/Admin/Conf/config.php代码如下: /*静态缓存*/ 'HTML_CACHE_ON'=> ...
- hihocoder #1122 二分图二•二分图最大匹配之匈牙利算法(*【模板】应用 )
梳理整个算法: 1. 依次枚举每一个点i: 2. 若点i尚未匹配,则以此点为起点查询一次交错路径. 最后即可得到最大匹配数. 在这个基础上仍然有两个可以优化的地方: 1.对于点的枚举:当我们枚举了所有 ...