koajs 项目实战(一)
(一)koa
1.Koa(koajs)-- 基于 Node.js 平台的下一代 web 开发框架
koa1
npm install koa -g

npm install koa-generator -g

koa eduline1

cd eduline1

npm install

运行:npm start

访问:http://localhost:3000
koa2
npm install koa@2 -g

npm install koa-generator -g

koa2 eduline2

cd eduline2

npm install

运行:npm start

访问:http://localhost:3000
2.koajs 框架解决的问题
解决了 Express 中具有的回调陷阱问题,大大优化了开发体验。
koa1: Generator + yield es6
示例:
index.js
var router = require('koa-router')();

router.get('/', function *(next) {

	// 注:yield 后面必须是一个 Promise

	// let rs = yield new Promise(function(resolve,reject){

	// 	setTimeout(function() {

	// 		console.log('执行setTimeout');

	// 		resolve('返回结果');

	// 	},2000);

	// })

	// reject的用法

	let rs = 'null';

	try{

		rs = yield new Promise(function(resolve,reject){

			setTimeout(function(argument) {

				console.log('执行setTimeout');

				reject('出错');

			},2000);

		})

	}catch(err){

		console.log(err);

	}

	console.log('aaaaaaaa=' + rs);

	this.body = 'hello,koa1' + rs;

  	// yield this.render('index', {

  	// 	title: 'Hello World Koa!'

  	// });

});

module.exports = router;
koa2: asyinc + await es7
示例:
index.js
const router = require('koa-router')()

router.get('/', async (ctx, next) => {

	// await 后面需要接 Promise

	// let rs = await new Promise(function(resolve,reject){

	// 	setTimeout(function(){

	// 		console.log('执行setTimeout');

	// 		resolve('返回结果');

	// 	},2000);

	// })

	// reject的用法

	let rs = 'null';

	try{

		rs = await new Promise(function(resolve,reject){

			setTimeout(function(){

				console.log('执行setTimeout');

				reject('出错');

			},2000)

		})

	}catch(err){

		console.log(err);

	}

	ctx.body = 'hello,koa2' + rs;

  	// await ctx.render('index', {

  	// 	title: 'Hello Koa 2!'

  	// })

})

module.exports = router
3.目前流行版本为 koa1 和 koa2
性能: koa2 > koa1 > Express
但: koa2 项目中如果安装多个插件,性能呈几何状下降,显示 koa2 尚不稳定。
(二)项目框架
客户端: jquery + bootstrap
服务端: koa1(koa2) + mongose(数据库mongodb) + ejs模板
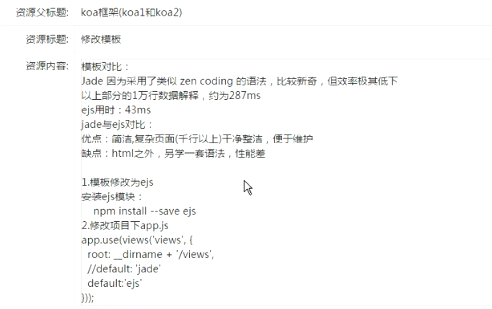
(三)修改模板
安装ejs模块:
npm install --save ejs
koa1:
app.js
app.use(views('views', {

  root: __dirname + '/views',

  // default: 'jade'

  default: 'ejs' // 默认使用ejs语法

}));
users.js
// 默认路由

router.get('/', function *(next) {

  this.body = 'this is a users response!';

});

// 登录页路由

router.get('/login', function *(next) {

  // this.body = 'login页面';

  // 绑定login.ejs文件

  yield this.render('login',{});

});
koa2:
app.js
app.use(views(__dirname + '/views', {

  // extension: 'pug'

  extension: 'ejs' // 默认使用ejs语法

}))
users.js
// 默认路由

router.get('/', async function (ctx, next) {

  // ctx.body = 'this is a users response!'

  ctx.state = {

  	title:'我是koa2的login'

  };

})

// 登录页路由

router.get('/login', async function (ctx, next) {

  await ctx.render('login', {});

});

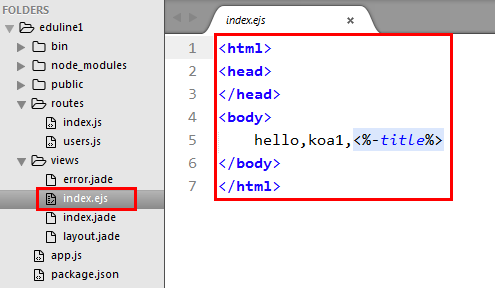
ejs 格式

(四)引入 bootstrap 并创建 index 界面

index.ejs
<!DOCTYPE html>

<html>

<head>

	<title>在线教育</title>

	<meta charset="utf-8">

	<!-- <link rel="stylesheet" type="text/css" href="http://cdn.bootcss.com/bootstrap/3.3.0/css/bootstrap.min.css">

	<script src="http://cdn.bootcss.com/jquery/1.11.1/jquery.min.js"></script>

	<script src="http://cdn.bootcss.com/bootstrap/3.3.0/js/bootstrap.min.js"></script> -->

	<!-- 新 Bootstrap 核心 CSS 文件 -->

	<link rel="stylesheet" type="text/css" href="/stylesheets/bootstrap.min.css">

	<!-- jQuery文件 务必在bootstrap.min.js之前引入 -->

	<script src="/javascripts/jquery.min.js"></script>

	<!-- 最新的 Bootstrap 核心 JavaScript 文件 -->

	<script src="/javascripts/bootstrap.min.js"></script>

	<!-- <link rel="stylesheet" type="text/css" href="/stylesheets/style.css" /> -->

	<style>

		.horul{

			float: left;

			font-size: 1.5em;

			line-height: 2em;

		}

		.horul li{

			display: inline-block;

			list-style: none;

			height: 25px;

			width: 3em;

			text-align: center;

		}

		.menu{

			width: 1024px;

			background-color: #005f3d;

			height: 1.5em;

			margin: 0 auto;

			font-size: 1.5em;

			display: hidden;

			text-align: center;

		}

		.menu span{

			float: left;

			display: inline-block;

			color: #ffffff;

			margin-left: 1em;

		}

		.answer tr td div{

			width: 45px;

			height: 45px;

			background-color: green;

			color: #ffffff;

			text-align: center;

		}

		a,a:hover,a:visited{

			color: #ffffff;

		}

	</style>

</head>

<body>

	<div style="width:1024px;height:3em;margin:1em auto;">

		<span class="glyphicon glyphicon-comment" style="float:left;font-size:2em;"><b>源库</b></span>


		<ul class="horul">

			<li>问答</li>

			<li>文章</li>

			<li>笔记</li>

			<li>活动</li>

		</ul>


		<div style="float:right;line-height:2em;">

			<input type="text" placeholder="请输入关键词" style="width:240px;height:30px;" />

			<span class="glyphicon glyphicon-zoom-in" style="font-size:1.5em;cursor:pointer;" />


			<input type="button" class="btn btn-success" value="登录/注册" />


		</div>

	</div>

	<div class="menu">

		<span>home</span>

		<span>|</span>

		<span><a href="#">javascript</a></span>

		<span>php</span>

		<span>python</span>

		<span>java</span>

		<span>mysql</span>

		<span>ios</span>

		<span>android</span>

		<span>node.js</span>

		<span>html5</span>

		<span>lunux</span>

		<span>c++</span>

		<span>...</span>

	</div>

	<div style="width:1024px;margin:1em auto;">

		<div style="border:1px solid green;width:720px;float:left;">

			<ul class="horul">

				<li>最新</li>

				<li>最热</li>

				<li>未回答</li>

			</ul>

			<table class="table">

				<tbody class="answer">

					<tr>

						<td>

							<div>0<br/>回答</div>

						</td>

						<td>36<br/>浏览</td>

						<td>node.js如何与vue.js两线开发</td>

					</tr>

					<tr>

						<td><div>3<br/>回答</div></td>

						<td>12<br/>浏览</td>

						<td>node.js如何与vue.js两线开发</td>

					</tr>

				</tbody>

			</table>

		</div>

		<div style="border:1px solid green;width:300px;float:right;">

			<table class="table">

				<caption>排行榜</caption>

				<tbody>

					<tr>

						<td>1</td>

						<td>Bangalore</td>

					</tr>

					<tr>

						<td>2</td>

						<td>Mumbal</td>

					</tr>

					<tr>

						<td>3</td>

						<td>Bangalore</td>

					</tr>

				</tbody>

			</table>

		</div>

	</div>

</body>

</html>
效果图:

(五)显示登录注册模态对话框
1.index.ejs添加模态框
<input type="button" class="btn btn-success" data-toggle="modal" data-target="#loginModal" href="./users/login" value="登录/注册" />
最下面加:
<!-- 模态框 -->

<div class="modal fade" id="loginModal">

	<div class="modal-dialog">

		<div class="modal-content" style="width:850px;">

			<!-- href 内容 -->

		</div>

	</div>

</div>
index.ejs
<!DOCTYPE html>

<html>

<head>

	<title>在线教育</title>

	<meta charset="utf-8">

	<!-- <link rel="stylesheet" type="text/css" href="http://cdn.bootcss.com/bootstrap/3.3.0/css/bootstrap.min.css">

	<script src="http://cdn.bootcss.com/jquery/1.11.1/jquery.min.js"></script>

	<script src="http://cdn.bootcss.com/bootstrap/3.3.0/js/bootstrap.min.js"></script> -->

	<!-- 新 Bootstrap 核心 CSS 文件 -->

	<link rel="stylesheet" type="text/css" href="/stylesheets/bootstrap.min.css">

	<!-- jQuery文件 务必在bootstrap.min.js之前引入 -->

	<script src="/javascripts/jquery.min.js"></script>

	<!-- 最新的 Bootstrap 核心 JavaScript 文件 -->

	<script src="/javascripts/bootstrap.min.js"></script>

	<!-- <link rel="stylesheet" type="text/css" href="/stylesheets/style.css" /> -->

	<style>

		.horul{

			float: left;

			font-size: 1.5em;

			line-height: 2em;

		}

		.horul li{

			display: inline-block;

			list-style: none;

			height: 25px;

			width: 3em;

			text-align: center;

		}

		.menu{

			width: 1024px;

			background-color: #005f3d;

			height: 1.5em;

			margin: 0 auto;

			font-size: 1.5em;

			display: hidden;

			text-align: center;

		}

		.menu span{

			float: left;

			display: inline-block;

			color: #ffffff;

			margin-left: 1em;

		}

		.answer tr td div{

			width: 45px;

			height: 45px;

			background-color: green;

			color: #ffffff;

			text-align: center;

		}

		a,a:hover,a:visited{

			color: #ffffff;

		}

	</style>

</head>

<body>

	<div style="width:1024px;height:3em;margin:1em auto;">

		<span class="glyphicon glyphicon-comment" style="float:left;font-size:2em;"><b>源库</b></span>


		<ul class="horul">

			<li>问答</li>

			<li>文章</li>

			<li>笔记</li>

			<li>活动</li>

		</ul>


		<div style="float:right;line-height:2em;">

			<input type="text" placeholder="请输入关键词" style="width:240px;height:30px;" />

			<span class="glyphicon glyphicon-zoom-in" style="font-size:1.5em;cursor:pointer;" />


			<!-- <input type="button" class="btn btn-success" value="登录/注册" /> -->

			<input type="button" class="btn btn-success" data-toggle="modal" data-target="#loginModal" href="./users/login" value="登录/注册" />


		</div>

	</div>

	<div class="menu">

		<span>home</span>

		<span>|</span>

		<span><a href="#">javascript</a></span>

		<span>php</span>

		<span>python</span>

		<span>java</span>

		<span>mysql</span>

		<span>ios</span>

		<span>android</span>

		<span>node.js</span>

		<span>html5</span>

		<span>lunux</span>

		<span>c++</span>

		<span>...</span>

	</div>

	<div style="width:1024px;margin:1em auto;">

		<div style="border:1px solid green;width:720px;float:left;">

			<ul class="horul">

				<li>最新</li>

				<li>最热</li>

				<li>未回答</li>

			</ul>

			<table class="table">

				<tbody class="answer">

					<tr>

						<td>

							<div>0<br/>回答</div>

						</td>

						<td>36<br/>浏览</td>

						<td>node.js如何与vue.js两线开发</td>

					</tr>

					<tr>

						<td><div>3<br/>回答</div></td>

						<td>12<br/>浏览</td>

						<td>node.js如何与vue.js两线开发</td>

					</tr>

				</tbody>

			</table>

		</div>

		<div style="border:1px solid green;width:300px;float:right;">

			<table class="table">

				<caption>排行榜</caption>

				<tbody>

					<tr>

						<td>1</td>

						<td>Bangalore</td>

					</tr>

					<tr>

						<td>2</td>

						<td>Mumbal</td>

					</tr>

					<tr>

						<td>3</td>

						<td>Bangalore</td>

					</tr>

				</tbody>

			</table>

		</div>

	</div>

	<!-- 模态框 -->

	<div class="modal fade" id="loginModal">

		<div class="modal-dialog">

			<div class="modal-content" style="width:850px;">

				<!-- href 内容 -->

			</div>

		</div>

	</div>

</body>

</html>
2.views下建立login.ejs
<div style="height:330px;background:#ffffff;">

	<!-- 登录 -->

	<div style="margin:9px 9px;border:1px solid green;width:400px;float:left;">

		<form method="post" action="./users/login">

			<table class="table">

				<tr>

					<td colspan="2" align="center">登录</td>

				</tr>

				<tbody>

					<tr>

						<td align="right">email:</td>

						<td><input type="text" name="email" class="form-control" placeholder="文本输入" /></td>

					</tr>

					<tr>

						<td align="right">密码:</td>

						<td><input type="password" name="pwd" class="form-control" placeholder="密码" /></td>

					</tr>

					<tr>

						<td colspan="2" align="center" valign="middle">

							<input type="submit" value="登录" class="btn btn-success" />

						</td>

					</tr>

				</tbody>

			</table>

		</form>

	</div>

	<!-- 注册 -->

	<div style="margin:9px 9px;border:1px solid green;width:400px;float:left;">

		<form method="post" action="./users/zhuce">

			<table class="table">

				<tr>

					<td colspan="2" align="center">注册</td>

				</tr>

				<tbody>

					<tr>

						<td align="right">email:</td>

						<td><input type="text" name="email" class="form-control" placeholder="文本输入" /></td>

					</tr>

					<tr>

						<td align="right">密码:</td>

						<td><input type="password" name="pwd" class="form-control" placeholder="密码" /></td>

					</tr>

					<tr>

						<td align="right">重复</td>

						<td><input type="password" name="repwd" class="form-control" placeholder="密码" /></td>

					</tr>

					<tr>

						<td align="right">昵称</td>

						<td><input type="text" name="nicheng" class="form-control" placeholder="昵称" /></td>

					</tr>

					<td colspan="2" align="center" valign="middle">

						<input type="submit" value="注册" class="btn btn-success" />

					</td>

				</tbody>

			</table>

		</form>

	</div>

</div>
3.添加登录页面
routes/users.js中添加
koa1:
// 登录页路由

router.get('/login', function *(next) {

  // 绑定login.ejs文件

  yield this.render('login',{});

});
koa2:
// 登录页路由

router.get('/login', async function (ctx, next) {

  await ctx.render('login', {});

});
效果图:

.
koajs 项目实战(一)的更多相关文章
- koajs 项目实战(二)
此篇文章,接 koajs 项目实战(一)后写 (六)表单提交和参数接收 表单: <form method="post" action="./users/zhuce& ...
- Asp.Net Core 项目实战之权限管理系统(4) 依赖注入、仓储、服务的多项目分层实现
0 Asp.Net Core 项目实战之权限管理系统(0) 无中生有 1 Asp.Net Core 项目实战之权限管理系统(1) 使用AdminLTE搭建前端 2 Asp.Net Core 项目实战之 ...
- 给缺少Python项目实战经验的人
我们在学习过程中最容易犯的一个错误就是:看的多动手的少,特别是对于一些项目的开发学习就更少了! 没有一个完整的项目开发过程,是不会对整个开发流程以及理论知识有牢固的认知的,对于怎样将所学的理论知识应用 ...
- 【腾讯Bugly干货分享】React Native项目实战总结
本文来自于腾讯bugly开发者社区,非经作者同意,请勿转载,原文地址:http://dev.qq.com/topic/577e16a7640ad7b4682c64a7 “8小时内拼工作,8小时外拼成长 ...
- Asp.Net Core 项目实战之权限管理系统(0) 无中生有
0 Asp.Net Core 项目实战之权限管理系统(0) 无中生有 1 Asp.Net Core 项目实战之权限管理系统(1) 使用AdminLTE搭建前端 2 Asp.Net Core 项目实战之 ...
- Asp.Net Core 项目实战之权限管理系统(1) 使用AdminLTE搭建前端
0 Asp.Net Core 项目实战之权限管理系统(0) 无中生有 1 Asp.Net Core 项目实战之权限管理系统(1) 使用AdminLTE搭建前端 2 Asp.Net Core 项目实战之 ...
- Asp.Net Core 项目实战之权限管理系统(2) 功能及实体设计
0 Asp.Net Core 项目实战之权限管理系统(0) 无中生有 1 Asp.Net Core 项目实战之权限管理系统(1) 使用AdminLTE搭建前端 2 Asp.Net Core 项目实战之 ...
- Asp.Net Core 项目实战之权限管理系统(3) 通过EntityFramework Core使用PostgreSQL
0 Asp.Net Core 项目实战之权限管理系统(0) 无中生有 1 Asp.Net Core 项目实战之权限管理系统(1) 使用AdminLTE搭建前端 2 Asp.Net Core 项目实战之 ...
- Asp.Net Core 项目实战之权限管理系统(5) 用户登录
0 Asp.Net Core 项目实战之权限管理系统(0) 无中生有 1 Asp.Net Core 项目实战之权限管理系统(1) 使用AdminLTE搭建前端 2 Asp.Net Core 项目实战之 ...
随机推荐
- BZOJ 3462 DZY Loves Math II ——动态规划 组合数
好题. 首先发现$p$是互质的数. 然后我们要求$\sum_{i=1}^{k} pi*xi=n$的方案数. 然后由于$p$不相同,可以而$S$比较小,都是$S$的质因数 可以考虑围绕$S$进行动态规划 ...
- 游戏(game)
游戏(game) 题目描述 这个游戏是这样的,你有一个初始序列S ,你每次可以选择一段任意长度的连续区间,把他们+1 再膜k,给定目标序列,你需要尝试用尽量少的操作次数将初始序列变为目标序列.作为一名 ...
- 5-Dalvik垃圾收集机制Cocurrent GC
Dalivik垃圾回收收机制Cocurrent GC简介和学习计划 导语: 在C/C++中,开发者需要手动地管理在堆中分配的内存,但是这往往导致很多问题. 1. 内存分配之后忘记释放,造成内存泄漏. ...
- 【bzoj4699】树上的最短路(树剖+线段树优化建图)
题意 给你一棵 $n$ 个点 $n-1$ 条边的树,每条边有一个通过时间.此外有 $m$ 个传送条件 $(x_1,y_1,x_2,y_2,c)$,表示从 $x_1$ 到 $x_2$ 的简单路径上的点可 ...
- react自定义组件属性类型检测
react当中的props-type用来检测传入组件当中的数据是否符合组件的要求,但是之前的只是能做些简单常规的判断,如果需要做复杂的判断,就需要使用到自定义函数来做类型检测了. 下面是官网的例子 c ...
- PowerDesigner常用快捷键
一般快捷键 F4 打开检查模型窗口,检查模型 F5 如果图窗口内的图改变过大小,恢复为原有大小即正常大小 F6 放大图窗口内的图 F7 缩小图窗口内的图 F8 在图窗口内中查看全部 ...
- 输出前k大的数
总时间限制: 10000ms单个测试点时间限制:1000ms内存限制:65536kB(noi) 描述 给定一个数组,统计前k大的数并且把这k个数从大到小输出. 输入 第一行包含一个整数n,表示数组的大 ...
- BZOJ1709超级弹珠
1709: [Usaco2007 Oct]Super Paintball超级弹珠 Time Limit: 5 Sec Memory Limit: 64 MBSubmit: 352 Solved: ...
- 在SQL Server中使用NewID()随机取得某行
原文发布时间为:2008-09-24 -- 来源于本人的百度文章 [由搬家工具导入] 这里提供了另外一个更有用的函数:NewID(),它返回一个GUID(全局唯一标志符) select top 10 ...
- 【Visual Studio】以管理员的身份运行软件
